Cozy vibes with Free Crochet BALACLAVA Pattern guiding you through simple stitches to warm neck and face during cold days for extra warmth on chilly days
When the wind bites and the air turns sharp, this cozy head and neck cover can make the day feel warmer. You can get the pattern from the YouTube channel Gülşah Özcan Filiz, where clear, step-by-step guidance helps beginners and quick learners. This Free Crochet BALACLAVA Pattern is designed to wrap the head, face, and neck in soft warmth without bulk. It is ideal for outdoor chores, early commutes, or frosty evenings inside, keeping drafts out while staying comfortable. Using simple stitches, it builds evenly and fits snugly under jackets or over a light hat.
Handmade Crochet Balaclava Hood - Free Pattern
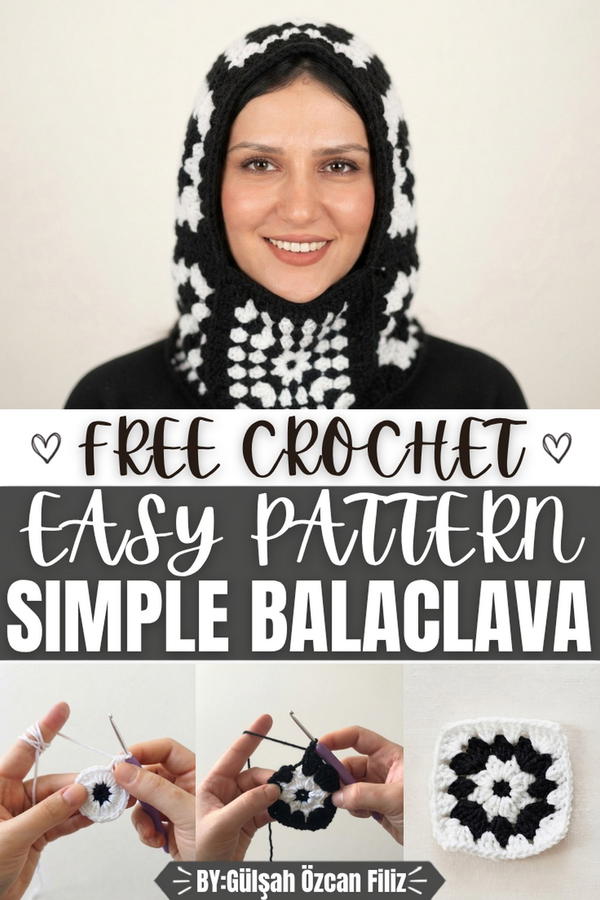
People choose it for full coverage that still breathes, so you don't overheat on active days. The working style is gentle and steady, with easy decreases and a smooth crown to fit different heads, and it grows with you if you need extra length. One of its best features is the clean, continuous shape that hugs the head and neck, with a well-finished edge that stops drafts. The design is versatile, letting you pick bold colors or soft neutrals to match your gear.
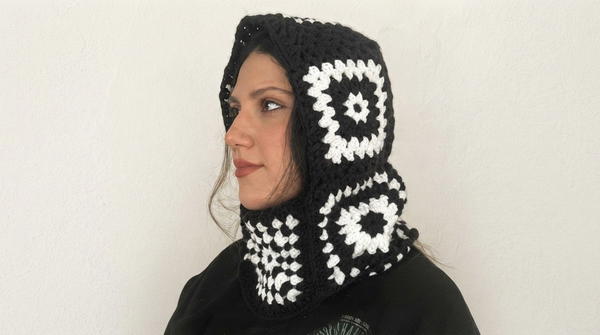
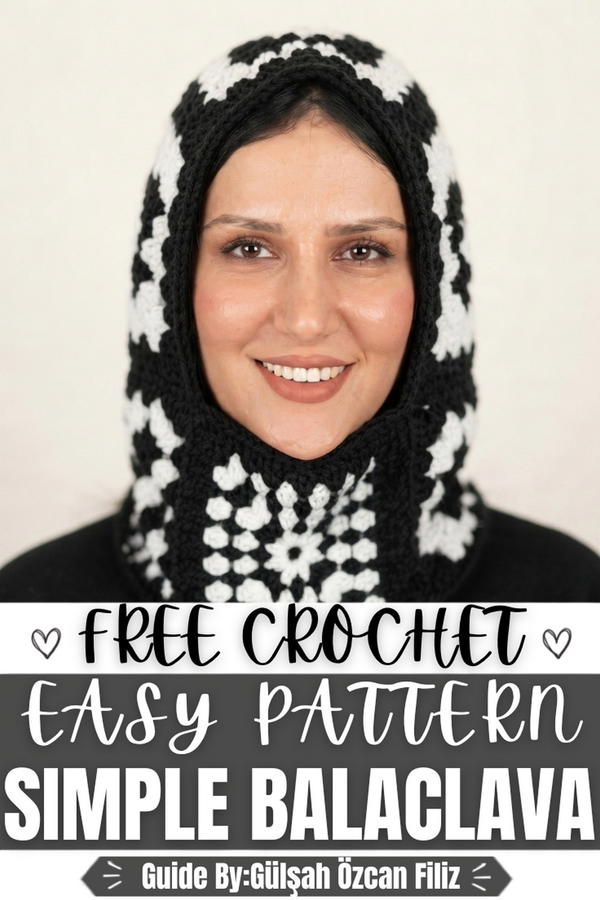
Crochet Balaclava Pattern
This balaclava pattern is a creative and functional design constructed by joining eight individual square motifs into a structured head-covering garment. Each motif is built from the center outward using a combination of classic granny square technique and clustered stitches, resulting in a beautifully textured and visually striking piece. The two-color construction adds dimension and character, making this an appealing project for anyone looking to expand their crochet skills while producing a practical and fashionable accessory suitable for cooler weather.
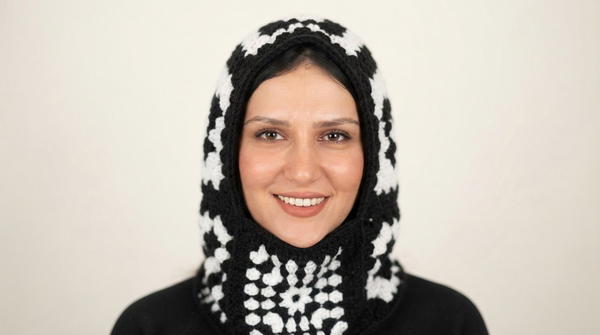
Skill Level: Intermediate — This pattern requires familiarity with working in the round, color changes, cluster stitches, and motif joining techniques. A crocheter who has completed basic projects and is comfortable reading stitch instructions will find this pattern both accessible and rewarding.
Materials
- Yarn: Cotton or acrylic yarn in two colors (the original design uses black and white)
- Hook: Crochet hook appropriate for your chosen yarn weight
- Tools:
- Sewing needle or tapestry needle for joining motifs
- Scissors
- Stitch markers (optional but recommended)
- Measuring tape
Special Stitches
- Magic Ring: An adjustable loop used to begin crocheting in the round, allowing the center to be pulled closed tightly with no gap.
- 3-HDC Cluster: Three half-double crochet stitches worked together into the same stitch or space, creating a puff-like cluster with a rounded, textured appearance.
- Granny Square Construction: A traditional method of working groups of three double crochet stitches into chain spaces, with corner increases, to build a square shape from a circular center outward.
- Corner Increase: Worked as 3 dc, ch 2, 3 dc all into the same corner chain space, creating a defined right-angle corner on the motif.
Stitch Abbreviations
- ch — chain
- sl st — slip stitch
- sc — single crochet
- hdc — half-double crochet
- dc — double crochet
- MR — magic ring
- sp — space
- st(s) — stitch(es)
- BLO — back loop only
- rep — repeat
- yo — yarn over
- tog — together
Useful Tips
- Pull the magic ring tightly after completing Round 1 to eliminate any gap at the center of the motif, which is especially important for a clean finished appearance.
- When changing colors between rounds, always join the new color with a slip stitch and fasten off the previous color neatly, weaving in ends as you go to reduce finishing time later.
- Use stitch markers to identify the four corner chain spaces of each motif, particularly in the earlier rounds when the square shape is just beginning to form.
- Check the width of each motif periodically with a measuring tape to ensure consistency. All eight motifs should measure between 16–17cm for even assembly.
- Work the final single crochet edging round at an even, relaxed tension to keep the edges flat and smooth, which will make the joining process significantly easier.
- When joining motifs, match the corners carefully and pin them in place before sewing to ensure a symmetrical and well-structured balaclava shape.
Pattern Instructions
Motif Construction (Make 8)
Round 1 — Center Ring
- Create a MR.
- Work 8 sc into the ring.
- Pull the ring closed tightly.
- Sl st into the first sc to join the round.
- Total: 8 sc
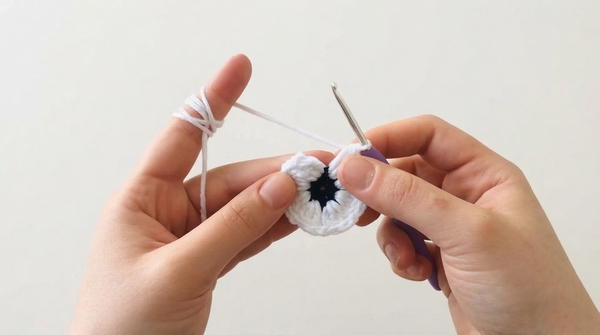
- Total: 8 sc
Round 2 — Cluster Round
- Fasten off the first color. Attach the second color with a sl st into any st.
- Work 8 clusters evenly spaced around the ring, each cluster consisting of:
- 3-HDC cluster worked into each st from the previous round.
- Separate each cluster with ch 1 or ch 2 depending on your desired spacing and yarn weight.
- Sl st to join at the end of the round.
- Total: 8 three-HDC clusters separated by chain spaces
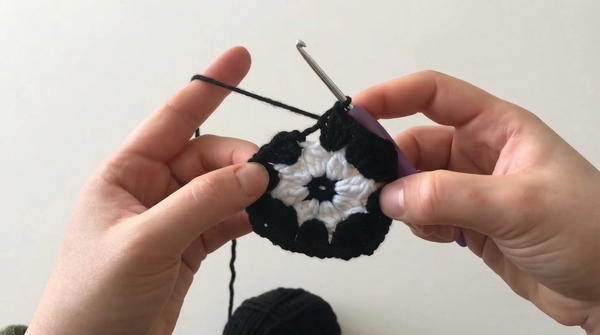
- Total: 8 three-HDC clusters separated by chain spaces
Round 3 — Shaping into a Square
- Attach black yarn (or your main color) into any chain space.
- Begin working in granny square style to transition the circular shape into a square:
- Work 3 dc into each regular chain space around.
- At every corner position (4 corners evenly spaced), work 3 dc, ch 2, 3 dc all into the same space.
- Sl st to join at the end of the round.
- Total: 4 corner groups of (3 dc, ch 2, 3 dc) and 3 dc in each side space
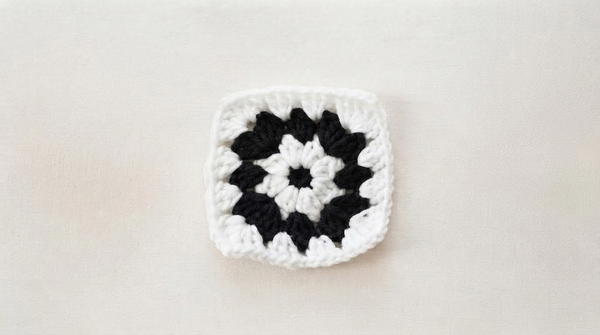
- Total: 4 corner groups of (3 dc, ch 2, 3 dc) and 3 dc in each side space
Round 4 and Subsequent Rounds — Granny Square Expansion
- Continue working in the established granny square pattern for each subsequent round:
- Ch 3 (counts as first dc), turn or continue in the round as preferred.
- Work 3 dc into each chain space along each side of the square.
- At each corner ch-2 space, work 3 dc, ch 2, 3 dc.
- Sl st into the top of the beginning ch-3 to close each round.
- Rep this round, adding one additional group of 3 dc to each side with every round completed.
- Continue until the motif measures 16–17cm in width, which typically requires approximately 8 rounds total from the magic ring.
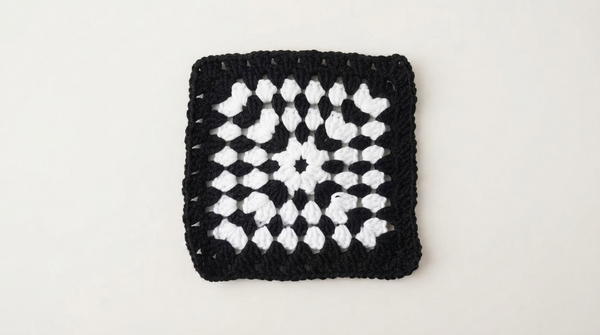
Final Round — Single Crochet Edging
- Before joining any motifs, work a complete edging round around the entire perimeter of each finished square motif.
- Join yarn in any corner sp.
- Work sc evenly around all four sides of the motif.
- At each corner, work 3 sc into the ch-2 corner space to keep corners neat and flat.
- Sl st to join at the end of the round.
- Fasten off and weave in all ends securely.
- Rep the full motif construction for all 8 motifs.
Assembly and Sizing
Arrangement of Motifs
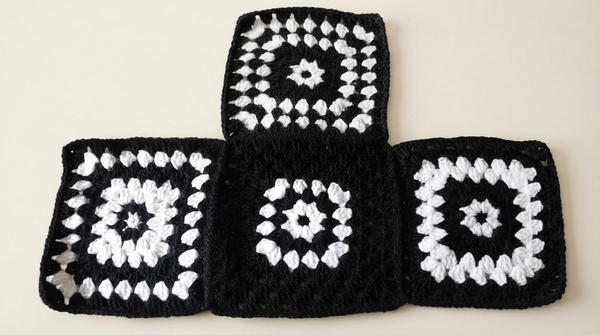
- Lay all eight completed motifs flat and arrange them in the following configuration before joining:
- 1 motif designated for the top of the head.
- 3 motifs arranged across the sides and back of the head.
- The remaining 4 motifs positioned to form the neck coverage and the structured face opening of the balaclava.
Joining the Motifs
- Thread a tapestry needle with matching yarn in a coordinating color.
- Hold two motifs together with their wrong sides facing inward.
- Sew the motifs together by stitching through the back loops of the single crochet edging stitches along the shared edges.
- Alternatively, use a sc join method by working single crochet stitches through both motifs simultaneously for a more visible and decorative seam.
- Join all motifs according to the arranged layout, working from the top motif downward and around the sides and neck.
- Leave the front face opening completely unjoined to create the characteristic balaclava opening for the face.
Sizing Notes
- Each motif measuring 16–17cm will produce a balaclava sized for an average adult head.
- For a larger size, work additional rounds on each motif before completing the edging.
- For a smaller size or a child's version, reduce the total number of rounds and check sizing frequently against actual head measurements.
Conclusion
This balaclava pattern showcases the remarkable versatility of the granny square motif when applied to garment construction. The combination of clustered half-double crochet stitches at the center and structured double crochet granny rounds creates a fabric that is both textured and sturdy, providing warmth and coverage without unnecessary bulk. The modular construction approach allows each individual motif to be completed and adjusted independently before final assembly, offering flexibility and control throughout the making process. The finished balaclava is a testament to how traditional motif techniques can be reimagined into modern, wearable, and functional crochet accessories.