A handmade bag that’s not just beautiful but also unique to your own style. Creating a crochet bag brings both elegance and practicality to your everyday life. These bags are lightweight and versatile, perfect for shopping, casual outings, or even storing small essentials at home.
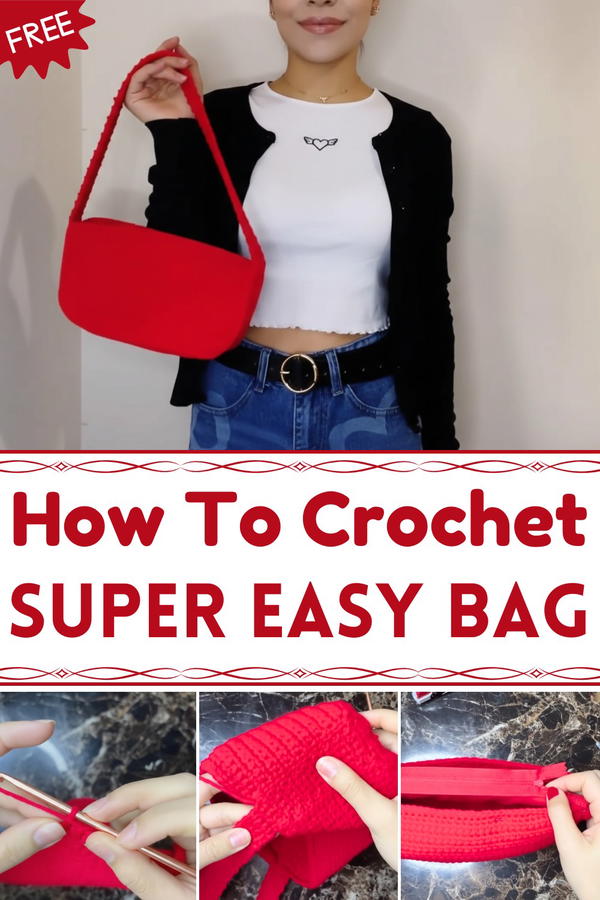
Basic to Bold Crochet Bag Pattern You’ll Obsess Over
Their intricate patterns and texture create a visually appealing accessory, making them stand out from ordinary bags. With soft yarn and creative colors, crochet bags can complement any outfit, giving a cozy yet fashionable look. Adding design elements like straps, zippers, or even a fabric lining enhances their functionality, while still keeping their charm intact.
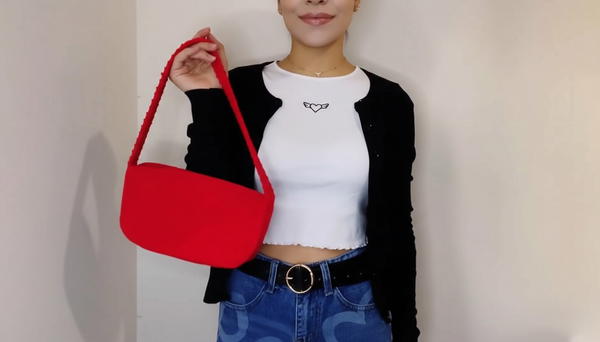
Plus, you can easily customize the size, shape, or decoration to match your taste. The beauty of crochet bags lies not only in their appearance but in the joy of crocheting them yourself, turning simple yarn into something truly stunning and useful!
Materials Needed
- Yarn: 4mm medium-weight yarn (color of your choice)
- Hook: 4.25mm crochet hook
- Extras:
- Scissors
- Zipper for the bag (size may vary)
- Optional fabric for lining
- Sewing needle and thread (if adding lining)
Key Abbreviations
- ch: Chain
- hdc: Half Double Crochet
- sl st: Slip Stitch
Special Notes
- The bag is worked in two separate pieces that are joined together. Measurements are in centimeters to ensure universal usability.
- The bag strap's length and corner increases/decreases can be customized based on preference.
Step-by-Step Pattern
Step 1: Create Two Bag Panels
- Start with a slip knot and make chains measuring 24cm in total length. Use a measuring tape to confirm accuracy.
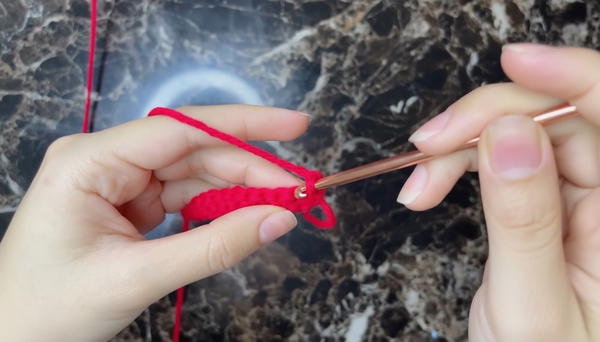
- In the second chain from the hook, work hdc across the row.
- Turn your work, chain 1 to gain height, and continue working hdc across the row for 19 rows or until the panel measures 12cm in height. Stretch fabric evenly during stitching for a neat appearance.
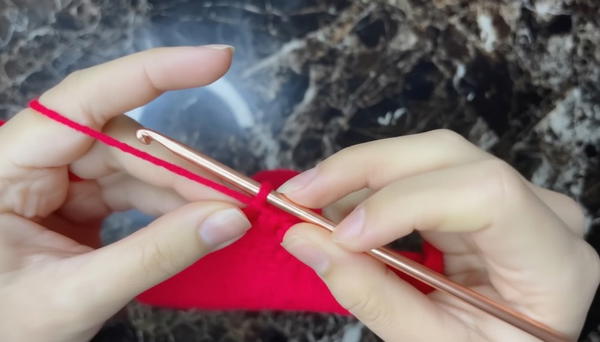
Step 2: Decrease Rows
- For the next row, begin with a chain 1 for height and skip the first stitch.
- Work hdc starting from the second stitch and repeat decreases at the start and second-to-last stitches for 4 rows.
- Turn your work after each row, keeping stitches tight for proper shaping.
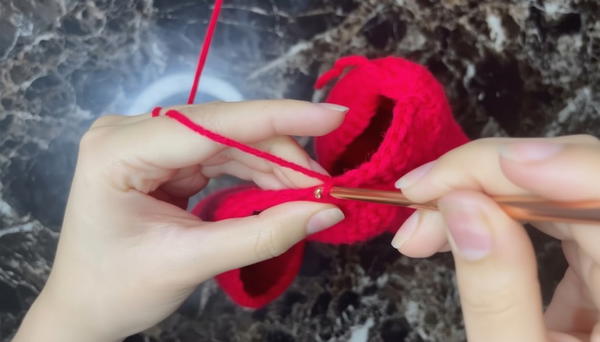
Step 3: Add Corner Increases
- Work 2 hdc increases in the same stitch at the corner edges.
- Continue working hdc evenly across and repeat corner increases on the other side of the panel.
- Repeat these increases for both panels to create matching pieces.
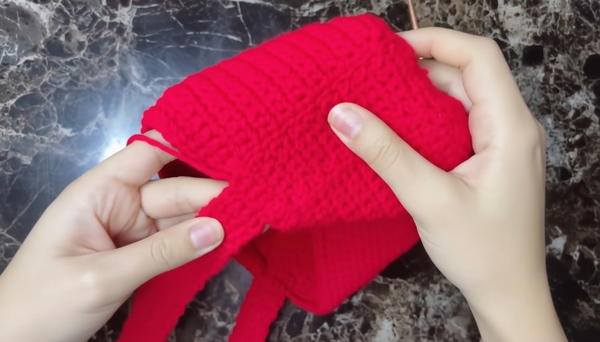
Step 4: Assemble Bag Panels
- Place the panels together with their right sides facing outward.
- Join corners by inserting the hook into one corner of both panels, pulling up a loop, chaining 5, and working hdc along the chains.
- Use sl st to secure edges and close gaps along the sides.
Step 5: Create and Attach the Strap
- Work a chain strap measuring 55cm (adjust length as needed).
- Attach the strap to the bag's edges by working hdc stitches, connecting both panel seams.
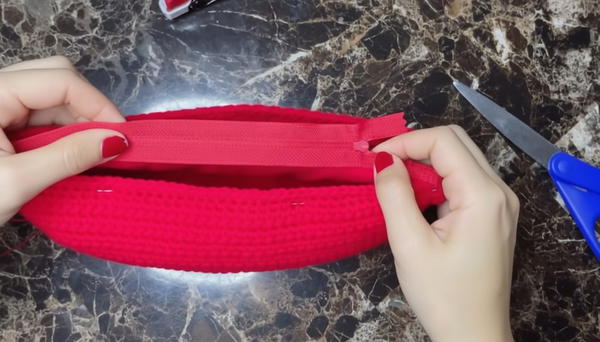
Step 6: Add Optional Lining and Closure
- To make a lining, cut fabric slightly larger than the bag's interior dimensions, leaving 1cm to fold edges inward.
- Sew the lining on the inside using hand stitching or a sewing machine.
- Attach a zipper to the inner top edge by sewing it simultaneously with the lining.
Conclusion
This practical crochet bag is a versatile accessory that allows for customization of size, strap length, and design. The option to add lining adds structure, making the bag durable while maintaining its stylish appearance.
Pattern Corrections & Tips
- Correction: Ensure tight tension during hdc decreases and increases to maintain the bag's shape. Stretch the fabric evenly after completing rows.
- Tip: When attaching the lining, use pins or clips to secure fabric placement for easier sewing.