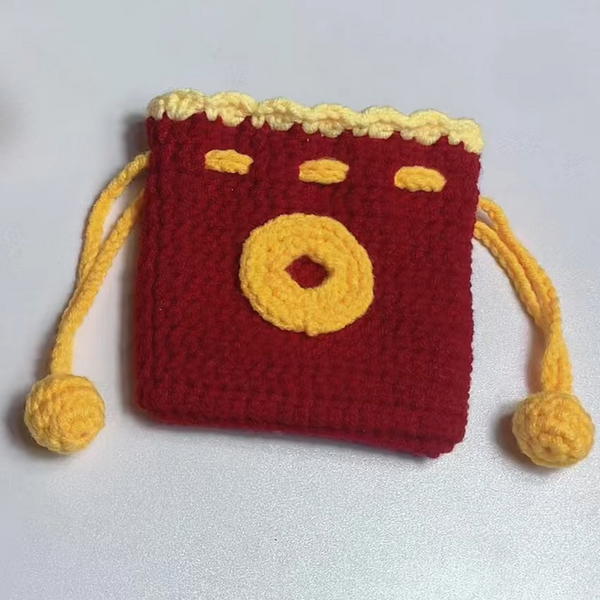
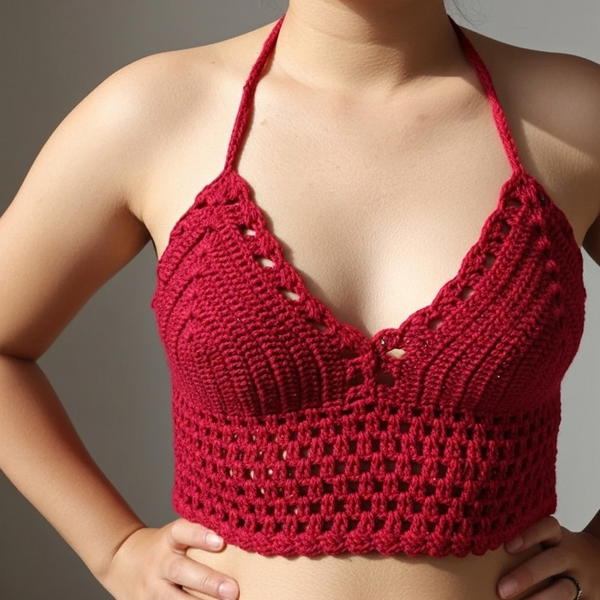
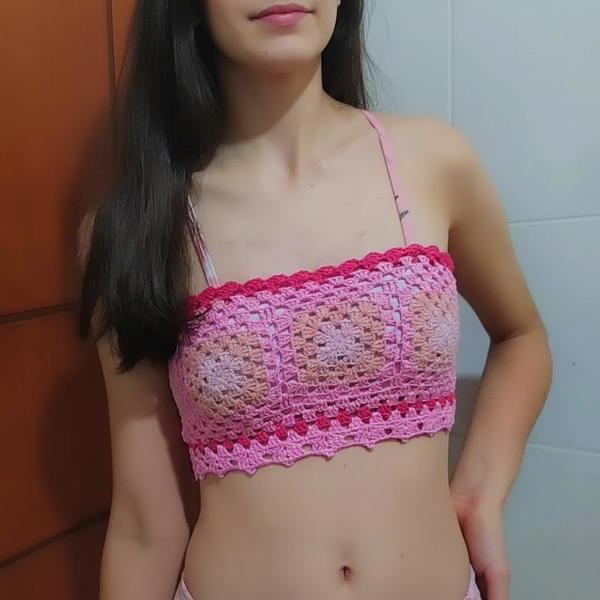
Unwind into style with this delightful Crochet Cropped Blouse Pattern, perfect for adding a playful, airy, and fresh touch to any summer outfit.
Sometimes, plain blouses can feel dull, but this beautiful, handmade top brings joy and color to any outfit. Light and soft, it feels comfortable and cool, making it perfect for sunny days. The short length shows a little waist, creating a fun and fresh look that anyone can enjoy. Its special patterns are made with care, turning simple yarn into a charming design that catches the eye.
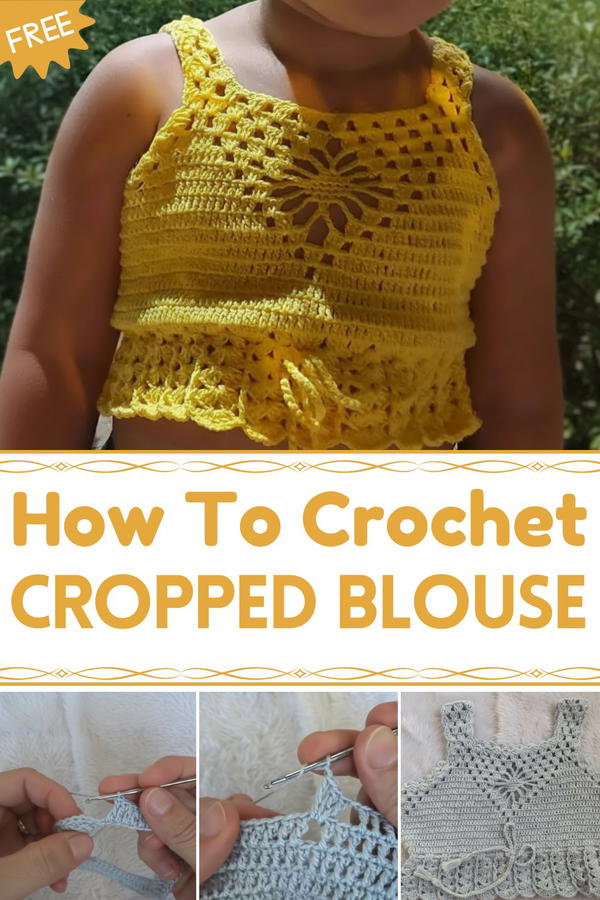
Handmade Summer Crochet Cropped Blouse Pattern to Wear
Whether you wear it with jeans, skirts, or shorts, it always looks stylish and neat. This blouse is great for many occasions, like going to the market, meeting friends, or relaxing at home.
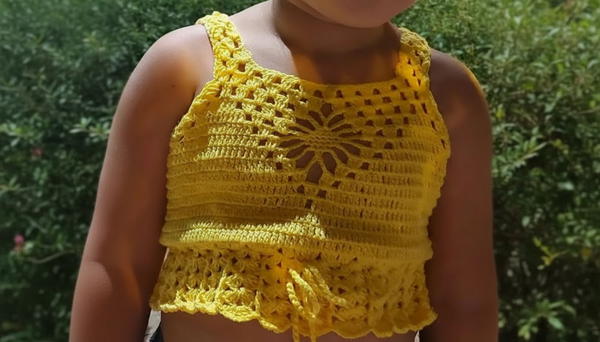
Easy to wear and full of personality, it makes everyone feel special and confident. Handmade with love, this top is more than just clothing—it’s a cheerful expression of creativity and comfort that anyone can treasure.
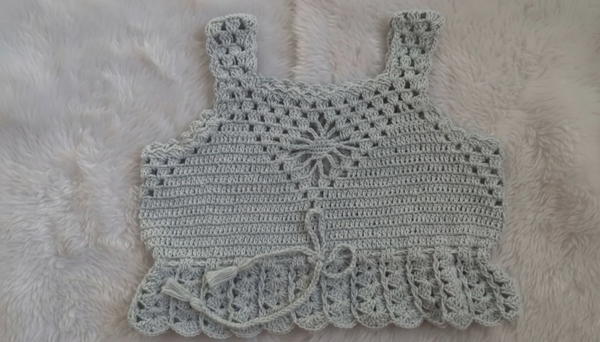
Crochet Pattern for Children’s Crop Top
Materials
- Fine yarn (e.g. Camila Fashion yarn)
- 2 mm crochet hook
- Stitch markers (optional)
- Tape measure, scissors, yarn needle
Stitches Used
- ch = chain
- sl st = slip stitch
- sc = single crochet
- dc = double crochet
- tr = treble crochet
- picot = (ch 2, sc in 2nd ch from hook) or as described
- dc3tog = double crochet 3 stitches together (not used in base, but useful for shaping if desired)
Instructions
Step 1: Measuring & Foundation Chain
- Measure bust circumference of the child (e.g. 64 cm).
- Choose chain length that corresponds to bust size and make sure number of chains is even and divisible by 4. For example, chain 156 stitches.
Step 2: Join Chain & Round 1
- Join foundation chain into a ring with a sl st, ensuring the chain is not twisted.
- Chain 3 (counts as first dc).
- Work 1 dc in each chain around (156 dc total).
- Join to starting ch-3 with a sl st.
Step 3: Rounds 2 to 5 (Body)
- Chain 3 (counts as first dc).
- Work 1 dc in each stitch around. Join with a sl st.
- Repeat for a total of 5 rounds (or adjust length for desired body height).
Step 4: Mark Divisions for Shaping
- Divide stitches (156) by 4 to get 4 equal sections (39 stitches each).
- Mark 4 equally spaced points on the round with stitch markers or small pieces of yarn.
Step 5: Rounds 6 to 11 — Creating Blocks with Chain Spaces
- Chain 3 (counts as first dc).
- Work dc into each stitch but at each marker skip 1 stitch, chain 1 (this creates small gaps between blocks).
- For example:
- Dc 38 stitches
- Skip 1 stitch, ch 1 (the skipped stitch is your marker point)
- Dc 38 stitches
- Repeat for all four blocks.
- Join with sl st.
- Repeat this pattern for Rounds 7-11, maintaining skipped stitches and chain spaces between blocks.
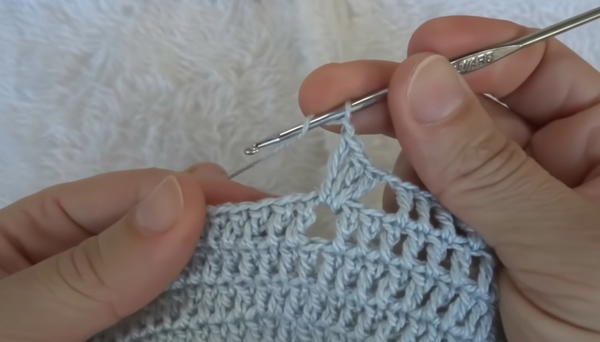
Step 6: Fan Stitch Clusters in Chain Spaces (Decorative Openwork)
- In each chain space between blocks:
- Work 3 tr (treble crochets) separated by chain stitches (usually ch 1 or ch 2). A typical mini fan looks like:
- (3 tr, ch 2, 3 tr) all worked into same chain space, or simplified as (3 tr, ch 1, 3 tr) depending on spacing.
- Work 3 tr (treble crochets) separated by chain stitches (usually ch 1 or ch 2). A typical mini fan looks like:
- Continue working dc in body stitches as before, skipping the stitch at chain space start as before.
- This creates decorative fan motifs and armhole openings.
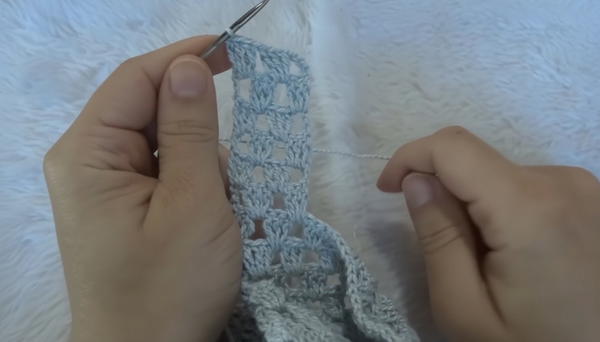
Step 7: Increase Fan Clusters & Adjust Chain Spaces
- On subsequent rounds (12–14), increase the chain stitches between fans to widen armholes and create sleeve shaping.
- Example: chain 5 instead of chain 2 between fan clusters for a larger open space.
- Maintain skipped stitches at start and end of blocks to shape the edges.
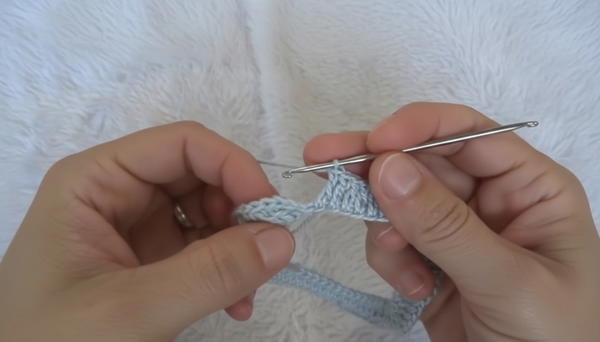
Step 8: Working the Straps
- Chain foundation length to desired strap length (measure child’s shoulder to under arm).
- Work 6 rows of:
- Chain 4 (counts as 1 tr + ch 1)
- 3 tr clusters separated by chain stitches to form a strip of desired width (e.g., 2 fan blocks width)
- Finish straps with one row of sc stitches for neat edges.
- Make two identical straps.
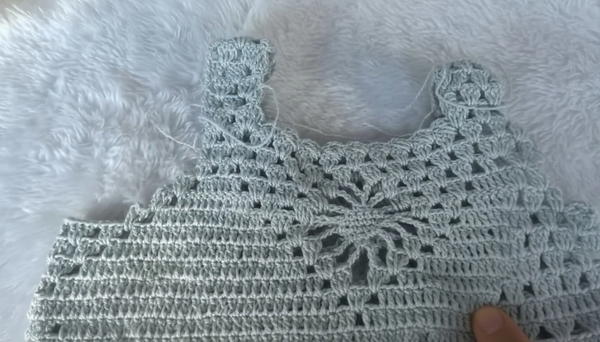
Step 9: Assembly
- Attach straps securely to the front and back armhole edges of the top with yarn needle.
- Optionally sew side seams for better fit.
- Weave in all yarn tails.
Step 10: Adding Edging and Finishing Touches
- Work a decorative edging around the bottom hem and neckline, for example:
- (2 dc, ch 2, 2 dc) fan stitch evenly spaced.
- Picot edging where desired.
- Block gently if needed to shape.
Tip
- Always count stitches carefully, especially when skipping for chain spaces, to keep the pattern symmetrical.
- Use a stitch marker to mark the start of rounds to avoid confusion.