Bring life to your decor with this free crochet succulent plant amigurumi pattern, offering a charming and maintenance-free touch to any corner.
I’ve always loved having plants around but keeping them alive is another story. That’s why I was so excited to try making a crochet version instead. The Free crochet Succulent Plant Amigurumi Pattern is a fun and easy way to bring the charm of greenery into your home without any fuss. This little succulent is a lovely handmade decor piece that also makes a unique gift.
Easy Crochet Succulent Plant Pattern Free Step by Step
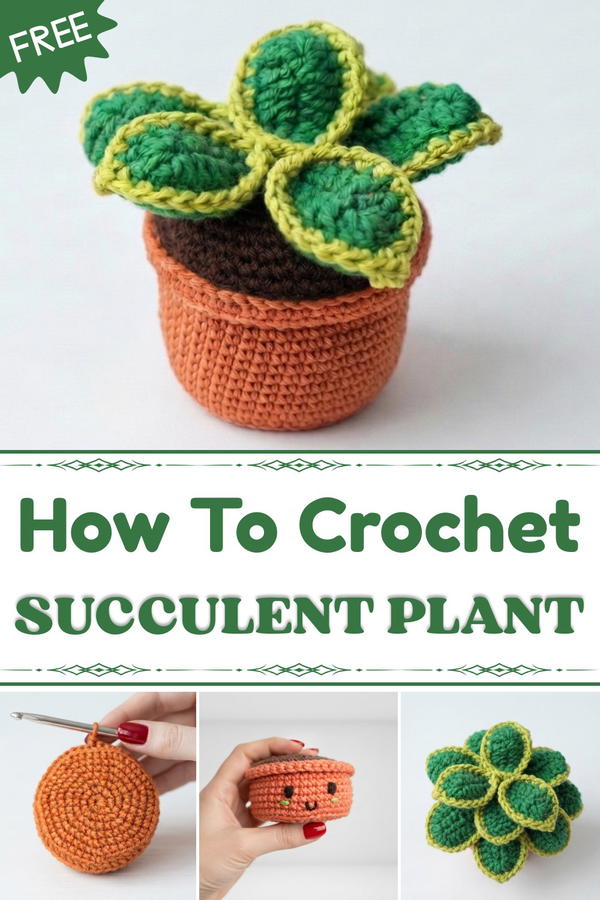
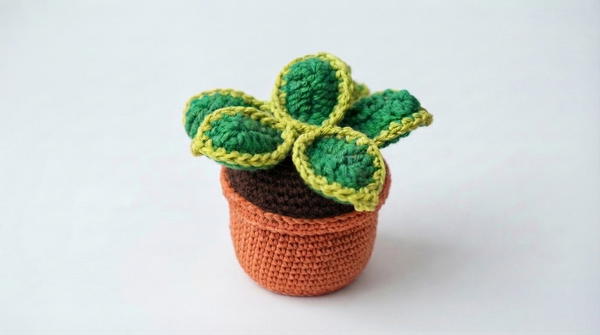
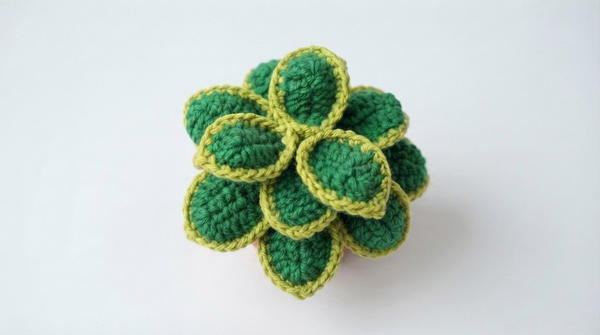
This amigurumi succulent looks just like the real thing with its layered leaves and compact rosette shape. The texture is soft but firm, created by tight stitches that hold the shape nicely. Its style is simple yet realistic, capturing the natural beauty of succulents in a cute, miniature form. The different shades of green yarn used give it a fresh, lively appearance, and the design’s standout feature is the way the leaves curl up, adding depth and dimension to the piece.
This project is perfect for beginners, as it mainly uses the single crochet stitch, which is easy to pick up and works well for shaping. The pattern guides you step-by-step, making the process smooth and enjoyable.
Overall, the Free crochet Succulent Plant Amigurumi Pattern is a charming crochet that’s great for decorating your desk, shelf, or windowsill. It’s also a thoughtful gift for plant lovers or anyone who appreciates handmade decor. Plus, since it doesn’t need watering, it’s a lasting, lovable addition to any space.
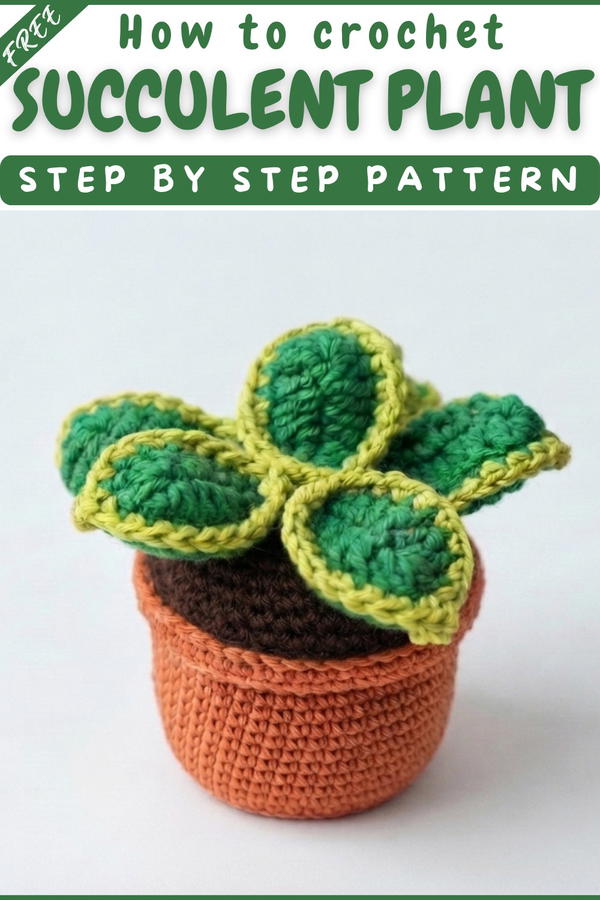
Amigurumi Succulent in Pot
Crochet a charming, vibrant amigurumi succulent in a darling pot using this step-by-step pattern and elevate your fiber display today. Each segment leads you through the process, from the colorful pot and realistic soil to lush leaves and a whimsical flower topper, with a surprise touch of personality in the embroidered face.
Pattern Highlights
- Realistic Succulent: Features both large and small leaves in layered shades of green.
- Adorable “Pot” Base: Firm shape, weighted for stability and realism.
- Whimsical Face: Add embroidered eyes, cheeks, and smile for extra cheer.
- Colorful Topper: Spiraled, coiled flower adds a final touch of charm.
- Modular Construction: Assemble pot, ground, leaves, and flower independently for easy customization.
Notes
- Work all main pieces in continuous spiral rounds unless otherwise indicated.
- For a neat join, use the invisible finish for final rounds.
- Use a plastic disc and small rocks to weight the vase securely.
- Embellish the facial details before attaching the ground to the vase.
- Leave long tails for sewing where instructed.
- Adjust yarn and hook size for different finished dimensions.
- For best results, stuff fiber fill firmly in both pot and leaves.
Skill Level
Confident Beginner to Intermediate
Requires knowledge of: magic ring, single crochet, increases and decreases, working in back loop only (BLO), embroidering small features, and simple assembly.
Materials
- Yarn: Cotton, 4-ply (or comparable sport weight)
- Black (face)
- Coral (pot/vase)
- Brown (ground)
- Green & Light Green (leaves)
- Lilac (flower)
- Hook: 3.0 mm crochet hook
- Scissors
- Tapestry needle
- Fiber fill stuffing
- Plastic disc (cut from a cap or sturdy container)
- Small rocks, gravel, or weighting pellets
- Optional: Stitch marker for rounds
Measurements / Sizing
- Finished Height: Approx. 10–13 cm (4–5 in)
- Pot Diameter: 7–8 cm (2.75–3.25 in) at widest point
(Actual size may vary depending on yarn & tension.)
Gauge
- Not critical for this project.
- Approx. 6.5 sc x 6 rows = 2.5 cm (1 in).
- Pot base after Round 6 should measure about 6–6.5 cm (2.5 in) diameter.
Stitch Abbreviations
| Abbreviation | Definition |
|---|---|
| ch | chain |
| sl st | slip stitch |
| sc | single crochet |
| inc | increase (2 sc in one st) |
| dec | decrease (sc2tog) |
| hdc | half double crochet |
| dc | double crochet |
| tr | treble crochet |
| BLO | back loop only |
| FLO | front loop only |
Special Stitches
- Magic Ring:
Form a ring, hold tail, insert hook, pull up a loop, and crochet stitches into ring. Pull tail to tighten. - Back Loop Only (BLO):
Crocheting only through the back loop of each stitch for subtle ridges or shaping. - Invisible Join:
After final stitch, cut yarn, pull tail through, and sew neatly for a seamless look. - Leaf Petal Cluster:
Seam big leaves into a rosette, layer small leaves above for realistic effect.
Step-by-Step Pattern
1. Vase (Pot) – Coral Yarn
- Round 1: 7 sc into a magic ring (7)
- Round 2: 7 inc (14)
- Round 3: [1 sc, inc] x 7 (21)
- Round 4: [2 sc, inc] x 7 (28)
- Round 5: [3 sc, inc] x 7 (35)
- Round 6: [4 sc, inc] x 7 (42)
- Round 7: [5 sc, inc] x 7 (48)
- Round 8: 48 sc BLO (work all sc in back loop only)
- Round 9: [10 sc, dec] x 4 (44)
- Rounds 10–14: 44 sc each round
- Round 15: 44 sc BLO (crochet all stitches in back loop only)
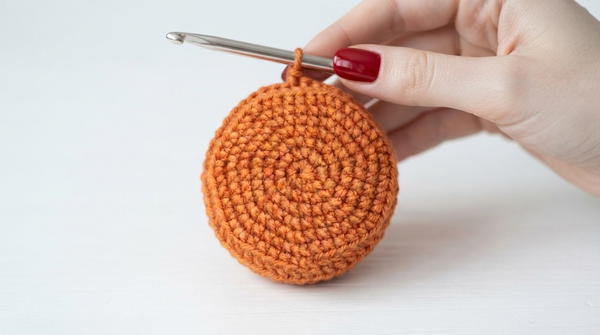
- Fasten off. Set aside.
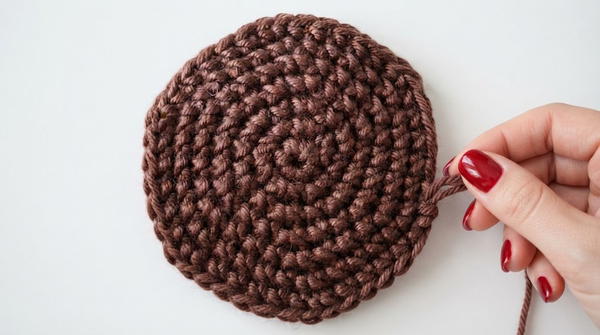
2. Ground (Soil) – Brown Yarn
- Round 1: 6 sc into a magic ring (6)
- Round 2: 6 inc (12)
- Round 3: [1 sc, inc] x 6 (18)
- Round 4: [2 sc, inc] x 6 (24)
- Round 5: [3 sc, inc] x 6 (30)
- Round 6: [4 sc, inc] x 6 (36)
- Round 7: [5 sc, inc] x 6 (42)
- Fasten off, leaving a long tail for sewing.
3. Facial Embroidery
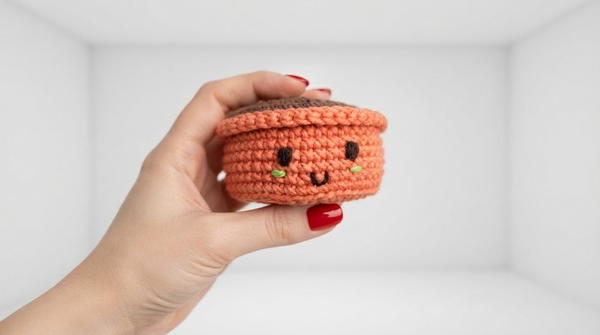
- Eyes: With black yarn, embroider small ovals or lines as eyes, positioned over Vase Rounds 10 and 11.
- Mouth: With black yarn, embroider a small arced smile over Rounds 8 and 9, centered between the eyes.
- Cheeks: With light green yarn, stitch two small vertical dashes just below each eye.
4. Small Leaves (Make 3) – Green Yarn
For each leaf:
- Ch 8
- Work into the chains as follows:
- 1 sc in 2nd ch,
- 1 hdc,
- 4 dc,
- 5 dc in last ch (the tip).
- Continue on opposite side of chain (back):
- 4 dc,
- 1 hdc,
- 1 sc,
- 1 sl st.
- Switch to light green yarn:
- 9 sc evenly up one side,
- ch 2, 1 sc in same base (makes the tip accent),
- 9 sc evenly down the other side,
- 1 sl st.
- Fasten off.
5. Big Leaves (Make 4) – Green Yarn
For each leaf:
- Ch 10
- Work into chains:
- 1 sc in 2nd ch,
- 1 hdc,
- 6 dc,
- 5 dc in final ch (leaf tip).
- Work along back of base chain:
- 6 dc,
- 1 hdc,
- 1 sc,
- 1 sl st. (Finish, but do not cut off last leaf.)
- Switch to light green yarn:
- 11 sc up one side,
- ch 2, 1 sc in tip st,
- 11 sc down other side,
- 1 sl st.
- Fasten off, leaving a tail for sewing (especially on the fourth/bottom leaf).
6. Assembly
Pot Construction:
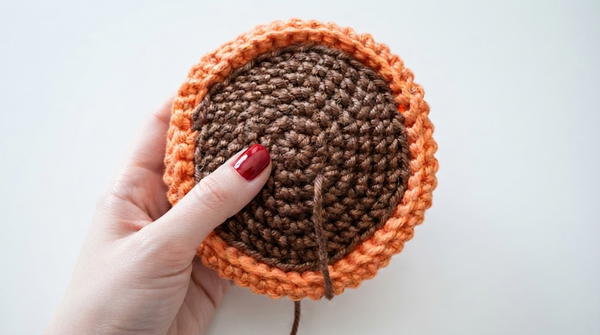
- Insert plastic disc into the bottom of the vase.
- Scatter small rocks or weighting pellets over the disc for added stability.
- Firmly stuff with fiber fill, ensuring the pot’s upper edge remains open for sewing.
- Place the finished ground/soil over the opening and use the brown yarn tail to sew ground to the vase neatly.
Leaf Cluster Assembly:
- Stitch the big leaves together at their base in a circular, slightly overlapping fan or rosette.
- Position the three small leaves over the assembled big leaf cluster, sewing securely at the base.
Plant Attachment:
- Use a tapestry needle and matching green or brown yarn to attach the entire leaf cluster to the ground/soil disc.
- Secure firmly so the plant stands upright and doesn't wobble.
7. Flower – Lilac Yarn
- Thread the lilac yarn through the very center of the ground and leaf cluster, so it emerges at the top.
- For each petal (repeat 8 times):
- Ch 10,
- Twist the chain into a small spiral,
- Fasten the chain with a single crochet into the center base where the yarn emerges.
- Space evenly so all 8 flower spirals radiate around the top.
- Fasten off and weave in ends.
Assembly & Finished Size
- Your finished succulent should measure approx. 10–13 cm in height with a firm, stable base.
- The rosette foliage will be layered, with big leaves at the base and small leaves centered above.
- The lilac flower coils crown the top for playful effect.
- The pot should sit securely thanks to the plastic disc and small rocks.
Conclusion
You have now created a delightful amigurumi succulent, complete with a weighted vase, earthy detail, plump leaves, and a bright, whimsical flower. Each section reinforces essential crochet techniques while allowing for playful customization. This project adds a cheerful and everlasting “plant” to any desk, shelf, or as a handmade gift.