Enjoy summer vibes by crocheting your own stylish and reusable mesh tote bag with our Free Crochet Mesh Tote Bag Pattern that is both easy and eco-friendly.
Creating your own stylish and functional accessory has never been easier! The Free crochet mesh tote bag pattern offers a lightweight and trendy design that’s perfect for summer outings, grocery trips, or even as a chic everyday carry-all. In the tutorial shared by Mgic yarn, you’ll find step-by-step instructions to crochet this stunning tote bag with simple stitches and straightforward techniques, making it ideal for beginners and experienced crocheters alike.
Free Crochet Mesh Tote Bag Pattern for Market & Beach Days
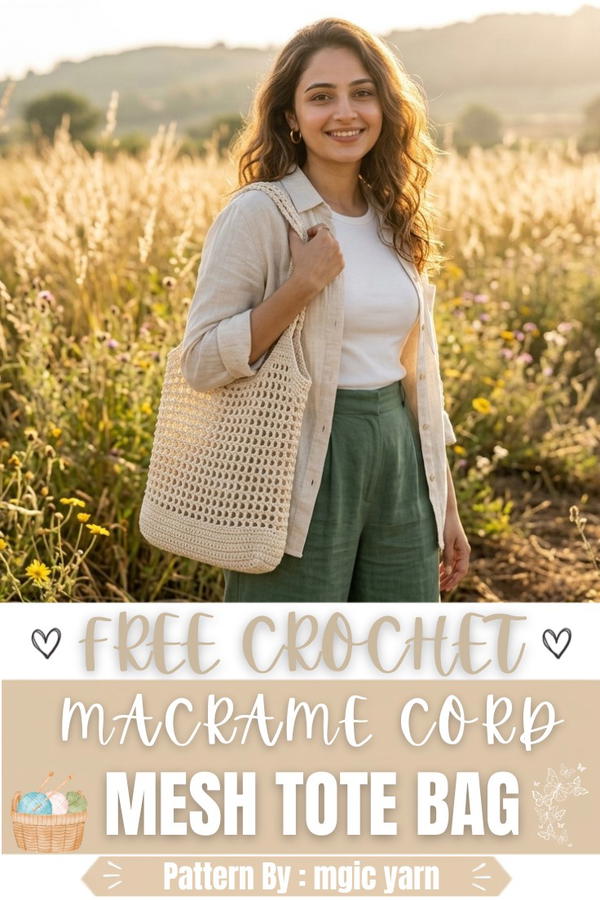
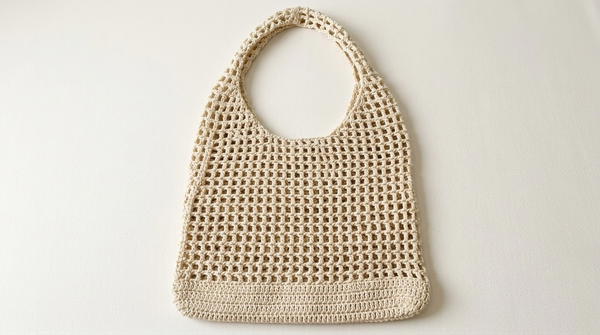
This tote bag stands out with its airy mesh design, giving it a modern and breezy feel. Its elongated rectangular shape offers plenty of space for essentials while maintaining a compact, sleek profile. The textured rows of double crochets and chain stitches create an intricate yet minimal pattern, delivering both beauty and functionality. The sturdy handles, crocheted with attention to detail, provide support while complementing the bag’s overall style.
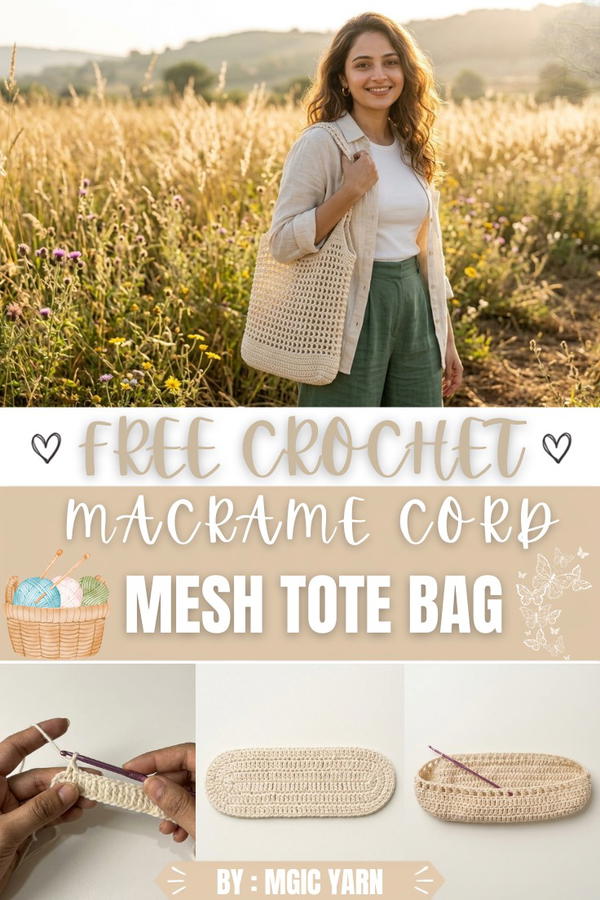
The cotton macrame yarn used in the pattern contributes to a soft but durable texture, ensuring the bag holds its shape without losing its stretch. Additionally, the neutral tones of the yarn make this tote versatile for pairing with any outfit, or you can customize the colors for a more personalized touch.
This handmade tote isn’t just a practical solution for carrying items, it’s a creative way to showcase your skills while reducing reliance on disposable bags. It also makes a thoughtful, eco-friendly gift for anyone who appreciates handcrafted beauty. Dive into this fun project and create a bag that’s as unique as you are.
Crochet Mesh Tote Bag Pattern
This crochet pattern creates a lightweight and breathable mesh tote bag ideal for shopping, carrying essentials, or casual outings. The structured base, airy mesh body, and comfortable handles make it a versatile and functional accessory.
Skill Level
Intermediate
The pattern includes foundational techniques like working in rounds, increases for shaping, mesh stitch patterns, and shaping handles. Familiarity with double crochet and basic assembly techniques is recommended.
Materials
- Yarn: 280 grams of pure cotton yarn (2mm thickness).
- Crochet hook: 3.5 mm.
- Stitch markers: To mark key points like the start of rounds or handle placement.
- Tapestry needle: For sewing the handles securely.
- Scissors: To trim yarn ends and tidy up the work.
Special Stitches
- Double Crochet (DC): A tall stitch used throughout the pattern for the base and mesh body.
- Mesh Stitch: A combination of DC and chain stitches (DC, ch 1, sk 1, DC) that creates a breathable and lightweight design.
Stitch Abbreviations
| Abbreviation | Meaning |
|---|---|
| ch | Chain |
| DC | Double Crochet |
| sk | Skip |
| sl st | Slip Stitch |
| st(s) | Stitch(es) |
Useful Tips
- Track increases: Use markers to keep track of curve sections when working the base to ensure consistent shaping.
- Count stitches: Accurate stitch counts are essential in the mesh pattern and for maintaining symmetry in the handles.
- Control your tension: Ensure even tension to create a balanced and sturdy tote bag.
- Secure assembly: When sewing handles, ensure the straps are evenly aligned for professional stitching.
- Customization: Adjust the size of the bag by increasing or decreasing rows in the base and mesh body.
Detailed Pattern
1. Base
Foundation:
- R1: Start with a slip knot and chain 40 ch (approx. 24 cm).
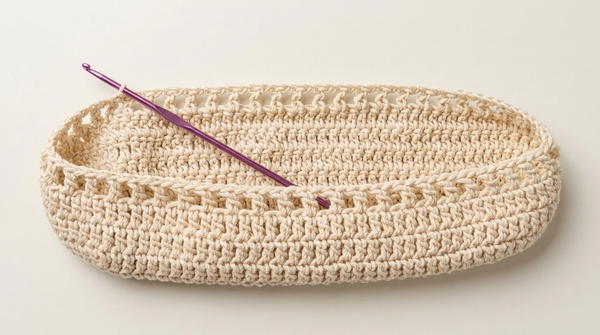
- R2: Chain 2, then work 3 DC into the 3rd chain from the hook (place a stitch marker in the 1st DC to mark the beginning of the round). Work 1 DC in each chain across the length. At the last chain, place 6 DC to form a rounded edge. Continue working 1 DC in each chain along the opposite side of the foundation. Add 3 DC into the final stitch to complete the round.
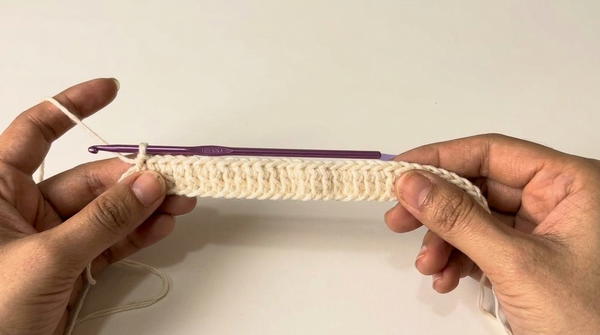
R3–R4: Work increases around the curves to maintain the oval shape as follows:
- In the curved sections, place 2 DC in each stitch of the previous curve section.
- Continue working evenly on flat edges with 1 DC in each stitch.
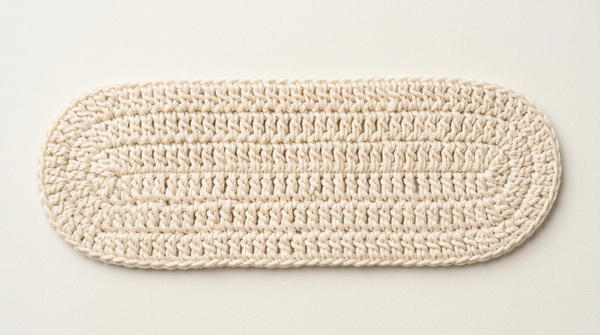
Base Dimensions:
The finished base measures approximately 31 cm x 8.5 cm.
2. Body
Stability Rows:
- R1–R2: Work 2 rounds of standard DC in each stitch without any increases. This helps stabilize the bag before transitioning into the mesh stitch.
Mesh Pattern:
- Begin the mesh stitch pattern: (DC, ch 1, sk 1 st, DC).
- Continue working this mesh sequence around the bag body for 16 rows.
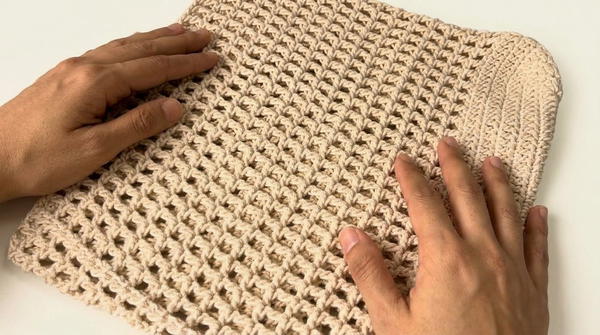
Ensure your total stitch count allows for an even repeat of the mesh pattern. The mesh body measures approximately 30 cm in length and offers a breathable, lightweight structure.
3. Handles
Marking:
- Divide the bag opening into evenly spaced sections (use stitch markers to mark the start and end points for the handles).
Construction:
- Work back-and-forth rows while shaping the straps through decreases at the start and end of each handle row. Decreasing helps taper the handle for a comfortable fit.
Straight Rows:
- After completing the reduced shaping, continue working straight rows of the mesh pattern to extend the handle length.
Handle Construction:
- Approx. 11 rows of stability in straight mesh rows.
- Handle straps should be long enough for comfortable use but can be adjusted to individual preference.
4. Finishing
- After completing the handles, cut the yarn, leaving a long tail for sewing.
- Fold the handles neatly and sew the ends together. Use a tapestry needle to work even and secure stitches along the connection points.
- Ensure alignment between both strap sides to avoid twisting.

Assembly and Sizing
The finished bag measures:
- Base dimensions: 31 cm x 8.5 cm.
- Body height: 30 cm.
- Handle length: Approx. adjustable to desired size.
When sewing, take care to align sections neatly for a polished and professional-looking bag.
Conclusion
This crochet mesh tote bag pattern offers both functionality and style. Its breathable structure and sturdy construction make it ideal for a variety of uses, such as shopping or carrying essentials. Adjust the dimensions or add decorative elements like color stripes for a personalized touch.