Warm up your winter wardrobe with this free crochet scarf pattern that helps you create a cozy and stylish accessory with simple steps to follow.
Adding a handmade touch to your wardrobe can be both fun and rewarding. The Free crochet scarf pattern shared by Crochet with Olga Dyvinets!!! invites you to create a stunning accessory that doubles as a scarf or shawl. This project is perfect for gifting, offering a personal and cozy present for loved ones during any chilly season.
Free Crochet Scarf Pattern for Beginners – Cozy and Stylish
The scarf features a lovely, airy texture achieved through a repeating diamond pattern made up of simple double crochet stitches and air loops. Its shape is an elegant triangle, easy to wrap around the neck or shoulders in various stylish ways. Using cotton yarn gives the finished piece a soft yet sturdy feel, making it comfortable to wear while holding its form beautifully.
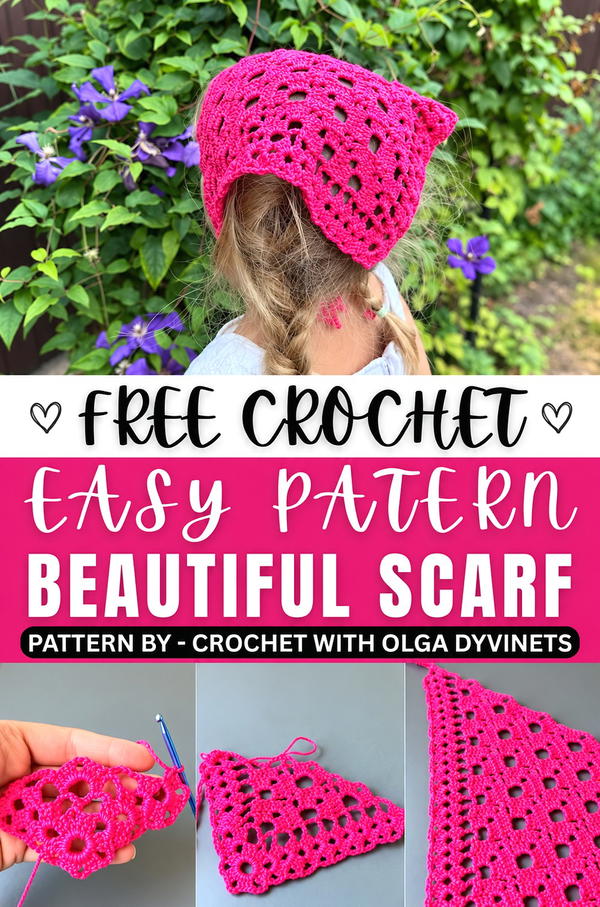
This design stands out because of its rhythmic rows of diamonds and arches that create a delicate, lacy effect, combining simplicity with charm. Each row builds upon the last, gradually forming a classic and timeless look that complements many outfits. The color choices, such as a rich raspberry seen in the video tutorial, add warmth and brightness, elevating the overall appeal.
Beyond its decorative beauty, the scarf is useful for warmth and layering, making it a versatile wardrobe addition. The easy-to-follow guide clearly explains each stitch and step, allowing makers of various experience levels to enjoy bringing this piece to life. This pattern means gifting both style and comfort to yourself or someone special.
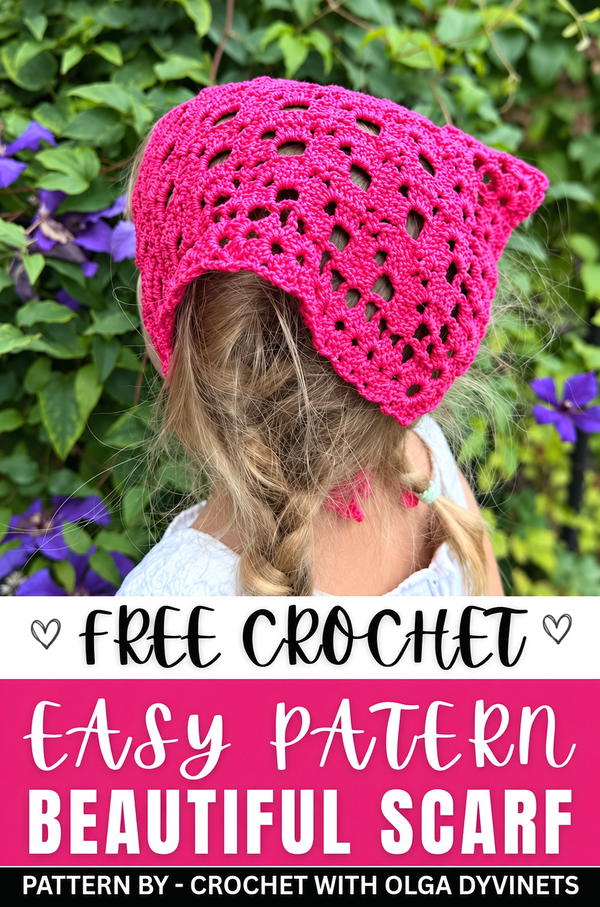
Crochet Pattern: Triangular Kerchief/Shawl
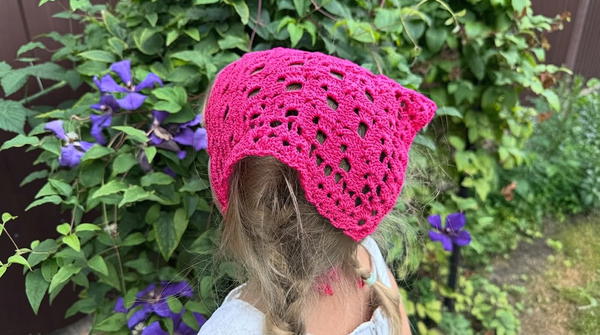
This triangular kerchief is a delicate, lightweight design perfect for wearing as a shawl or headscarf. The adaptable pattern uses elegant geometric motifs to build a stunning triangular shape. The combination of "rhombus" motifs and arch-based rows creates both texture and charm, while added ties make the kerchief versatile and practical.
Skill Level
Intermediate – This pattern requires familiarity with working in the round, chaining, double crochets, single crochets, and creating increasing geometric shapes. It is ideal for crocheters comfortable with repeating patterns and basic shaping techniques.
Materials
- Yarn: Pekhorka Vintage or similar cotton yarn (100% cotton, 240m per 100g). The tutorial uses raspberry color, but you can select any shade to suit your style.
- Crochet Hook: Size 2.5 mm.
- Scissors for cutting yarn.
- Yarn needle for weaving in the ends securely.
Stitch Abbreviations
- Ch: Chain
- Sl St: Slip Stitch
- SC: Single Crochet
- DC: Double Crochet
Special Stitches
Double Crochet Cluster
A group of double crochet stitches worked together in a single space or arc to form a cluster.
- Yarn over, insert the hook into the space, yarn over and pull up a loop.
- Yarn over, pull through two loops.
- Repeat steps 1–2 for the required number of double crochets (e.g., 3 double crochets).
Rhombus Motif
A rhombus is formed by working clusters of double crochets separated by chain spaces.
- Crochet 3 DC, Ch 3, 3 DC into a designated arc or space.
- This motif is expanded in subsequent rows for a geometric appearance.
Useful Tips
- Tension: Maintain consistent tension throughout the project to ensure even arches and motifs.
- Counting: Track stitch and chain counts carefully in rows involving increases and rhombus expansions.
- Blocking: Block the finished kerchief gently to define its shape and straighten the edges. Cotton yarn especially benefits from blocking.
- Ties: When attaching ties, ensure they are symmetrical and secure for practical use.
Pattern Instructions
This pattern is divided into three sections: starting the base, main pattern development, and finishing and ties. The triangular shape is created through consistent increases at the edges and geometric motifs worked throughout the rows.
Starting the Base
- Make a slip knot and place it on the hook.
- Ch 8, then join the chain into a ring with a Sl St into the first chain.
- Ch 3 (counts as your first DC), then work 2 DC into the ring, followed by Ch 3.
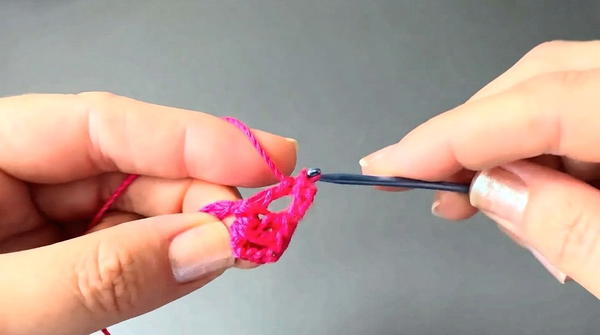
- Repeat the following sequence into the ring: 3 DC, Ch 3 until you have 6 groups of clusters of 3 DC inside the ring.
- Complete with Ch 3, then join the round with a Sl St into the top of the starting chain.
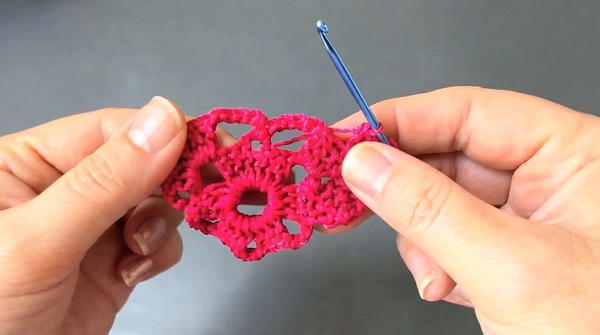
Main Pattern Development
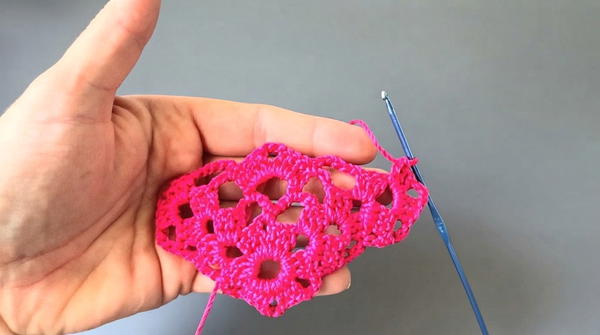
Row 2
- Ch 3 to begin the row.
- In the first chain arc from the previous row, crochet 3 DC, Ch 3, 3 DC to form the first rhombus motif.
- Ch 5, then work 1 SC into the next arc.
- Ch 5, then repeat the rhombus motif (3 DC, Ch 3, 3 DC) in the final arc.
- Complete the row and turn.
Row 3
- Begin with Ch 3, then repeat the pattern sequence for Row 2: working rhombus motifs at the edges and adding Ch 5 arches between motifs.
- Ensure the arches flow symmetrically through the row to expand the triangle shape.
Row 4
- Work the outer rhombus motif as in previous rows (3 DC, Ch 3, 3 DC).
- Ch 5, then crochet 1 SC into the next arch space.
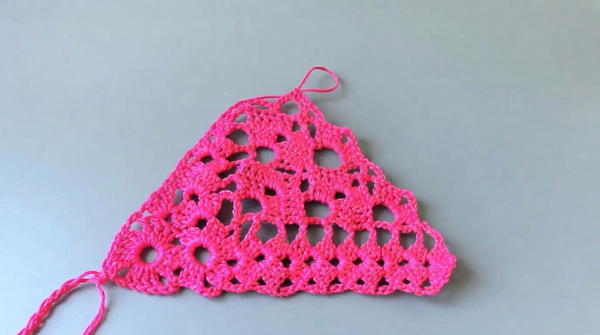
- In the next space, begin forming a rhombus by working 3 DC, Ch 3, 3 DC. This introduces rhombus motifs between arches.
- Continue repeating this pattern for the full row width.
Rows 5–6
Row 5: Expand the rhombuses further by forming larger clusters.
- In each chain-3 center space of the rhombus, work 5 DC on either side.
- Separate motifs using arches (Ch 5 and SC) as before.
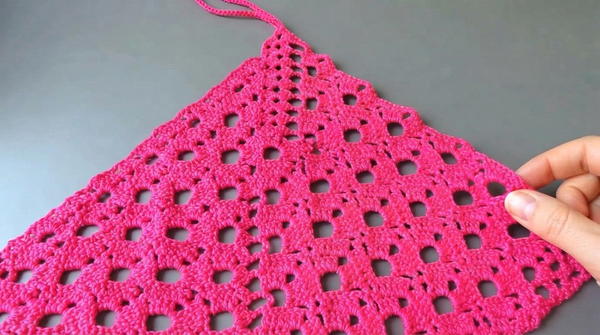
Row 6: Prepare for the next expansion by crocheting rows of arches (chains and single crochets).
Rows 7–10
- Continue working in segments by adding arches and expanding rhombus motifs.
- Increase the triangle’s width by systematically introducing more rhombus shapes:
- First, expand to 2 rhombuses across in width.
- Then increase further to 3 rhombuses across, while maintaining arches between motifs.
- Follow the logic of alternating rhombus expansions with supporting arch rows until reaching the desired width.
Finishing and Ties
- Final Row: The creator finished on the 28th row, with the kerchief measuring 45cm long and 25cm deep.
- Ties:
- Attach yarn to one of the corner arcs.
- Ch 42, then work 41 SC back down the chain to create a sturdy tie.
- Edging:
- Continue working single crochets into the edges of the kerchief, ensuring smooth stitches along arcs and spaces.
- Edge both sides evenly and continue to the opposite corner.
- Second Tie:
- At the second corner, Ch 42, then work back down with 41 SC to form the matching tie.
- Fasten Off: Secure all yarn ends and trim them using scissors.
Conclusion
This triangular kerchief combines practicality with elegance, featuring intricate rhombus motifs and arch details. The addition of ties makes it versatile for use as either a shawl or headscarf. Customize your kerchief with alternative yarns or colors to suit your style, and block the finished piece gently for optimal shape and texture.