Dress little ones in handmade comfort with this Free Crochet CARDIGAN FOR CHILDREN Pattern, featuring a cozy shape and simple details for a lovely finish.
A cool morning often calls for something soft and warm that a child can wear comfortably throughout the day. A lovely little cardigan can be just the right choice, adding warmth while making a simple outfit look extra sweet. Special thanks and appreciation to Gülşah Özcan Filiz for sharing this beautiful tutorial and explaining the steps in a clear and helpful way.
Cardigan Pattern Free Crochet Tutorial for Beginners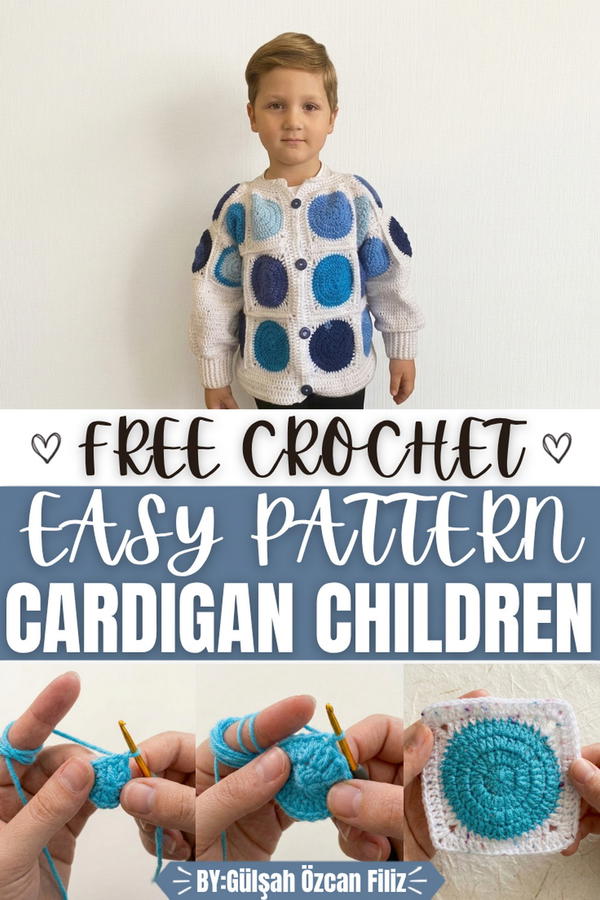
This cardigan has a comfortable shape that looks lovely on children without making their outfit feel too heavy. The open front makes it easy to wear over a dress, shirt, or simple top. Its soft texture gives a cozy feeling, while the neat design keeps the overall appearance clean and attractive.
The working style is easy to follow by completing each part step by step. The main body, sleeves, and edges come together to create a balanced shape that sits nicely on a child. The length can also be adjusted to provide a comfortable fit for different ages and sizes.
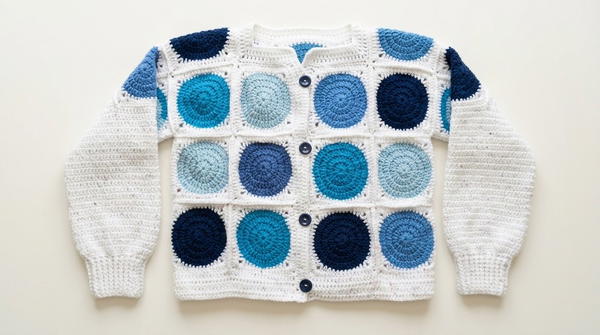
The most attractive feature is its simple yet charming shape. The open front, neat edges, comfortable sleeves, and soft texture give this cardigan a beautiful everyday look. It can be worn at home, during family visits, on cool evenings, or for casual outings. This pattern is a lovely choice for making a warm, useful, and pretty cardigan that children can enjoy wearing.
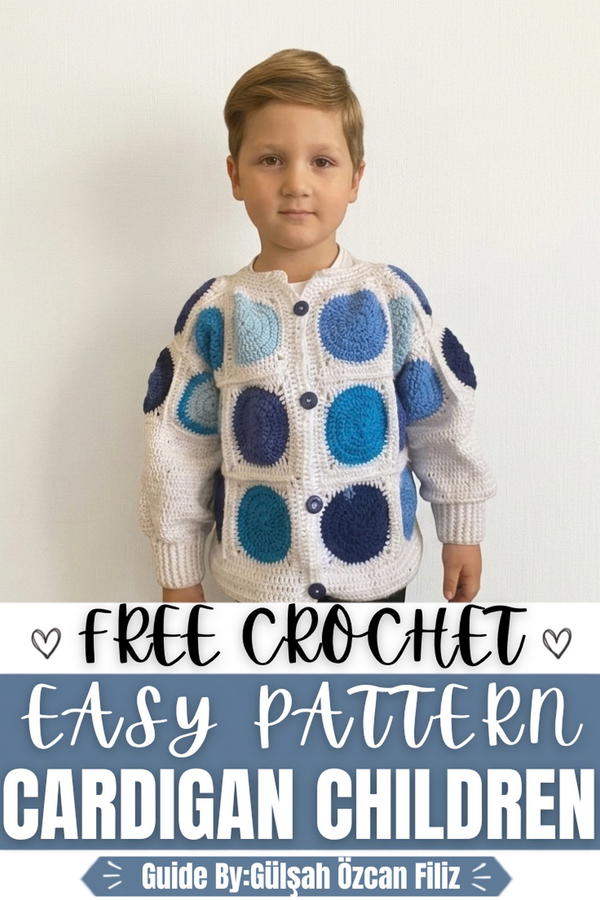
Crochet Children's Motif Cardigan Pattern
This pattern constructs a fully wearable children's cardigan sized for approximately 5 to 7 year olds using 30 circular motifs that are shaped into squares and joined together to form the complete garment. The construction begins with individually worked circular motifs that are transitioned into squares using a combination of stitch heights, then assembled into a flat layout that forms the back, front panels, and shoulders of the cardigan. Sleeves are worked directly from the armhole openings, and the garment is finished with a hemline extension, front button placket with buttonholes, and a shaped neckline with double crochet edging. The use of acrylic stash yarn makes this an economical and practical project that produces a charming and well-structured children's garment.
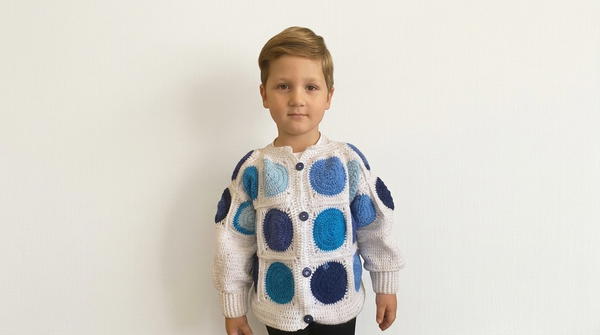
Skill Level: Intermediate — This pattern is best suited for crocheters who are comfortable working in the round, executing increases, transitioning motif shapes, and working basic garment construction such as sleeves, plackets, and neckline shaping. Beginners with some completed projects may also attempt this pattern with patience and careful attention to the motif layout.
Materials
- Yarn: Acrylic yarn in two or more colors (stash yarn is perfectly suitable; one color for the motif center rounds and a contrasting color for the squaring and final rounds)
- Hook: 3.25mm crochet hook
- Tools:
- Tapestry needle for weaving in ends
- Scissors
- Measuring tape
- Stitch markers
- Buttons for front placket closure (quantity based on personal preference)
Special Stitches
- Magic Ring: An adjustable starting loop worked around the finger that allows the center of the motif to be pulled completely closed after the first round, eliminating any gap at the center point.
- Standard Increase: Work 2 dc into the same stitch to add one stitch to the round, used consistently across Rounds 2 through 4 to expand the circular motif outward.
- Corner Construction: Worked during the squaring round using a descending combination of dc, hdc, and sc stitches to shape the fabric toward corner points, with ch-2 spaces placed at each of the four corners to define the square shape.
- Front-Post Double Crochet (FPdc): Insert the hook from the front and around the post of the stitch below, then complete the double crochet as normal. Used in the cuff ribbing section.
- Back-Post Double Crochet (BPdc): Insert the hook from behind and around the post of the stitch below, then complete the double crochet as normal. Alternated with FPdc to create the ribbed cuff texture.
- Single Crochet Join: Two motif edges held together and joined simultaneously by working sc through corresponding stitches on both pieces, creating a flat and secure seam.
Stitch Abbreviations
- ch — chain
- sl st — slip stitch
- sc — single crochet
- hdc — half-double crochet
- dc — double crochet
- FPdc — front-post double crochet
- BPdc — back-post double crochet
- MR — magic ring
- inc — increase (2 dc in same stitch)
- dec — decrease (2 sc worked together)
- sp — space
- st(s) — stitch(es)
- rep — repeat
- tch — turning chain
Useful Tips
- Make all 30 motifs before beginning the assembly process to ensure consistent sizing and tension across the full set of pieces.
- Use stitch markers to identify the four corner chain spaces on each motif from the squaring round onward to simplify the joining process.
- Count stitches carefully at the end of each increase round to confirm the correct stitch count before proceeding to the next round.
- When transitioning from circular to square in the squaring round, maintain relaxed tension on the dc, hdc, and sc stitches so the fabric lies flat without pulling or curling at the corners.
- Press or lightly block each completed motif before assembly to ensure uniform sizing and to make the joining process easier and more precise.
- When working the sleeve rounds directly from the armhole opening, place a stitch marker at the beginning of each round to track round counts and avoid losing your place.
- Test button placement along the front placket before sewing to ensure even spacing across the full placket length.
Pattern Instructions
Motif Construction (Make 30)
Foundation — Magic Ring
- Using the main color yarn, create a MR.
- Ch 3 (counts as first dc).
- Work 12 dc into the ring.
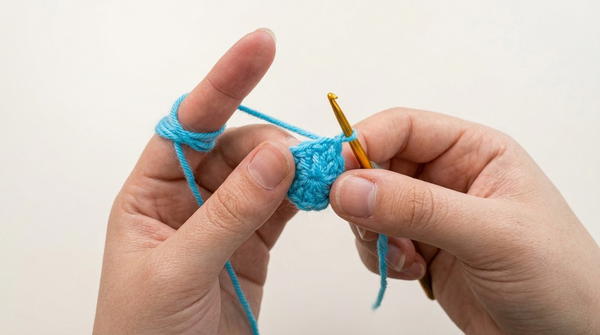
- Pull the ring tail to close the center completely.
- Sl st into the top of the beginning ch-3 to join.
- Total: 13 sts including the beginning ch-3
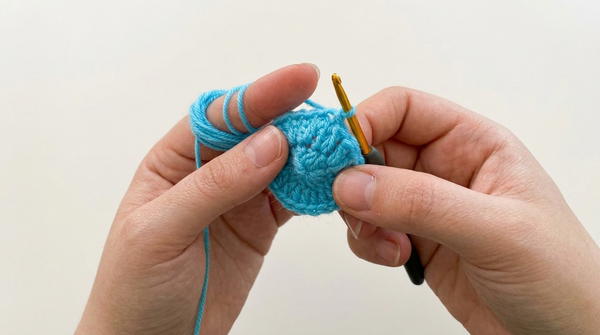
- Total: 13 sts including the beginning ch-3
Round 2 — First Increase Round
- Ch 3 (counts as first dc), turn or continue in the round.
- Work inc (2 dc) into each st around.
- Sl st to join at the top of the beginning ch-3.
- Total: 26 dc
Round 3 — Second Increase Round
- Ch 3.
- Work 1 dc into the first st.
- Work inc (2 dc) into the next st.
- Rep the sequence of 1 dc, then inc around the entire round.
- Sl st to join.
- Total: 39 dc
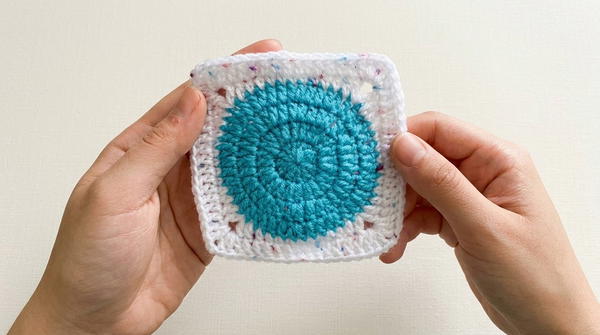
- Total: 39 dc
Round 4 — Third Increase Round
- Ch 3.
- Work 1 dc into each of the next 2 sts.
- Work inc (2 dc) into the next st.
- Rep the sequence of 2 dc, then inc around the entire round.
- Sl st to join.
- Total: 52 dc
Squaring Round — Transitioning to Square Shape
- Join contrasting color yarn at any stitch.
- Ch 3.
- Work a sequence of dc, hdc, and sc stitches around the circle, reducing the stitch height gradually as you approach each corner position.
- At each of the 4 corner positions, work ch 2 to create an open corner space.
- Use the descending stitch height sequence to angle the fabric naturally toward each corner, then ascend again with sc, hdc, dc as you move away from each corner.
- Sl st to join at the end of the round.
- Fasten off contrasting color.
Final Round — Square Finishing Round
- Join yarn (main or contrasting color) at any corner ch-2 sp.
- Ch 3.
- Work 3 dc, ch 2, 3 dc all into the same corner ch-2 sp.
- Work dc evenly into every stitch along each side of the square.
- At each remaining corner ch-2 sp, work 3 dc, ch 2, 3 dc.
- Rep around all four sides.
- Sl st to join and fasten off.
- Weave in all ends on each completed motif.
- Rep the full motif construction until all 30 motifs are complete.
Assembly and Sizing
Motif Layout
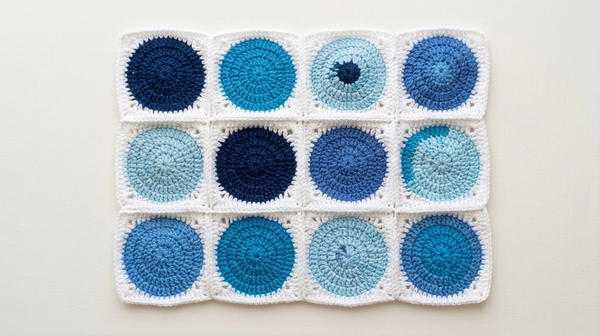
- Arrange the completed motifs on a flat surface according to the following layout:
- Back panel: 4 motifs wide arranged in rows to form the full back of the cardigan.
- Front panels: Motifs arranged on each side of the center front opening to form the left and right front sections.
- Shoulder sections: Motifs positioned to connect the back and front panels at the shoulder line.
- Refer to a simple schematic or count to confirm that the total of 30 motifs is distributed correctly across all sections before beginning to join.
Joining the Motifs
- Hold two adjacent motifs together with their wrong sides facing each other.
- Join yarn and work sc through corresponding stitches along both shared edges simultaneously.
- Work sc evenly across the full shared edge from one corner to the opposite corner.
- Fasten off and weave in ends after each seam.
- Rep across all shared edges until all motifs are joined into a single flat body panel.
Hem Extension
- Join yarn at the lower edge of the assembled body panel.
- Ch 3 and work dc evenly across the entire lower edge.
- Ch 3, turn, and work dc across for each additional row.
- Continue working straight dc rows until the hem reaches the desired total length for the garment.
- Fasten off.
Front Placket
- Join yarn at the lower edge of one front opening edge.
- Work dc rows upward along the full front edge for several rows to create a neat placket band.
- On one front edge only, create buttonholes by working ch 2 and skipping 2 sts at evenly spaced intervals along one placket row.
- Work dc into the ch-2 sp on the following row to close each buttonhole.
- Work the opposite front edge with straight dc rows without buttonholes.
- Fasten off both placket edges.
Sleeves
- Join yarn at the armhole opening on one side of the assembled body.
- Work dc evenly around the entire armhole opening in the round.
- Sl st to join each round and ch 3 to begin the next.
- Continue working straight dc rounds until the sleeve reaches the desired length for the child's arm.
- On the final sleeve round, work sc dec (2 sc together) evenly around the wrist edge to reduce the total stitch count and tighten the cuff opening.
- Work the ribbing cuff by alternating FPdc and BPdc across each cuff round for several rounds until the cuff reaches the desired depth.
- Sl st to join and fasten off.
- Rep the full sleeve construction on the opposite armhole opening.
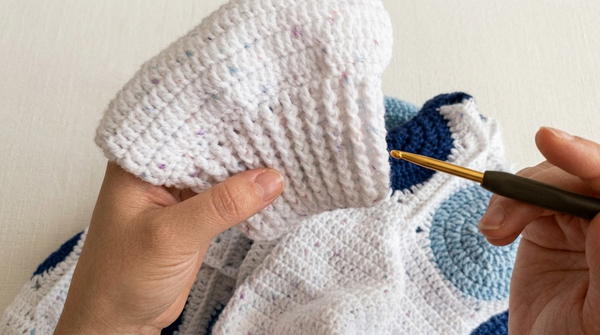
Neckline Shaping
- Join yarn at the neckline edge of the assembled cardigan.
- Work sc evenly around the entire neckline opening, working sc dec at the inner corners and shoulder transition points to pull the neckline inward and reduce bunching.
- Work 2 to 3 rows of dc around the neckline, skipping stitches at corner points to prevent excess fullness and keep the neckline lying flat and smooth against the body.
- Sl st to join each neckline round and fasten off after the final row.
- Weave in all remaining ends throughout the garment.
Finishing
- Sew buttons onto the front placket edge without buttonholes, aligning each button directly opposite its corresponding buttonhole.
- Weave in any remaining yarn ends and trim neatly.
Sizing Notes
- The pattern as written is sized for children aged approximately 5 to 7 years.
- To adjust for a smaller child, reduce the number of motifs in the layout or omit one row of hem extension rows.
- To adjust for a larger child, add one additional motif to the width of the back panel or increase the number of hem and sleeve rows accordingly.
Conclusion
This children's cardigan pattern demonstrates how modular motif construction can be applied effectively to garment making, producing a structured and fully wearable piece through a series of clearly defined and repeatable steps. The circular-to-square motif transition introduces an important and versatile technique that can be applied across a wide range of future crochet projects. The addition of ribbed cuffs, a buttoned front placket, and a shaped neckline brings a level of refinement to the finished garment that makes it suitable for both everyday wear and special occasions. The adaptability of the pattern in terms of yarn color and motif arrangement means that each finished cardigan can carry a completely individual character while following the same reliable construction method.