Add playful charm to your collection with this free crochet monkey amigurumi pattern, delivering a cute and soft companion that's fun to hold and display.
There’s something truly heartwarming about crocheting little creatures that bring joy and personality to any space. If you’re looking to add a playful companion to your amigurumi collection, you’ll find the Free Crochet Monkey Amigurumi pattern a delightful and rewarding project. This pattern offers an adorable take on a classic monkey figure, charming in both design and detail.
Simple and Quick Crochet Monkey Amigurumi Free Pattern
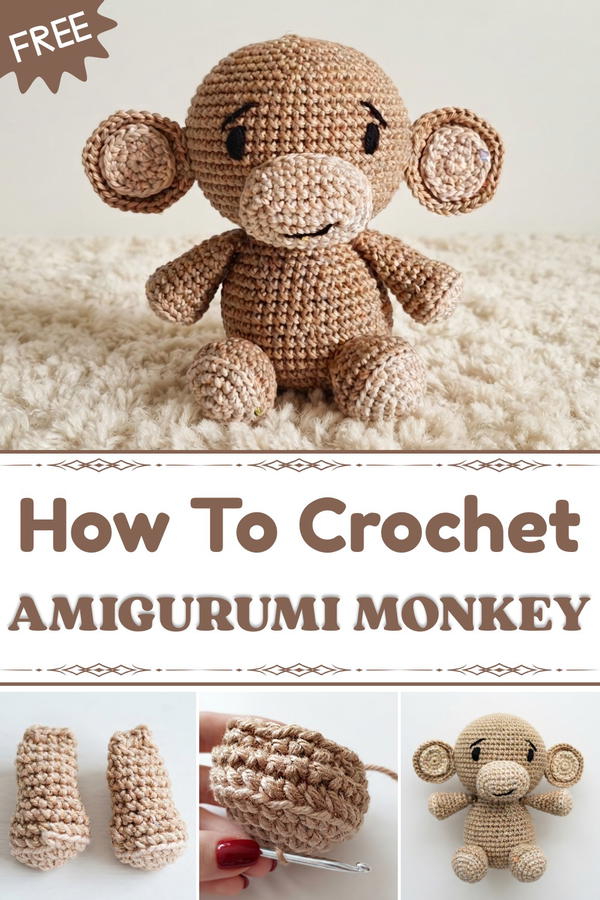
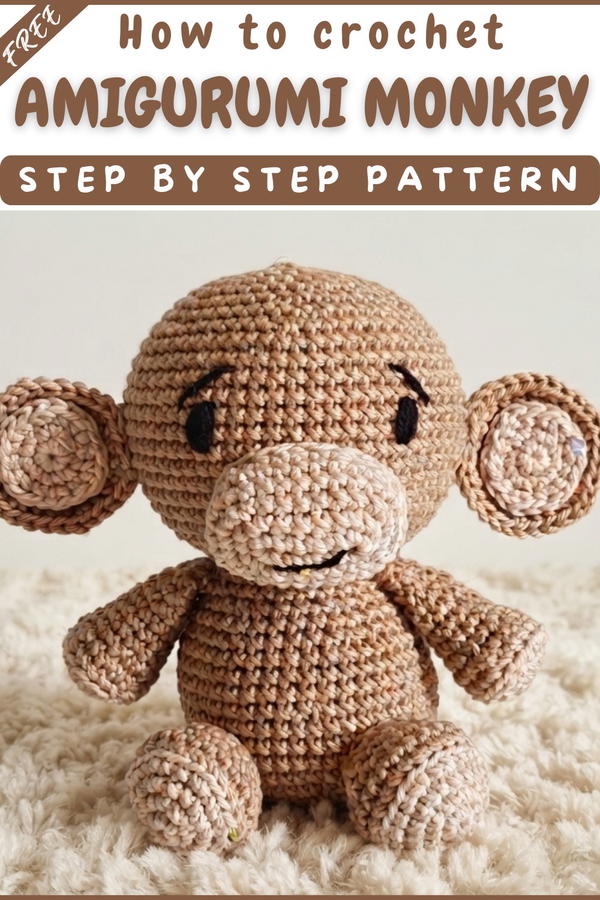
This amigurumi monkey is crocheted with soft, rounded shapes that reflect the friendly and curious nature of these animals. The texture is smooth yet slightly bumpy from the tight single and half-double crochet stitches used, giving it a handmade charm that feels cozy and cuddly. Its standout features include expressive eyes, a cute tail, and little hands and feet that add character and a sense of movement to the figure.
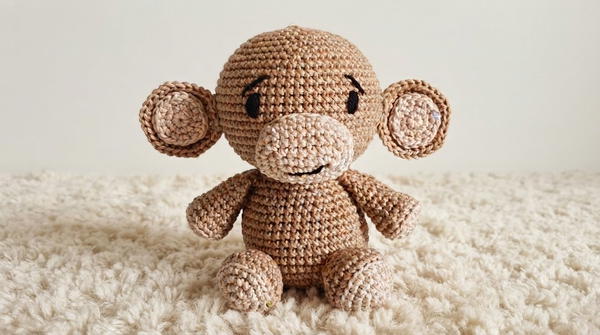
One of the best things about this Free Crochet Monkey Amigurumi pattern is its versatility in size. By simply adjusting the yarn weight and hook size, you can create anything from a tiny keychain monkey to a larger plush friend. Construction mainly involves crocheting in the round, working small pieces that are stuffed and sewn together. For best results, use a lightweight cotton or acrylic yarn to create a firm texture that holds the shape well. A useful tip is to stuff firmly to keep the monkey’s form neat and to embroider facial features securely for durability.
Inspired by the playful spirit of monkeys and a love for wildlife, this design brings life to your crochet projects. It’s perfect as a handmade gift for children, nursery decor, or just a sweet collectible to brighten your day. Feel free to get creative with colors and accessories to make your monkey truly one-of-a-kind.
Amigurumi Monkey Crochet Pattern
This step-by-step pattern will guide you through creating an adorable crocheted monkey, featuring jointed arms, sturdy legs, a fluffy tail, expressive snout, and a sweet face crafted with basic embroidery. Every round and detail from the transcription is translated into clear, structured instructions for your convenience and crafting enjoyment.
Pattern Highlights
Key Features:
- Seamless Body & Head Construction: Minimal sewing required for a smooth finish.
- Realistic Shaping: Strategic increases and decreases for limbs and body.
- Jointed Arms: Arms are crocheted into the body for a secure hold.
- Lifelike Snout: Shaped with both rounds and ovals for realistic dimension.
- Detailed Expression: Simple embroidery brings out the monkey's personality.
- Contrasting Ears: Double-layered in two colors for added character.
Notes
- The entire project is crocheted in rounds, working in continuous spirals unless otherwise noted.
- Use stitch markers to keep track of round beginnings.
- All color changes and joining directions are included in the rounds.
- Firm stuffing ensures the monkey maintains its shape but avoid overstuffing the limbs.
- Embroider face details only after assembling head, for symmetry.
Skill Level
Intermediate
Crafters should be comfortable with:
- Working in the round
- Increases and decreases
- Changing colors
- Basic embroidery and assembling pieces
Materials
- Scissors
- Tapestry needle
- 3.0 mm crochet hook
- Cotton yarn:
- Black (embroidery and features)
- Brown (body, ears, tail)
- Beige (paws, snout, ear lining)
- Fiber fill (polyester stuffing)
Measurements / Sizing
- Overall Height: Approx. 18-22 cm (7-8.5”), depending on yarn/hook/tension.
- Limb & Body Proportions: Designed for classic amigurumi proportions, with a large head.
- Snout: Oval and plush for a friendly facial profile.
- Ears: Densely double-layered for standing details.
For detailed schematic, refer to finished size after assembly.
Gauge
- Gauge is not critical for amigurumi but should ensure tight stitches to prevent stuffing from showing through. Complete a sample round:
- 6sc in a magic ring; work [sc, inc] x 6 = 18 sts in round 3 = approx. 3.5 cm diameter.
Stitch Abbreviations
| Abbreviation | Meaning |
|---|---|
| ch | chain |
| sl st | slip stitch |
| sc | single crochet |
| inc | increase (2 sc in 1 st) |
| dec | decrease (sc2tog) |
| hdc | half double crochet |
| dc | double crochet |
| tr | treble crochet |
| BLO | back loop only |
Special Stitches
- Magic Ring:
Form a loop, draw up a loop, and work the indicated number of stitches into the loop. Pull to close. - Invisible Decrease:
Insert hook in front loops only of the next 2 stitches, yarn over and pull up a loop, yarn over and complete the stitch.
Pattern Instructions
Arms (Make 2)
With Beige yarn:
- Round 1: 6sc into a magic ring (6)
- Round 2: 6 inc (12)
- Round 3: [sc, inc] x 6 (18)
Switch to Brown yarn:
- Round 4: 18sc (BLO) (18)
- Round 5: 18sc (18)
- Round 6: [sc, dec] x 6 (12)
- Rounds 7–10: 12sc each round (12 per round)
- Round 11: [2sc, dec] x 3 (9)
- Round 12: 9sc (9)
- Stuff with fiber fill.
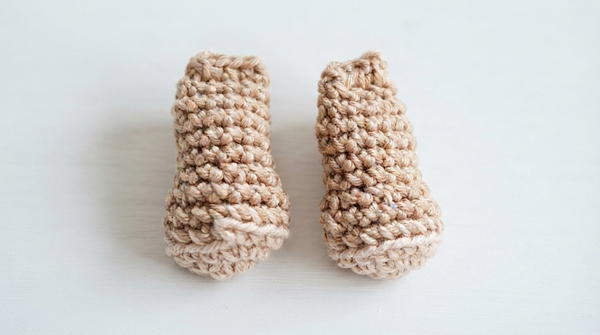
- Flatten the opening and sc across to close. Fasten off and leave a tail for joining if needed.
Legs (Make 2)
With Beige yarn:
- Round 1: 6sc into a magic ring (6)
- Round 2: 6 inc (12)
- Round 3: [sc, inc] x 6 (18)
- Round 4: [2sc, inc] x 6 (24)
Switch to Brown yarn:
- Round 5: 24sc (BLO) (24)
- Round 6: 24sc (24)
- Round 7: [2sc, dec] x 6 (18)
- Round 8: 18sc (18)
- Round 9: [sc, dec] x 6 (12)
- Stuff with fiber fill.
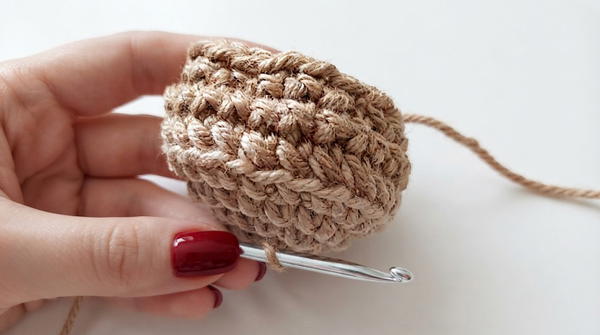
- Fasten off, leaving a long tail for sewing.
Tail
With Brown yarn:
- Round 1: 5sc into a magic ring (5)
- Round 2: [sc, inc] x 3 (9)
- Rounds 3–6: 9sc per round
- Round 7: 4sl st, 5hdc (9)
- Rounds 8–13: 9sc per round
- Round 14: [sc, dec] x 3
- Stuff with fiber fill and fasten off, leaving a tail for sewing.
Body
With Yellow or Brown yarn:
- Round 1: 7sc into a magic ring (7)
- Round 2: 7 inc (14)
- Round 3: [sc, inc] x 7 (21)
- Round 4: [2sc, inc] x 7 (28)
- Round 5: [3sc, inc] x 7 (35)
- Round 6: [4sc, inc] x 7 (42)
- Round 7: [5sc, inc] x 7 (49)
- Rounds 8–11: 49sc per round
- Round 12: [5sc, dec] x 7 (42)
- Rounds 13–15: 42sc per round
- Round 16: [4sc, dec] x 7 (35)
- Round 17: 35sc
- Round 18: [3sc, dec] x 7 (28)
Attaching Arms (While Continuing Body)
- Round 19:
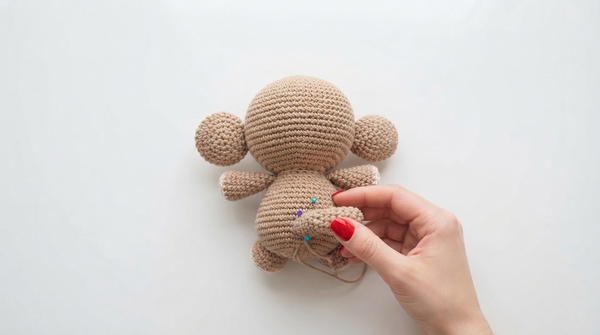
- 9sc, join the first arm with 4sc (crochet through both body and arm stitches), 9sc, join the second arm with 4sc, 2sc (28)
- Round 20: [2sc, dec] x 7 (21)
- Stuff body well before closing.
Head (Worked Directly After Body)
- Round 21: 21sc (BLO) (21)
- Round 22: 21 inc (42)
- Round 23: [6sc, inc] x 6 (48)
- Round 24: [7sc, inc] x 6 (54)
- Round 25: [8sc, inc] x 6 (60)
- Rounds 26–36: 60sc per round
- Round 37: [8sc, dec] x 6 (54)
- Round 38: [7sc, dec] x 6 (48)
- Round 39: [6sc, dec] x 6 (42)
- Round 40: [5sc, dec] x 6 (36)
- Round 41: [4sc, dec] x 6 (30)
- Round 42: [3sc, dec] x 6 (24)
- Stuff the head thoroughly as you go.
- Round 43: [2sc, dec] x 6 (18)
- Round 44: [sc, dec] x 6 (12)
- Round 45: 6 dec (6)
- Finish with an ultimate (invisible) close.
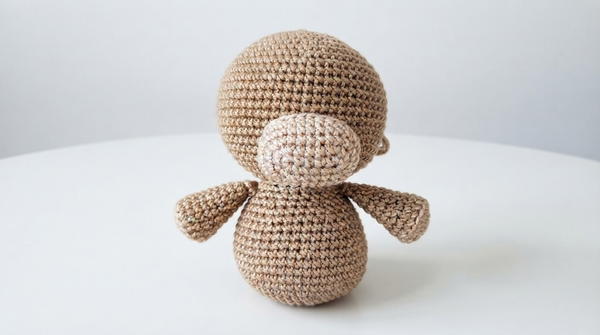
Snout
With Beige yarn:
- Row 1: Ch 6
- Row 2 (working into chain):
- inc in first st, 3sc, 4sc in next st (turns at end), 3sc along the opposite side of the chain, inc in last st (14)
- Row 3: 2inc, 3sc, 4inc, 3sc, 2inc (22)
- Row 4: 2inc, 7sc, 4inc, 7sc, 2inc (30)
- Rows 5–6: 30sc per round
- Row 7: [4sc, dec] x 5 (25)
- Stuff with fiber fill and sew to lower half of the head, centering.
Ears (Make 2, each with 2 parts)
External (Brown):
- Round 1: 6sc in magic ring (6)
- Round 2: 6 inc (12)
- Round 3: [sc, inc] x 6 (18)
- Round 4: [2sc, inc] x 6 (24)
- Round 5: [3sc, inc] x 6 (30)
- Fasten off, leave long tail.
Internal (Beige):
- Round 1: 6sc in magic ring (6)
- Round 2: 6 inc (12)
- Round 3: [sc, inc] x 6 (18)
- Fasten off, leave long tail.
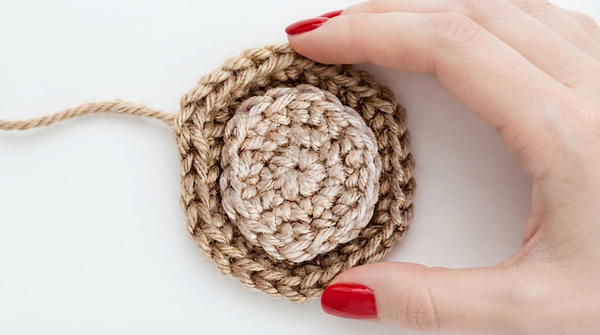
- Place beige piece inside brown, sew together, then attach to head.
Assembly & Finishing Details
- Ears:
- Join brown and beige parts together and sew onto both sides (top-center) of the head.
- Legs:
- Sew legs securely to the body at the base.
- Tail:
- Sew the tail onto the lower back of the body.
- Snout:
- Center and sew the snout to the head.
- Face Details:
- Embroider black eyes in symmetry and slanted eyebrows above the eyes.
- Embroider a mouth as a curved line on the snout.
- Final Shaping:
- Make any final adjustments to stuffing and shape to ensure balance and cuteness.
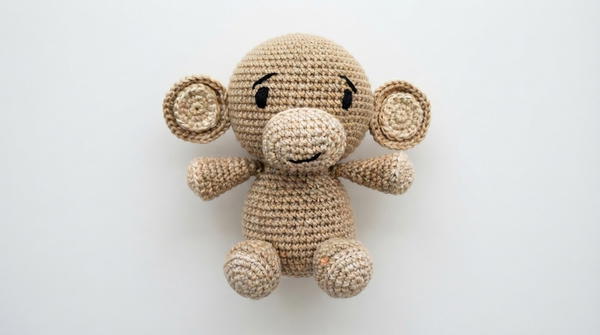
- Make any final adjustments to stuffing and shape to ensure balance and cuteness.
Conclusion
Congratulations on completing your own amigurumi monkey! By following every directed round, color change, and assembly step, you have created a teddy with moveable arms, a chubby face, and personality-rich features. This project provides experience in seamless crocheting, joining-in-arms, and embroidery, essential amigurumi skills. You are welcome to customize further with accessories or colors, and we hope your finished monkey becomes a cherished keepsake or delightful gift.