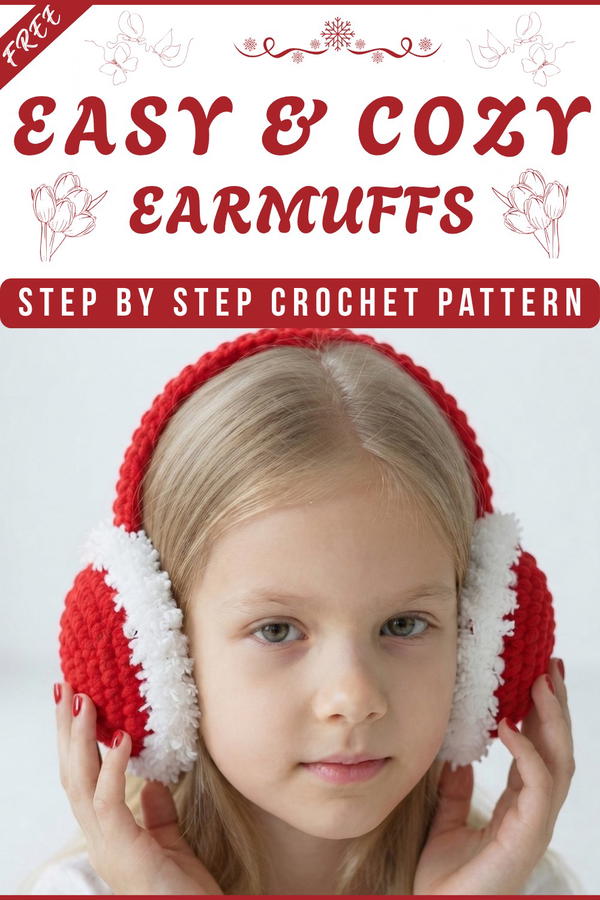
Make winter cozier with this Free Crochet Earmuffs Pattern, offering easy-to-follow steps to create stylish and warm earmuffs perfect for chilly days or gifting.
If you’re anything like me, cold ears are an instant winter bummer and that’s exactly why I fell in love with making these cozy ear warmers. The Free Crochet Earmuffs Pattern is a brilliant little project that’s all about keeping your ears toasty without turning your whole head into a woolly fortress. Also known as ear warmers or headbands, they’re the perfect mix of warmth and style, no bulky hats required.
Free Crochet EARMUFFS Pattern for Colorful Designs
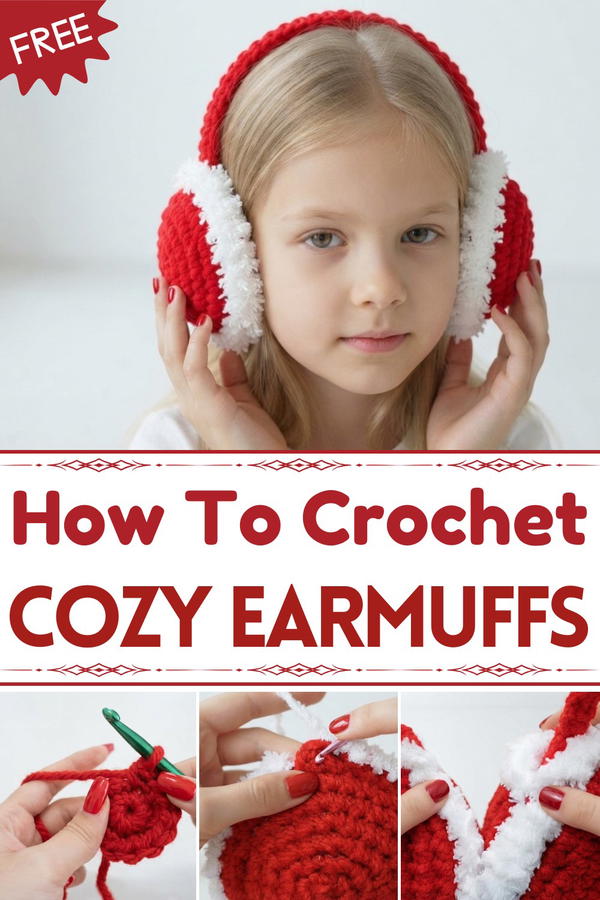
What’s really fun about this project is how adorable and versatile these earmuffs can be. Picture a soft, squishy band that fits snugly around your head, wrapping your ears in the coziest hug you’ve ever had. The texture is thick and plush, thanks to the simple yet charming stitch pattern, and the rounded shape molds perfectly to your ears. The real show-stopper? Adding cute little accents like a playful bow or a funky flower, that make your earmuffs pop with personality. Plus, you get to pick your favorite colors or even experiment with fuzzy yarn for that next-level snug feeling.

The best part? This pattern is super beginner-friendly. It mostly uses easy stitches like single crochet and half double crochet, making it a breeze even if you’re new to crochet. The project works up quickly, giving you instant gratification, like a cozy reward you can wear! My tip: keep your tension even so the fit stays just right.
These Free Crochet Earmuffs make fantastic gifts, think winter birthdays, holiday surprises, or just a sweet pick-me-up for a friend. They’re stylish, practical, and so comfy, you’ll want to make a whole collection in every color. If you want a fun, fast, and functional project that’ll brighten your chilly days, these earmuffs are calling your name.
Cute Crochet EARMUFFS Free Pattern
Quick Overview of the Pattern
Motif Construction: Crochet four identical circular pieces in the round using red yarn.
Pairing and Padding: Join these motifs in pairs with white yarn and add stuffing to form comfortable ear covers.
Headband Encasing: Work a tubular cover in the round to conceal a standard headband.
Final Assembly: Use an adhesive to attach the ear covers permanently to the headband.
Notes
Work the circular pieces in continuous rounds; you do not need to join them with a slip stitch at the end of each round.
Use stitch markers to track your progress accurately through the increases.
If you lack store-bought stuffing, use scrap yarn to fill the ear covers.
Skill Level
Beginner-Intermediate: This project suits anyone who knows how to perform basic increases and work in the round.
Materials
Yarn: Red acrylic yarn (worried/chunky weight) and white yarn for accents.
Tools: 7mm crochet hook and 4.5mm crochet hook.
Hardware: A standard headband.
Notions: Stitch marker, toy stuffing or scrap yarn, glue gun, and glue sticks.
Stitch Abbreviations
ch: Chain
sc: Single crochet
inc: Increase (work two single crochet stitches into the same stitch)
hdc: Half double crochet
The Crochet Pattern
Part 1: Circular Ear Motifs (Make 4)
Grab your 7mm crochet hook and the red yarn to begin the foundation:
Foundation: Make a magic ring and ch 1.
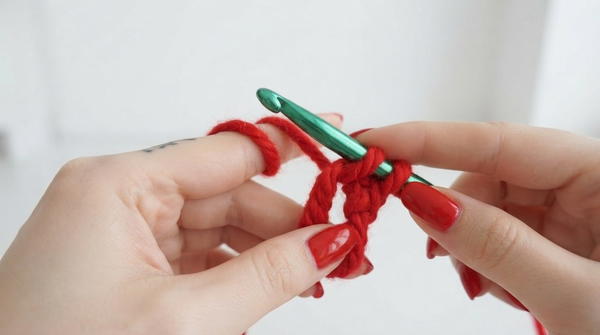
Round 1: Work 6 sc into the ring. Pull the tail tight to close the circle and place a stitch marker for the continuous round.
Round 2: Inc in every stitch around (work 2 sc in each). You will finish this round with 12 stitches.
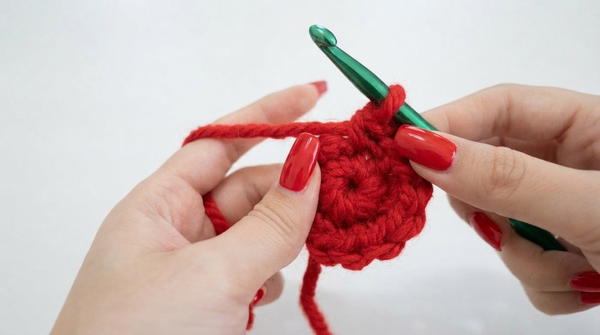
Round 3: Work 1 sc in the first stitch, then 1 inc in the next stitch. Repeat this sequence around to finish with 18 stitches.
Round 4: Work 1 sc in the next 2 stitches, then 1 inc in the next stitch. Repeat this sequence around to finish with 24 stitches.
Round 5: Work 1 sc in the next 3 stitches, then 1 inc in the next stitch. Repeat this sequence around to finish with 30 stitches.
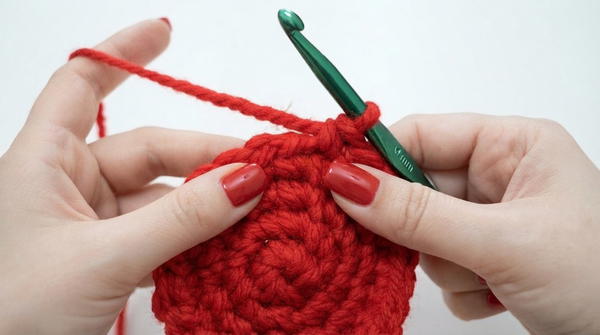
Round 6: Work 1 sc in the next 4 stitches, then 1 inc in the next stitch. Repeat this sequence around to reach a total of 36 stitches.
Round 7: Work 1 sc in every stitch around without any further increases. This final round maintains 36 stitches.
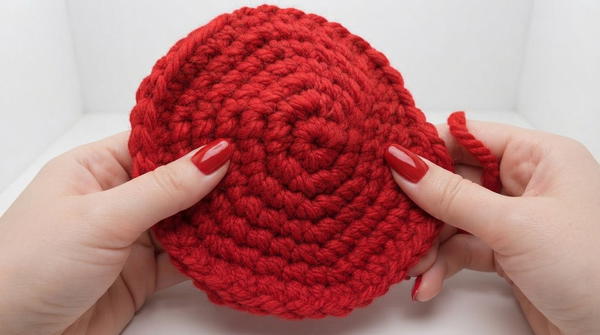
Finish off your yarn after completing these rounds. Repeat these steps until you have four finished circular motifs.
Part 2: Joining and Stuffing the Ear Covers (Make 2)
Switch to the 4.5mm crochet hook and the white yarn to connect your circular motifs.
Joining Process: Hold two red circles together with the right sides facing outward.
Seaming: Insert your hook through the corresponding stitches of both circles simultaneously. Work 2 hdc stitches into each stitch around the edge to join the pieces.
Stuffing: Pause after you have seamed approximately halfway around to add your toy stuffing or scrap yarn into the center cavity.
Closing: Continue working 2 hdc stitches around the remaining perimeter. Leave a small opening of approximately 2cm at the end. This gap allows the headband to fit inside.
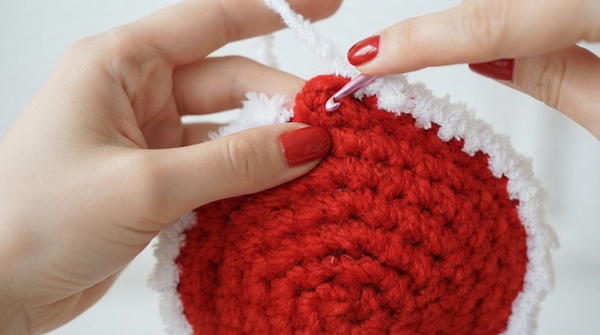
Repeat this process for the second pair of circles.
Part 3: Headband Cover
Using the 4.5mm crochet hook and the red yarn, you will now produce a long, tubular cover that will protect and decorate your headband. You will work in continuous rounds until the piece reaches the desired length to encase the entire band.
Headband Cover Foundation
Foundation: Begin by making a magic ring and chain
Headband Cover Rounds 1-20
Round 1: Work 6 single crochet into the magic ring.
Round 2: Work 1 single crochet in every stitch around (6 total stitches).
Round 3: Work 1 single crochet in every stitch around (6 total stitches).
Round 4: Work 1 single crochet in every stitch around (6 total stitches).
Round 5: Work 1 single crochet in every stitch around (6 total stitches).
Round 6: Work 1 single crochet in every stitch around (6 total stitches).
Round 7: Work 1 single crochet in every stitch around (6 total stitches).
Round 8: Work 1 single crochet in every stitch around (6 total stitches).
Round 9: Work 1 single crochet in every stitch around (6 total stitches).
Round 10: Work 1 single crochet in every stitch around (6 total stitches).
Round 11: Work 1 single crochet in every stitch around (6 total stitches).
Round 12: Work 1 single crochet in every stitch around (6 total stitches).
Round 13: Work 1 single crochet in every stitch around (6 total stitches).
Round 14: Work 1 single crochet in every stitch around (6 total stitches).
Round 15: Work 1 single crochet in every stitch around (6 total stitches).
Round 16: Work 1 single crochet in every stitch around (6 total stitches).
Round 17: Work 1 single crochet in every stitch around (6 total stitches).
Round 18: Work 1 single crochet in every stitch around (6 total stitches).
Round 19: Work 1 single crochet in every stitch around (6 total stitches).
Round 20: Work 1 single crochet in every stitch around (6 total stitches).
Continue repeating these rounds of 1 single crochet in every stitch until the tube measures the length of your headband. Once finished, ensure the cover is secure and even, ready for the final attachment.
Assembly & Finished Size
- Slide the headband through the middle of the crocheted tube. Place your completed ear covers on either side of the headband.
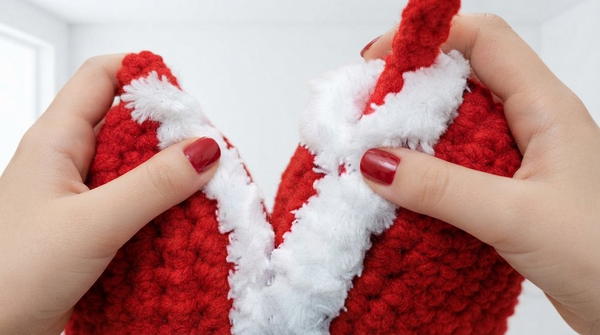
- Use your glue gun to apply hot glue, securing the covers firmly to the headband. Ensure the opening you left earlier aligns with the band.
Conclusion
Your new ear warmers are fully assembled and ready to wear. This project provides an excellent way to update a simple accessory with a cozy, personalized touch. Thank you for following this tutorial. If you found these instructions helpful, please like the video and subscribe to the channel for more inspiration. Happy hooking.