Mint Design Blog


Follow this free crochet Christmas tree house pattern to make adorable decorations that enhance your Christmas décor with cozy and handcrafted elegance.
Bringing holiday cheer to life isn’t always easy without the right project to inspire you. Luckily, this charming crochet house adds a cozy, festive touch that’s perfect for gifting, decorating your tree, or adding to your seasonal collectibles. It radiates warmth and personality, transforming any space into a winter wonderland filled with handmade charm.
Try Free Crochet Christmas Tree House Pattern for Holiday Fun
This unique design features a delicate, miniature house with crisp architectural lines and thoughtful details like open windows and a pitched roof. The size is just right—not too bulky—making it ideal for hanging on your Christmas tree, placing on a mantel, or including in a holiday village display. It’s an inviting piece that complements all kinds of holiday decor with its handcrafted elegance.
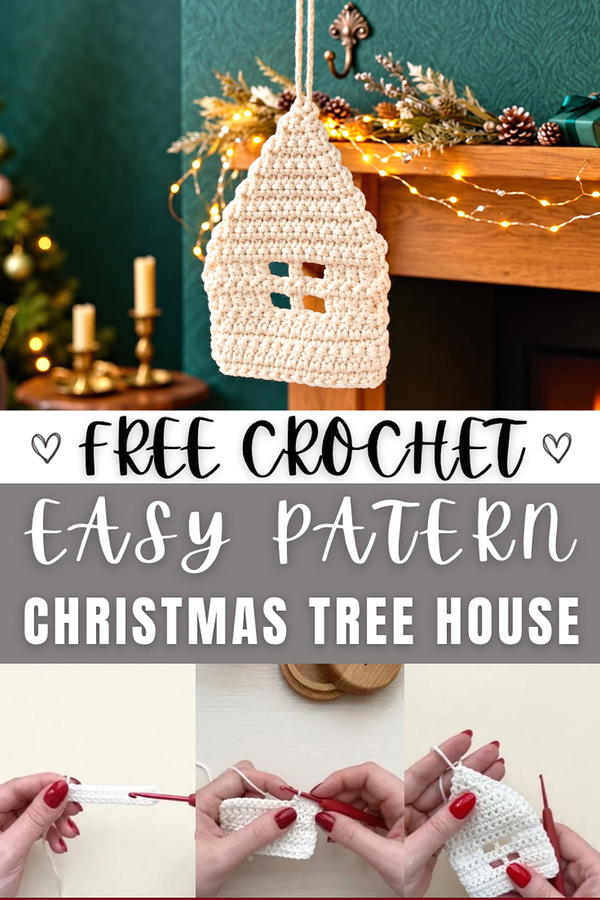
Suitable for beginner to intermediate skill levels, this free crochet Christmas tree house pattern introduces essential stitches such as single crochet and double crochet, alongside working with chain stitches and shaping techniques. The pattern builds your confidence with step-by-step instructions, perfect for those looking to expand their crochet repertoire.
Using fine polyester cord or yarn around 1 to 2 mm in thickness, combined with a small crochet hook (around 2 mm), helps create a firm yet lightweight structure. This choice of material ensures the house maintains its form without becoming too bulky. The pattern also incorporates helpful tips on finishing touches and blocking to give your creation a professional, polished look.
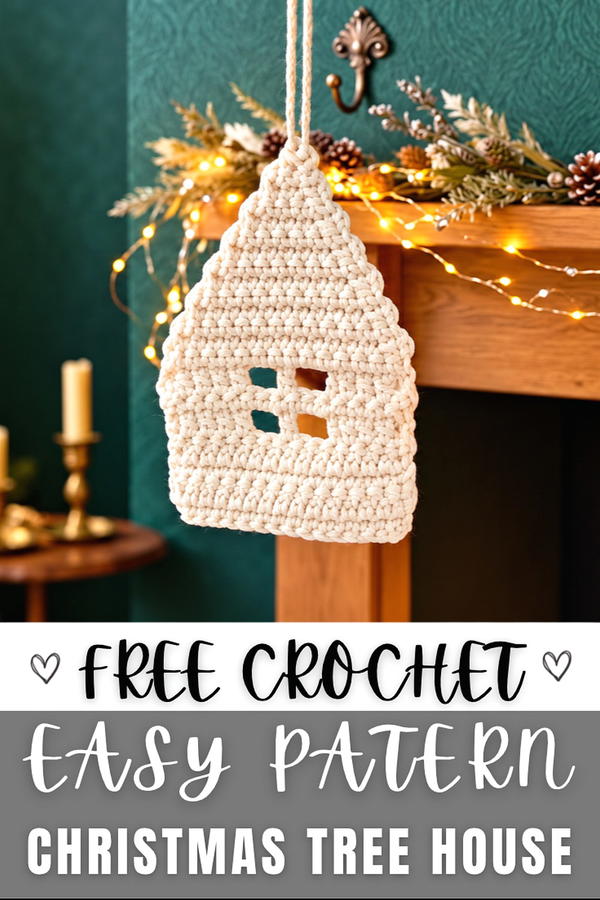
Crochet Pattern: "House" Ornament
This crocheted house ornament is a charming addition to holiday decor or gifting options, showcasing a cozy look with structural details such as a base, windows, and a tapered roof. The project balances simplicity and creativity, allowing you to create a decorative piece that brings handmade warmth to your surroundings.
Skill Level
Intermediate – This pattern requires working in rows, increasing and decreasing stitches, and constructing design elements such as windows and tapered sections. It is suited for crocheters familiar with shaping techniques and basic stitches like single crochet and double crochet.
Materials
- Polyester Cord: Approximately 20 meters, with a diameter of 1 mm recommended for a neat finish and compact design. You may use a different type of yarn if desired.
- Crochet Hook: Size appropriate to your cord or yarn, typically 1–2 mm for this pattern.
- Additional Tools:
- Scissors for cutting.
- Yarn needle for weaving in loose ends.
- Lighter (if using polyester cord to seal ends).
- Steam iron for wet blocking.
Stitch Abbreviations
- Ch: Chain
- SC: Single Crochet
- DC: Double Crochet
- SC2tog: Single Crochet Two Together (a decrease stitch)
Special Techniques
SC2tog (Single Crochet Two Together):
An easy decrease stitch to reduce stitch count.
- Insert the hook into the first stitch, yarn over, and pull up a loop.
- Insert the hook into the second stitch, yarn over, and pull up another loop (3 loops total on hook).
- Yarn over and pull through all 3 loops on the hook to complete the stitch.
Wet Blocking:
Steam ironing over a covered surface helps set the shape of your ornament while ensuring the finished piece lies flat and symmetrical.
Useful Tips
- Tension Control: Polyester cord tends to be slippery and stiff. Work with consistent tension to prevent uneven edges.
- Counting Stitches: Careful stitch counting is necessary for window rows and roof decreases to maintain symmetry.
- Cord End Management: Seal cord ends carefully if using polyester. Hold the flame just close enough to slightly melt without burning the material.
- Blocking Benefits: Wet blocking ensures the ornament holds its shape firmly and adds to its crisp, polished appearance.
Detailed Pattern Instructions
The house ornament is crafted in distinct sections: the foundation and base, the windows, the roof, and finishing touches. Follow these instructions carefully for a neatly structured piece.
Foundation (Base Setup)
The foundation consists of a simple chain row, serving as the base of your ornament.
- Foundation:
- Begin by Chaining 15 stitches. These chains form the width of the house base.
- Ensure your chain is even and not overly tight so the foundation row lies flat.
Base Rows
Work a solid base by alternating rows of single crochet (SC) and double crochet (DC).
- Row 1:
- Ch 1: This serves as the turning chain and provides height for the row.
- Work 1 SC into each of the 15 foundation stitches.
- (Total: 15 SC)
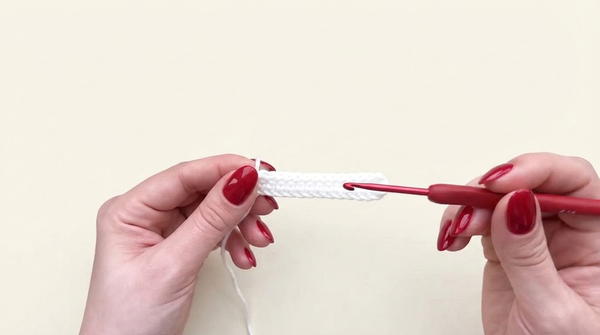
- Row 2:
- Ch 2: This counts as the first DC stitch in the row.
- Work 1 DC into each stitch across the row, maintaining even stitches.
- (Total: 15 DC)
- Row 3:
- Ch 1 to begin.
- Work 1 SC into each stitch across.
- (Total: 15 SC)
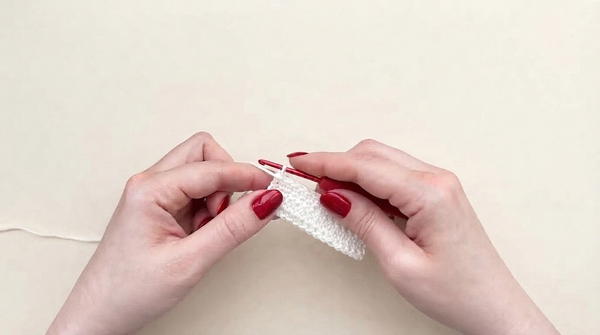
- Row 4:
- Ch 2 to start.
- Repeat the second-row pattern by working 1 DC into each stitch across.
- (Total: 15 DC)
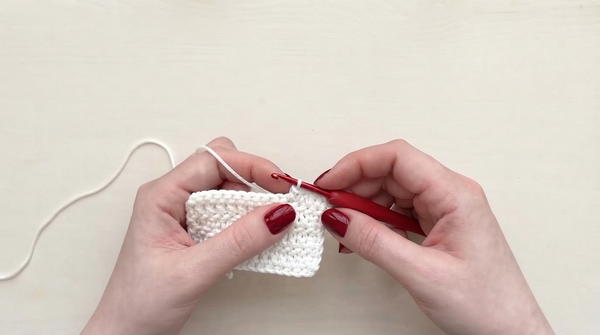
These four rows establish the sturdy base of the house ornament, creating a firm rectangular structure.
Forming Windows
This section introduces windows in the house by creating gaps within the row pattern.
- Row 5 (Window Row):
- Ch 2: Counts as the first DC stitch.
- Work 4 DC into the first 4 stitches.
- Ch 2, skip the next 2 stitches, then DC in the third stitch.
- Ch 2, skip the next 2 stitches, and 5 DC to finish the row.
This row forms two windows represented by empty chain spaces.
- Row 6:
- Ch 1 for height.
- Work SC across the row, inserting 2 SC stitches into each window space and 1 SC into each regular DC stitch.
- (Total: 15 SC)
- Row 7:
- Repeat the window pattern from Row 5 to create a second row of windows.
- Row 8:
- Repeat the consolidation row from Row 6, filling gaps with SC stitches to create a firm rectangular shape again.
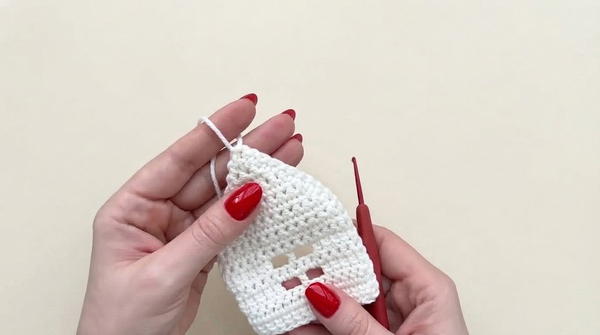
These rows result in a house with symmetrical window styles.
Roof Decreases
The roof section is shaped by progressively decreasing stitch counts until only 3 stitches remain at the top.
Work the following alternating rows:
- Decrease Row:
- Ch 1 for height and SC placement.
- Begin the row with SC2tog (Single Crochet Two Together), then work 1 SC into each stitch until 2 stitches remain.
- End with SC2tog to decrease the total stitch count.
- Plain SC Row:
- Work a simple row of SC across all remaining stitches, without decreasing.
Alternate these two rows until the total remaining stitch count is reduced to 3 stitches.
Final Row
- Work a triple decrease to close the roof tip:
- Insert the hook into the first stitch, yarn over and pull up a loop.
- Repeat for the second stitch (3 loops total on hook).
- Repeat for the third stitch (4 loops total on hook).
- Yarn over and pull through all loops to complete the triple decrease.
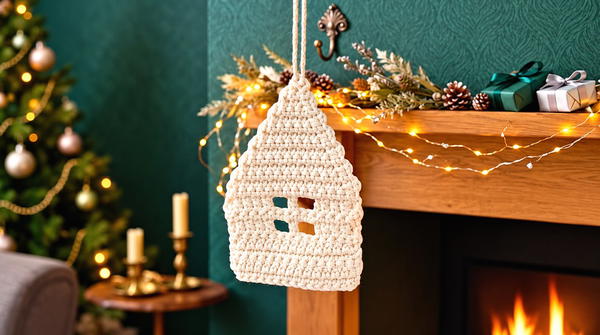
Finish with a chain, then fasten off the cord and trim. Seal the ends with a lighter (for polyester) to prevent fraying.
Finishing Touches
- Blocking: Lay the house ornament flat on a heat-resistant surface. Cover with a thin cotton cloth or gauze and steam lightly using a steam iron. Shape the house and roof while warm, pressing it into crisp angles and a neat outline.
- Hanger Loop: Use a chain loop or the roof tip to attach thread or cord for hanging.
Conclusion
This crocheted house ornament blends artistic and decorative features, with a sturdy base, charming window design, and neatly tapered roof. By experimenting with colors or cord selections, you can create personalized styles that suit any holiday or seasonal theme. This project is ideal for individuals looking to explore different techniques while crafting an intentional and symbolic decorative piece.