Keep your feet warm and cozy with this Crochet Socks Free Pattern and enjoy making soft, comfortable socks that are perfect for chilly days at home.
A wonderful tutorial by Crochet with Olga Dyvinets!!! shares an easy and fun way to make cozy socks by hand — big thanks to Olga for this great free pattern. The project is Crochet Socks, soft and warm socks you make with yarn.
Easy Crochet Socks Free Pattern For Beginners To Try
These socks fit most adult feet, and Olga shows you how to adjust the size to fit you just right. The socks have stretchy cuffs that stay up without squeezing too hard. They also have a nice shape on the heel and toe so they feel comfortable to wear. You can use these socks at home to keep your feet warm or give them as a nice handmade gift.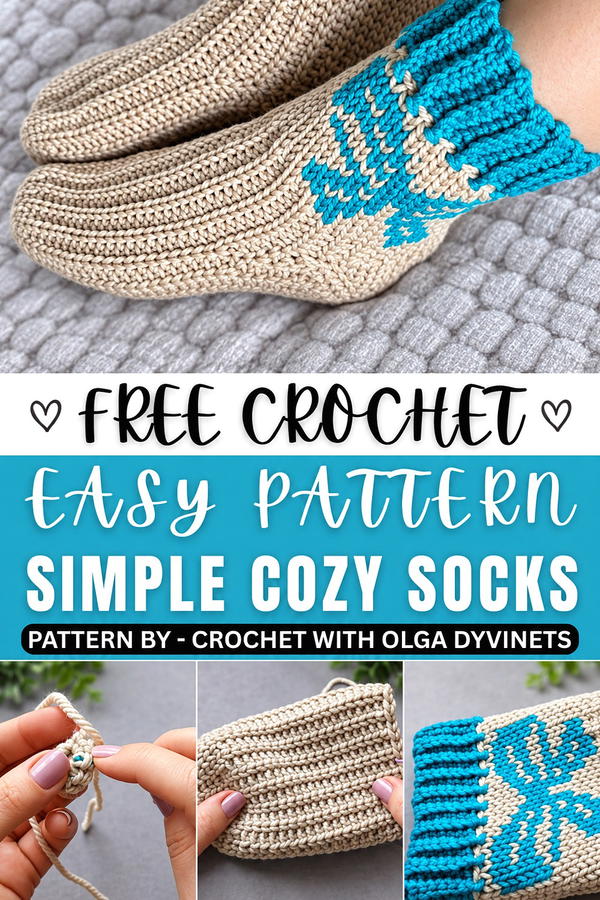 This project is good for beginners and those with some crochet experience. You will use simple stitches like single crochet and half double crochet. Olga’s instructions are clear and easy to follow, helping you learn how to shape the socks while making them. It’s a great way to practice your skills and make something useful.
Why try this project? It feels great to wear something you made yourself, and these socks are cozy and nice for chilly days. You can also pick your favorite colors and yarn types to make socks that match your style.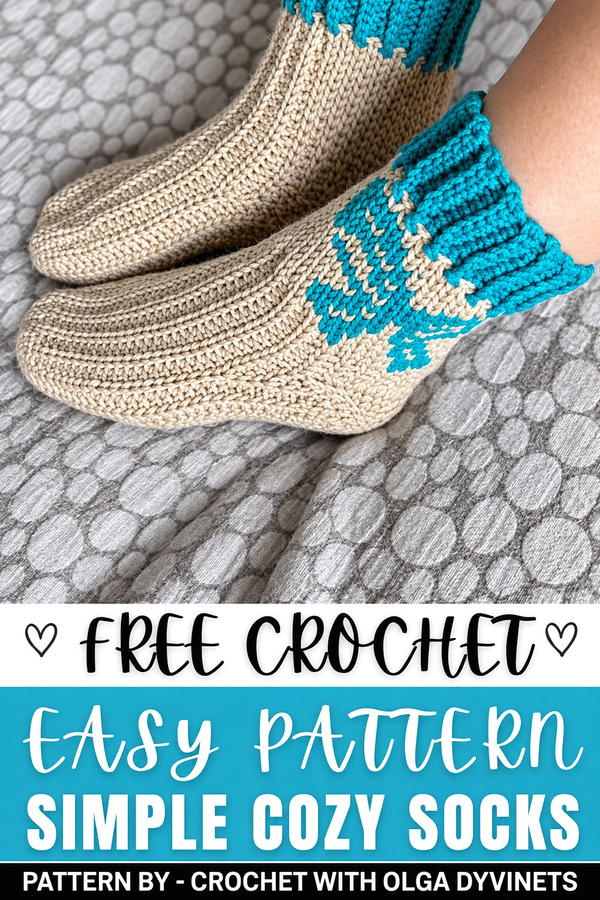 Stay warm and crochety — try this lovely free pattern from Olga and enjoy making your own comfy Crochet Socks today!
About the Pattern
Key Pattern Details
- The sock is worked from the toe upward; a magic ring is utilized for the start, and progress is made in concentric rounds.
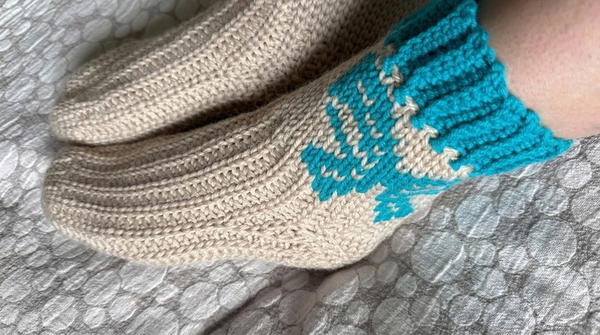
- The fabric texture combines the split single crochet (waistcoat stitch) and back loop only single crochet in alternating pattern.
- Shaping is provided by increases at both the toe and heel gusset points.
- The heel opening is formed with a chain bridge, which later allows the cuff and closure to be added easily.
Jacquard (multi-color) patterning is incorporated after the main body, with the float technique being employed.
The ribbed cuff is constructed separately using a slip stitch join and is worked directly onto the sock top.
Seams and finishing are discreetly accomplished from within the sock for comfort.
Important Notes
- Maintain consistent tension throughout for uniform stitches and a professional finish, especially when carrying floats within jacquard sections.
- Use the “yarn under” movement for waistcoat stitches for a more compact, durable fabric.
- Count rounds and stitches carefully, especially during increase sections, heel construction, and colorwork rows.
- When joining new yarn colors, ensure firm but not tight joins, trimming and weaving tails on the inside.
- Techniques such as carrying unused yarn (float) are used to ensure that the interior of the sock is not snagged by loose strands.
Difficulty Level
- This sock requires an advanced beginner or intermediate skill level, including confidence with round construction, increases, chain bridging, colorwork, and textured stitches.
- Experience with waistcoat stitch or split single crochet is advantageous.
Supplies Needed
- Main sock yarn in base and contrast colors (weight and fiber blend suitable for socks)
- Smaller amount of secondary color for jacquard sections and cuff
- Crochet hook(s) in two sizes (one standard, one slightly smaller for ribbed cuff)
- Tapestry needle for weaving in ends and seam closure
- Scissors
- Stitch markers if desired
Size & Measurements
- The final size will be determined by the chosen yarn, hook, and gauge, and a standard adult sock is produced when instructions are followed
- Actual measurements will vary depending on final row count and foot circumference chosen.
Gauge & Stitch Details
- Gauge is set by the waistcoat stitch; it should be verified that rounds are laid flat, that fabric is not loose, and that the circumference is matched
- Consistent gauge is particularly vital in the foot and cuff to avoid loose or overly tight fit.
- The split single crochet (waistcoat stitch) creates a denser fabric ideal for socks.
Crochet Abbreviations
- MR: Magic Ring
- SC: Single Crochet
- BLO SC: Single Crochet in Back Loop Only
- WST: Waistcoat Stitch (Split SC)
- CH: Chain
- SL ST: Slip Stitch
- INC: Increase (2 SC in same stitch or as stated)
- DEC: Decrease (single crochet two stitches together)
Special Stitch Guide
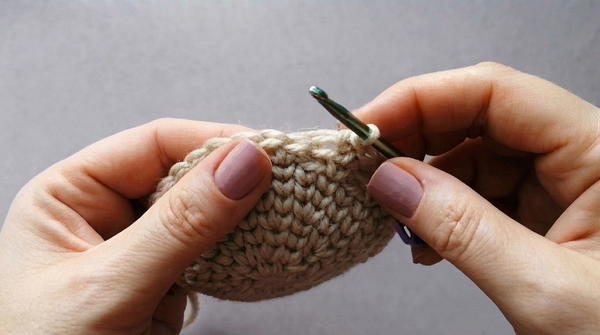
- Waistcoat Stitch (WST): Insert hook between the legs of the single crochet from previous round (rather than under the top loops), yarn under, and complete as for SC.
- Single Crochet in Back Loop Only (BLO SC): Insert hook under the back loop only of the next stitch, yarn over/under as pattern specifies, and complete.
- Float (for Jacquard/Colorwork): Carry unused yarn along inside of sock, crocheting over it with active stitch to secure and conceal.
Complete Crochet Pattern
Toe
1:
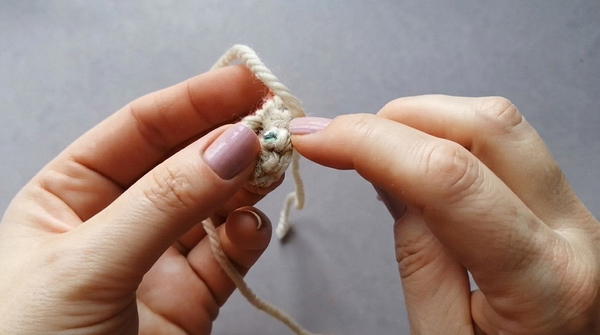
- Begin with MR, 8 SC into ring.
2:
- INC in each stitch (total 16 stitches).
3:
- (1 SC, 1 INC) repeat around (total 24 stitches).
4:
- (2 SC, 1 INC) repeat around (total 32 stitches).
Foot Body
5–20:
- Work evenly in rounds with 32 stitches per round.
- For texture: alternate 1 WST, 1 BLO SC around each round, maintaining pattern. Continue in established pattern for all rounds in this section.
Heel Gusset Construction
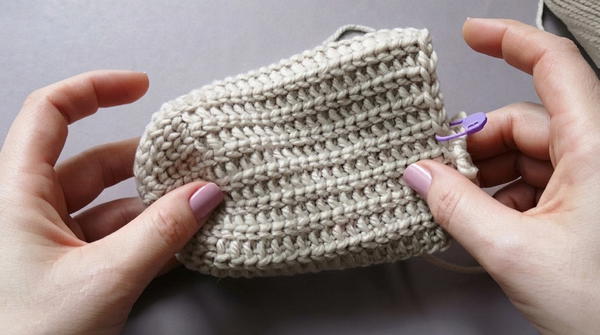
Side Increases:
- Designate heel sides.
- At each increase point on both sides, work 3 SC into a single stitch (for a total of 6 additional stitches per round at each side).
- Repeat increases on the same points over multiple rounds to expand the heel gusset, keeping in established texture pattern.
Heel Opening and Cuff
Chain Bridge:
- At heel position, stop when both sides are correct width.
- CH 20.
- Join chain to opposite side to form bridge.
- Continue in round, working WST and BLO SC into the chain stitches as you proceed, maintaining established stitch pattern.
Jacquard Pattern
After 31 Base Rounds:
- Begin jacquard (colorwork) section.
- Follow chart or written color pattern, switching yarn colors as needed.
- When changing color, hold unused yarn inside work and crochet over it using the float technique to create a neat interior.
- Continue in colorwork rounds for desired height.
Ribbing and Finishing
Cuff:
- Switch to a smaller hook for a snugger cuff.
- Attach contrast cuff color at top edge with SL ST.
- CH 8 for foundation ribbing.
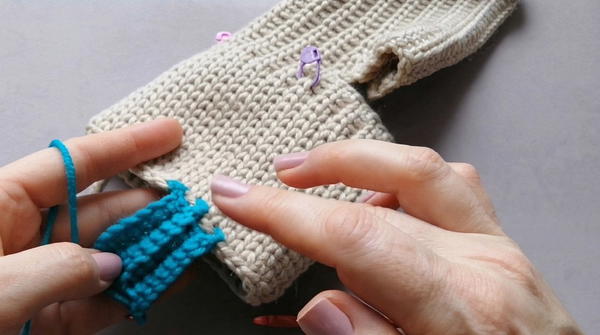
- For each rib row: work SC back along chain, SL ST to next sock edge stitch, turn, and repeat to form ribbed rows joined to the sock top. Continue around full circumference.
Heel Closure:
- At heel gap, resume working in the round at heel corners, decreasing at each heel edge.
- Work DEC at corners until only 5 stitches remain.
- Break yarn and thread tail through remaining stitches; sew gap closed from inside for a comfortable and nearly invisible finish.
Joining & Final Size
Final Words
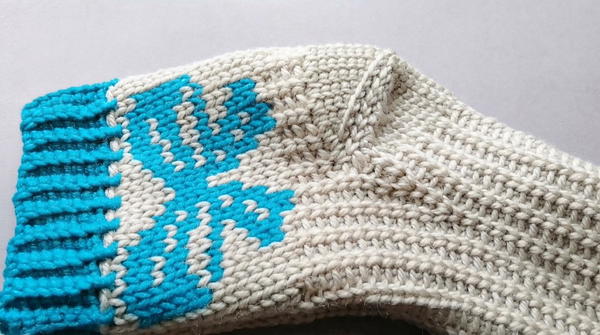
This crochet sock pattern blends classical structure and technical challenge, guiding the maker through toe-up shaping, gusset and heel architecture, textile colorwork, and a professional finish. Each element is constructed to ensure that comfort, durability, and visual interest are maximized The integration of advanced techniques like waistcoat stitch and colorwork provides a versatile template for future socks, as well as a practical, wearable result. The pattern encourages confidence in textured and color-rich sock-making, resulting in a personalized and functional handmade accessory.