Mint Design Blog


Cozy vibes meet the Free Crochet ARM WARMER SWEATER Pattern and simple steps for a wearable that warms sleeves during cool days and cozy plan for chilly days
On a chilly morning, a cozy arm warmer can feel like a warm hug for your arms, making your outfit feel complete. The Free Crochet ARM WARMER SWEATER Pattern is available on the YouTube channel Gülşah Özcan Filiz, where clear steps guide you from start to finish. This makes it a practical choice for anyone who wants a friendly, quick project that adds comfort and style to everyday wear.
Trendy Crochet Arm Warmer Sweater Pattern
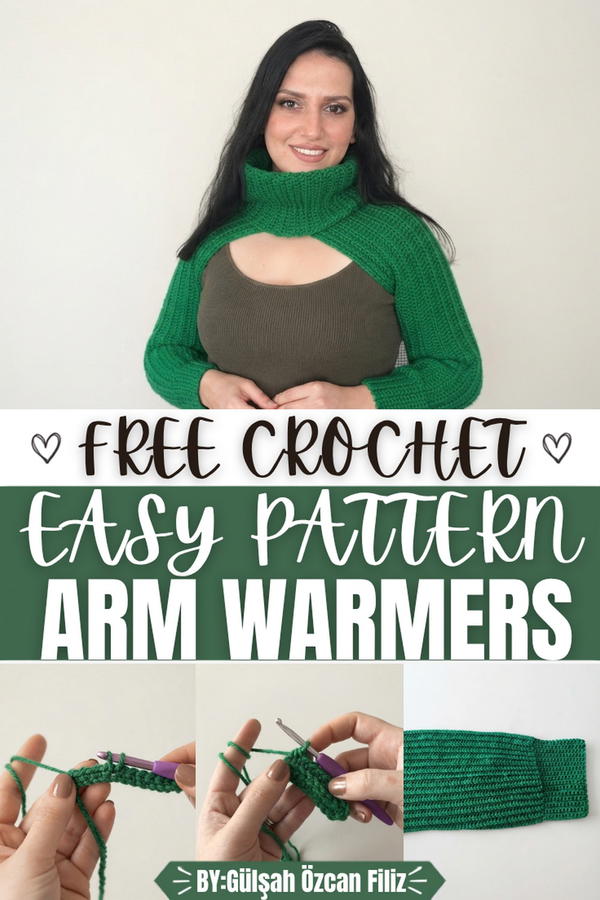
People wear it at home, at work, or during cool trips outside to keep the wrists warm without adding bulk under jackets or sleeves. Its working style uses simple stitches in a steady rhythm, so even a beginner can follow along, pause, and repeat until the sleeve length feels right. The pattern is favored because it uses common yarns, dries quickly, and gives a soft, breathable finish that lasts through many seasons.
The most attractive design feature is a clean, elongated shape that fits snugly near the wrist while leaving room for movement, and a neat cuff that keeps warmth in. The silhouette works well with many outfits, from simple T-shirts to heavier jackets, and the color choices can range from gentle neutrals to bold accents.
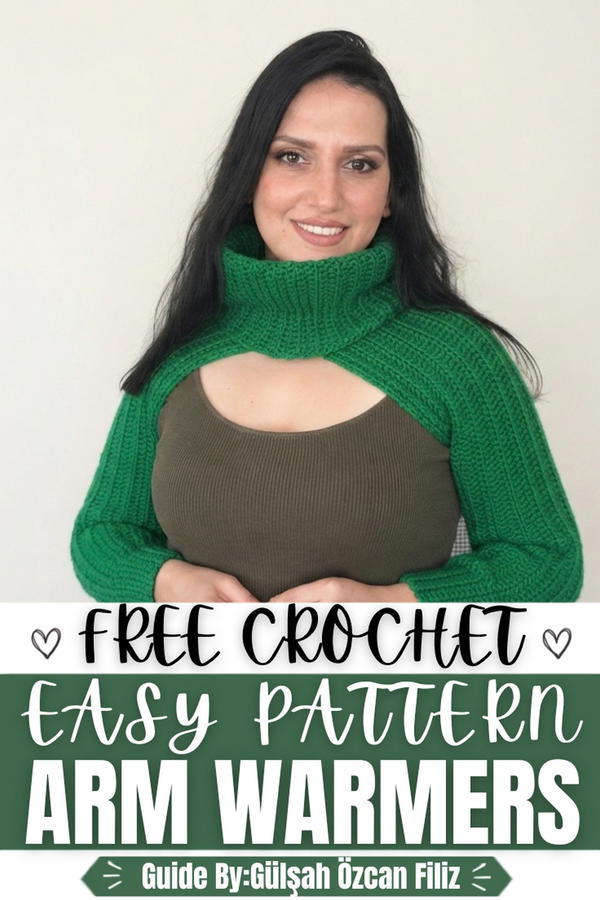
Crochet Bolero Pattern
This bolero pattern is a stylish and versatile piece that combines simplicity with elegance. Constructed using two sleeves and a neck panel, this design creates a flattering, lightweight garment suitable for layering over tops, dresses, or casual outfits. The ribbed texture achieved through back loop only stitching adds a professional finish, while the straightforward rectangular construction makes the process enjoyable and manageable from start to finish.
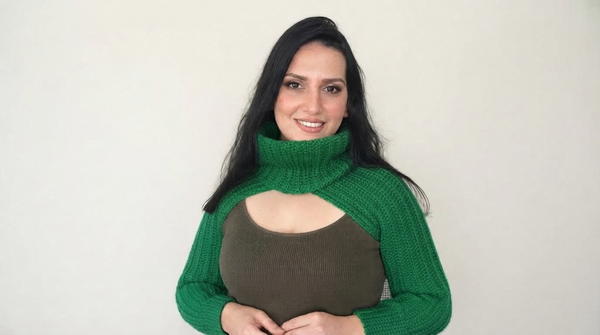
Skill Level: Beginner to Intermediate — This pattern is ideal for those who are comfortable with basic crochet stitches and simple seaming techniques. A beginner with foundational knowledge of chaining, single crochet, and half-double crochet will be able to complete this project with ease.
Materials
- Yarn: 100% acrylic yarn (or yarn of your preference in a worsted weight)
- Hook: 5mm crochet hook
- Tools:
- Measuring tape
- Stitch markers
- Scissors
- Tapestry needle for assembly
Special Stitches
- Ribbed / "Selanik" Stitch: Working into the back loop only (BLO) of each stitch across every row creates a horizontal ribbed texture that gives the bolero its structured, stretchy appearance.
- Wrist Band Stitch: A dedicated section of 15 single crochet stitches worked consistently at one edge of the sleeve throughout all rows to form the fitted wrist band.
Stitch Abbreviations
- ch — chain
- sc — single crochet
- hdc — half-double crochet
- BLO — back loop only
- st(s) — stitch(es)
- RS — right side
- rep — repeat
- sm — stitch marker
- yo — yarn over
Useful Tips
- Always place a stitch marker on the 15th stitch from the wrist edge at the beginning of your project to help maintain the consistent wrist band section throughout every row.
- When working in BLO, take your time identifying the correct loop to avoid accidental twisting of your stitches, which can affect the ribbed texture.
- Adjust your foundation chain count based on your actual arm length before starting. The recommended 95 chains is a general guide for an average arm length.
- Leave a long tail of at least 20–25cm when fastening off each piece, as this will be used for seaming during assembly.
- Block your finished pieces lightly before assembly to ensure even edges and easier sewing.
- Use stitch markers during the assembly stage to pin pieces together before sewing, which helps maintain alignment and even seams.
Pattern Instructions
Part 1: Sleeves (Make Two)
Foundation Chain
- ch 95 (adjust this number up or down depending on your arm length; each additional or removed chain adds or reduces length accordingly).
Wrist Band Section
- Row 1 (Wrist Band): Skip the very last ch, sc in the next 15 ch stitches.
- Place a sm on the 15th stitch to mark the boundary between the wrist band and the sleeve body.
Sleeve Body
- Continuing from the wrist band section in the same row:
- Work hdc into every remaining ch stitch across to the end of the foundation chain.
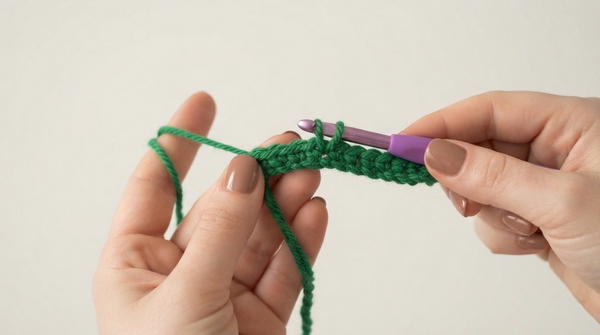
- Work hdc into every remaining ch stitch across to the end of the foundation chain.
Ribbed Rows
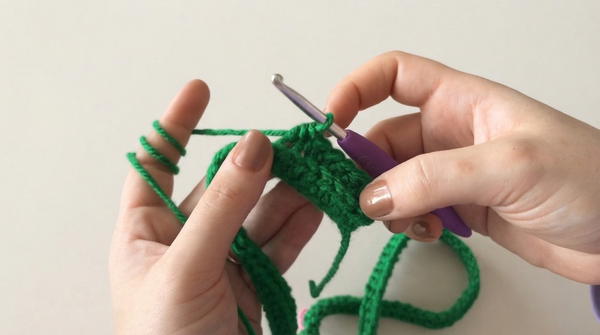
- Row 2 and all subsequent rows:
- Ch 1, turn.
- Work sc BLO in each of the first 15 sts (wrist band section — always maintain these 15 sc stitches at the wrist edge throughout every row without exception).
- Work hdc BLO in each remaining st across to the end of the row.
- Rep this row, maintaining the sc wrist band and hdc BLO sleeve body sections in every row.
Finishing the Sleeve
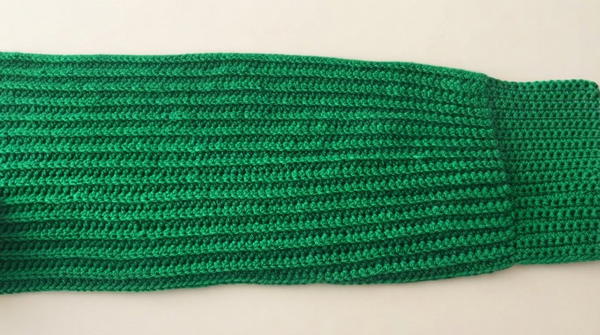
- Continue repeating the ribbed row until the sleeve measures the desired width around your arm when the rectangle is folded in half lengthwise.
- Once the desired width is reached, fasten off the yarn.
- Leave a long tail of approximately 20–25cm for sewing and seaming.
- Repeat the entire sleeve section to create the second sleeve.
Part 2: Neck/Body Panel (Make One)
Foundation Chain
- Ch 55.
Row 1
- Hdc in the 2nd ch from the hook and in each ch across.
- Total stitches: 54 hdc
Row 2 and Subsequent Rows
- Ch 1, turn.
- Work hdc BLO in each st across.
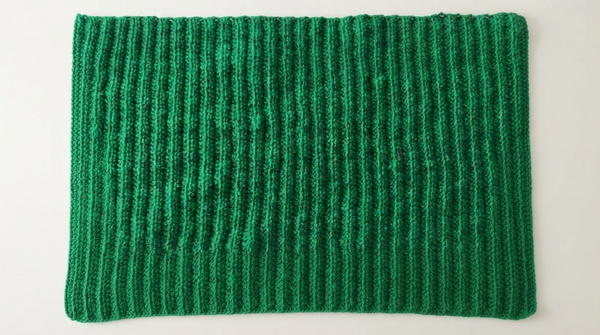
- Rep this row continuously until the neck panel reaches the desired length.
- The finished panel should measure approximately 59cm in length and 32cm in width, though these measurements can be adjusted to suit your body measurements and preferred fit.
- Fasten off, leaving a long tail for assembly.
Assembly and Sizing
Body Panel Assembly
- Take the completed neck/body panel and fold it in half lengthwise so that the two short edges meet.
- Using your tapestry needle and the yarn tail, sew along both side edges of the folded panel together to form the central neck/back piece of the bolero.
- This seamed panel will form the back section that sits across your neck and upper back.
Sleeve Assembly
- Take one completed sleeve rectangle and fold it in half lengthwise so the long edges meet.
- Beginning at the wrist end, sew along the long edge using the mattress stitch or whipstitch, but leave a 19cm gap open along the seam to create the armhole opening.
- The sewn portion at the wrist forms a fitted wrist cuff, while the open gap allows the arm to pass through comfortably.
- Repeat this process for the second sleeve.
Final Join
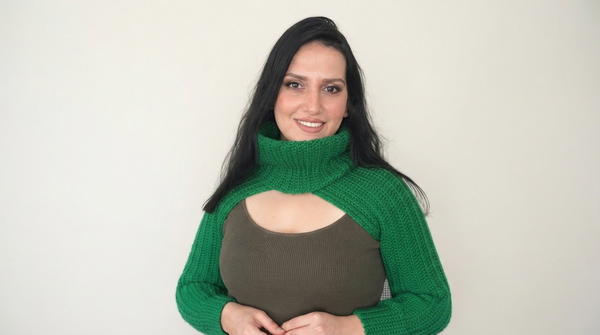
- Align each assembled sleeve with the neck panel, positioning them on either side of the main body piece.
- Sew the top and bottom edges of the open sleeve ends directly onto the side edges of the neck panel.
- Ensure both sleeves are attached symmetrically and at even lengths on both sides of the panel.
- Weave in all remaining yarn ends securely using the tapestry needle.
- Trim any excess yarn carefully.
Sizing Notes
- The recommended chain count of 95 for the sleeve and 55 for the neck panel is designed for a standard adult size.
- For a larger size, add additional chains to the foundation of each piece in increments of 5 stitches.
- For a smaller size, reduce the foundation chain in the same increments.
- Always measure your completed rectangles against your body before beginning assembly to confirm proper fit.
Conclusion
This bolero pattern demonstrates how straightforward rectangular construction can result in a beautifully wearable and polished garment. The consistent use of back loop only stitching throughout creates a refined ribbed texture that gives the piece structure and a professional aesthetic. The separate wrist band section adds a thoughtful design detail that enhances the overall fit and finish. With only three panels to construct and a simple seaming process, this pattern offers a satisfying and rewarding crochet experience for those building their garment-making skills. The adaptability of this pattern in terms of sizing and yarn choice makes it a reliable and repeatable design for any season or wardrobe.