Hang a green and white Christmas wreath on your door with this Free Crochet Pattern for a small holiday decoration that also looks lovely above a mantel.
Bare walls can leave a small room feeling unfinished after you put up the tree. This Free Crochet Pattern for a Christmas Wreath gives you a piece of holiday decor that fits where a larger wreath would crowd the space. Green cord gives the ring its evergreen look, and white cord picks up the colors of snow. Both shades stand out against a wooden door or a plain wall.
Snowy Christmas Wreath for Your Door | Free Crochet Pattern
The Channel Behind the Wreath
Seasonal decor is part of the cord crochet collection at Promlatex. Шнур для вязания. Alongside the wreath, you’ll find a little bell and a candle decoration. With several holiday projects to choose from, you can plan pieces that share the same colors and fit different spots in your own home.
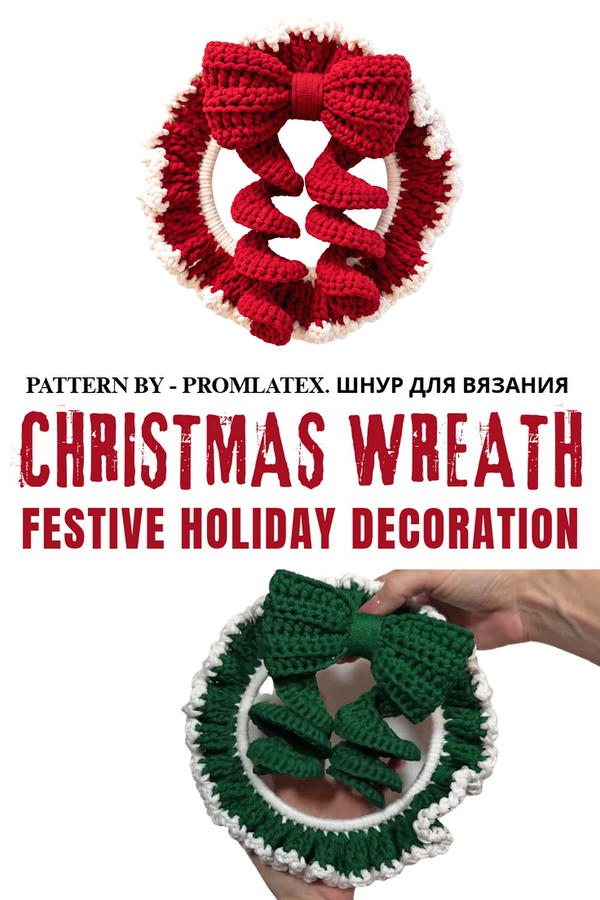
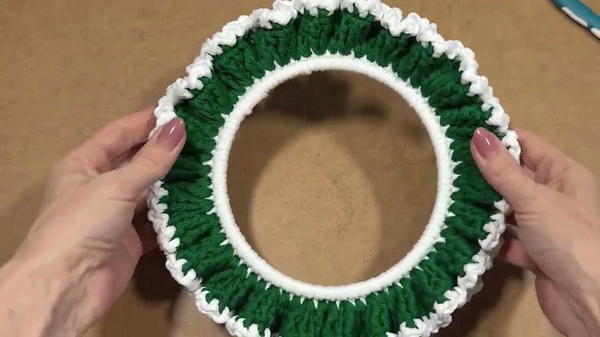
The finished wreath measures about 24 cm across. It starts with a 15 cm ring, and the crochet extends beyond the ring to give the decoration its fuller outline. The sample uses 4 mm polyester cord and a 4 mm hook. Cord at that thickness gives the stitches enough definition to show from across a small room. The space in the middle also keeps the circular shape easy to see once the wreath is hanging.
A wall hook by the entry gives it a spot of its own. Over a mantel, hang it where the white stitches stand clear of other decorations. You can also rest the wreath on a shelf and lean it against the wall. For a Christmas gift, the modest size is easy to wrap, and the green and white go with ornaments in many colors.
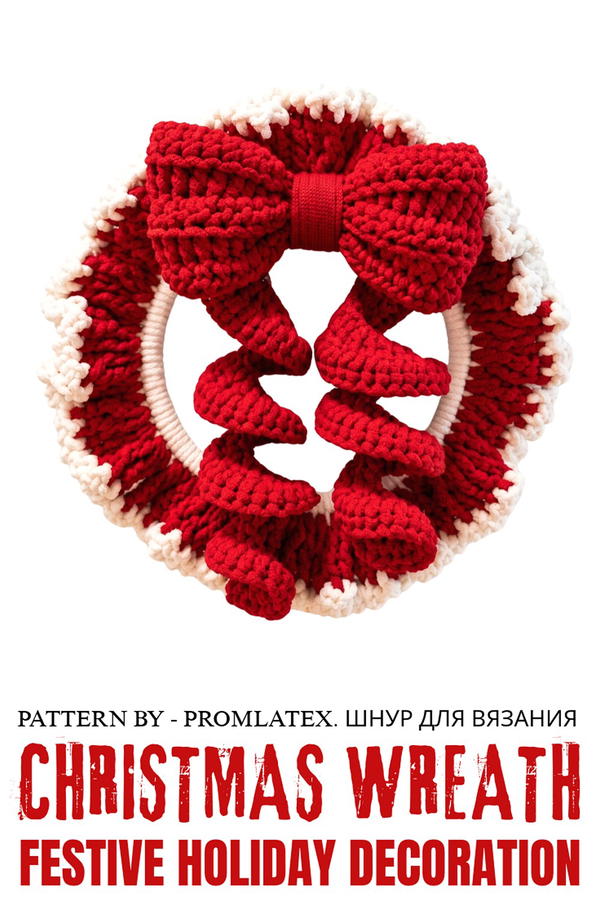
Crocheted New Year’s Wreath Pattern
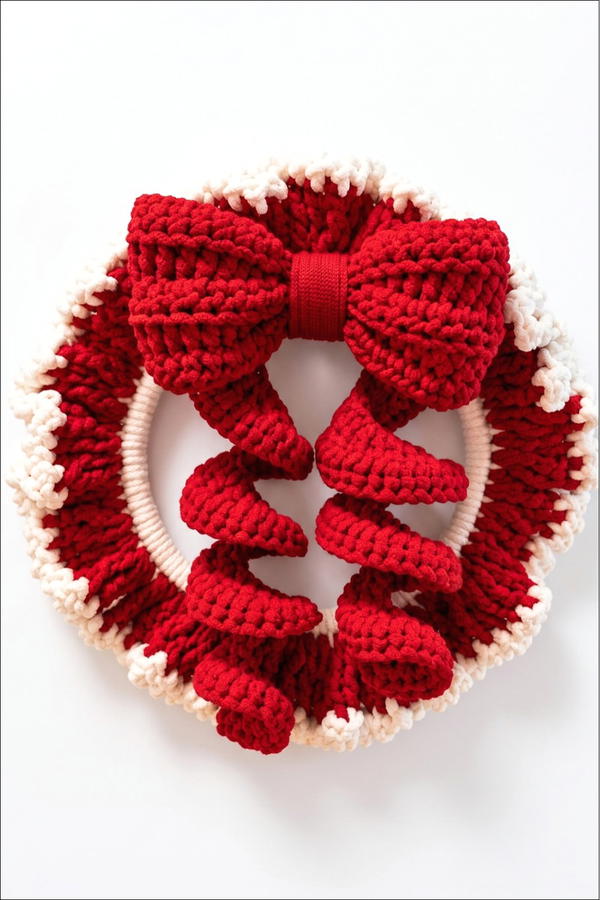
This elegant crocheted wreath, featuring a two-color design and decorative bow embellishment, is a perfect addition to your festive decor. Whether used as a wall hanging, table centerpiece, or gifted as a holiday souvenir, this versatile project allows for creative customization with colors, shapes, and embellishments. The soft polyester cord ensures durability while lending a sophisticated touch to your creations.
Skill Level
Intermediate – This pattern is recommended for crocheters familiar with basic stitches such as single crochet (SC), slip stitch, half-double crochet (HDC), and double crochet (DC), as well as techniques such as working around a ring, shaping decorative bows, and assembling details.
Materials
- Yarn:
- 20 meters of white (4 mm polyester cord) for the ring covering.
- 90 meters of green (4 mm polyester cord) for additional rows and bow details.
- Hook:
- 4 mm crochet hook.
- Additional Supplies:
- Plastic ring (15 cm diameter) (alternatively: metal, wood, or foam).
- Scissors for trimming ends of yarn.
- Lighter to seal the cord ends.
- Glue gun or sewing needle to attach decorations.
Stitch Abbreviations
- ch = chain
- sc = single crochet
- sl st = slip stitch (connecting chain stitch)
- hdc = half-double crochet
- dc = double crochet
Useful Tips
- Cord Selection: This pattern uses a flat polyester cord without a core, making it stretchy, easy to handle, and shapable. You can substitute with similar types of yarn or cord.
- Maintaining Tension: Adjust your tension based on the thickness of your cord to ensure uniform stitch sizes and a sturdy wreath structure.
- Ring Options: Use any type of ring (plastic, metal, or wood) based on availability, ensuring it matches the desired size of your wreath.
- Custom Colors: Explore different combinations for festive or seasonal themes—for example, red and gold for Christmas, pastel for spring, or silver and blue for winter motifs.
- Add Decorative Elements: Beads, glitter, or embroidered accents can elevate the design for added holiday charm.
Step-by-Step Pattern Instructions
1. Covering the Ring
White Cord:
- Start: Take the white polyester cord and place the end along the back of the ring.
- Fold the cord around the ring, creating a loop over the ring.
- First Loop: Insert the hook into the loop you created, pull out the cord, and create the first sc stitch.
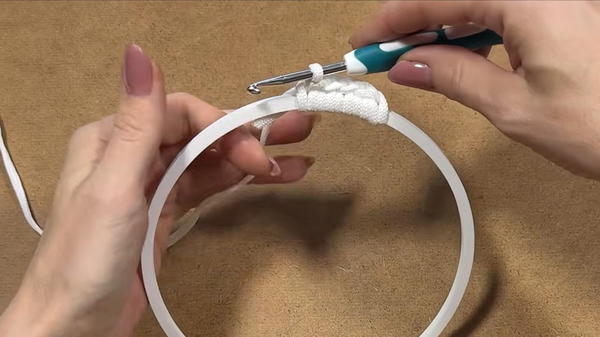
Round 1: Tying the Ring:
- Work sc stitches around the ring:
- Step: Bring the cord over the ring, insert the hook under the cord, pull it through, and complete the SC.
- Repeat this until the entire plastic ring is covered.
- There’s no need to count the stitches; simply ensure that the entire ring is evenly covered and no gaps are visible.
Closing the Round:
- Cut the cord, pull out the last loop completely, and create a finishing braid:
- Insert the hook under the first braid from the start of the round and pull the end through.
- Then, pass the hook under the back bridge of the last braid and pull the tip back.
- Shorten the end, seal it using a lighter, and tuck the burnt end into the stitches.
2. Adding the Second Row (Green Cord)
Round 2: Double Crochet Fans:
- Start anywhere by inserting the hook under a braid from the previous round. Pull out the green cord to form a loop, leaving a tail for weaving in later.
- Step 1:
- Ch 4 to create a lifting loop.
- Make 2 yarn overs and insert the hook under the same braid. Pull out a loop and work as follows:
- Yarn over, pull through 2 loops.
- Yarn over, pull through the next 2 loops.
- Yarn over, pull through the last 2 loops. This forms the first DC stitch.
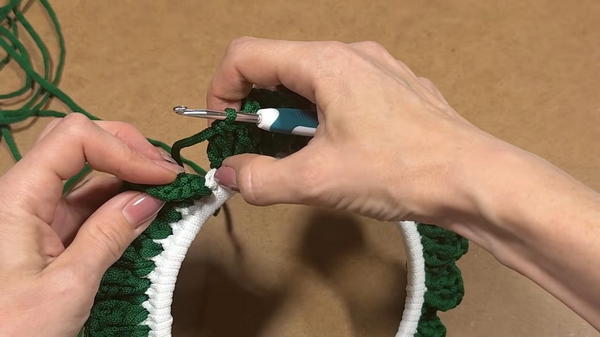
- Step 2:
- Repeat the DC process twice more under the same braid to create a fan of three DC stitches.
- Continue working three DC stitches under each braid until the entire ring is covered.
Tidy the Cord:
- If the cord twists while working double crochet stitches, leave the hook in the loop and lift the knitting to untangle and straighten the cord.
Finishing the Row:
- In the last braid, complete the row by working a fan with three DC stitches. Cut the cord and pull out the tail completely.
- Closing the Row:
- Insert the hook under the first braid between the chain stitches and first DC from the start of the row, pulling the end through.
- Insert the hook from the back under the back bridge of the last braid, and pull the tip into the middle of the braid.
3. Binding Round
Round 3: Slip Stitch Chain Binding (Using White Cord):
- Start anywhere on the wreath by pulling out a white cord loop through a braid from the previous row.
- Slip Stitch:
- Insert the hook under the next braid, pull through a loop, and use this loop to stitch through the loop on the hook.
- Steps:
- Alternate sl st and ch 1 under each braid around the wreath.
- Continue this pattern evenly until you reach the starting braid.
Closing the Binding Round:
- Cut the cord, pull out the loop completely, and connect the tail under the first chain made at the start of the round.
- Hide the tail by weaving it under the braids for a neat finish using a crochet hook or needle.
4. Creating the Bow
Rows 1–5: Bow Base (Using Green Cord):
- Create a foundation chain of 42 stitches. Add 1 lifting chain (43 total).
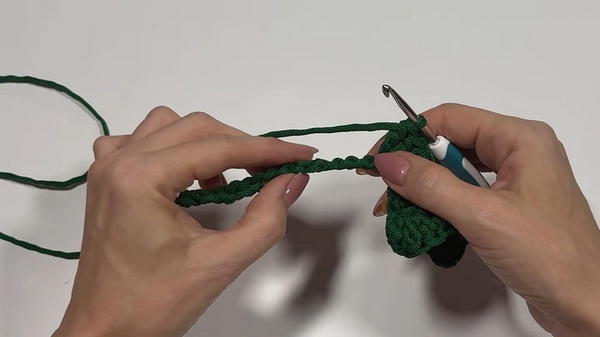
- Begin working from the 42nd chain (skip the lifting loop):
- Work 3 sl sts in the first three chains.
- Work 15 HDC stitches in the next 15 chains.
- Work 6 sl sts in the following 6 chains.
- Work 15 HDC stitches in the next series of 15 chains.
- Work 3 sl st stitches in the last 3 chains.
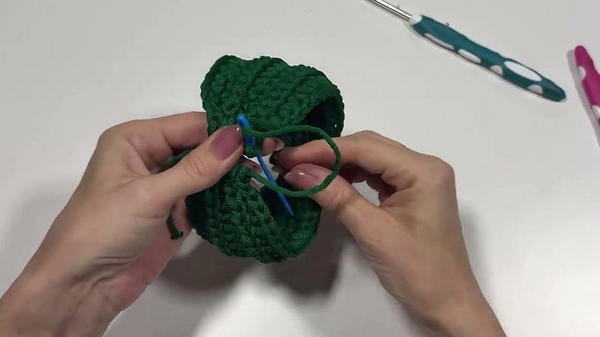
- Repeat this sequence for a total of 5 rows, turning the work at the end of each row.
Forming the Bow:
- After finishing 5 rows, leave a long tail of cord for sewing. Fold the bow in half lengthwise, matching ends.
- Sew the short ends together from the wrong side using a needle or hook, and secure both yarn tails.
5. Creating and Attaching the Wreath Loop & Bow
- Decorative Cord Pendant:
- Create a chain of 25 stitches using a green cord and work decorative double crochets, HDC, and SC stitches to form curls.
- Align bow pieces and sew or glue them together.
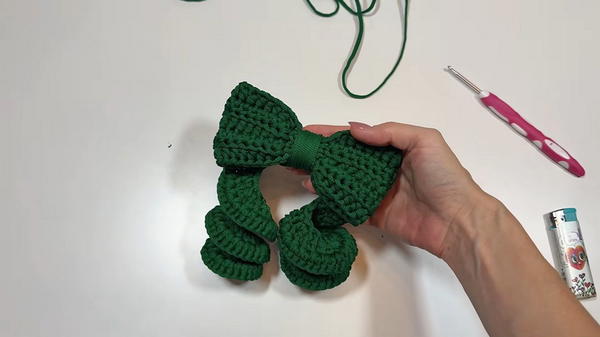
- Attaching the Bow:
- Wrap a green cord around the middle to secure and shape the bow. Trim and hide ends.
- Finally, glue the bow to the wreath using a hot glue gun or sew it in place.
Conclusion
This New Year’s wreath blends creativity and functionality, bringing festive charm to any decor. Easy to customize with color schemes, additional embellishments, or personal touches, this project allows you to create thoughtful gifts or one-of-a-kind decorations. Its sturdy construction makes it long-lasting while retaining a soft, elegant look. Celebrate the season with this versatile and beautiful handmade piece.