Style a plain dress with this Free Crochet Rose Cord Bag and give its raised raspberry petals and silver tone handles room to stand out at your next dinner.
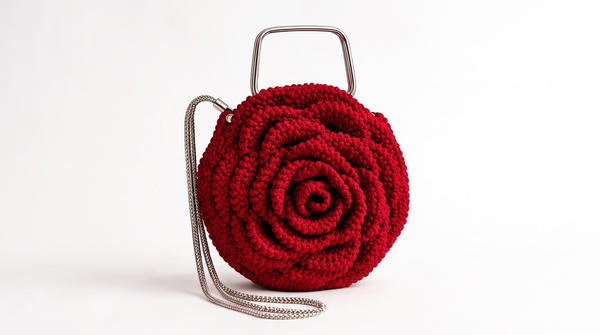
Layered petals spread from the center of this bag, giving the front the shape of a rose in bloom. In this Free Crochet Rose Cord Bag, raspberry polyester cord forms raised rows that cast small shadows between the petals. The metal handles sit above the round body, leaving the flower easy to see when you carry the bag by hand.
Raspberry Free Crochet Rose Cord Bag With Raised Petals
Who’s Behind the Rose Bag
Flower shaping takes this Promlatex project in a different direction from its everyday handbags. The channel pairs the raised rose with metal handles, a chain, and magnetic snaps. That mix gives viewers a chance to see how a textured front and a practical opening can work together on one bag. Promlatex. Шнур для вязания.
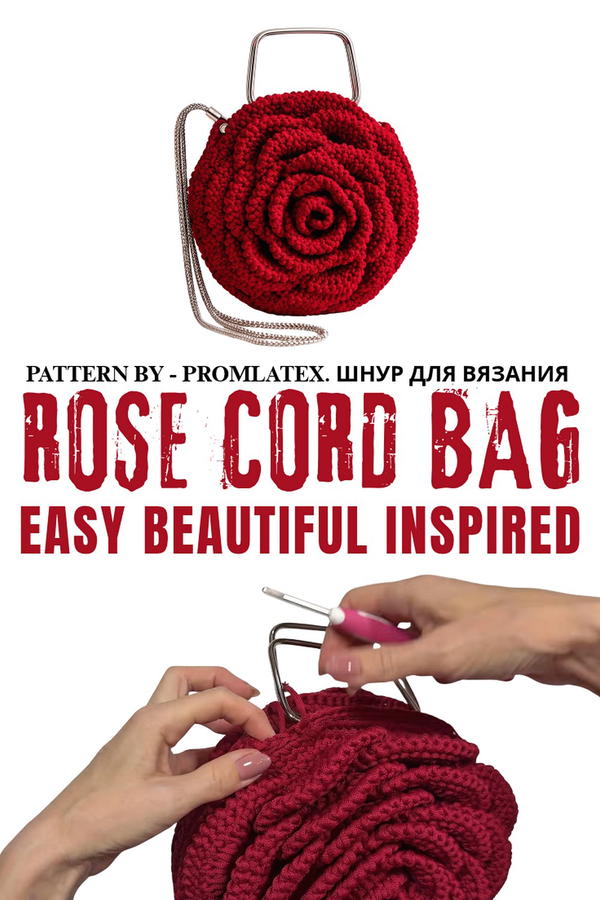
At approximately 24 by 12 centimeters, this is a bag for a few small belongings. A key, a slim card case, and lipstick are good examples of what you might take to a dinner or a party. The project includes a fabric lining, magnetic snaps, and a metal chain. Carry it by the short handles to show off the flower, or use the chain when you want your hands free.
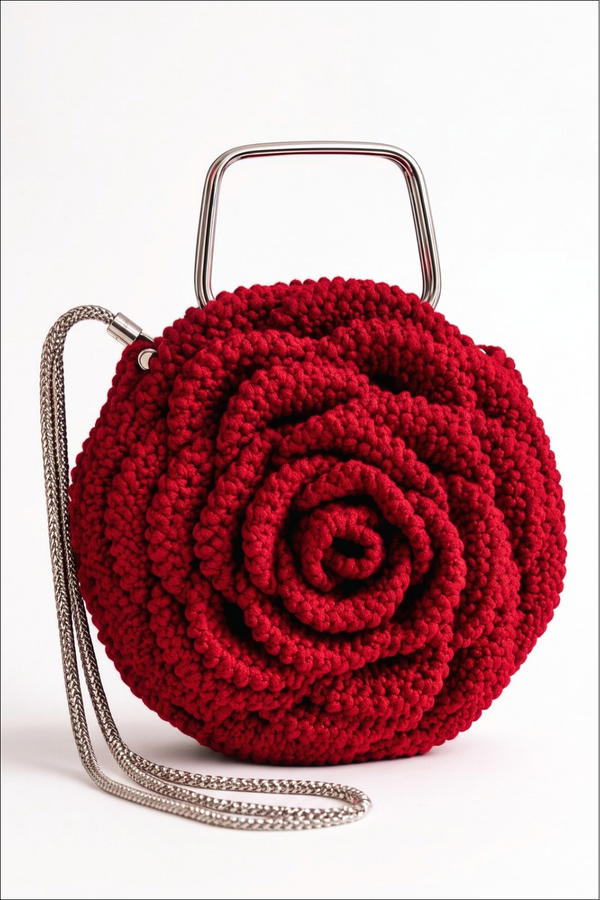
The cord listed for the sample is 3 mm thick, paired with a 3.5 mm hook. Each raised row sits against the next one, so it is worth smoothing the petals as you check the front. From the side you can see more of their depth, while the front shows the full round shape. For a dinner outfit, try the bag with a solid-color dress or a plain shirt and dark trousers. Either gives the flower enough room to stand out on its own. 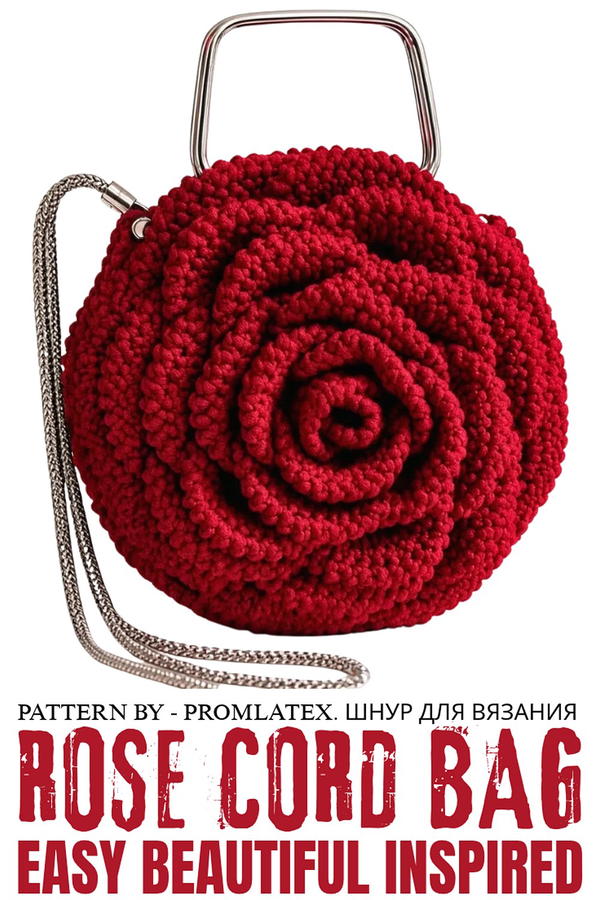
Crochet Rose Bag Pattern
This beautiful rose-patterned bag offers a modern and sophisticated design that works well as a fashion accessory. It features intricate petal details, a sturdy structure, and a detailed lining for functional use. With options for customization in color, this intermediate-level crochet project is both engaging and rewarding. The finished bag features a diameter of 24 cm and a thickness of 3 cm, with a practical handle and fastening system.
Skill Level
Intermediate
This pattern is ideal for crocheters with experience in techniques like double crochet, slip stitch, working in rounds, handling complex increases, and assembling lining.
Materials
- Polyester Cord: Promlatex brand, 3 mm, coreless, 400 meters (2 skeins), in a color of your choice (used here: raspberry).
- Crochet Hook: 3.5 mm.
- Bag Hardware:
- 2 metal trapezoids for short handles.
- A long metal chain handle with snap hooks or carabiners.
- 2 rods for attaching a longer handle.
- 2 magnetic sew-on buttons for fastening.
- Tools:
- Scissors.
- Lighter (to seal cord ends).
- Clips or pins (for lining).
- Sewing needle and thread (for lining).
- Lining Fabric: To construct two circular inserts.
Stitch Abbreviations
- ch = chain stitch
- sl st = slip stitch
- sc = single crochet
- dc = double crochet
Useful Tips
- Cord Behavior: Polyester cord can twist during use; placing the reel upright and letting it unwind counterclockwise reduces tangles.
- Lining Installation: For a sturdy shape, sew the lining before assembling the bag. Add reinforcing stitches for durability.
- Marking Rows: Use markers to identify connection points, especially when creating petals or attaching handles.
- Seal Cord Ends: Use a lighter to gently melt and seal the ends of the cord to prevent fraying.
- Petal Formation: Work patiently when shaping the rose petals to ensure consistent stitches and symmetry.
Step-by-Step Pattern
1. Round Base
Foundation (Round 1):
- Leave a 40–50 cm tail for sewing later.
- Create a magic ring, and work 3 ch stitches (counts as the first dc).
- Work 11 dc into the magic ring (12 stitches total).
- Pull the cord tail to tighten the ring and close the center.
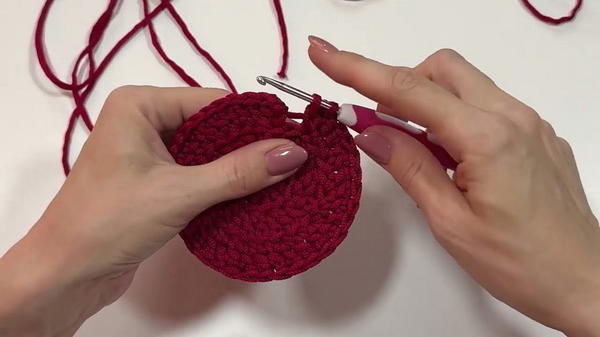
Joining Round 1:
- Close the row using the tail:
- Insert the hook into the fourth stitch from the starting ch-3.
- Pull the tail through this stitch and tighten it.
Round 2:
- Pick up the top part of the braid and the back jumper for every stitch (leaving one part of the braid on the front for the petal foundation).
- Work 2 dc into each stitch of the previous round (24 stitches total).
- Use a tighter dc method for denser texture:
- Insert the hook under the braid and pull up a loop (mimicking a yarn over). Work a dc into the same stitch.
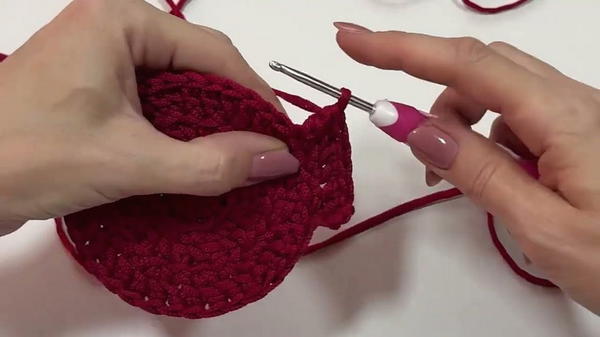
- Insert the hook under the braid and pull up a loop (mimicking a yarn over). Work a dc into the same stitch.
Third to Seventh Rounds:
Continue expanding the round by evenly placing 12 increases per round, following these guidelines:
- Round 3: Alternate 1 dc and 1 increase (36 sts).
- Round 4: Alternate 2 dc and 1 increase (48 sts).
- Round 5: Alternate 3 dc and 1 increase (60 sts).
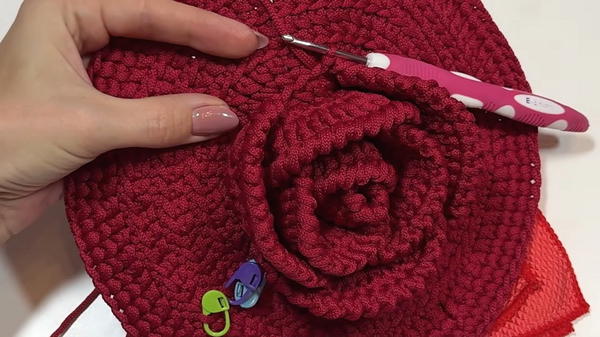
- Round 6: Alternate 4 dc and 1 increase (72 sts).
- Round 7: Alternate 5 dc and 1 increase (84 sts).
- Use the denser dc method throughout for a sturdier base.
2. Transition to Single Crochet Layer
Eighth Round:
- Switch to single crochet (sc) for this round:
- Work increases every 13 stitches for a total of six increases (90 stitches).
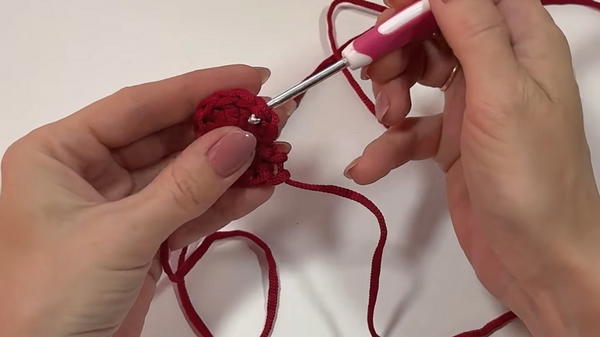
- Crochet into split stitches for added density: Insert the hook into the center of the stitch below, ensuring the back jumper is picked up.
- Work increases every 13 stitches for a total of six increases (90 stitches).
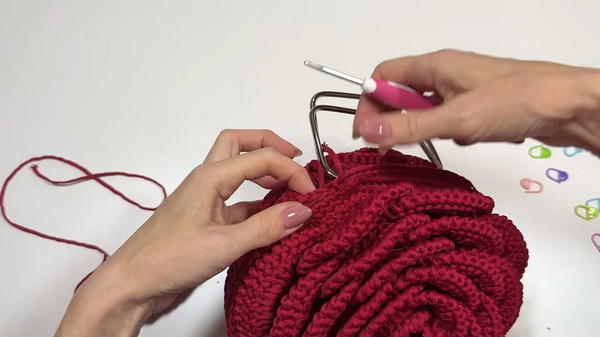
- Attach the handle between the increases by integrating the loops into your work as you crochet. Secure with additional sc stitches.
Ninth Round:
- Repeat the sc pattern, increasing every 14 stitches. This round should end with 96 stitches.
- Close the row securely and hide the tail within the stitches.
3. Rose Petals
Petal Foundation:
Mark your rows into six parts to leave jumpers for each row of petals. Mark clearly for six rows of petals.
Row 1 (Petals):
- Work into the jumper of the first row as follows:
- 3 ch stitches, then 2 dc into the same loop.
- Continue across three adjacent jumpers with 2 dc in each.
- Turn and work the petals back:
- Chain 3, then 2 dc into each stitch of the previous row for a total of 12 stitches.
- Join the petal base with a slip stitch to the next marked loop.
Subsequent Petal Rows:
- As you move to a new row of petals:
- Chain 2 for transitioning to the next jumper.
- Gradually increase petals per row:
- Row 2: Work 2 petals.
- Row 3: Work 3 petals.
- Row 4: Work 4 petals, alternating spaces evenly.
- Row 5: Work 6 petals.
- Row 6 (Final Row): Complete the rose with 8 petals.
- In each petal, work 3 dc per loop and expand with 2 dc per stitch in each row of the petal.
4. Assembly and Finishing
Creating the Bag Handles:
- Chain and braid a 72-stitch strip. Attach the strip evenly to both halves of the bag with slip stitches along the edges.
Adding Lining:
- Cut two fabric circles slightly larger than the base (approx. 1.5 cm excess).
- Pin the lining inside each half and sew it securely, folding the edges cleanly.
Assembling the Bag Halves:
- Align the handles and stitch the halves together using slip stitches along the edge braids.
- Attach the chain handle or carabiners to the rods for an adjustable handle.
5. Finishing Edges and Fasteners
Top Edge Binding:
- Work slip stitches along the top edge under the braid to tidy up the opening.
Fasteners and Details:
- Sew magnetic buttons to the top placket for closure.
- Install additional decorative or functional hardware as desired.
Conclusion
This rose bag combines elegance with practicality, offering a sturdy structure and intricate petal designs. While primarily for intermediate crocheters, it allows room for experimentation with colors and textures to make it uniquely yours. With a detailed lining and hardware, it transitions seamlessly from a craft project to a functional fashion accessory. Explore color combinations and enjoy the beauty of your handmade rose-inspired crochet bag.