 Mint Design Blog



Dress up a simple outfit with this Free Crochet Granny Square Bag with Beads and see how green bead centers and bamboo handles give the brown panels character.
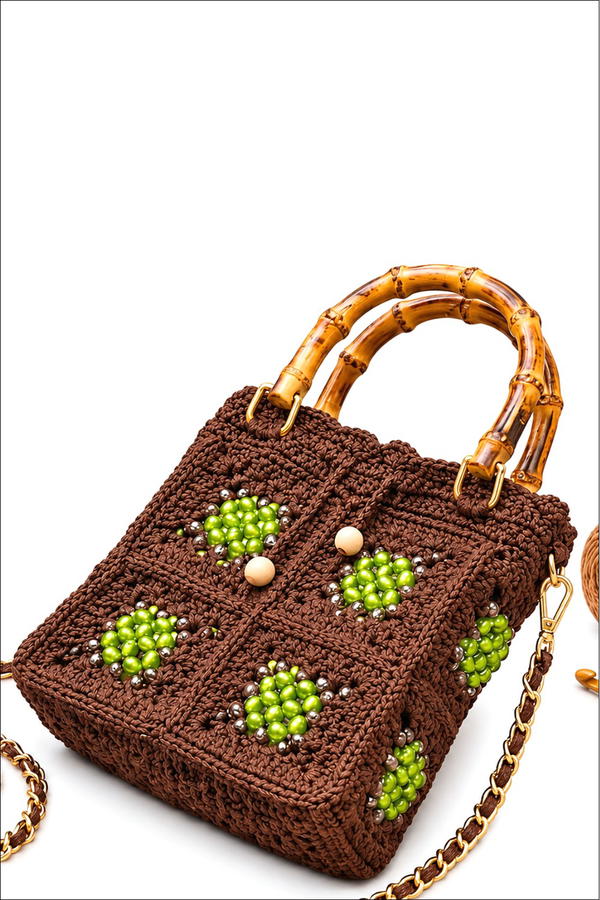
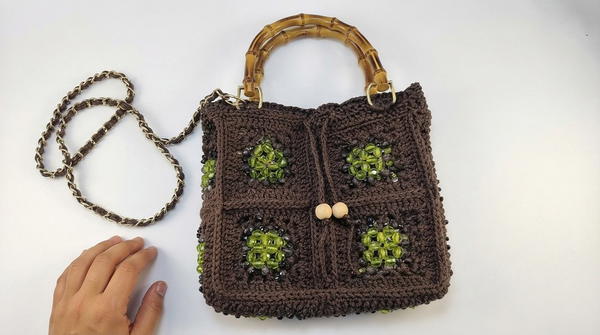
Brown crochet can look understated until a few glossy beads catch the light. This Free Crochet Granny Square Bag with Beads uses green beads at the center of each motif, where they stand out against the darker stitches. The sample also has curved bamboo handles. Their warm color suits the brown yarn, and their smooth surface feels different from the textured panels.
Bamboo Handles for a Free Crochet Granny Square Bag with Beads
Meet the Channel
Maison Hanin shows how separate beaded motifs can come together in a finished accessory. This project focuses on assembling the squares and adding bamboo handles. The channel also shares the square on its own, so you can practice the beadwork first and return to the bag once they’re all ready.
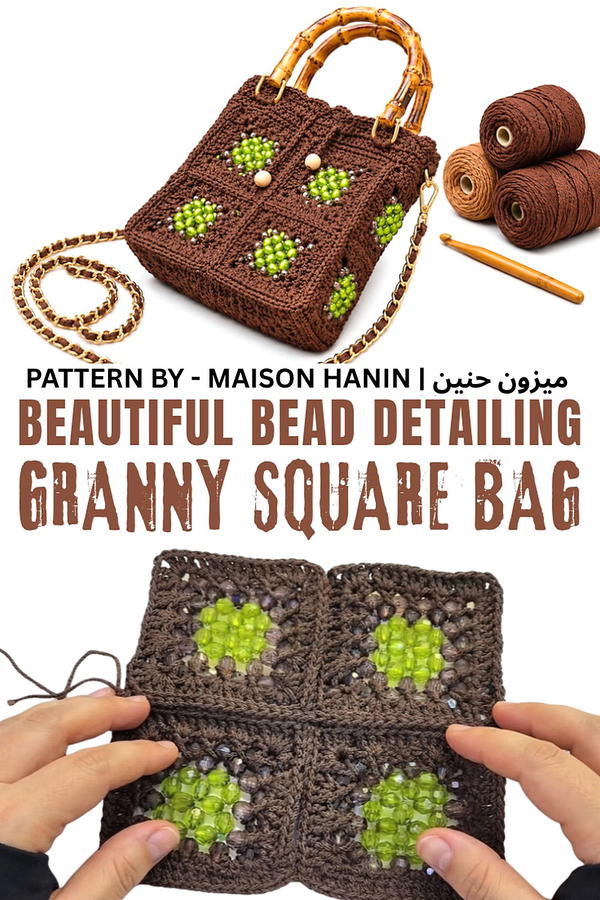
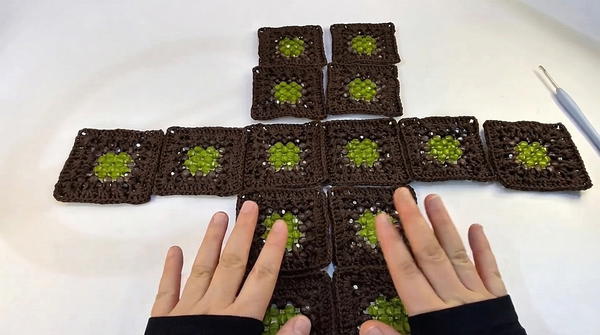
Much of the work is in the squares. Each one is a piece you can check on its own before joining it to the others. Lay the motifs side by side first and look at how the green centers line up. Arranging them on a table also gives you a chance to spot a square that needs a little adjustment before you join the panels and attach the handles.
Pair the finished bag with a cream shirt and jeans or a plain brown dress. The green beads give you a color to work with when choosing earrings or a scarf, while a simple outfit keeps the squares in focus. Use it when you need a bag for your phone, a card case, and a few other small items. It would also suit someone who likes vintage style and warm, earthy colors.
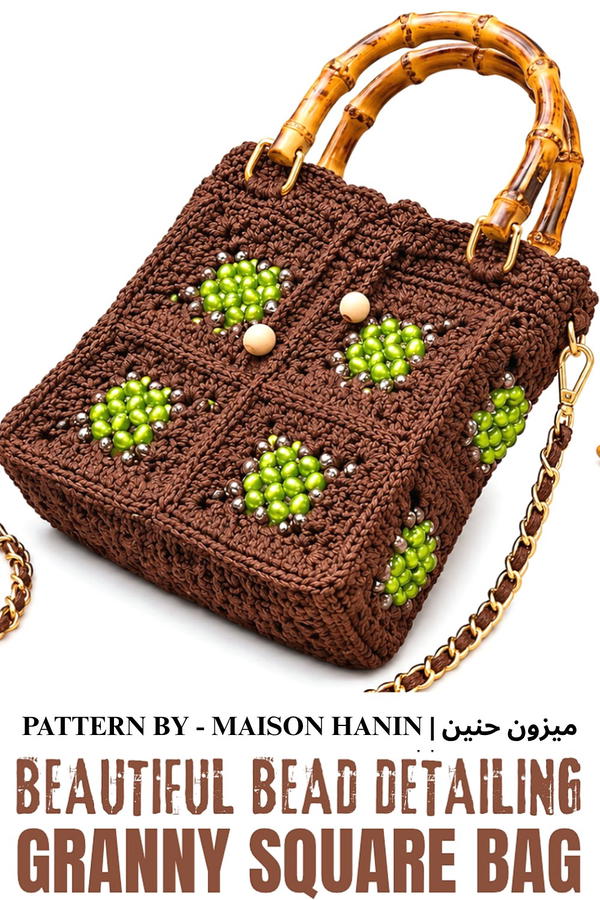
Crochet Handbag Assembly Using Granny Squares
This crochet handbag uses pre-made granny squares, hand-embedded beads, and elegant hardware to create a stylish accessory. With clear instructions and a simple joining technique, this intermediate-level project produces a functional, handmade handbag perfect for casual and formal use.
Skill Level
Intermediate
This project is ideal for crocheters who have experience working with granny squares and assembling pieces with slip stitches. Additional skills include securing handles and straps, ensuring a sturdy and balanced structure.
Materials
- Granny Squares: Pre-made crochet squares featuring embedded beads suitable for a medium handbag.
- Yarn: Matching dark brown yarn to assemble the squares and add border details.
- Crochet Hook: A hook size that matches your yarn (e.g., 4 mm for most medium-weight yarns).
- Bag Hardware:
- Bamboo or Wooden Handles: For a sturdy grip and an aesthetic touch.
- Gold-Tone Metal Chain Strap: For an optional shoulder strap.
- Adhesive: Strong glue to secure beads if necessary.
- Tapestry Needle: For weaving in ends and attaching hardware.
- Scissors: For cutting yarns and trimming any loose ends.
Stitch Abbreviations
- sl st = slip stitch
- ch = chain
Useful Tips
- Organize Your Layout: Arrange the granny squares neatly to ensure proper symmetry, especially with bead placements, as this will affect the final look of the handbag.
- Tight Stitches for Seam Durability: Work slip stitches through the back loops only to create a strong connection between the granny squares.
- Reinforce Beads: Check the embedded beads on your granny squares. If they are loose, secure them using strong glue before assembling the bag.
- Balanced Handles: Position the handles evenly across the bag's top edge to provide a comfortable and balanced grip.
- Customize Straps and Handles: Feel free to substitute the gold chain strap with a crocheted strap or another material for your preferred look and feel.
Step-by-Step Instructions
1. Layout the Granny Squares
- On a flat surface, arrange the granny squares to form the desired shape of the bag.
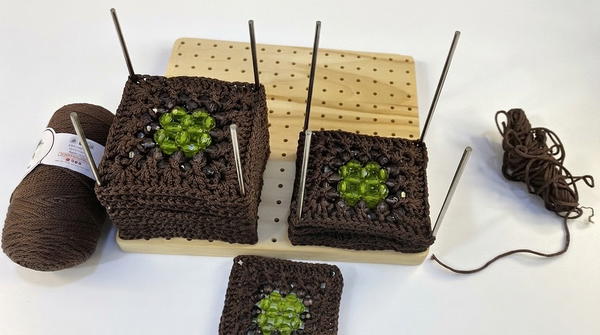
- Select an arrangement where:
- The bottom squares form the base of the bag.
- The side rows fold upward to create the body and form natural edges.
- Ensure any bead placements on the granny squares align symmetrically for aesthetic balance and consistency across the completed bag.
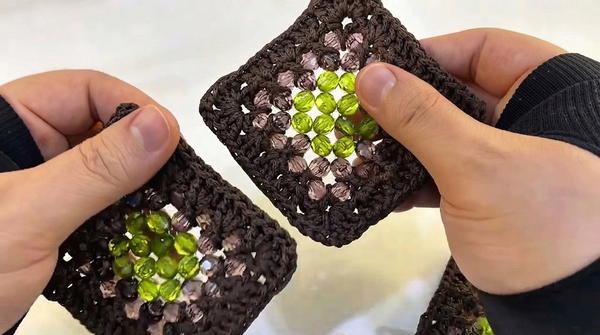
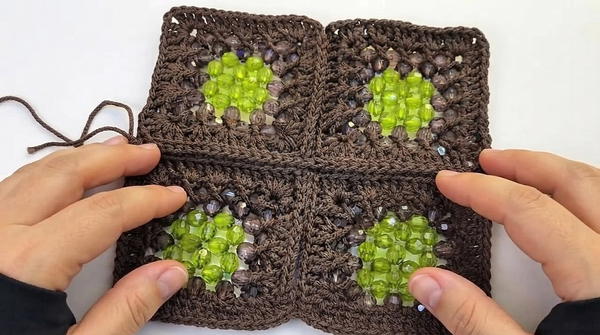
2. Joining the Granny Squares
- Use the dark brown yarn with the appropriate crochet hook to join the squares together.
- Align two squares with their wrong sides together to prepare for seaming.
- Join the sides of the granny squares using the following method:
- Insert your hook through the back loops only of both squares.
- Yarn over, pull through both loops, and complete the sl st.
- Repeat across the entire edge of the square, working slowly and carefully to maintain even tension.
- Continue joining squares in your layout, connecting the edges one by one to form the base.
- Move on to the side sections, working row by row to build the structure of the bag.
- As you join squares for the sides, ensure they are evenly lined up to maintain the bag’s proper shape.
3. Forming the Base and Sides
- After the squares for the base have been secured together, fold the side rows upward to form the walls of the bag.
- Using the same sl st technique through the back loops, connect the side edges to the base and join the sides to one another.
- Continue joining until the structure of the bag is complete.
4. Finishing the Top Edges
- Once the bag structure is formed, create a crochet border around the top opening of the bag to give it a polished look.
- Using the dark brown yarn:
- Insert the hook into the top edge stitches and work sl st or sc across the entire opening.
- Maintain even tension to create a neat and sturdy finish, ensuring no curling or loose loops.
5. Adding the Handles
- Align the bamboo handles with the top edge of the bag, centering them for balance and aesthetic.
- Using yarn and your crochet hook, attach the handles using the following steps:
- Insert the yarn through the handle and around the top edge of the bag.
- Work secure slip stitches around the handle.
- Pull each stitch firmly, ensuring the handle is tightly anchored.
- Repeat the same process on both sides for two evenly spaced handles.
6. Attaching the Metal Strap
- Prepare the Chain Strap:
- To make the strap more comfortable, optionally weave yarn through the chain links.
- Attach the Chain to the Bag:
- Position the chain ends on opposite sides of the bag.
- Use the bag hardware or crochet yarn loops tightly through the chain and sides of the bag to secure it.
- Check that the chain strap is firmly attached and can support the weight of the bag.
Final Assembly Details
- Check Symmetry: Before finishing, check that all components—the handles, chain strap, and pattern alignment—are symmetrical.
- Weave in Ends: Use a tapestry needle to securely weave in any loose yarn ends inside the bag to avoid fraying.
- Reinforce Beads: If any beaded squares appear loose, reinforce them by applying a small amount of strong glue to the backs of the beads. Let them dry before use.
Conclusion
This crochet handbag, made with pre-designed granny squares and accessorized with elegant hardware, highlights creativity and craftsmanship. The precise slip-stitch joining, polished top edge, and custom handles and straps come together to create a fashionable and durable accessory. This project is an excellent opportunity to explore layout planning, assembly, and attaching hardware to crochet pieces. Enjoy experimenting with colors, bead designs, and finishing touches to make your handbag one-of-a-kind.