Start with this Free Crochet 3D Rose Granny Square and work a flower with raised petals that you can repeat for a cushion, a patchwork bag, or a table runner.
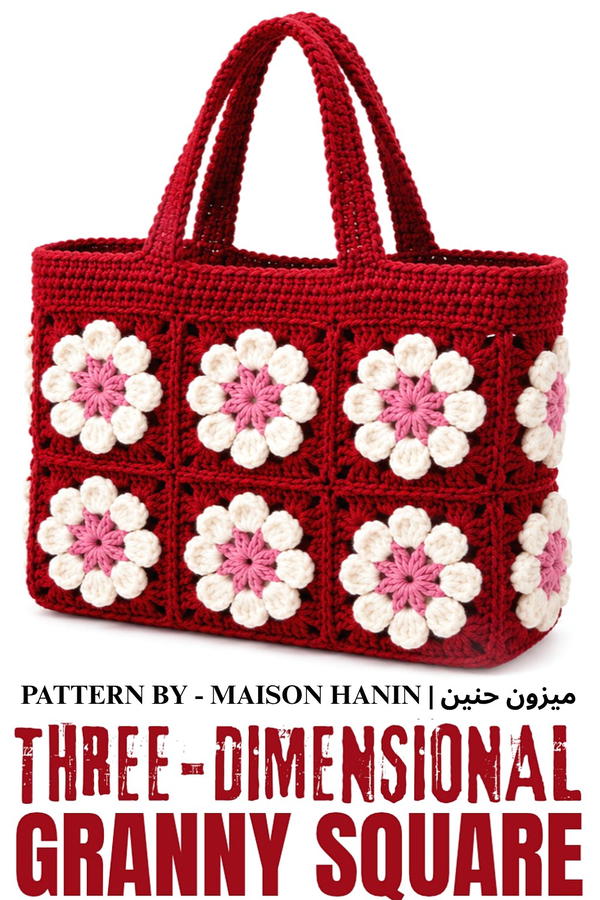
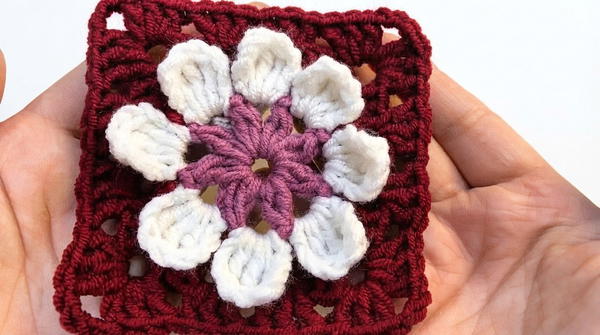
Flat squares work well for patchwork, but sometimes a plain panel needs one detail you can see from across the room. The Free Crochet 3D Rose Granny Square has petals that stand above the background, so the flower stays visible even when the square is joined to other pieces. In the sample, pale petals surround a pink center, and a deep red border frames the flower.
Floral Cushion Idea Using a Free Crochet 3D Rose Granny Square
Working on one motif at a time gives you room to play with color. Start with one sample and see how the petals look in daylight. A lighter flower on a darker square shows off the raised edges, while shades from the same color family give a softer result. Check the corners before you repeat the design. Corners that line up are easier to join when you lay out a row of squares.
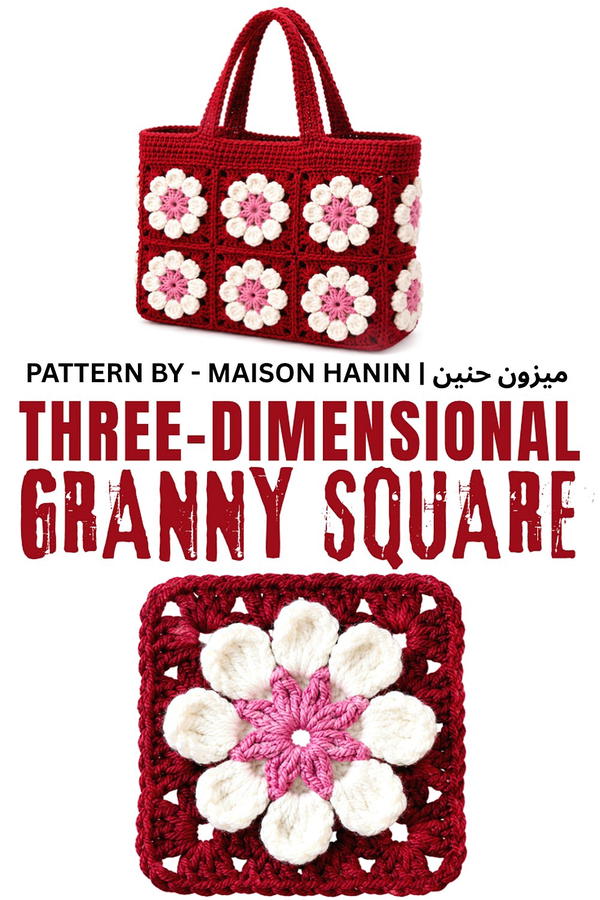
For a cushion, you could put the raised flowers on the front and use plain crochet on the back. For a bag, try a row of flowers across the front panel. Several matching squares could also form a table runner with a simple border around the outside. Because the flower has height, place dishes on the flatter parts of the table. One square on its own is enough to test whether you like the look before committing to a larger piece.
Behind the Flower Design
Petal shape is the focus of this project from Maison Hanin. The channel presents the raised rose as a square that can be used again in different projects. It also shares other flower motifs, including a puff stitch square, which gives viewers another way to work with texture and color.
Crochet 3D Rose Granny Square Pattern
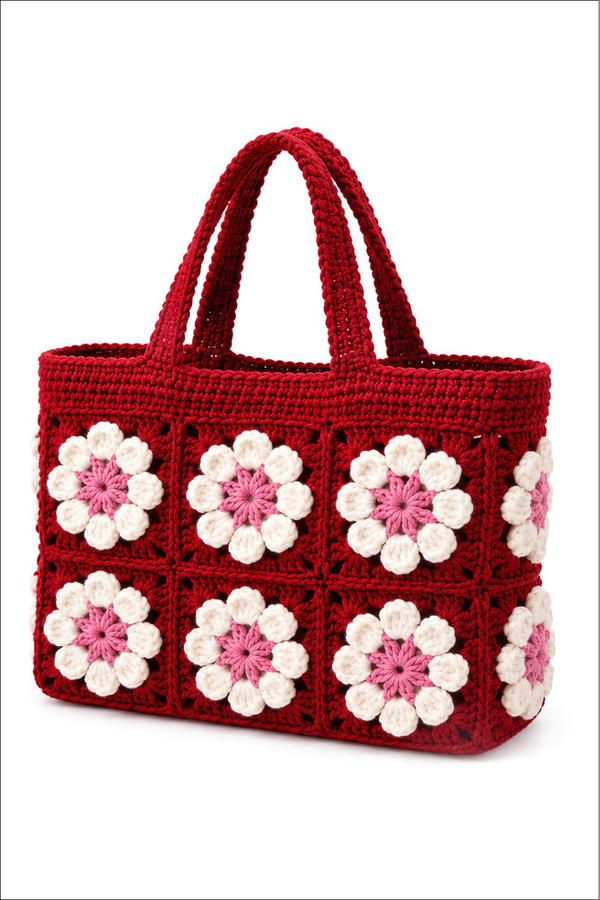
This beautiful 3D rose granny square combines creativity and technique to create a unique design suitable for blankets, cushions, and other crochet projects. With a decorative rose at the center surrounded by a square border, this pattern introduces a charming touch to your work.
Skill Level
Intermediate
The pattern involves creating a 3D rose, working with color changes, and shaping the project into a square. Techniques include crocheting in the round, chaining, and forming structured corners, making this ideal for crocheters with some experience.
Materials
- Yarn:
- Purple (for the rose)
- White (for the square background)
- Other contrasting colors for variation or creative interpretation
- Crochet Hook: 4 mm
- Other Tools:
- Scissors
- Stitch markers (optional for tracking rounds)
Stitch Abbreviations
- sl st = slip stitch
- ch = chain
- sc = single crochet
- hdc = half double crochet
- dc = double crochet
- magic ring = adjustable loop to start in the round
Useful Tips
- Magic Ring Mastery: Ensure your magic ring is tightened evenly to avoid gaps in the rose’s center.
- Counting: Accurately count stitches and spaces per round to prevent misaligned petals or uneven squares.
- Color Changes: Use a seamless method when transitioning from one yarn color to another for a polished look.
- Blocking: Once complete, block your granny square to enhance its shape and alignment before using it in larger projects.
Step-by-Step Pattern
1. Rose Center
Round 1:
- Create a magic ring.
- Work ch 5 (to form a chain arch).
- Insert your hook back into the magic ring and work sc to anchor the arch.
- Repeat: Work ch 5, then sc into the magic ring, until you have 8 evenly spaced chain arches.
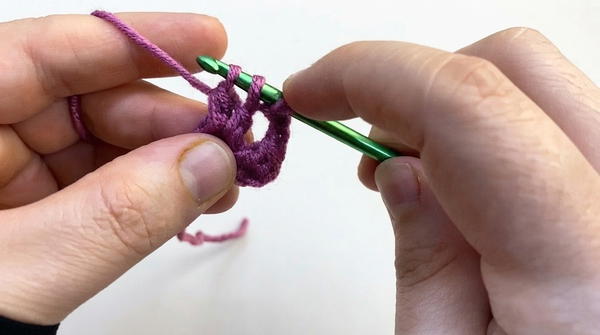
- Pull the magic ring tight to close the center circle.
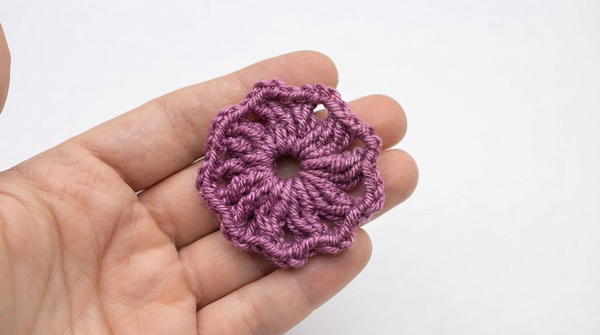
Round 2:
- In each chain arch created in Round 1:
- Work sc, hdc, 3 dc, hdc, sc.
- This completes one petal of the rose.
2. Background for the Rose
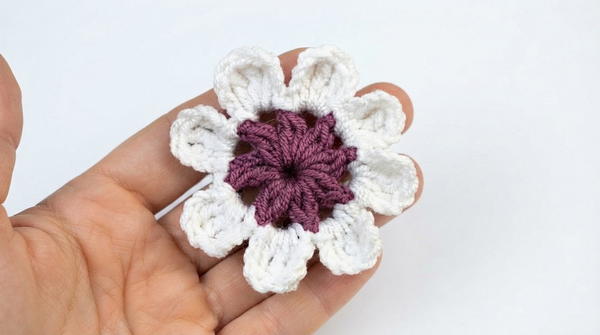
Round 3:
- Switch to the contrasting yarn color (e.g., white).
- To form spaces behind the rose petals, turn your work and ch 4, inserting the hook behind the petals as you go.
- Work sc behind each petal to anchor the chain spaces. You should have 8 evenly spaced chain arches behind the petals once complete.
3. Transforming the Circle into a Square
Round 4:
- In the first chain space behind the rose petals:
- Work 3 dc, then ch 1.
- Move to the next chain space:
- Work 3 dc, then ch 1.
- Work 3 dc, then ch 1.
- Repeat this pattern in every chain space behind the rose to complete one round of dc clusters separated by chain spaces.
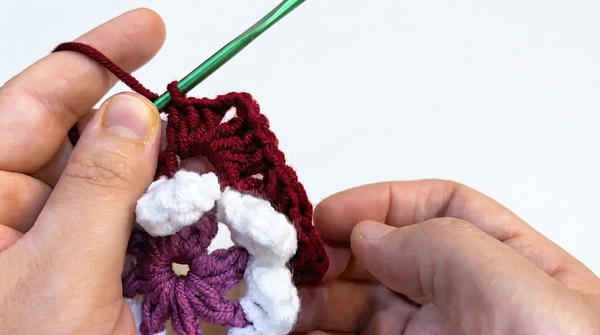
Round 5:
- To begin shaping the rose into a square, work corner clusters in this round:
- In specific chain spaces where corners need to form, work a “fan-shaped cluster” comprising 3 dc, ch 3, 3 dc.
- In the other chain spaces between corners:
- Continue working normal dc clusters with ch 1 between each.
- Once complete, the 4 corners will create the square’s structure.
Round 6:
- Work an additional round of dc clusters in each chain space, continuing to form and reinforce the square shape.
- In corner chain spaces, repeat the “fan-shaped cluster” pattern (3 dc, ch 3, 3 dc) to keep the corners sharp.
- Once finished, you will see an evenly shaped granny square with the 3D rose at the center.
Finishing Touch
- Fasten off your yarn and weave in all loose ends using a tapestry needle.
- Block your square to refine its appearance and ensure it is perfectly shaped for use in larger projects.
Conclusion
This elegant 3D rose granny square combines texture, color, and design into a standout crochet piece. With its dimensional rose center and symmetrical square border, this pattern is perfect for creating decorative blankets, cushions, or wall hangings. Customize the colors or expand upon the border rounds to adapt the square to your creative vision.