Brighten your style effortlessly with this free crochet flower bracelet pattern that offers a simple and charming accessory for any occasion.
Pretty flowers around the wrist can make a simple outfit feel much more special. This Free Crochet Flower Bracelet Pattern is a wearable crochet accessory with a fun floral look and a light, lovely feel.
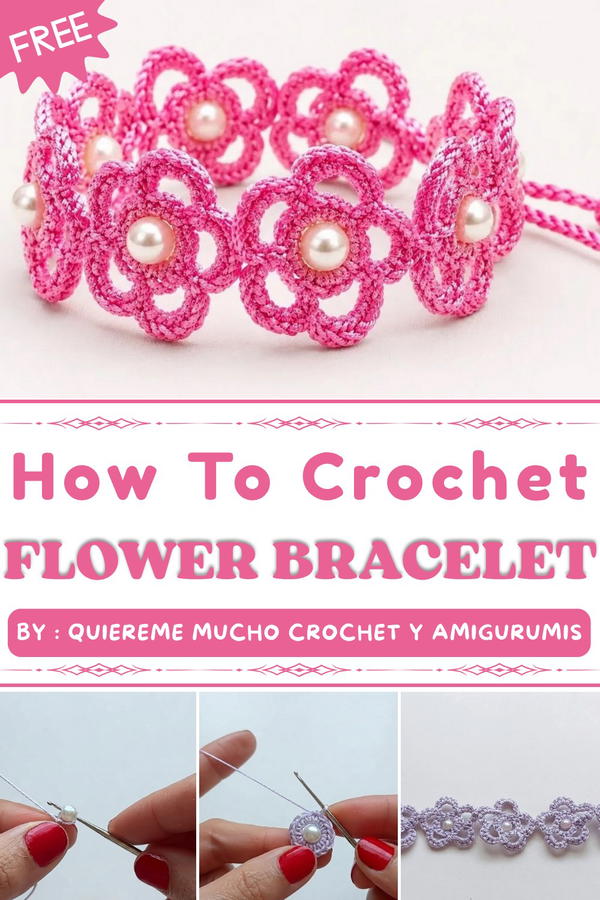
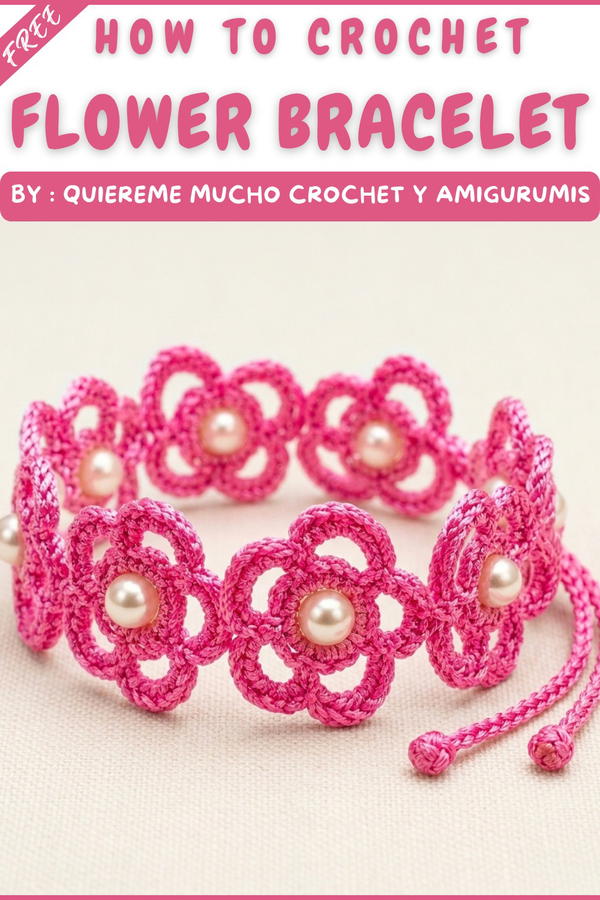
Quiereme Mucho crochet y amigurumis presents this project through its YouTube channel. The bracelet has a narrow shape that sits neatly around the wrist, with small crochet flowers as its main feature. The flowers give it a cute and playful style, while the soft texture adds a warm handmade touch. Different flower colors can also make the piece look bright, soft, or cheerful.
Flower Bracelet Crochet Pattern for Beginners
This little bracelet can easily become part of an everyday outfit. Wear it with a simple top, a dress, or casual clothes when you want a small detail around your wrist. It can also work nicely with other bracelets for a fun layered look. The flower design gives the accessory a fresh style that feels different from plain wristbands.
What makes this project special is its mix of jewelry and crochet. Instead of a simple band, it has tiny floral shapes that give the whole piece more character. The compact design makes it easy to wear, while the handmade texture gives it a cozy and personal feel.
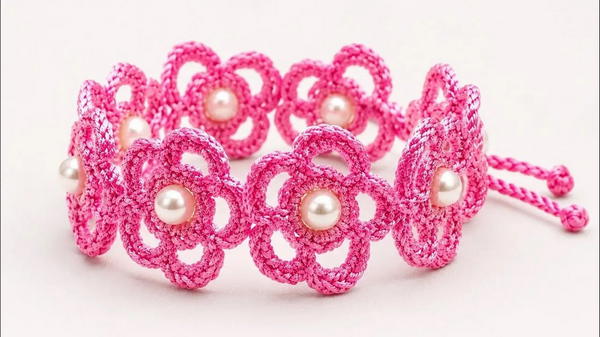
It can also be a lovely choice when looking for a small handmade present. A flower bracelet could suit a friend, sister, mother, or someone who enjoys pretty wearable items. It can mark a birthday, special day, or simple moment of kindness.
The Free Crochet Flower Bracelet Pattern offers a sweet way to enjoy crochet as wearable art. Its flowers, gentle texture, and simple shape make it easy to love, wear, and keep as a charming part of a crochet accessory collection.
Crochet Flower Bracelet Pattern – Easy Step-by-Step Guide for Beginners
Create a delicate crochet flower bracelet featuring pearl-like beads at the center of each flower. Using macramé thread and a tiny 1.25 mm crochet hook, this pattern teaches you how to crochet flowers with beautiful petals, join them into a bracelet, and add decorative ties. Perfect for beginners looking to expand their crochet skills with finer thread and beads.
Materials Needed
- Thin macramé thread or similar fine cotton thread
- 1.25 mm crochet hook (or a size suitable for your thread)
- Small beads (approx. 0.5 cm diameter)
- Tapestry needle (for sewing flowers together)
- Scissors
Abbreviations & Special Stitches
| Abbreviation | Meaning |
|---|---|
| ch | Chain |
| sc | Single Crochet |
| sl st | Slip Stitch |
| dc | Double Crochet |
Special Techniques:
- Bead Incorporation: Thread the bead on the yarn before starting your foundation stitch.
- Petal Arch: Chain 6 and slip stitch to shape petal spaces.
- Petal Formation: Fill arches with single crochet stitches for petal texture.
Step-by-Step Pattern
1. Base: Creating the Pearl Center
- Prepare the bead:
- Thread your yarn through the bead.
- Tie a loose knot, leaving enough space for your crochet hook to fit through.
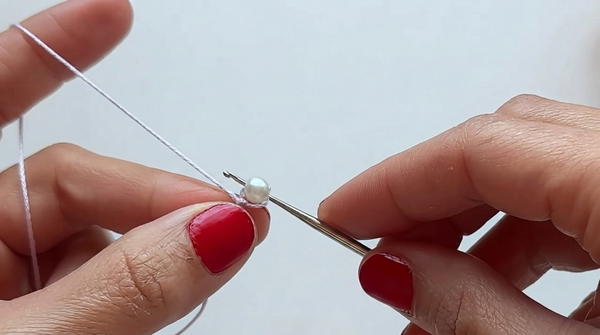
- Start foundation:
- Insert the hook through the loose knot and pull the yarn through to form a loop.
- Crochet around the bead:
- Work 8 single crochet (sc) stitches on one side of the bead.
- Then, work 7 sc stitches on the other side of the bead.
- Total stitches around the bead: 15 sc.
- Close the round:
- Join with a slip stitch (sl st) into the very first single crochet stitch.
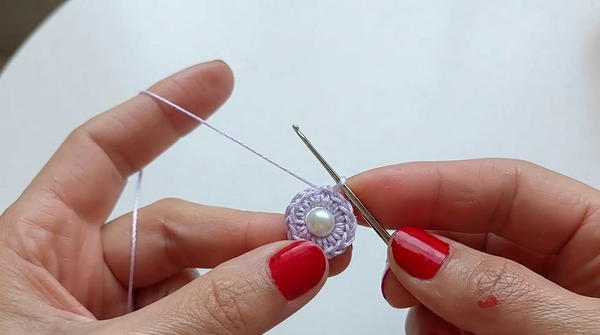
- Join with a slip stitch (sl st) into the very first single crochet stitch.
2. Make the Petal Arches
- Form arches:
- Chain 6 (ch 6).
- Skip the next 2 stitches on the base.
- Slip stitch (sl st) into the 3rd stitch to form an arch.
- Repeat:
- Repeat chaining 6, skipping 2 stitches, and slip stitching into the 3rd stitch until you have created 5 arches total around the flower.
- Join round:
- Slip stitch (sl st) into the base of the first chain-6 to close the round.
3. Form the Petals
- Chain 1 (ch 1) — prepares you to start working petals.
- Work petals:
- In each chain arch, work 6 single crochet (6 sc) stitches.
- Connect petals:
- Between each petal, slip stitch (sl st) into the gap created by the previous round’s slip stitch to secure the shape.
- Finish round:
- Slip stitch to join, cut the thread, chain 1 to lock the stitch.
- Weave in all loose ends neatly.
4. Make Enough Flowers for Your Bracelet
- Measure your wrist to determine how many flowers fit comfortably.
- Typically, 7 to 9 flowers work for most adult wrist sizes (around 17–19 cm circumference).
5. Assembly: Sewing Flowers Together
- Set your flowers side by side, wrong sides facing inward.
- Using a tapestry needle and matching thread, sew the flowers together petal-to-petal on the reverse side for a neat finish.
- Take your time to keep sewing even and secure.
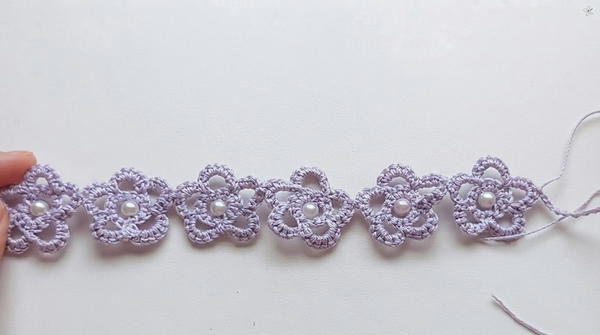
6. Make the Bracelet Ties
- Create decorative ends:
- Chain 4 (ch 4) stitches.
- Work 3 double crochet (3 dc) stitches into the first chain to form a small cluster.
- Remove the hook, insert it through the 3rd chain, and pull the loop through to close the cluster neatly.
- Make strap:
- Chain 15 (ch 15) stitches for the tie strap.
- Attach this strap to the center of the end petal by slip stitching (sl st) into the base.
- Repeat:
- Make the decorative end and strap for both ends of the bracelet.
Finished Bracelet Size
- Approximately 17–19 cm in circumference (about 6–7.5 inches), adjustable with ties.
- Flowers measure about 2.5–3 cm each in diameter.
Tips for Beginners
- Work slowly when handling fine thread and small hook for accuracy.
- Keep your tension consistent to prevent uneven petals.
- Use stitch markers to track rounds if needed.
- Practice the single crochet and slip stitch smoothly before starting.
- Securely weave in ends to avoid unraveling.
Conclusion
This crochet flower bracelet combines fine craftsmanship and delicate stitches for a stunning accessory. Working around beads gives a beautiful center for the flowers, while the petal arches and detailed stitching create an appealing textural pattern. Assembling multiple flowers with careful reverse-side sewing yields a neat professional finish. The decorative ties add charm and versatility.