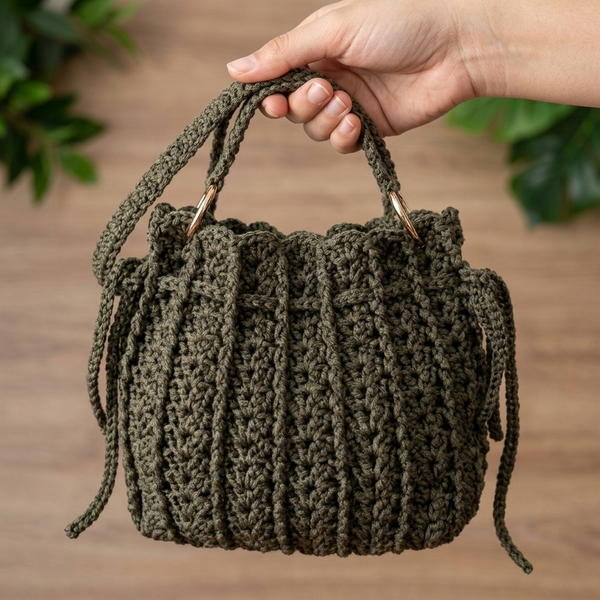
Capture elegance with this free crochet Italian bag pattern offering a stylish accessory full of charm and perfect for any occasion or outfit.
The Italian bag shared by the Örgü ütopyası channel is a wonderful example of elegance, practicality, and durability. This spacious and stylish bag can be made using paper yarn, raffia yarn, or glittery macrame cord, giving it a luxurious finish that is both sturdy and visually appealing. The detailed tutorial makes the process simple and easy to follow for anyone wanting to make a standout bag from scratch.
Easy Free Crochet Italian Bag Pattern for All Skill Levels
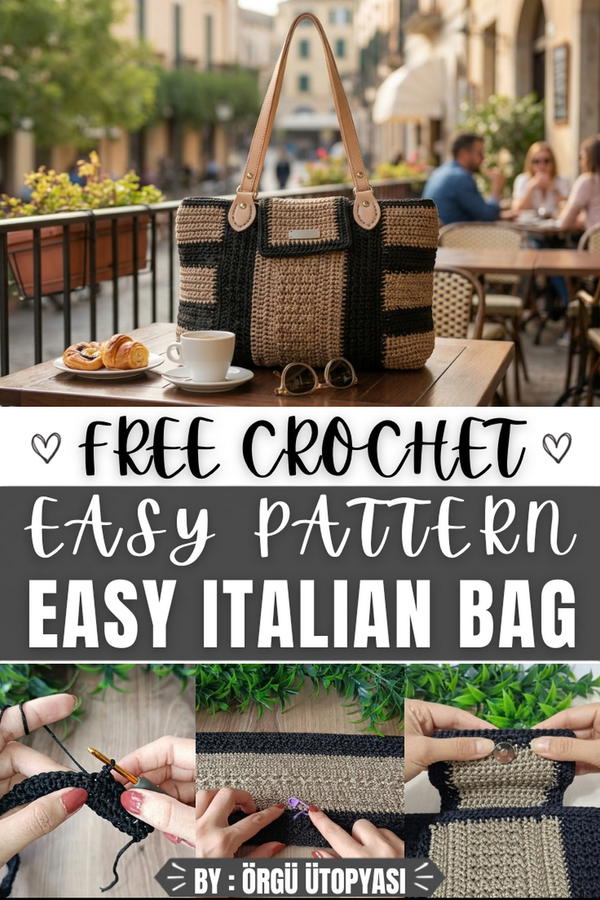
This bag’s design combines functionality with beauty. Measuring 43 cm wide, it is large enough to carry daily essentials or even heavier items without losing its shape. Its texture is created using double treble crochets and slip stitches, forming a neat and polished surface that resembles fine Italian artistry. The bag’s structured appearance, paired with its clean, straight lines, makes it ideal for everyday use or even as a stylish accessory for formal occasions.
What sets this bag apart is its versatility and thoughtful details. The pattern allows customization of the size, shape, and color, ensuring that the finished product matches your personal style perfectly. It also includes a lid with magnetic buttons for added security and an elegant touch, while the option to attach handles from a haberdashery shop further elevates its charm and usability.
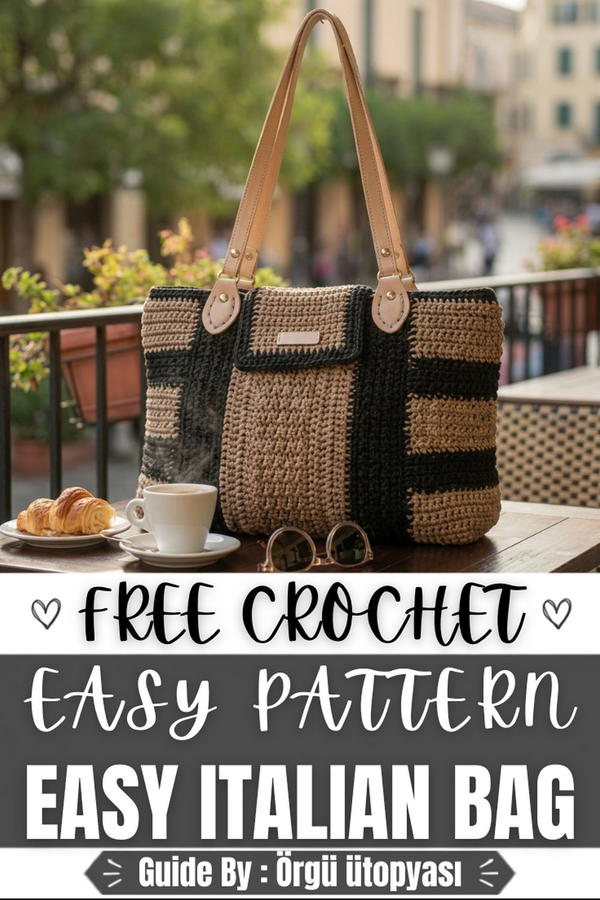
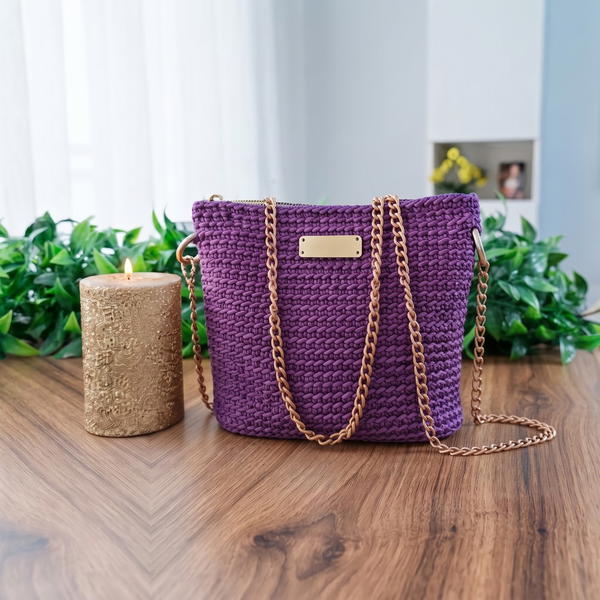
Textured Macramé Tote Bag Pattern
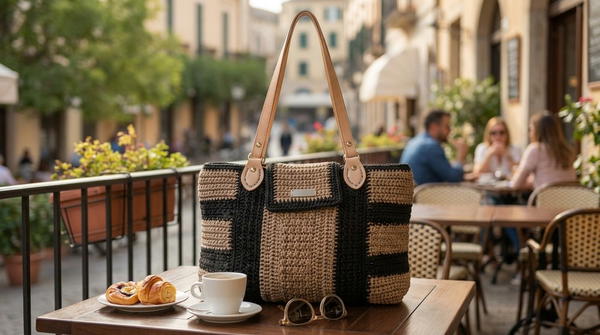
This large, structured macramé tote bag combines bold texture with a clean silhouette. Alternating slip stitch and single crochet panels framed by double crochet sections create a modern striped effect. The bag is spacious, sturdy, and suitable for daily use, beach trips, or shopping. It can be worked with polyester macramé, paper yarn, or raffia for different looks, and finished with a purchased handle, lining, and magnetic closure for a professional result.
Skill Level
Intermediate
The pattern involves consistent stitch patterning (alternating slip stitch and single crochet), color changes, shaping of a base and gusset, and seaming. A confident beginner familiar with basic stitches and careful counting can also attempt it.
Materials
- Yarn
- Main yarn A: 2 mm macramé cord (e.g., Hobi Trend Macrome), shade of your choice
- Contrast yarn B: 1.4 mm macramé cord (e.g., Eliza Tekstil Macrome), black or another contrasting color
- Hook
- 3.5 mm crochet hook (Tulip brand, or similar ergonomic hook)
- Notions
- Magnetic button(s) for closure
- Optional fishing line thread (transparent) for sewing magnetic button
- Purchased bag handles from haberdashery
- Optional lining fabric
- Tools
- Scissors
- Yarn needle
- Lighter or heat tool (for carefully sealing polyester cord ends)
- Stitch markers (optional, for marking sections and sides)
Special Stitches Used
- Slip Stitch (sl st)
Insert hook into stitch, yarn over, pull through stitch and loop on hook in one motion. - Single Crochet (sc)
Insert hook into stitch, yarn over, pull up a loop, yarn over and pull through both loops. - Double Crochet (dc)
Yarn over, insert hook into stitch, yarn over, pull up a loop (3 loops on hook), yarn over, pull through 2 loops, yarn over, pull through remaining 2 loops.
All pattern texture is created by alternating sl st and sc in rows, and by framing these panels with dc sections.
Stitch Abbreviations
- ch – chain
- sl st – slip stitch
- sc – single crochet
- dc – double crochet
Useful Tips
- Maintain even tension: slip stitches can become too tight and distort the fabric; work them loosely.
- Always begin pattern rows by matching stitch types: slip stitch where there was a slip stitch, single crochet where there was a single crochet.
- Count rows in “ridges”: two rows of sl st/sc together appear as one textured ridge. This helps track the required stripe counts.
- When changing colors, secure the new yarn with a chain, and cut the old yarn with a tail long enough to weave in and seal.
- Polyester macramé can be gently melted at cut ends to prevent fraying; use care and keep away from the main fabric.
Complete Pattern
Main Panel (Black Yarn – First Strip)
- Foundation:
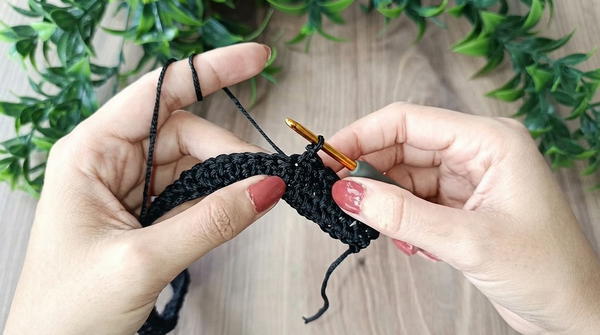
- Ch 100.
- Starting in the 3rd ch from hook, work 1 dc in each ch across.
- You will have 99 dc at the end of the row.
- Row 2 (Pattern Setup – Black):
- Ch 1, turn.
- First stitch: into the first dc, work 1 sl st.
- Next stitch: into the second dc, work 1 sc (pull all three loops through at once as described).
- Continue across:
- 1 sl st in next dc,
- 1 sc in next dc,
- repeat sl st, sc to the end of the row.
- End with sl st.
- Row 3 (Pattern Repeat – Black):
- Ch 1, turn.
- Work sl st into each previous sl st and sc into each previous sc.
- Maintain the sl st, sc sequence across.
- Rows 4–7 (Pattern – Black):
- Repeat Row 3 until you have 6 rows of the pattern total (they appear as 3 ridges).
- Always begin with a slip stitch where you ended with a slip stitch, followed by single crochet.
- Row 8 (All sc – Black):
- Ch 1, turn.
- Work 1 sc into each stitch across the row (over both previous sl st and sc stitches).
Middle Color Panel (Cream/Colored Yarn)
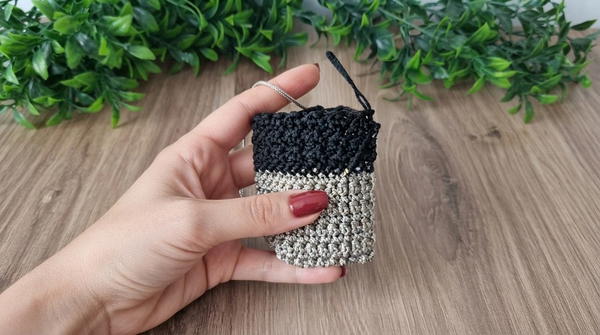
- Row 9 (Change Color to Yarn A):
- Drop black yarn, join colored yarn with ch 1 and turn.
- Work 1 sc in each stitch across.
- Row 10 (dc – Color):
- Ch 2, turn (do not count these chains as a dc).
- Starting in the first sc, work 1 dc in each stitch across.
- Row 11 (dc – Color):
- Ch 2, turn, again not counted as dc.
- Work 1 dc in each dc across.
- Row 12 (sc – Color):
- Ch 1, turn.
- Work 1 sc in each stitch across.
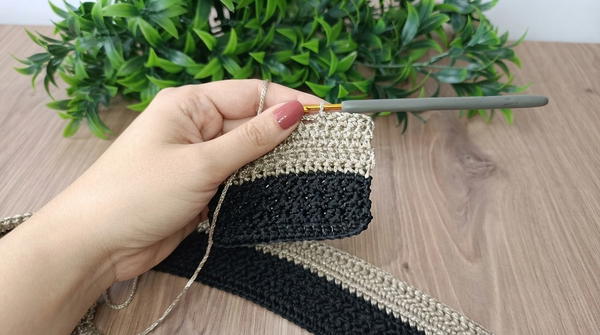
- Row 13 (Pattern Setup – Color):
- Ch 1, turn.
- First stitch: 1 sl st in first sc.
- Second stitch: 1 sc in next sc.
- Alternate sl st, sc across.
- Rows 14–23 (Pattern – Color):
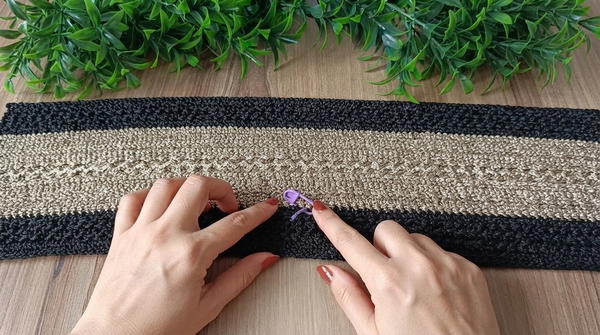
- Ch 1, turn each row.
- Work sl st where there was sl st, sc where there was sc.
- Continue until you have 10 rows total (1 setup + 9 repeats), forming 5 ridges.
- Row 24 (sc – Color):
- Ch 1, turn.
- Work 1 sc in each stitch across.
- Row 25 (sc – Color):
- Ch 1, turn.
- Work 1 sc in each stitch across.
- Row 26 (dc – Color):
- Ch 2, turn (do not count as dc).
- Work 1 dc in each stitch across.
- Row 27 (dc – Color):
- Ch 2, turn.
- Work 1 dc in each dc across.
- Row 28 (sc – Color):
- Ch 1, turn.
- Work 1 sc in each stitch across.
Second Black Pattern Strip (Top Black Panel)
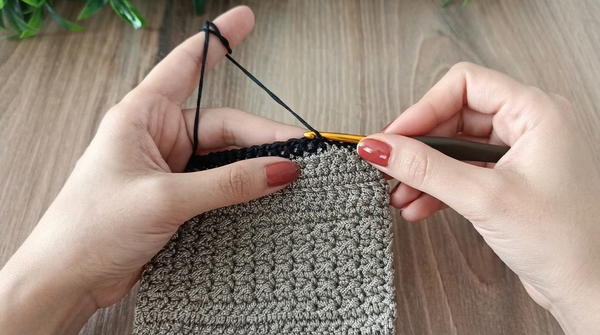
- Row 29 (Change to Black – sc):
- Join black yarn with ch 1, turn.
- Work 1 sc in each stitch across.
- Row 30 (Pattern Setup – Black):
- Ch 1, turn.
- Work 1 sl st in first sc, then 1 sc in next sc, and alternate sl st, sc to the end.
- Rows 31–36 (Pattern – Black):
- Ch 1, turn each row.
- Work sl st over sl st, sc over sc.
- Continue until you have 6 rows of pattern (3 ridges).
- Row 37 (dc – Color or Black, Final Frame Row):
- Change back to cream (color) if desired for symmetry.
- Join yarn with ch 1–2, turn.
- Work 1 dc in each stitch across.
- At this point you have a large rectangle consisting of alternating black texture strips and cream double crochet sections.
Base Panel (Separate Piece)
- Foundation:
- Ch 18.
- Row 1:
- Starting in 2nd ch from hook, work 17 sc.
- Ch 1, turn.
- Rows 2–8:
- Work 17 sc in each row.
- You now have 8 rows of sc forming a small rectangle (the bag base).
Joining Base to Main Panel and Side Gusset
The bag body is divided into three sections along the 99 stitches: 41 stitches for front, 17 stitches for base, 41 stitches for back.
- From the last dc row of the large rectangle, mark:
- First 41 stitches (front side),
- Next 17 stitches (base attachment zone),
- Last 41 stitches (back side).
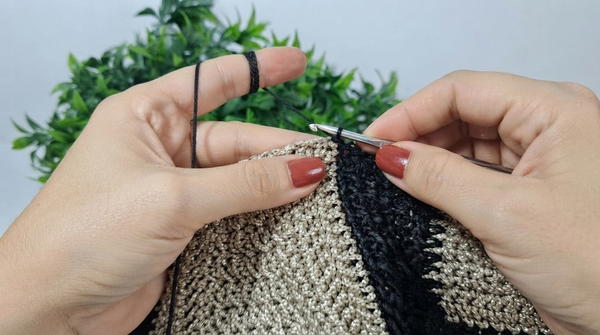 Attach Base:
- Join yarn to one short edge of the base rectangle.
- Work sc along the edge of the base while simultaneously working into the 17 marked stitches on the main panel, working around to form the gusset.
- For the gusset sides, work sc evenly along the side edges, increasing in the corners as needed to avoid pulling.
- Continue to build several rows of sc around this base to form the sides of the bag, maintaining approximately 33 sc per round (as counted in the transcription) and keeping numbers consistent.
Side Seaming
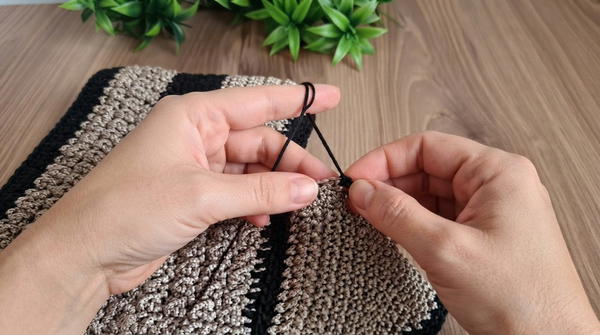
- Fold the large rectangle so that the right side (flat dc side) is facing outward once turned; sew wrong sides together.
- Use a yarn needle and matching yarn:
- Pick up two loops (“wings”) from one edge and two loops from the opposite edge.
- Pull yarn through and repeat along the entire side.
- Ensure stitch counts match so the side seam is straight.
- Repeat for the other side of the bag.
- After seaming, turn the bag right side out.
Top Edge and Slip Stitch Border
- With black yarn, join at the top opening of the bag.
- Work 1 round of sc around the entire mouth, placing:
- 2 sc around each dc post where needed
- 1 sc in each stitch along straight sections.
- Join with sl st to first sc, ch 1.
- Work 1 round of sl st in back loop only around the mouth:
- Insert hook into back loop of each sc, sl st.
- Finish at marker, cut yarn, weave in and seal ends.
Lid/Flap
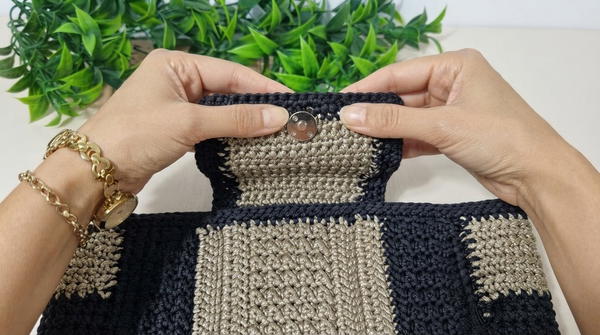
- With cream yarn, join at the chosen central top area (approximately 15 stitches wide).
- Foundation Row (Flap):
- Work 15 sc across the selected top edge.
- Ch 1, turn.
- Rows 2–18 (Flap Growth):
- Work 1 sc in each sc, back and forth.
- After 18 rows, cut cream yarn.
- Border with Black Yarn and Shaping:
- Join black yarn along flap edge.
- Work 1 sc in each row-end, placing increases at the flap corners:
- At the very top corner, work 3 sc in the same stitch to round the corner.
- Repeat symmetrical increases at both top corners for a squared/rounded flap.
- At the base of the flap, attach with sl sts to the black stripe on the bag body, securing flap to the bag while maintaining stitch count.
- Work several rows of sc on the flap edge, repeating 3-sc increases at the center row of the flap to maintain the shape.
- Finish with a final row of sc, connect again at the side with sl st, cut yarn, and weave in.
Assembly and Sizing
- Approximate Dimensions (based on transcription):
- Width of bag (flat): around 43 cm.
- Height of bag body (excluding flap): large tote height (approximately 30–35 cm), depending on yarn and tension.
- Base width: 17 sc wide, 8 rows deep, forming a sturdily supported bottom.
- Attach magnetic button(s) centered beneath the flap and on the front panel using fishing line thread or matching sewing thread.
- Attach purchased handles at the top using the manufacturer’s instructions or by sewing through reinforced points on the bag.
Conclusion
This macramé tote bag pattern provides a robust, stylish accessory with a strong structural base, textured sides, and a practical flap closure. The interplay between slip stitches, single crochets, and double crochets creates a visually appealing striped fabric that is well-suited to macramé cord, raffia, or paper yarn. With the addition of lining, magnetic closures, and purchased handles, the finished bag presents a refined, durable piece that can be tailored in size and color, making it a versatile project for enhancing any handmade wardrobe.