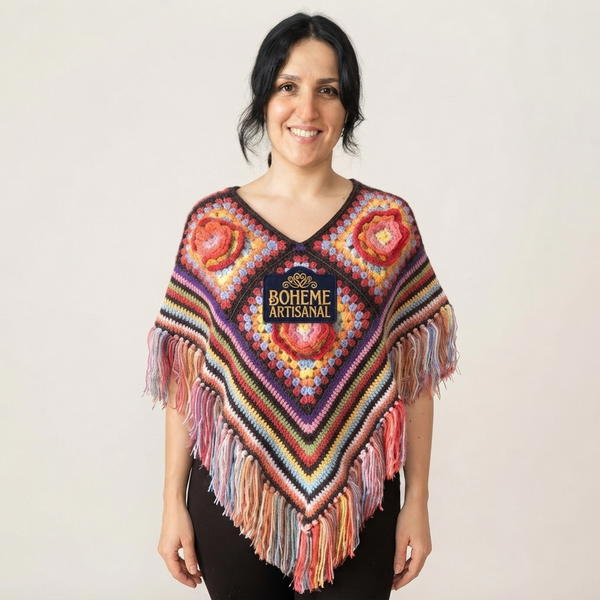
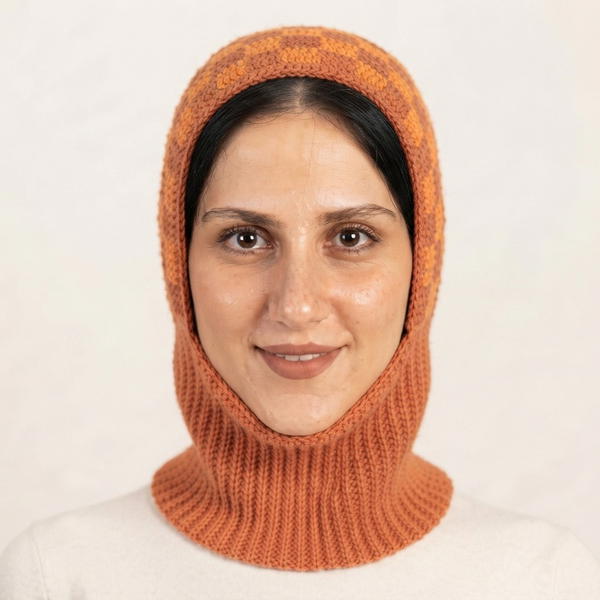
Make your spring wardrobe pop by crocheting this easy-to-follow Free Crochet SPRING SWEATER Pattern perfect for mild weather.
Gülşah Özcan Filiz has shared an easy and clear way to make a lovely, comfortable sweater perfect for spring days when the weather is warming up but still needs a light cover. This sweater uses small square pieces with a special flower design called the African violet motif, joined carefully to create a beautiful and balanced shape that fits well.
Free Crochet Spring Sweater Pattern – Perfect for Mild Weather
The pattern involves making each square separately, then joining them with simple stitches like single crochet to make the front, back, and sleeves. The size can be easily changed by adding or removing these square pieces, letting anyone adjust the sweater to fit well.

This sweater is great for wearing on fresh spring mornings or cool evenings because the yarn used is soft cotton, which feels nice on the skin and allows air to flow. Its most attractive feature is how the small squares with flower designs come together, creating a charming, classic look that is also modern and stylish. The square shapes give the sweater a neat structure but also enough flexibility for comfort. The edges and collar are made with smooth, ribbed stitches that add a fine finish and keep the sweater looking polished.

Crochet African Flower Motif Sweater Pattern
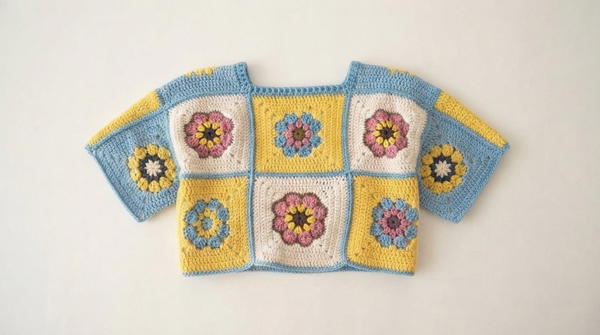
This pattern constructs a wearable pullover sweater using twenty African Flower motifs shaped into squares and joined together to form a complete garment with a defined neckline, armhole openings, and finished edges. Each motif is built from the African Flower base (referenced separately in the pattern video description) and then squared off through multiple rounds of double crochet clusters with corner increases and a final single crochet border. The motifs are arranged in a flat layout that accounts for neckline placement, shoulder positioning, and armhole spacing before being joined horizontally and then vertically into a single continuous fabric panel. The finished sweater has a relaxed and textured surface quality that reflects the organic geometry of the African Flower motif, making it a distinctive and handcrafted garment suitable for casual everyday wear in warmer seasonal conditions.

Skill Level: Intermediate — This pattern is suited to crocheters who are comfortable working foundation motifs, executing post stitch ribbing, and assembling flat motif panels into a three-dimensional garment shape. Prior experience with motif joining and basic garment construction is recommended before beginning this project.
Materials
- Yarn: Cotton yarn in the desired color or color combination (exact yardage will vary based on motif size and personal gauge; ensure sufficient quantity for 20 complete motifs plus finishing rounds)
- Hook: 3.5mm crochet hook
- Tools:
- Tapestry needle for weaving in ends
- Scissors
- Measuring tape
- Stitch markers
Special Stitches
- African Flower Motif: A hexagonal or circular floral crochet motif worked from the center outward in rounds, forming the decorative base of each square used throughout this sweater pattern. The full African Flower motif instructions are provided separately in the video description link.
- Triple Crochet: Yarn over the hook twice before inserting into the stitch, then draw through loops in stages to produce a tall stitch used at the corners and transition points when squaring off the African Flower motif.
- Front Post Double Crochet (FPdc): Worked by inserting the hook around the post of the stitch below from the front side, creating a raised vertical ridge on the right side of the fabric used in the ribbing rounds.
- Back Post Double Crochet (BPdc): Worked by inserting the hook around the post of the stitch below from the back side, creating a recessed vertical channel on the right side of the fabric used alternately with FPdc to produce the ribbed texture.
- Corner Increase: Worked as 2 dc, ch 1, 2 dc all into the same corner chain space, establishing and maintaining the square shape of each motif through all growth rounds.
- Single Crochet Join: A joining technique worked by inserting the hook through the back loops only of two corresponding stitches on adjacent motif edges simultaneously and working a sc through both layers to produce a flat and secure seam.
Stitch Abbreviations
- ch — chain
- sl st — slip stitch
- sc — single crochet
- hdc — half-double crochet
- dc — double crochet
- tr — triple crochet
- FPdc — front post double crochet
- BPdc — back post double crochet
- sp — space
- st(s) — stitch(es)
- BL — back loop
- rep — repeat
- inc — corner increase
Useful Tips
- Complete the African Flower motif base before beginning the squaring rounds — ensure the flower is fully finished and fastened off before joining with the squaring yarn color.
- Count stitches carefully at the end of every squaring round to confirm all four corners have been correctly increased and the stitch count along each side is growing evenly before proceeding to the next round.
- Use stitch markers to identify the four corner chain spaces during the squaring rounds, particularly in the first squaring round where the transition from the circular flower shape to the square outline can make corner placement less obvious.
- Block all twenty motifs to the same dimensions before beginning assembly to ensure that joined edges align cleanly and the finished sweater panel lies flat without puckering or distortion.
- When planning the motif layout for the front panel, physically arrange all motifs on a flat surface and mark the neckline, shoulder, and armhole positions with stitch markers or removable tape before committing to any joins.
- Always work the single crochet join through the back loops only of both corresponding edge stitches — inserting through both loops will create a bulkier seam that may distort the finished garment surface.
- Work all horizontal joins across the full motif layout before beginning any vertical joins to maintain consistent alignment and prevent the panel from pulling out of square during assembly.
Pattern Instructions
African Flower Motif Base
- Complete the African Flower motif following the separate instructions linked in the video description.
- The finished flower motif should have defined long stitches around the outer edge that will serve as the foundation for the squaring rounds.
- Fasten off the flower motif and join the squaring yarn color with a ch into any long outer stitch of the flower to begin the first squaring round.
Squaring Round 1 — Establishing the Square Shape
Begin at any long stitch on the outer edge of the completed flower motif.
- Join yarn with a ch into any long tr stitch on the outer flower edge.
- Work 1 tr into the same long stitch.
- Work 1 dc into the next stitch.
- Work 1 dc into the following stitch.
- Work 1 hdc into the next stitch.
- Work 4 sc across the next four stitches along the side edge.
- At the corner gap, work 1 tr, ch 1, 1 tr into the corner space (corner established).
- Work 4 sc across the next four stitches along the following side edge.
- Work 1 hdc into the next stitch.
- Work 1 dc into the following stitch.
- Work 1 dc into the next stitch.
- Work 1 tr into the next long stitch.
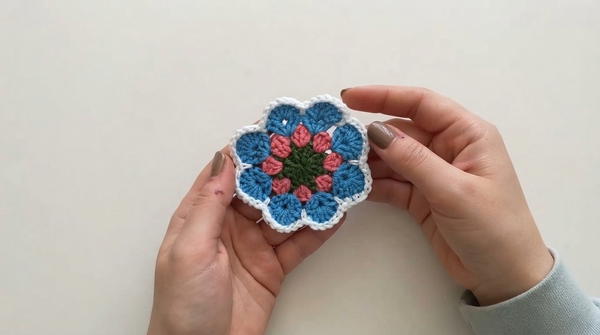
- Rep the sequence of 4 sc, corner (tr, ch 1, tr), 4 sc, hdc, dc, dc, tr for each remaining side and corner around the full motif.
- Sl st to join at the top of the beginning stitch.
- Fasten off or continue with the next round in a new color as desired.
- Total: 4 defined corners with ch-1 sp at each corner and transitional stitches along each side
Squaring Rounds 2 through 4 — Growing the Square
Work Rounds 2, 3, and 4 consecutively using the same structure.
- Join yarn into any corner ch-1 sp.
- Ch 3 (counts as first dc).
- Work 1 dc into the same sp.
- Ch 1.
- Work 2 dc into the same sp (first corner complete).
- Work 1 dc into every st along the side edge until reaching the next corner sp.
- At the next corner ch-1 sp, work 2 dc, ch 1, 2 dc (corner increase).
- Work 1 dc into every st along the following side edge.
- Rep the corner increase and dc into every side st sequence for all four sides.
- Sl st to join at the top of the beginning ch-3 at the end of each round.
- Change yarn color between rounds as desired.
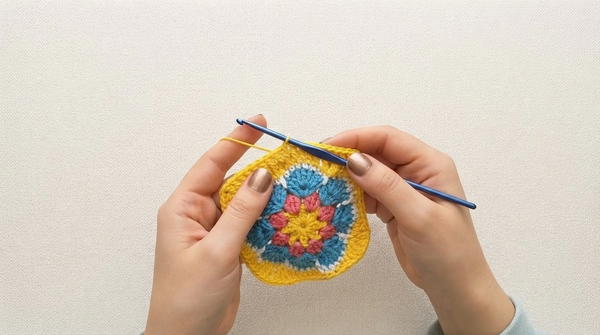
- Rep the same round structure for all three growth rounds (Rounds 2, 3, and 4) without any variation — corner increases at every corner sp and single dc into every st along all side edges.
- Total after Round 4: 4 complete growth rounds on top of the squaring foundation with a clearly defined square shape
Final Border Round — Single Crochet Edging
- Join yarn into any corner ch-1 sp.
- Work sc into every st around the entire outer edge of the motif.
- At every corner ch-1 sp, work 2 sc into the space (corner increase maintained).
- Work 1 sc into every st along each side edge between corner spaces.
- Rep the 2 sc at corner sp and 1 sc into every side st sequence around all four sides.
- Sl st to join at the end of the border round.
- Fasten off and weave in all ends.
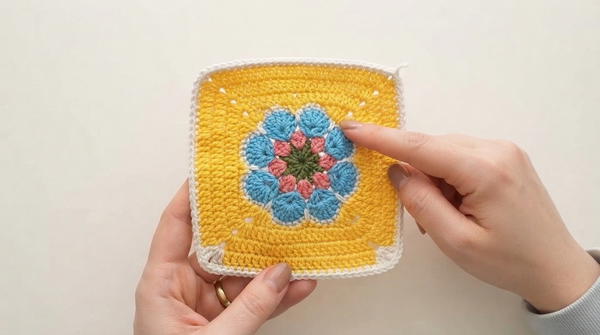
- Rep the full motif construction process for all 20 motifs total.
- Total per completed motif: African Flower base + 1 squaring round + 3 growth rounds + 1 sc border round
Assembly and Sizing
Motif Layout Planning
- Arrange all 20 motifs flat on a work surface in the planned sweater layout before beginning any joining.
- Place 5 motifs across the front panel in a horizontal row.
- Identify and mark the center motifs that will be left partially unjoined to create the neckline opening at the center top of the front panel.
- Mark the shoulder positions on the outer top edges of the front panel layout.
- Mark the armhole positions on the side edges of the panel where sleeve openings will remain.
- Confirm the full layout is correct and symmetrical before proceeding to joining.
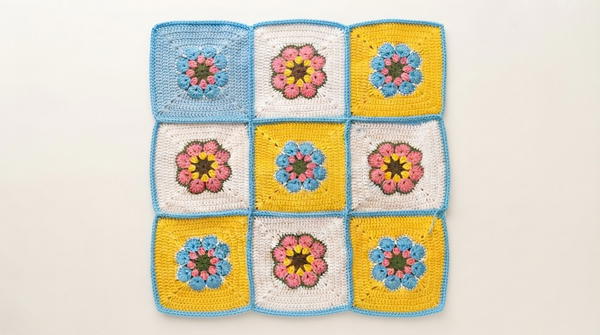
Horizontal Joining
- Hold two adjacent motifs with their edges touching and right sides facing upward.
- Join yarn with a sl st at the starting corner of the shared edge.
- Insert the hook through the back loop only of the corresponding st on the first motif and the back loop only of the corresponding st on the second motif simultaneously.
- Work 1 sc through both back loops to join.
- Rep working 1 sc through both corresponding back loops across the full length of the shared edge.
- Fasten off at the end of each joined edge and weave in ends.
- Rep the horizontal joining process across all motifs in the same row until all horizontal seams within each row are complete.
- Complete all horizontal joins across the entire layout before beginning any vertical joins.
Vertical Joining
- After all horizontal joins are complete, join corresponding rows of motifs together along their horizontal shared edges using the same sc through back loops only method.
- Work vertically across all row joins until the full front and back panels are completely assembled.
- Leave the designated neckline opening unjoined at the center top edge of the front panel.
- Leave the designated armhole openings unjoined at the appropriate side edge positions on both panels.
Side Seam Joining
- Fold the assembled panel at the shoulder line so the front and back panels align with right sides facing outward.
- Join yarn at the armpit point on one side seam.
- Work sc through the corresponding edge stitches of the front and back panels simultaneously from the armpit point downward to the bottom hem edge.
- Fasten off and weave in ends.
- Rep on the opposite side seam.
Neckline Finishing
- Join yarn at any point around the neckline opening edge.
- Round 1: Work 1 sc into every st around the full neckline opening.
- Sl st to join at the end of Round 1.
- Round 2: Work 1 dc into every st around the neckline opening.
- Sl st to join at the end of Round 2.
- Round 3 onward — Ribbing: Work alternating FPdc and BPdc around the full neckline opening, working each post stitch around the corresponding dc post of the previous round.
- Rep the alternating FPdc, BPdc sequence for as many ribbing rounds as desired to achieve the preferred neckline depth and structure.
- Sl st to join at the end of each ribbing round.
- Fasten off and weave in ends after the final ribbing round.
Bottom Hem and Sleeve Edge Finishing
- Join yarn at any point along the bottom hem edge of the assembled sweater.
- Work 1 sc into every st around the full bottom hem opening.
- Sl st to join and fasten off.
- Rep the single sc round along each sleeve opening edge (armhole edge) on both sides.
- Fasten off and weave in all remaining ends throughout the completed garment.
Sizing Reference
- The sweater as written uses 20 motifs total arranged across a standard adult size layout.
- To increase the size, add additional rounds to each individual motif before assembly or add extra motifs to the width of each panel row.
- To decrease the size, reduce the number of growth rounds per motif by one or two rounds while maintaining the 2-round difference proportionally across all motifs.
- Armhole size is determined by the number of motifs left unjoined along the side edges — leaving more motifs unjoined creates a larger armhole opening.
Conclusion
This African Flower motif sweater pattern brings together the decorative richness of a traditional crochet motif with a practical and wearable garment structure that showcases the versatility of modular crochet construction. The transition from the circular flower center through the squared border rounds produces a motif with considerable visual depth and texture, and the consistent joining method used throughout the assembly process ensures that the finished panel has a clean and uniform surface quality on both the interior and exterior of the completed sweater. The ribbed neckline treatment adds a professional and polished finishing detail that elevates the overall appearance of the garment beyond what a simple edging round would achieve. The adaptable sizing system built into the motif count and round count gives this pattern significant flexibility across a wide range of body measurements and personal style preferences.