Mint Design Blog


Stay cozy and stylish with our free crochet granny motif poncho pattern perfect for adding a handmade touch to your fall and winter outfits.
Are you looking for a beautiful and practical clothing piece to elevate your wardrobe? This poncho pattern is a great option for anyone who loves unique and colorful designs. Shared in detailed tutorials by Gülşah Özcan Filiz on her YouTube channel, this pattern offers an easy and enjoyable way to create something stylish and comfortable.
Quick and Easy Granny Motif Poncho – Free Crochet Pattern & Tutorial
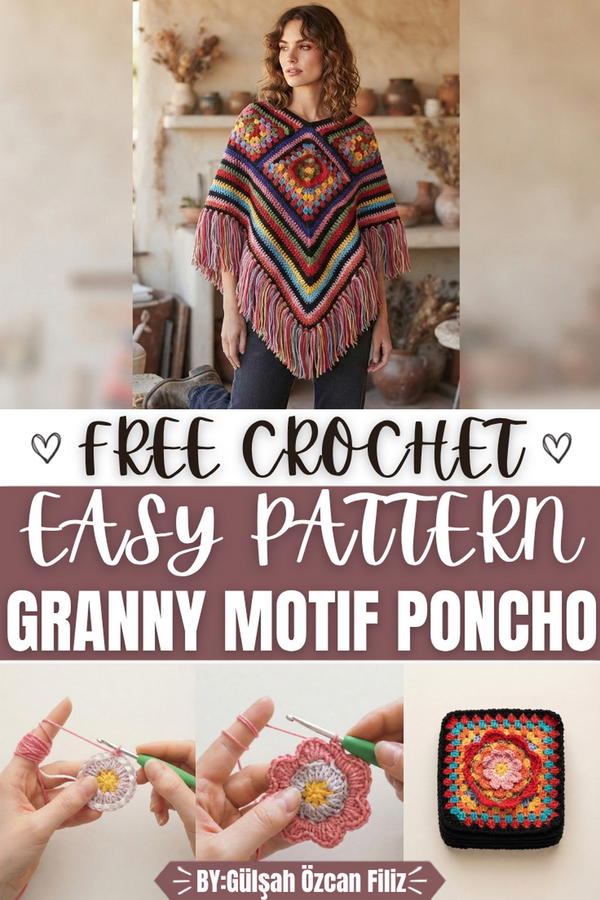
The design features a collection of classic granny motifs that are joined together seamlessly to form a flowing and attractive shape. These motifs, with their vibrant colors and intricate details, make the poncho eye-catching and full of character. Its lightweight and loose-fitting structure not only provides comfort but also makes it a perfect layering piece for any occasion, from relaxed outings to more formal events.
One of the reasons this pattern stands out is its simplicity and versatility. With an organized layout, it is equally suitable for beginners and those who want a quick yet artistic project. The ability to customize the colors and layout of the motifs ensures every poncho is unique.
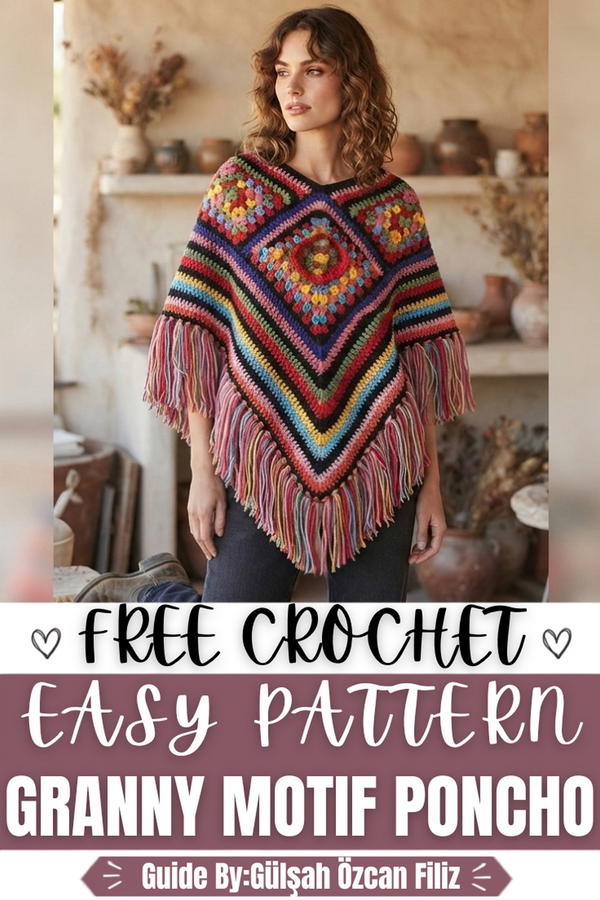
Crochet Poncho Pattern with Motif Design
This crochet poncho is a beautiful, timeless design made by assembling six individual motifs, which are then joined together to form the structure of the piece. The motifs feature intricate details, layered textures, and are squared off to ensure uniform assembly. With tassels and a simple neckline for finishing, this poncho is a versatile addition to your wardrobe, offering both functionality and style.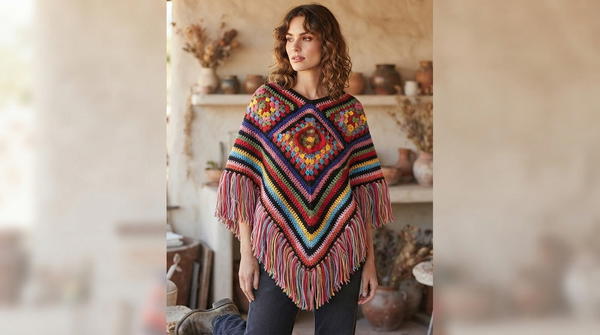
Skill Level
This pattern is aimed at intermediate crocheters. The motif design involves creating multiple petal layers, arches, and textured details, requiring familiarity with joining motif pieces and working in the round.
Materials Needed
- Yarn: Acrylic yarn or your choice of yarn in various colors (approximately 350-400g depending on the size).
- Crochet Hook: 4mm crochet hook, or size suitable for your chosen yarn.
- Yarn Needle: For weaving in ends and sewing motifs together.
- Book or sturdy surface: To create consistent-length tassels.
Special Techniques Used
- Magic Ring: A circular foundation that keeps the center tight and secure.
- Cluster Stitch: A group of stitches worked together in the same space to create texture and volume.
- Puff Stitch: A decorative stitch with additional loops pulled up to create puffed texture.
- Granny-Square Style Rounds: Simple and structured double crochet rounds used for squaring.
Stitch Abbreviations
- MC: Magic Circle (Ring)
- SC: Single Crochet
- HDC: Half Double Crochet
- DC: Double Crochet
- TC: Triple Crochet
- CH: Chain Stitch
- SL ST: Slip Stitch
Useful Tips
- Maintain consistent tension throughout, especially when working the motif layers and arches.
- Block motifs before assembly to ensure consistent sizing and smooth corners.
- Use contrasting yarn for tassels or neckline to enhance the overall look.
- Stitch markers may be helpful to mark corners or as you transition between rounds.
Detailed Pattern
1. Motif Creation (Make 6)
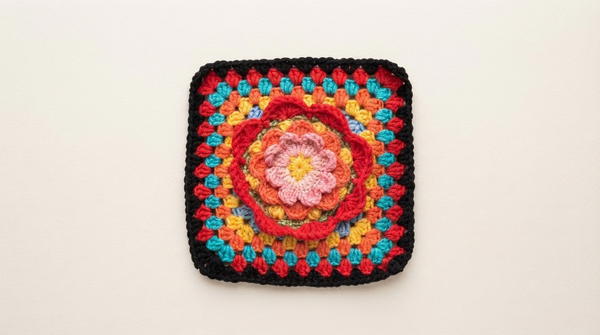
Each motif measures approximately 20cm after completion.
Center:
- Round 1:
Begin with a magic ring. Chain 2 (counts as the first DC) and work 7 DC into the ring. (Total: 8 stitches). Secure with a SL ST.
Row 2 (Clusters):
- In the space between each DC from Round 1, work a cluster of 3 DC. Repeat this step for a total of 8 clusters. End with a SL ST.
Row 3 (Arches):
- Slip stitch into the middle of a cluster, then chain 3. Repeat this to create 8 arches around the motif, joining each to the space between clusters with a SL ST.
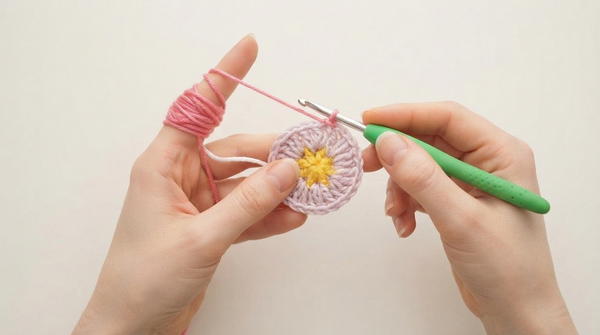
Row 4 (1st Petal Layer):
- Into each arch, work the following sequence:
1 SC, 1 HDC, 3 DC, 1 HDC, 1 SC.
Row 5 (Back Arches):
- Work behind the first petal layer. Create 8 arches by chaining 3 and anchoring them with SCs between each petal.
Row 6 (2nd Petal Layer):
- Into each new back arch, repeat the petal sequence:
1 SC, 1 HDC, 3 DC, 1 HDC, 1 SC.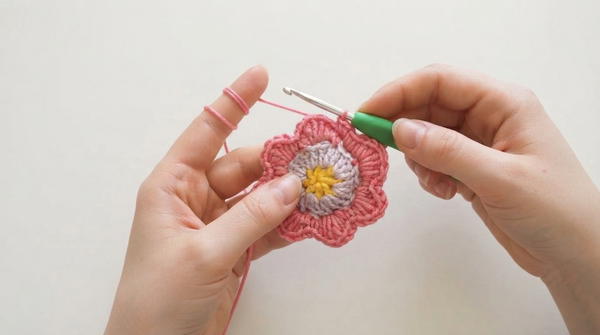
Row 7 (Preparation for Texture):
- Work 8 arches again behind the petals by chaining 3, anchoring them into the spaces between petals with SC.
Row 8 (Double Crochets):
- Work 5 DC in each of the 8 arches created in the previous round.
Row 9 (Puff Stitches):
- Work a puff stitch cluster (5 loops) using each set of 5 double crochets. Between clusters, work 4 SC.
Row 10 (Increases):
- Begin forming even bases by skipping the puff stitch and working:
- 2 SC in the second stitch, then 4 SC across.
Row 11 (Corner Setup):
- Form 8 groups of 8 TC, each separated by SC, to start squaring the motif.
Row 12 (Back Arches):
- Form new arches behind the square shape using 3 chains, secured with SC.
Row 13 (Squaring the Edges):
- In the corner arches, work:
3 TCs, 2 CH, 3 TCs. - Between corners, alternate with groups of 3 DC and 3 HDC.
Rows 14-18:
- Continue working the motif in granny-square style rounds for additional rows, creating corners with:
3 DC, 2 CH, 3 DC.
2. Assembly and Sizing
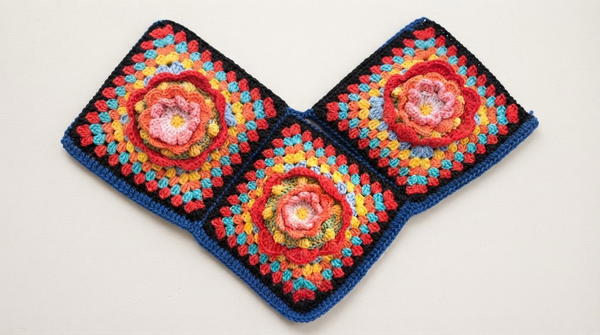
Once all six motifs are complete, assemble the poncho into two main panels with three motifs each.
Assembly of Pieces:
- Position the motifs with triangle sides of the square motifs facing upward.
- Sew the side motifs to the central one using corresponding stitches.
- Complete two large panels for the front and back by joining stitches in rows.
Sewing:
- Align the edges of the front and back panels and sew them together, leaving an opening at the top for the neck (approximately 20-25cm, depending on preference).
- Sew the side edges of the panels together to form the body.
3. Main Body
The body of the poncho is built around the motifs.
Row 1:
- Attach yarn at the corner space. In corners, work 3 DC. Make 1 DC in every stitch across straight edges and corners. Join with a SL ST.
Subsequent Rows:
- In the corners, work: 3 DC, 2 CH, 3 DC. Across the straight edges, work 1 DC in every gap.
- Continue adding rows in this manner until you reach 12 rows or your desired length.
4. Tassels
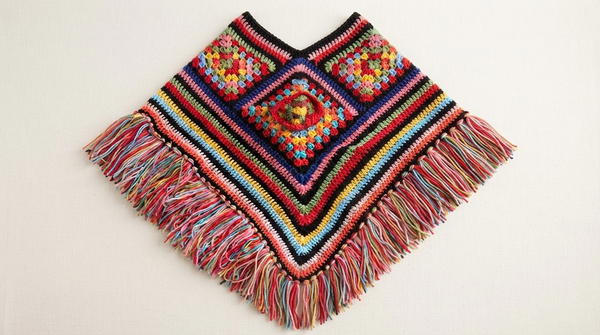
For a decorative and functional trim, add tassels to the edge.
- Wrap yarn around a book or sturdy surface for consistent lengths. Cut one end to create strands of equal size.
- Group 6 strands, fold them in half, and pull the loop through edge stitches of the poncho. Pull the ends through the loop to secure.
- Trim the tassels evenly.
5. Neckline
For a clean neckline, attach yarn to the opening and work as follows:
- Row 1: Work 1 round of SC evenly around the neck.
- Optional Row 2: Add another row in SC or switch colors for added contrast.
Conclusion
This intricate crochet poncho showcases layered motifs and rich textures while offering warmth and elegance. By carefully creating and assembling motifs, you'll produce a wearable piece of art fit for any occasion. Focus on attention to detail during motif construction and follow even tension for a polished finish.