Stitch together your new favorite sweater with this Free Crochet Granny Square Sweater Pattern combining nostalgic design and contemporary crochet fashion.
Gülşah Özcan Filiz brings a fresh and easy-to-follow guide for making a colorful and warm sweater using small square pieces linked together. This sweater is perfect for cool days, offering comfort while adding a cheerful splash of color to any outfit. The design includes 42 squares that join to fit different sizes, making it simple to adjust by adding or removing rows. Thick yarn is used, and the squares are connected with neat stitches that hold the sweater firmly while giving it a lovely texture.
Free Crochet Granny Square Sweater Pattern | Beautiful Design
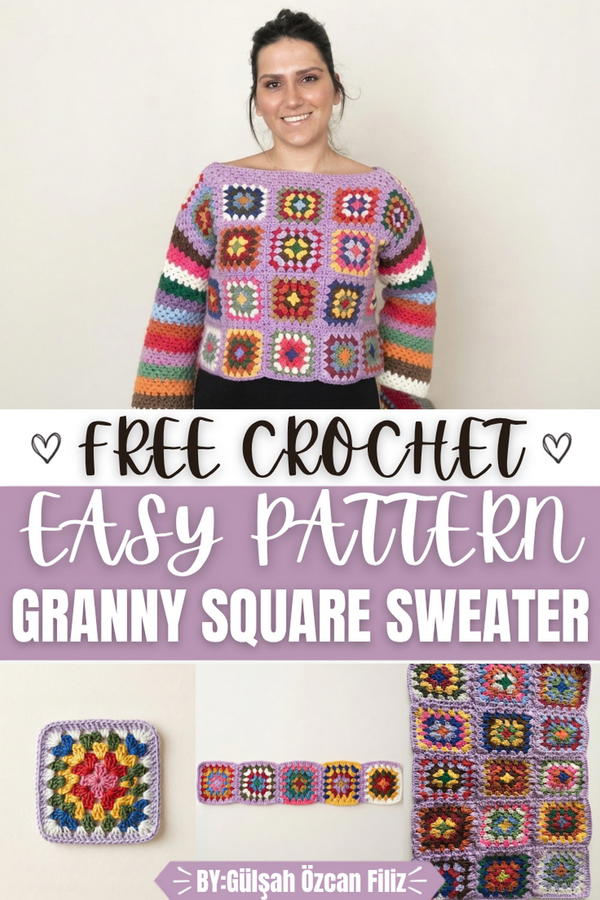
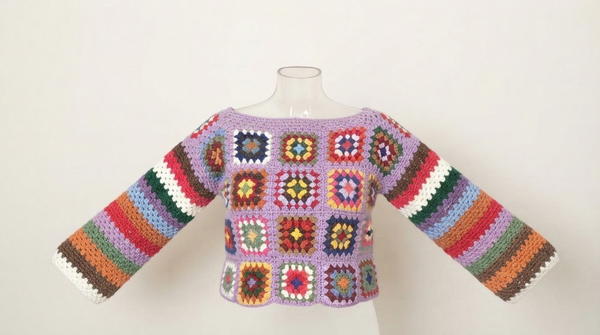
The process joins each square by linking corners and edges with double and single crochet stitches, creating a strong but soft fabric. The sweater’s neckline is wide and open, making it comfortable to wear, and the shaped armholes give freedom of movement. The collar is finished with taller stitches and color changes that add a stylish border and neat detail, enhancing the overall look. The sleeves match the body with the same colorful and sturdy links, giving the sweater a balanced and attractive shape.
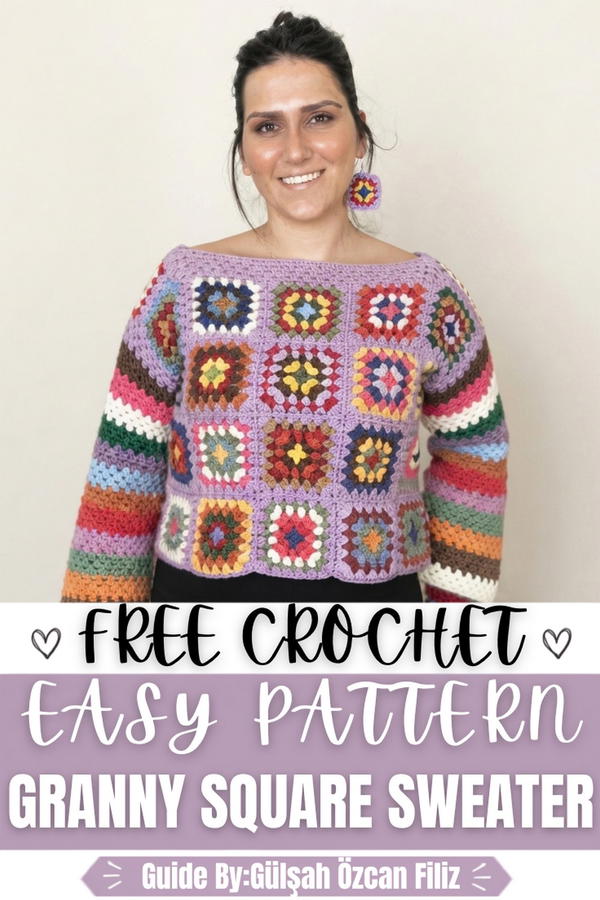
Crochet Granny Square Motif Sweater Pattern
This pattern constructs a full pullover sweater using forty-two granny square motifs arranged into front and back panels that are joined together at the sides and shoulders to form a complete and wearable garment. The motifs are worked individually using cotton yarn and then joined together using acrylic yarn in a continuous border round that connects adjacent squares simultaneously, eliminating the need for a separate seaming step. The construction follows a straightforward flat panel layout of five motifs across and four rows deep for each panel, with armhole openings left naturally by the panel dimensions and sleeve rounds worked directly into the armhole edges after the body is assembled. The finished sweater has a relaxed and textured surface with a structured collar worked in multiple rounds directly from the neckline opening, creating a clean and polished finished garment.
Skill Level: Intermediate — This pattern is suited to crocheters who are comfortable working granny square motifs independently and have some prior experience with motif joining techniques and basic garment panel construction. Familiarity with working in rounds from a joined edge will be helpful for the sleeve and collar sections.
Materials
- Yarn:
- Cotton yarn in the desired color or color combination for the individual motifs
- 100% acrylic yarn for the joining rounds, border rounds, sleeves, and collar sections
- Hook: Size appropriate to the chosen yarn weights
- Tools:
- Tapestry needle for weaving in ends and tightening armhole openings if needed
- Scissors
- Measuring tape
- Stitch markers
Special Stitches
- Hanımdilendi Granny Square Motif: The specific granny square format used throughout this sweater pattern as the primary building block for both the front and back panels, worked from the center outward in rounds
- Double Crochet Cluster: Groups of 3 dc worked consecutively into the same gap between existing clusters along the side edges of each motif, forming the primary surface texture of all joining border rounds, sleeve rounds, and collar rounds throughout the pattern
- Corner Increase: Worked as 3 dc, ch 1, 3 dc all into the same corner chain space, maintaining a defined right-angle corner at every motif corner point and preventing the fabric from pulling inward at the corners during joining
- Simultaneous Single Crochet Join: A joining method worked by inserting the hook through the current gap of the working motif border and simultaneously through the corresponding gap on the adjacent motif, then working a sc through both layers to connect two motifs without cutting yarn
- Slip Stitch Join: Used at the end of each completed round to connect the last stitch to the first stitch and close the round neatly
Stitch Abbreviations
- ch — chain
- sl st — slip stitch
- sc — single crochet
- dc — double crochet
- sp — space
- st(s) — stitch(es)
- rep — repeat
- inc — increase
Useful Tips
- Work all forty-two motifs to completion and block them to a consistent size before beginning any joining rounds — motifs that vary in size will cause the finished panel to buckle or pull out of alignment during assembly
- Use stitch markers to clearly identify and track the four corner chain spaces on each motif throughout the joining process, particularly when working simultaneous joins across long horizontal seams
- When joining panels at the side seams, always hold both pieces with right sides facing outward so that the join sits on the inside of the finished garment and keeps the exterior surface clean
- If the armhole opening appears too large after the side seams are joined, use a tapestry needle and matching yarn to stitch across a small portion of the armhole edge before beginning the sleeve rounds
- Change yarn color every four rounds during the sleeve construction to create a clean and evenly spaced stripe effect — cut and rejoin at the beginning of each new color section rather than carrying yarn up the inside
- When working the collar rounds, join yarn at the center back or center front of the neckline opening rather than at a side point to keep the color join hidden at a less visible position
- Measure the sleeve length after each completed stripe section by trying the garment on — sleeves can be extended or shortened by adjusting the total number of completed rounds before fastening off
Pattern Instructions
Section 1: Individual Motif Construction
Hanımdilendi Granny Square Motif (Make 42)
- Work the Hanımdilendi granny square motif beginning from the center and working outward in rounds
- Complete each motif fully with a finished outer edge before beginning the joining process
- Fasten off and weave in all ends on every individual motif before assembly
- Make a total of 42 motifs — enough for two full panels of 5 motifs across and 4 rows deep
Section 2: Front Panel Construction
Motif Layout
- Arrange 20 motifs in a flat layout of 5 motifs across and 4 rows deep on a flat work surface
- Confirm the layout is correct and all motifs are oriented consistently before beginning any joining rounds
- Place stitch markers at all four corner chain spaces of each motif before beginning
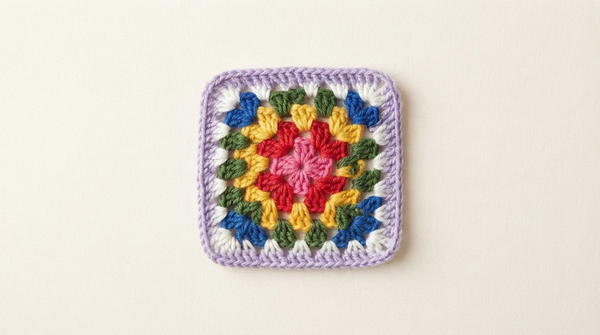
Joining Round — First Motif Border
Round 1
- Join acrylic yarn into any corner ch sp of the first motif in the layout
- Ch 3 (counts as first dc)
- Work 2 dc into the same corner sp
- Ch 1
- Work 3 dc into the same corner sp (first corner increase complete)
- Work 3 dc into every gap along the side edge moving toward the next motif in the row
- At each corner ch sp, work 3 dc, ch 1, 3 dc (corner increase)
- Work 3 dc into every gap along each side edge between corner increases
- Rep corner increases and side clusters around all four sides of the motif
- Sl st to join at the top of the beginning ch-3
Joining Motifs Horizontally
Simultaneous Join Round
- Work the border round on the first motif across the first three sides as described in Round 1
- When the fourth side of the first motif is reached (the shared side with the adjacent motif), pick up the second motif
- Work 3 dc into the current gap on the working motif border
- Insert the hook through the corresponding gap on the adjacent motif simultaneously with the current gap on the working motif
- Work 1 sc through both layers to join the two motifs at that gap point
- Work 3 dc into the next gap on the working motif
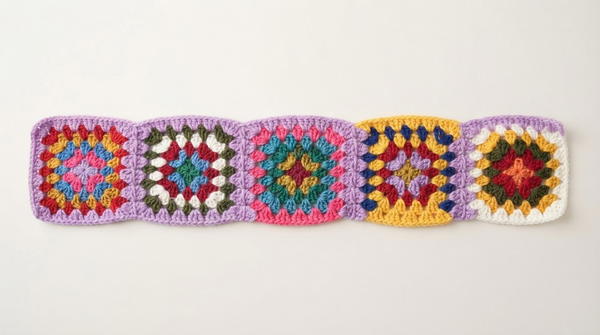
- Rep the alternating sequence of 3 dc in working motif gap and sc join through both corresponding gaps along the full shared edge
- At the shared corner point, work 3 dc, ch 1 into the corner sp of the working motif
- Insert the hook through the corresponding corner sp of the adjacent motif and work sc join
- Work 3 dc into the same corner sp of the working motif to complete the corner
- Continue the border round along the next unshared side of the working motif normally
- Rep the horizontal joining process across all five motifs in the first row
- Fasten off and weave in ends after completing each row join
Joining Motifs Vertically
Row Join Round
- Place the second row of five motifs directly below the first completed row
- Work the border round on the first motif of the second row across the three unshared sides following the same Round 1 border structure
- When the top edge of the second row motif (shared with the bottom edge of the first row motif directly above) is reached, work the simultaneous sc join through corresponding gaps on both motifs across the full shared edge
- Work 3 dc, ch 1, 3 dc at corner increases and 3 dc into every gap along all side edges, working the sc join wherever a shared edge with an already-completed row motif is encountered
- Continue joining all five motifs in the second row to the five motifs in the first row using this method
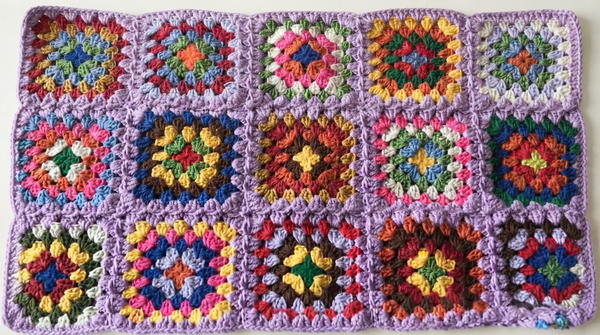
- Rep the vertical joining process for rows three and four until all twenty motifs of the front panel are completely joined into a single flat panel
- Fasten off and weave in all ends throughout the front panel
Section 3: Back Panel Construction
- Rep the entire front panel construction process using the remaining 20 motifs to produce an identical back panel of 5 motifs across and 4 rows deep
- Follow exactly the same horizontal and vertical joining sequence used for the front panel
- Fasten off and weave in all ends throughout the back panel
Section 4: Panel Assembly
Aligning Front and Back Panels
- Place the front panel and back panel together with right sides facing outward so both panels are visible from the exterior of the garment
- Align all edges carefully so the motif corners and side edges match precisely before beginning any panel joining
- Use stitch markers to clearly identify the top two motifs on each side edge of both panels — these motifs will remain unjoined on the side seams to create the armhole openings
Side Seam Joining
Side Seam Round
- Join acrylic yarn at the bottom corner of one side edge
- Work 3 dc into the first gap of the front panel side edge
- Insert the hook through the corresponding gap on the back panel side edge simultaneously
- Work sc join through both layers
- Rep the alternating 3 dc and sc join sequence up the side seam, working from the bottom hem edge upward
- Stop joining when the third motif from the top is reached on the side edge
- Leave the top two motifs on each side completely unjoined to form the armhole opening
- Fasten off and weave in ends
- Rep on the opposite side seam in the same manner
Shoulder Joining
Shoulder Seam Round
- Join acrylic yarn at the outer shoulder edge of the front panel
- Work 3 dc into each gap along the shoulder edge of the front panel
- Work sc join through the corresponding gap on the back panel shoulder edge simultaneously
- Rep the 3 dc and sc join sequence across the shoulder width
- Leave the center top motifs unjoined to form the neckline opening
- Fasten off and weave in ends
- Rep on the opposite shoulder seam
Armhole Size Adjustment (If Needed)
- Thread a tapestry needle with matching yarn if the armhole opening appears too large after both seams are joined
- Use a simple overcast stitch or whipstitch to close a small portion of the upper armhole edge, reducing the opening to the desired size
- Fasten off the needle yarn securely and weave in ends before beginning the sleeve rounds
Section 5: Sleeve Construction
Working the Sleeve Rounds
Round 1
- Join acrylic yarn at any point around the armhole opening edge
- Work 3 dc into every gap around the full circumference of the armhole opening
- Sl st to join at the end of Round 1
Round 2
- Work 3 dc into every gap around the full round without any chains between clusters
- Sl st to join at the end of Round 2
Round 3
- Work 3 dc into every gap around the full round
- Sl st to join at the end of Round 3
Round 4
- Work 3 dc into every gap around the full round
- Sl st to join at the end of Round 4
- Cut yarn after Round 4 to complete the first color stripe section
Stripe Color Change
- Join a new yarn color at the beginning of Round 5
- Work Rounds 5 through 8 following the same 3 dc into every gap structure used in Rounds 1 through 4
- Sl st to join at the end of each round
- Cut yarn after Round 8 and join the next color to begin the following stripe
Continuing Stripe Pattern
- Rep the color change every 4 rounds to continue the striped sleeve pattern
- Work 3 dc into every gap in every round throughout all stripe sections
- Sl st to join at the end of every round
- Continue working sleeve rounds until the sleeve reaches the desired length
- Fasten off and weave in all ends after the final sleeve round
- Rep the entire sleeve construction process on the opposite armhole opening
Section 6: Neckline Collar Construction
Working the Collar Rounds
Round 1
- Join acrylic yarn at the center front or center back of the neckline opening edge
- Work 3 dc into every gap around the full circumference of the neckline opening
- Sl st to join at the end of Round 1
Round 2
- Work 3 dc into every gap around the full neckline round
- Sl st to join at the end of Round 2
Round 3
- Work 3 dc into every gap around the full neckline round
- Sl st to join at the end of Round 3
Round 4
- Work 3 dc into every gap around the full neckline round
- Sl st to join at the end of Round 4
- Fasten off after Round 4 and weave in all remaining ends throughout the completed collar
Assembly and Sizing
Panel Dimensions
- Each panel uses 5 motifs across and 4 rows deep for a standard adult fit
- The front and back panels are identical in size and construction
Sizing Adjustments
- To increase the sweater width, add one additional motif to each row of each panel and adjust the armhole spacing accordingly
- To increase the sweater length, add one additional row of motifs to the bottom of each panel before beginning the side seam joining
- Sleeve length is fully adjustable by adding or removing stripe sections — each four-round stripe section adds a consistent amount of length regardless of yarn weight
- Armhole size is determined directly by the number of motifs left unjoined on the side seams — leaving three motifs unjoined instead of two will produce a wider and deeper armhole opening
- Neckline opening size is determined by the number of top-edge motifs left unjoined at the shoulder — adjust the number of joined shoulder motifs on each side to widen or narrow the collar opening before beginning the collar rounds
Motif Count Reference
- Total motifs required: 42 motifs
- Front panel: 20 motifs (5 across × 4 rows)
- Back panel: 20 motifs (5 across × 4 rows)
- Remaining 2 motifs can be used for sizing adjustments or set aside as spare motifs
Conclusion
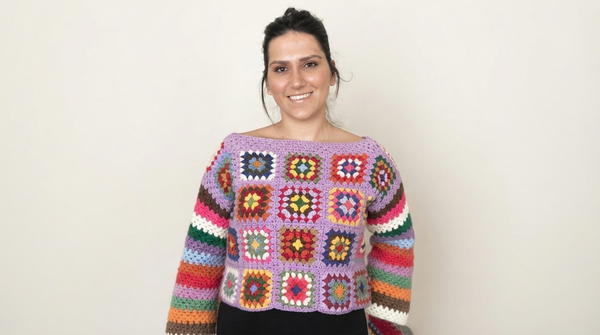
This granny square sweater pattern demonstrates how a repetitive and familiar motif format can be organized into a complete and structurally sound garment through a logical and methodical assembly process that keeps construction decisions clear and manageable at every stage. The combination of cotton yarn motifs with an acrylic joining yarn produces a finished fabric that has the softness and breathability of natural fiber alongside the durability and stitch definition that acrylic yarn provides for border and structural rounds.