Open up the creativity with the Free Crochet Victorian Lattice Square Pattern, an easy-to-follow design that adds a touch of vintage charm to any project.
If you’re looking to add a touch of timeless elegance to your crochet projects, the Free Crochet Victorian lattice square pattern is a wonderful choice. This beautiful pattern combines classic Victorian charm with a lattice design that creates an intricate, open texture perfect for a variety of uses. The Free Crochet Victorian lattice square pattern can be a stunning component in blankets, scarves, or decorative pieces, making it both versatile and eye-catching.
Free Crochet Victorian Lattice Square Pattern for Special Projects
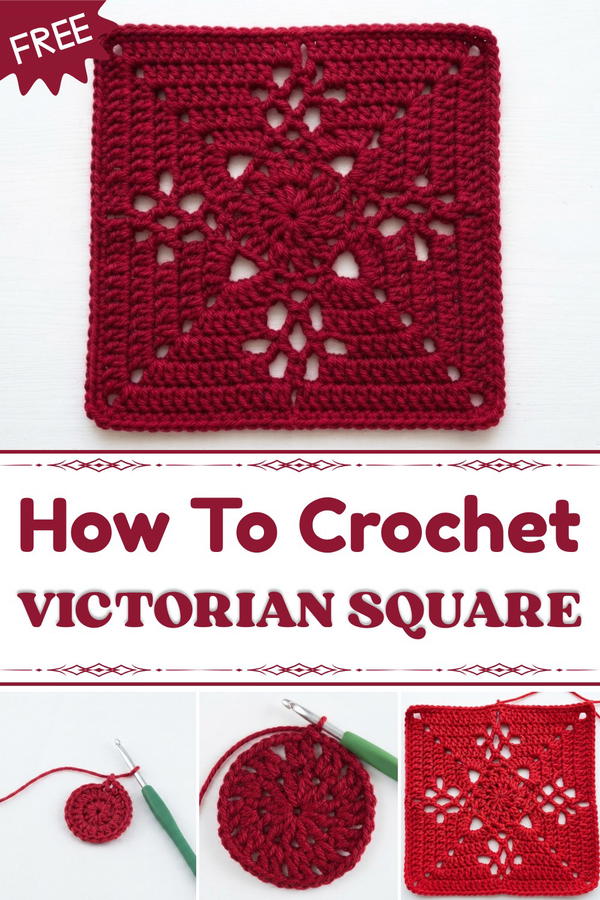
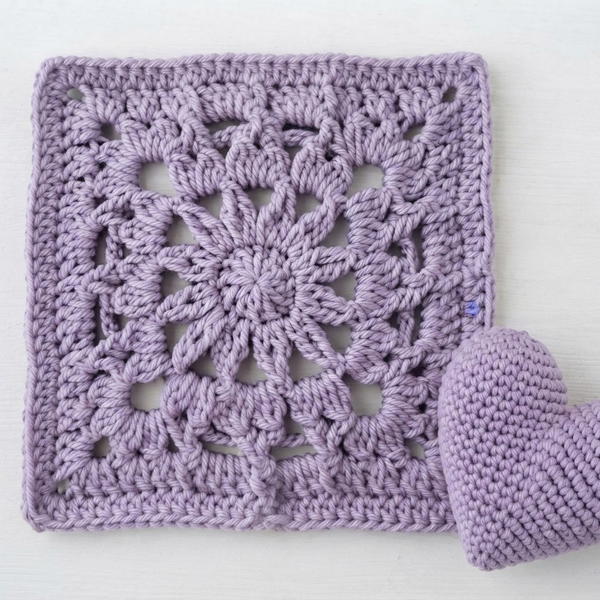
This project showcases a delicate square shape with an airy yet structured feel. The lattice stitch gives the fabric a lovely texture that’s neither too dense nor too loose, striking a perfect balance for warmth and breathability. The standout features of this pattern are its ornate details and the geometric lattice that lends an old-world charm while still feeling fresh and modern. You can easily customize the size of each square depending on your project, smaller squares for cozy blankets, larger ones for shawls or tablecloths.
Construction involves relatively simple stitches, primarily chains and double crochets, making it friendly even for those with some basic crochet experience. One helpful tip is to consistently count your stitches and maintain even tension to preserve the pattern’s beautiful shape. Inspiration for this design comes from Victorian-era lace and decorative arts, which often balanced elegance with functionality. Using soft cotton or a smooth acrylic yarn enhances the stitch’s definition while maintaining comfort and durability.
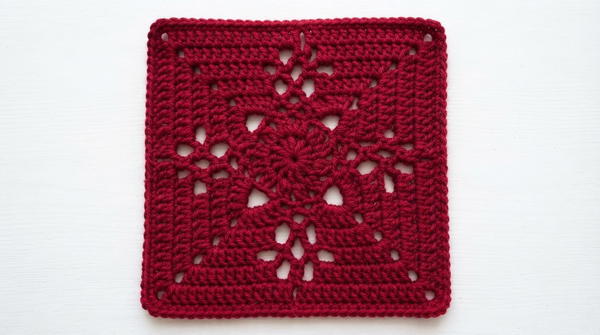
Victorian Lattice Square: The Definitive Guide
The Victorian Lattice Square is a stunning fusion of vintage elegance and structural beauty in crochet. Characterized by lacy cutwork and a unique lattice effect, the motif creates a striking visual centerpiece or joining block for larger creations such as blankets, shawls, or decorative throws. Its distinctive corners, openwork panels, and texture-rich rounds make each square both an enjoyable challenge and a rewarding addition to any lace project.
Pattern Important Tips
Choosing Yarn and Hook
- A smooth, tightly-spun cotton or cotton-blend yarn highlights the lacy stitches best.
- Adjust the hook size according to your yarn weight for a neat, defined motif.
Blocking for Perfect Shape
- Blocking is crucial for this openwork design to help define corners and lattice spaces.
- Use rust-proof pins and shape gently to avoid stretching the central lattice too much.
Stitch Placement
- Work into chain spaces rather than stitches where indicated—this maintains openwork clarity.
- Count clusters and chains often to avoid missing corners or skipping chain spaces.
Joining Squares
- Use the final single crochet border for seamless joining via slip stitch, whip stitch, or preferred assembly method.
Skill Level
Intermediate Crocheter
Exploring double crochet clusters, controlled openwork, and precise stitch placement make this motif best suited to those who have mastered crochet basics and are comfortable with following multi-round patterns.
Materials
- DK weight cotton yarn or yarn of choice
- Crochet hook (commonly 4mm for DK, adjust as needed)
- Yarn needle for weaving ends
- Scissors
- Blocking mats and pins (optional but highly recommended)
Gauge (and Stitch Pattern)
Gauge:
1 finished square measures approx. 8–9 inches (20–23 cm) after blocking, depending on yarn and hook.
Stitch Pattern Highlight:
The square uses a combination of double crochet (dc), double crochet two together clusters (dc2tog), chains, and single crochet (sc) to create both dense and openwork lace areas.
Stitch Abbreviations
- ch – chain
- dc – double crochet
- dc2tog – double crochet two together
- sc – single crochet
- sl st – slip stitch
- st(s) – stitch(es)
- sp(s) – space(s)
Special Stitches
Magic Ring
Create a loop, hold tail, yarn over and pull up one loop; chain to secure base and work stitches into adjustable ring. Pull to tighten after first round.
Double Crochet Two Together (dc2tog) Cluster
(Yarn over, insert hook in stitch, yarn over, pull through, yarn over, pull through 2 loops) twice, yarn over and pull through all 3 loops on hook.
Notes for Starting the Pattern
- Begin each round with the specified stitch and chain counts. Chains at the start of each round often count as the first stitch.
- Always join rounds as directed, typically with a slip stitch to the indicated chain or top of the starting stitch.
- Center your work by pulling the magic ring tight after the initial round is completed.
The Crochet Pattern
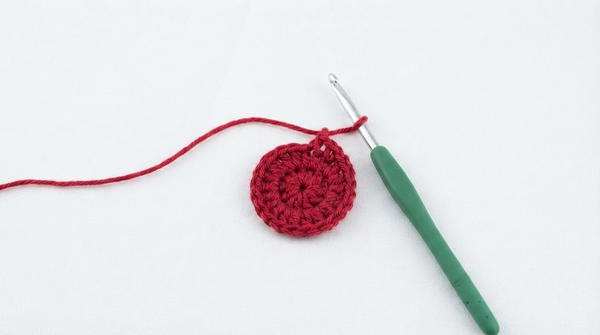
Round 1: The Central Hub
- Start with a magic ring.
- Chain 4 (counts as 1 double crochet (dc) + chain 1).
- Into the ring, 1 double crochet (dc), 1 chain 1 — repeat 12 times total (12 dc + 12 ch-1 spaces).
- Chain 1, pull ring tight.
- Join with a slip stitch (sl st) to 3rd chain of initial chain-4.
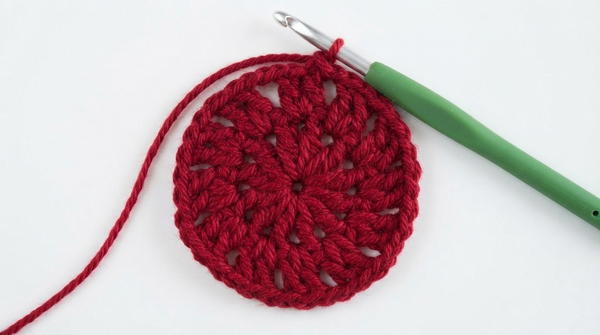
Round 2: Building Texture
- Slip stitch (sl st) into the first chain-1 space.
- In the chain-1 space, work single crochet (sc), chain 1 (counts as first dc).
- Complete a double crochet two together (dc2tog) cluster in the same space.
- Chain 2.
- Repeat (dc2tog cluster, chain 2) in each chain-1 space around.
- Join with slip stitch (sl st) to top of beginning chain-1.
Round 3: The Lattice Base
- Slip stitch (sl st) to next chain-2 space.
- 1 single crochet (sc) in chain-2 space, chain 7, 1 single crochet (sc) in next chain-2 space.
- Chain 3, 1 single crochet (sc) in next chain-2 space.
- Chain 3, 1 single crochet (sc) in next chain-2 space.
- Chain 7 (corner formed).
- Repeat this sequence (corner with chain 7, sides with chain 3) around.
- Join with slip stitch (sl st) to first single crochet.
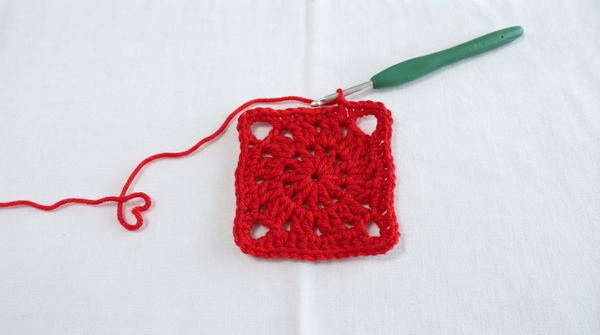
Round 4: Developing the Corners
- Slip stitch (sl st) into first chain-7 space.
- Work 1 single crochet (sc) and chain 1 (counts as first double crochet (dc)).
- Work 4 more double crochets (dc) in the same chain-7 space.
- Chain 3 (corner).
- Work 5 more double crochets (dc) in same space.
- 1 single crochet (sc) in next chain-3 loop, chain 4, 1 single crochet (sc) in following chain-3 loop.
- In next chain-7 space, work 5 double crochets (dc), chain 3, 5 double crochets (dc).
- Repeat around; join to top of initial chain-1.
Round 5: Expanding the Lattice
- Slip stitch (sl st) to next double crochet (dc).
- 1 single crochet (sc) and chain 1 (counts as first double crochet (dc)).
- Work 1 double crochet (dc) into next 3 stitches.
- In corner chain-3 space, work (2 double crochets (dc), chain 3, 2 double crochets (dc)).
- Work 1 double crochet (dc) into next 4 stitches.
- Skip last stitch of side group, chain 4, 1 single crochet (sc) into center chain-4 loop.
- Chain 4, skip first stitch of next side, work 1 double crochet (dc) into next 4 stitches.
- Repeat around and join with slip stitch (sl st).
Round 6: Strengthening the Structure
- Slip stitch (sl st) to next stitch.
- 1 single crochet (sc) and chain 1 (counts as first double crochet (dc)).
- Work 1 double crochet (dc) into next 3 stitches.
- In corner chain-3 space, work (2 double crochets (dc), chain 3, 2 double crochets (dc)).
- Work 1 double crochet (dc) into next 4 stitches.
- Chain 4, 1 single crochet (sc) into first chain-4 loop, chain 4, 1 single crochet (sc) into next chain-4 loop, chain 4.
- Skip 2 stitches, work 1 double crochet (dc) in next 4 stitches.
- Proceed to next corner.
- Repeat around and join to chain-1 space.
Round 7: Preparing the Edges
- Begin at join space: 1 single crochet (sc) and chain 1.
- Work 1 double crochet (dc) into next 5 stitches.
- In corner, work (2 double crochets (dc), chain 3, 2 double crochets (dc)).
- Work 1 double crochet (dc) into next 6 stitches.
- In chain-4 loop, work (2 double crochets (dc), chain 4, 1 single crochet (sc) in middle chain-4 loop, chain 4, 2 double crochets (dc) in final chain-4 loop).
- Continue side double crochets and corner work as before.
- Join as usual.
Round 8: Closing the Lattice
- 1 single crochet (sc) and chain 1 in join space.
- Work 1 double crochet (dc) into next 7 stitches.
- Corner: (2 double crochets (dc), chain 3, 2 double crochets (dc)).
- Work 1 double crochet (dc) into next 10 stitches.
- In chain-4 loops, work (2 double crochets (dc), chain 1, 2 double crochets (dc)).
- Continue 10 double crochets (dc) on each side and corners as established.
- Join with slip stitch (sl st).
Round 9: The Final Border
- Work 1 single crochet (sc) into every stitch around, including chain-1 spaces.
- In corner chain-3 spaces, work (2 single crochets (sc), chain 3, 2 single crochets (sc)).
- Join with slip stitch (sl st).
- Fasten off.
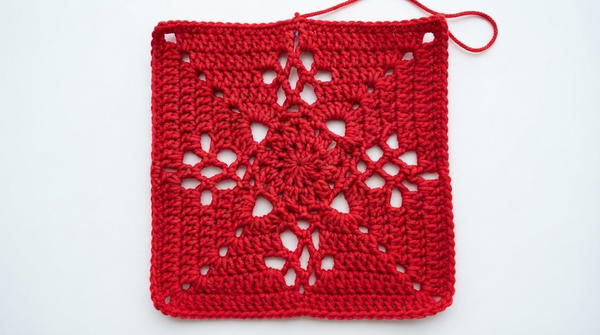
Assembly & Finishing
- Curling is normal for detailed lace work.
- To flatten, block your square or apply weight with books for several hours.
- Finished size approx. 8–9 inches, depending on yarn and hook.
- The single crochet (sc) border ensures a firm edge for easy joining in larger projects.
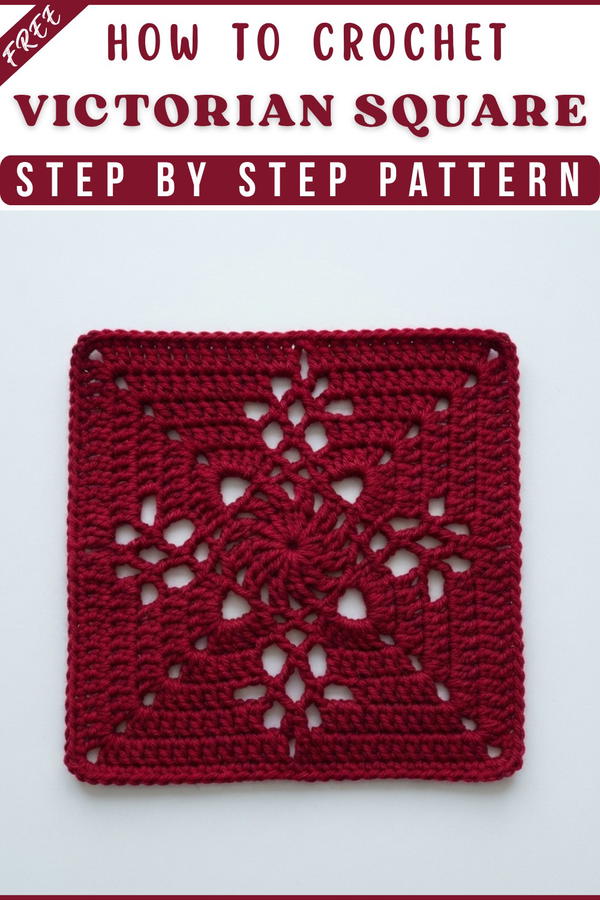
Assembly and Sizing
Assembly is straightforward thanks to the single crochet border, which allows for the easy alignment and joining of multiple squares. Blocking the finished square is highly recommended to achieve crisp edges and emphasize the lattice design. A blocked square typically measures 8–9 inches, making it adaptable for use in a variety of larger projects such as throws, afghans, or even garments.
Conclusion
The Victorian Lattice Square presents an appealing blend of openwork and structure that sets off vintage-inspired crochet projects. Its distinctive texture, lacy lattice, and bold corners ensure each motif stands out, whether showcased as a standalone piece or as part of a larger composition. The deft balance between solid and open stitches offers both visual interest and creative possibilities for crafters seeking heirloom-quality results.