Wrap up in a crochet Hexagon Jacket with a roomy hood and a solid granny stitch texture that goes well with jeans and a plain tee on cooler days outside.
Cool mornings call for a layer you can slip over whatever you already have on. This crochet Hexagon Jacket has a roomy hood, dark trim down the front, and full sleeves that narrow into fitted cuffs. The brown sample has a clear stitch texture that shows up well over a plain top.
Cozy & Free Crochet Hexagon Jacket Pattern With Solid Granny Stitches
About the designer
Jackets, shawls, and bags all appear on this channel, giving viewers several ways to use the stitches they practice. For the hexagon project, the creator pairs the stitch demonstration with a diagram so you can see where each round grows. The diagram and the project are both from rasha Crochets.

Its shape starts with two six-sided pieces. Stitch groups sit close together along the straight edges, while increases at the corners give each piece room to grow. When folded, each hexagon forms a sleeve and part of the body. That’s one of the fun things about this project. At the beginning, the pieces look more like something you’d put on a table than something you could wear. Once they’re folded, you can see where your arms go.
For a casual outfit, wear it open over a long-sleeved tee with straight jeans. The cuffs sit close to the wrists, which helps keep the sleeves out of the way when you carry groceries or reach into your bag. On a breezy day, you can pull up the hood for a little more coverage. The dark edging already frames the front, so a simple base layer gives the stitchwork room to stand out.
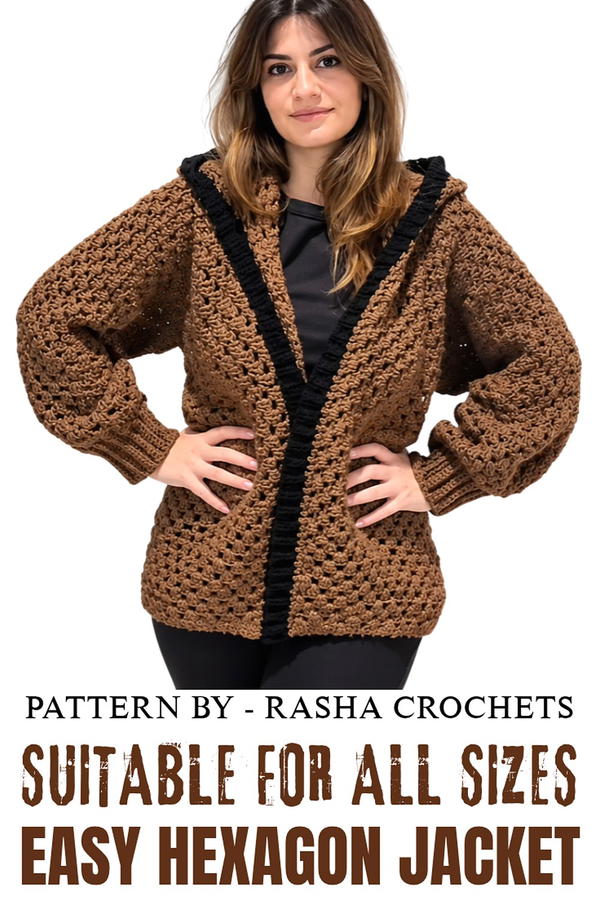
Crochet Jacket with Hat Pattern
This versatile pattern guides you through creating a beautiful, customized crochet jacket with a hat. The design features structured increases, decreases, and neat edges that add a polished and finished look to the garment. The jacket is perfect for cooler weather and can be tailored to different sizes based on stitch count and row repetitions.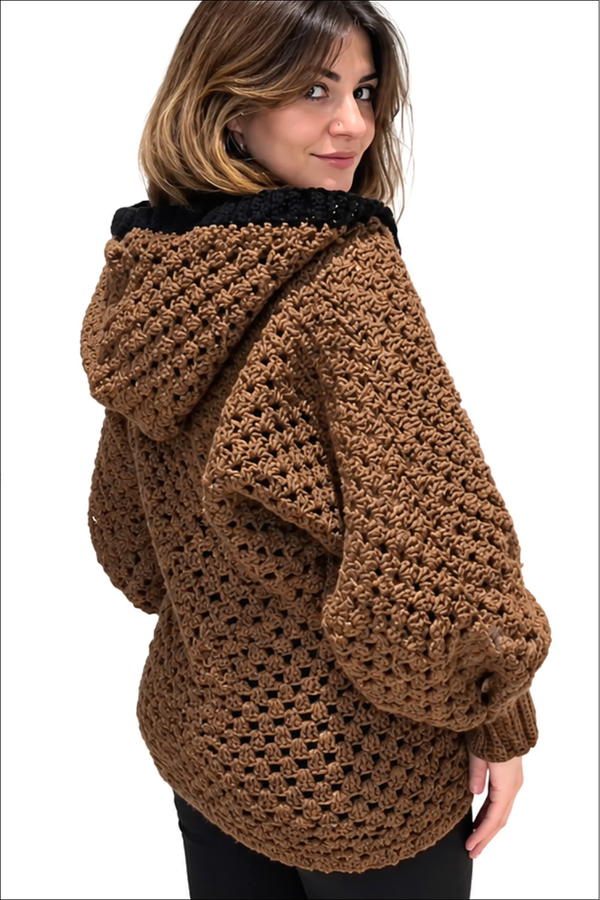
Skill Level
Intermediate – Recommended for those familiar with basic crochet stitches, as well as techniques such as working in rounds, making increases and decreases, joining pieces, and adding edges.
Materials
- Yarn:
- DMC Extra Value, medium-sized yarn (400g skein). Approximately 800g required for a large size jacket. Machine washable at 40°C.
- Alternatively, use any yarn of similar thickness that suits your preference.
- Hook:
- Size 6 mm hook (or size suitable for your yarn).
- Optionally, switch to 5 mm hook for edging and finer details.
- Additional Notions:
- Stitch markers.
- Scissors and yarn needle for weaving in ends and sewing seams.
Stitch Abbreviations
- Ch – Chain
- SC – Single Crochet
- DC – Double Crochet
- Sl St – Slip Stitch
Useful Tips
- Choose Appropriate Yarn: You can use any type of yarn, but ensure it complements the hook size and desired jacket thickness and drape.
- Use Markers: Markers can be placed at increase and decrease points, corners, and designated stitch spaces for clarity while working.
- Tension Control: Avoid stretching stitches to maintain a smooth and even appearance throughout the garment.
- Edges: Work single crochet stitches along the edges to prepare for neat finishings. This ensures a well-shaped and clean edge for your crochet jacket.
- Measurements: Try the jacket on periodically as you work to ensure the fit and adjust the size or length as needed.
Pattern Instructions
1. Initial Rounds – Magic Ring and First Groups
Foundation Round
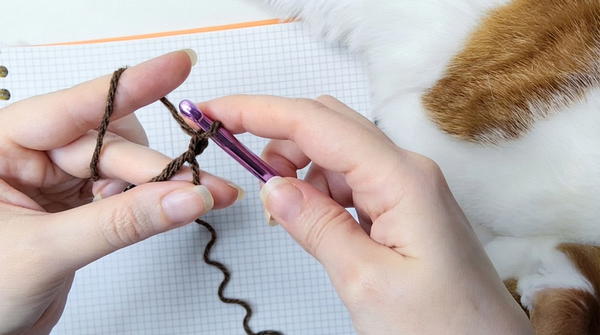 Create a Magic Ring: Wrap the short yarn tail and pull through the main yarn to form a loop. Secure with 1 Ch.
- Begin with 6 groups of DC separated by a Ch 1 space:
- Work 1 SC into the ring.
- Insert the hook and pull the yarn through the loop.
- Make another SC on top of the first SC (this counts as the first DC).
Group 1:
- Work 3 DC into the ring.
- Ch 1 to separate.
Repeat Group 2–6:
- Work 3 DC into the ring.
- Ch 1 after each group.
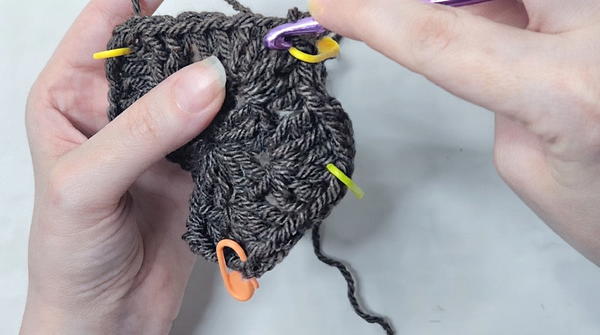
- After completing 6 groups:
- Pull the tail tightly to close the ring.
- Sl St into the top of the first DC.
- Work 1 SC into the ring.
Increase Points:
- To ensure clarity, place stitch markers at the 6 chain spaces between DC groups. These are your increase points in future rows.
2. Expanding Groups with Increases
Each row adds height and increases the size evenly, while maintaining the 6 distinct increase points.
Round 2:
- Start as previously:
- SC as first DC: Begin with 1 SC, make another on top of it, and count as the first DC.
- Work the groups as follows:
- 3 DC at normal points.
- At increase points:
- Work 3 DC, Ch 1, 3 DC into the same space.
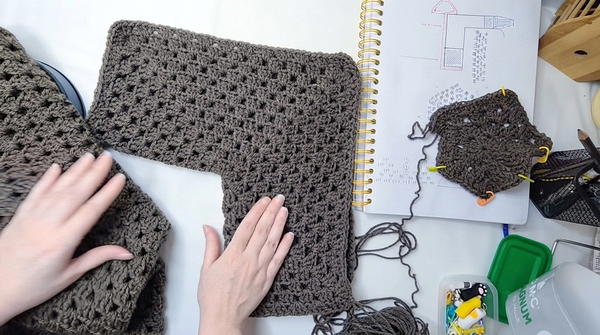
- Work 3 DC, Ch 1, 3 DC into the same space.
Continue until all groups and increase points are complete for this round.
Repeat rounds with consistent increases at all 6 points. The space between increases will grow with each row, forming the circular shape of the piece.
3. Reaching Desired Row Count
Work until the size and row count match your desired fit.
- Example in transcription: Worked 19 rows, pausing before the final row to prepare for joining the pieces.
- Ensure you finish one row early to leave space for assembly.
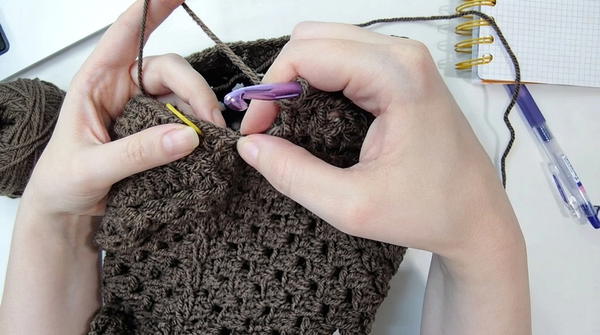
Joining Pieces
Once two identical pieces are completed from the circular increases:
Step 1 – Marking Corners for Joining
- Use markers to indicate which corners to skip during joining.
- Example: Mark points for 4 corners and skip 2 corners marked for joining the sleeve openings.
Step 2 – Joining Process
- Use Sl St to connect the corners and edges:
- At each corner:
- Work 3 DC, Ch 1, then Sl St into the corresponding corner of the adjacent piece.
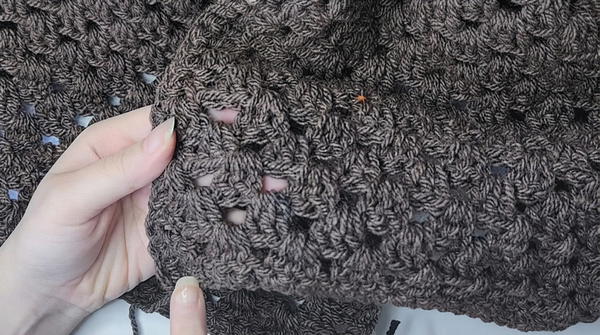
- Work 3 additional DC into the same space and place marker at the joined increase point.
- Work 3 DC, Ch 1, then Sl St into the corresponding corner of the adjacent piece.
- At each corner:
- Continue connecting stitch by stitch in the same method for symmetrical joining.
Working Sleeves
The sleeves are shaped through decreases.
Begin Sleeve Base:
- Pick up stitches from the sleeve opening using SC. Start with a row of SC evenly distributed around the opening.
- At points of decrease, skip marked sections of the sleeve to shape the gradual narrowing.
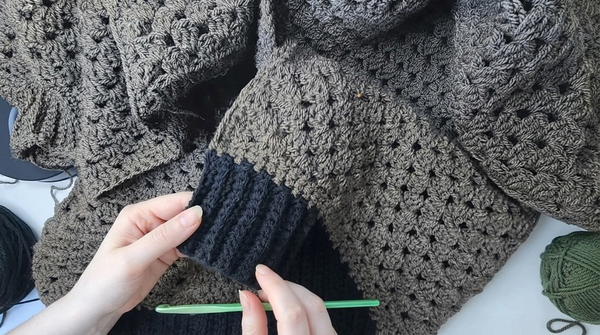
Cuff Construction on Sleeves:
- Work Edging:
- Start with Ch 11, leaving the first Ch unworked.
- Work 10 SC back along the chain, turning your work and working back along the piece.
- Join the cuff edge in a spiral around the sleeve opening with Sl St, then turn and repeat.
- Alternate rounds with 2 or 3 slip stitches depending on desired cuff tightness.
Additional Length and Edging
Once the sleeves are complete, continue working lengthwise to add rows for the desired garment length.
Front Part and Bottom Edge:
- Begin edging from the first point at the bottom corner:
- Use single crochet stitches along the edges to prepare clean rows for attaching additional yarn or further decoration.
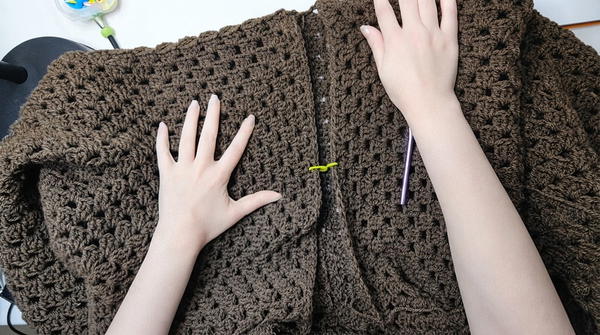
- Use single crochet stitches along the edges to prepare clean rows for attaching additional yarn or further decoration.
Optional Hood Construction
After marking the neckline where the hood begins:
- Use magical knot to secure yarn at the marked points.
- Work hood rows in a similar pattern to increasing and lengthening rows.
- Add double crochet sets symmetrically at the hood edges.
Conclusion
This crochet jacket with optional hood is a structured and versatile wearable, ideal for customization. Use stitch markers for clarity at join points, and measure as you progress to ensure an ideal fit. The edges can be finished in a contrasting or matching yarn color for extra flair or continuity. Explore adding flaps or making creative adjustments if desired for a fully tailored fit. Thank you for reading!