Keep tiny treasures together using the Heart-Shaped Basket Free Crochet Pattern, a sweet covered storage idea for a bedside table or a lovely special gift.
Small personal items often disappear inside large drawers, even when they are used every day. A Heart-Shaped Basket Free Crochet Pattern gives these belongings a special home that is easier to notice and reach. Instead of a basic square container, this project follows a recognizable heart outline.
Special Heart-Shaped Basket Free Crochet Pattern with a Lid
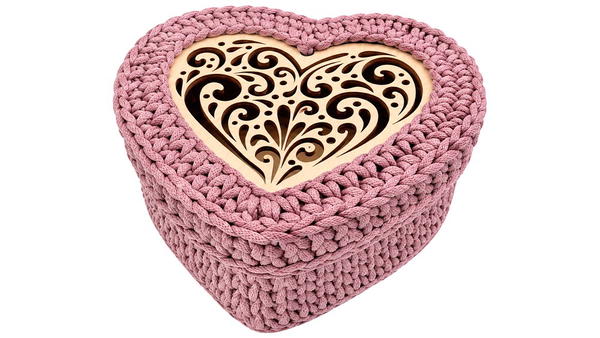
The curved upper sections and pointed end give it a gentle, decorative appearance. A matching lid helps keep the contents covered, so the basket can sit neatly on a dresser without exposing everything inside. It works well for hair clips, notes, little gifts, and other light objects. The heart shape also suits birthday surprises and thoughtful presents.
What the Video Tutorials Offer
A useful part of Promlatex. Knitting cord. is the focus on showing complete projects through videos. Seeing the shape develop can help viewers follow changes in the work and understand the finished item better. The channel covers home storage, decorative containers, and wearable accessories without staying with only one style.
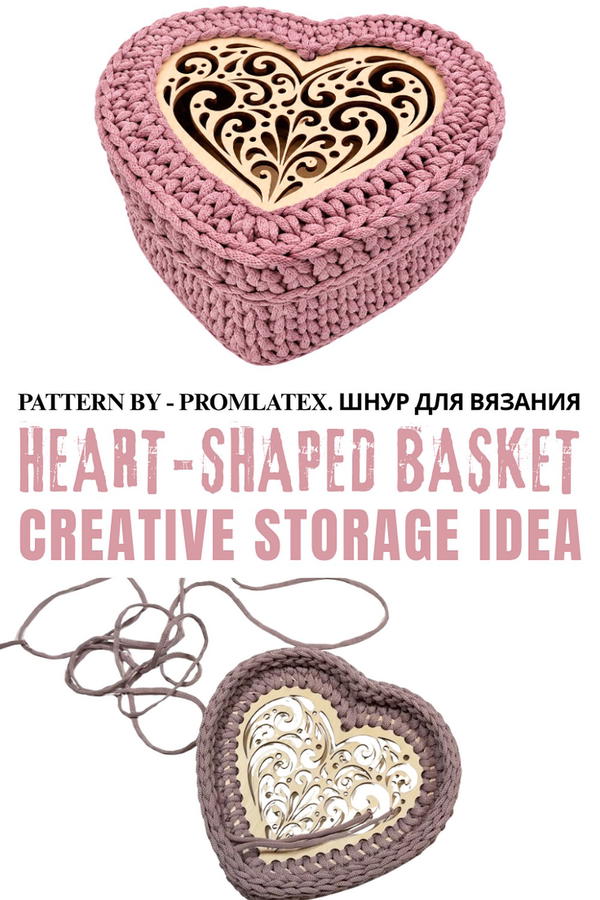
Promlatex demonstrates this basket with polyester cord and a wooden base and lid. These parts support the shape while the crocheted walls provide texture around the sides. The listed materials include 5 mm cord and a 5 mm hook. As you follow the tutorial, pay attention to the turns around the heart outline so the edges remain balanced. The separate cover completes the storage piece.
Choose a soft color for a gentle finish or a stronger shade for a more noticeable accent. This basket can rest on a bedroom shelf, dressing table, or small cabinet. Besides keeping things organized, it has a friendly look that feels personal without requiring a large space.
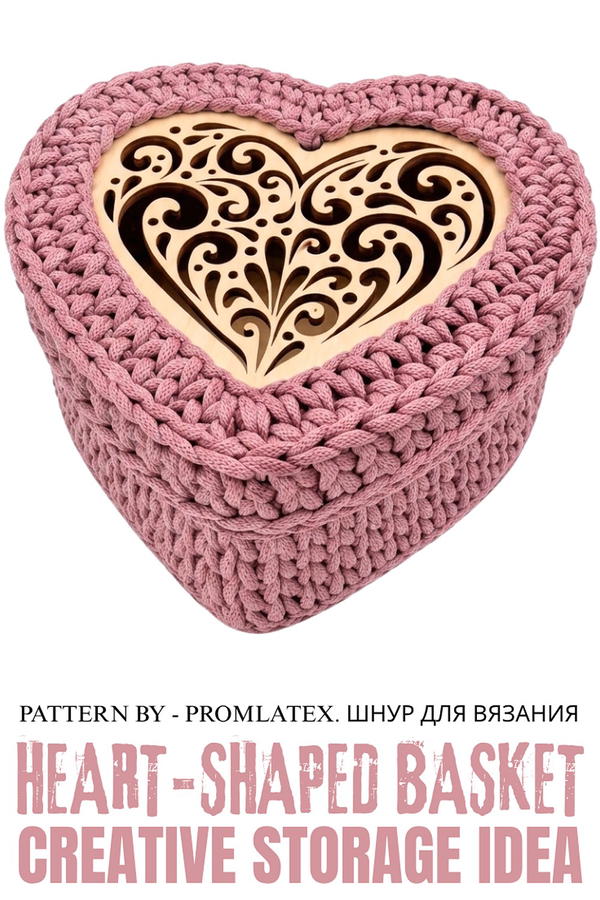
Crochet Heart-Shaped Basket With Lid
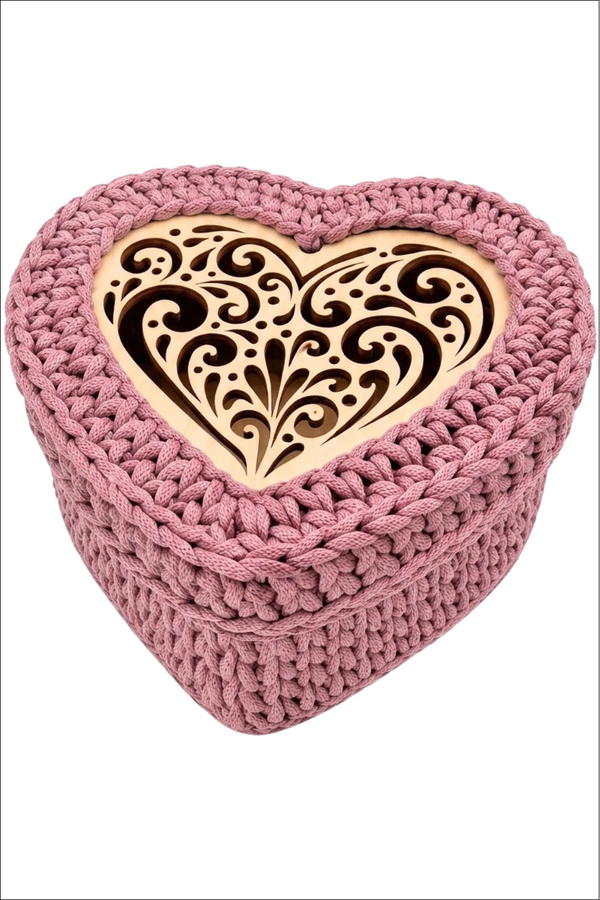
This pattern provides instructions for creating a sturdy heart-shaped basket with a matching lid, using a wooden base and polyester cord. Perfect as an organizational piece or a decorative storage basket, the unique wood-and-cord combination ensures it is a durable and stylish addition to your home.
Skill Level
Intermediate
Crocheters should be confident with single crochet, slip stitch, surface crochet techniques, stitch increases, and working behind the back bars.
Materials
- Polyester cord:
- Thickness: 5 mm.
- Approximate Quantity: 70–80 meters.
- Crochet hooks:
- 5.5 mm crochet hook for main sections.
- Wooden components:
- Heart-shaped wooden base with pre-drilled holes for the basket bottom.
- Heart-shaped wooden lid with pre-drilled holes for the basket cover.
- Other Tools:
- Scissors.
- Lighter (to secure cord ends).
Stitch Abbreviations
- ch – Chain
- sc – Single Crochet
- sl st – Slip Stitch
Useful Tips
- Cord Ends: Trim and gently melt the cord ends with a lighter to prevent fraying. Secure melted ends beneath stitches for a clean finish.
- Tension Matters: Maintain consistent tension throughout for evenly shaped basket walls. Loose stitches may cause collapse; overly tight stitches may strain the cord.
- Increase Placement: Increases are crucial for maintaining the shape, particularly at curved areas and the heart’s point. Follow placement instructions carefully.
- Use the Wooden Base: The wooden bottom and lid provide structure and style, ensuring a cohesive heart shape for both the basket and lid.
Pattern Instructions
1. Preparing the Base
The basket begins with the wooden base, and the first few rounds define the structure of the bottom.
Round 1 – Surface Crochet Around the Base:
- Leave a 50–60 cm tail to join later for a seamless finish. Insert the hook into the first holes from the wooden base edge.
- Work surface crochet stitches by pulling cord through the holes to create a chain over the edge of the wooden base.
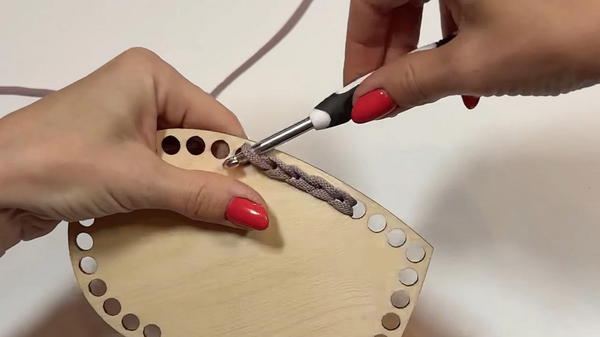
- Continue inserting the hook into each consecutive hole and pulling through the yarn to create the chain stitch.
- At the final hole: Secure the stitch with the tail by pulling it through firmly beneath the surface crochet chain.
Round 2 – Reinforcement Row With Single Crochet:
- Work sc into the center of each chain stitch created in Round 1.
- Placement of increases:
- Curved edges: Add two stitches into a single hole to keep these portions flat.
- Point of the heart: Work three sc into one hole to reinforce its sharp shape.
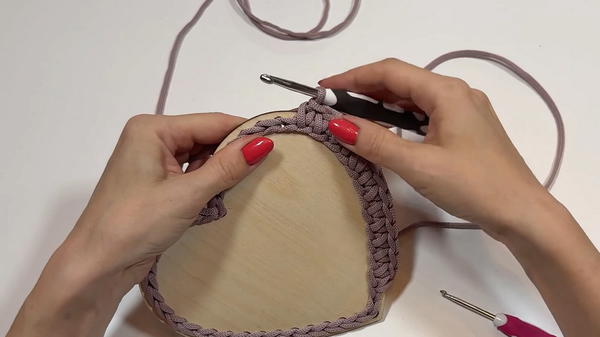
- Continue working single crochets evenly around the base, ensuring the heart shape is maintained.
2. Forming the Basket Walls
The basket walls give height and depth to the design. Ensure consistent tension for uniform vertical walls.
Round 3 – Transitioning to Vertical Walls:
- Work into the back bars of the previous row, crocheting single crochets into these loops.
- This technique creates a clean edge and begins raising the vertical wall of the basket.
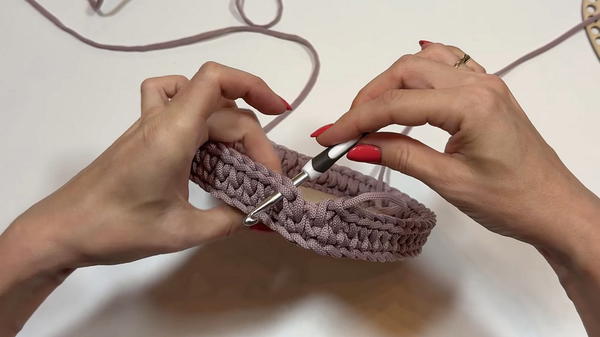
- This technique creates a clean edge and begins raising the vertical wall of the basket.
Rounds 4–9 – Main Basket Body:
- Work 1 sc into the “split” of each stitch from the previous row.
- Continue this technique evenly around the basket to create straight walls without increasing.
- Total Height: 6 rows of single crochet.
Round 10 – Top Edge Finishing:
- Use sl st around the top edge. Insert the hook into each stitch and pull through the loop directly to braid the edge into a decorative finish.
- Check that each slip stitch is evenly spaced to create a neat border.
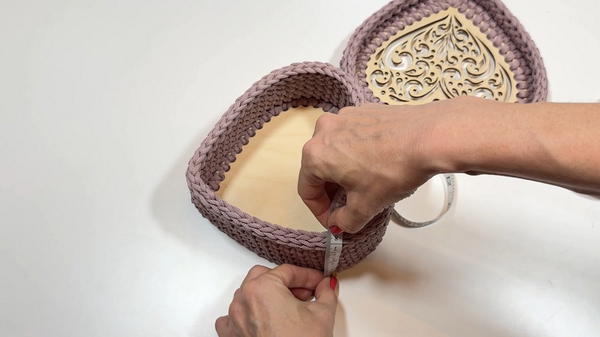
3. Making the Lid
The lid replicates the base of the basket, with slight modifications for height and structure.
Round 1 – Surface Crochet:
- Using the wooden lid's pre-drilled holes, repeat surface crochet around the edge as done in Round 1 of the base.
Round 2 – Reinforcement Row:
- Work single crochet stitches into each chain stitch around the surface crochet.
- Apply the same increase pattern as the bottom piece:
- Add two sc stitches on curved edges and three sc stitches at the sharp point.
Rounds 3–4 – Lid Body:
- Work 2 rows of single crochet stitches evenly around the heart-shaped lid.
Round 5 – Creating Lid Walls:
- Row 1: Work into the back bars of the previous row to raise a slight vertical edge.
- Row 2: Work single crochet into the split of each stitch to maintain the lid’s structure and height.
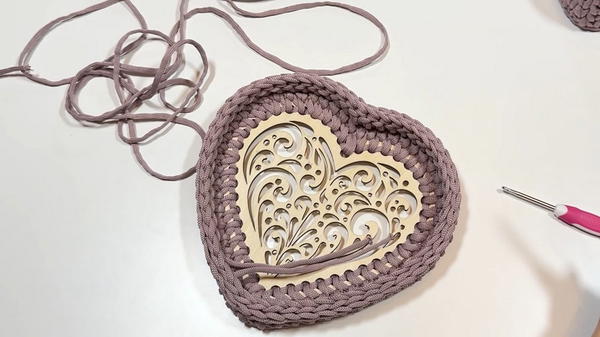
Round 6 – Final Lid Border:
- Use sl st around the lid’s edge, just as done for the basket.
- This creates a braided decorative finish and ensures the lid fits snugly onto the basket top.
4. Finishing
Securing Ends:
- After completing the lid and basket, use scissors to trim excess cord.
- Melt the ends gently with a lighter and tuck them beneath the stitches.
Basket-Lid Fit Check:
- Place the lid onto the basket to test alignment. Ensure the lid sits flush against the top edge of the basket walls.
Measurements
- Basket Width: Approximately matches the wooden base (depending on the size of the base used).
- Basket Wall Height: Approx. 11–12 cm.
- Lid Height: Approx. 3 cm above the basket walls.
Conclusion
This heart-shaped basket with a matching lid is a charming and functional crochet project, offering both durability and aesthetic appeal. The combination of wooden components and polyester cord ensures a long-lasting structure, while the thoughtful pattern lets you create a design that’s customizable and stylish. Perfect for gifts, storage, or as a decorative centerpiece. Follow the steps carefully to achieve a beautifully shaped finished product.