Hands on fun awaits with a free crochet bag pattern that includes a buckle detail crocheting a standout piece you’ll want to carry everywhere.
A stylish and functional addition to your wardrobe is the Free crochet Bag with a Buckle Pattern. Promlatex. Шнур для вязания.. offers a detailed video tutorial that guides you through creating this roomy, sturdy handbag featuring a charming buckle detail. This project combines practicality with a touch of elegance, making it a standout accessory.
Free Crochet Pattern: Create a Beautiful Bag with Buckle Detail
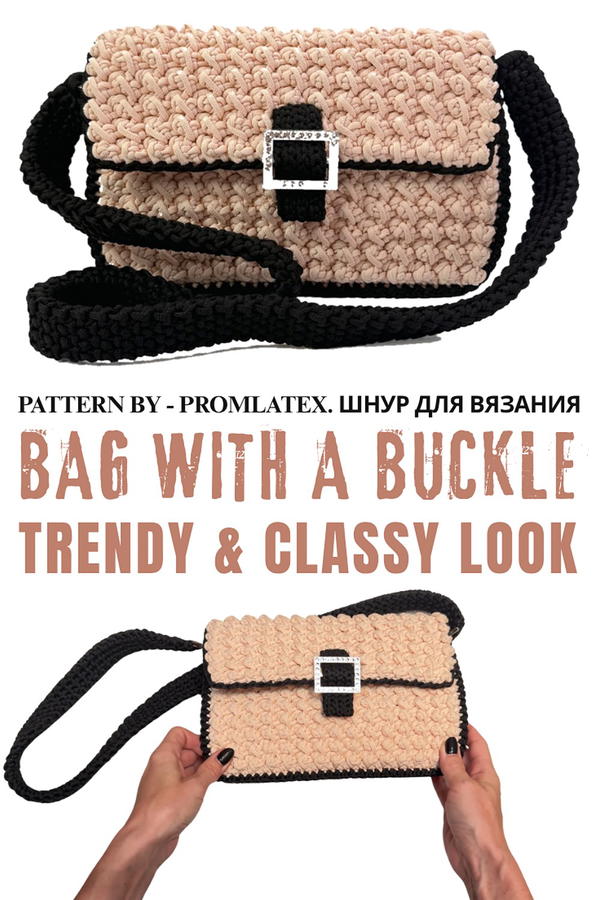
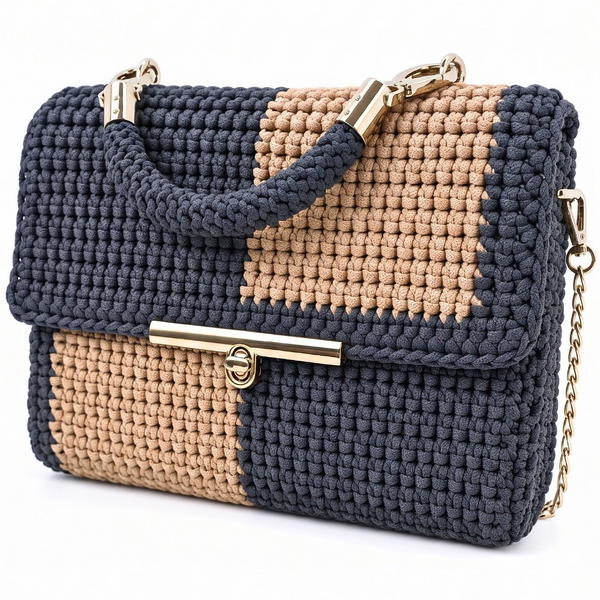
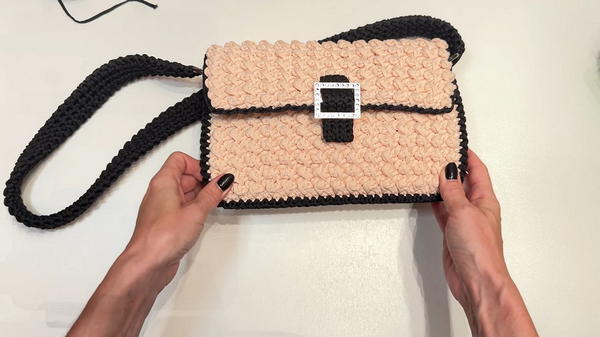
Measuring approximately 19 by 26 cm with an 8 cm depth, the bag is perfect for daily use and makes a thoughtful gift. It can be comfortably worn over the shoulder or even over the head, thanks to its long handle. The magnetic button closure keeps belongings secure, and adding a fabric lining enhances durability and a finished look.
The bag's appearance captivates with lively cone-like stitches forming a textured surface that feels interesting to touch. Its structured shape ensures it keeps form without being rigid. The two-tone polyester cord in powder and black creates a subtle yet eye-catching color contrast. Securely attached handles with carabiners add both strength and style.
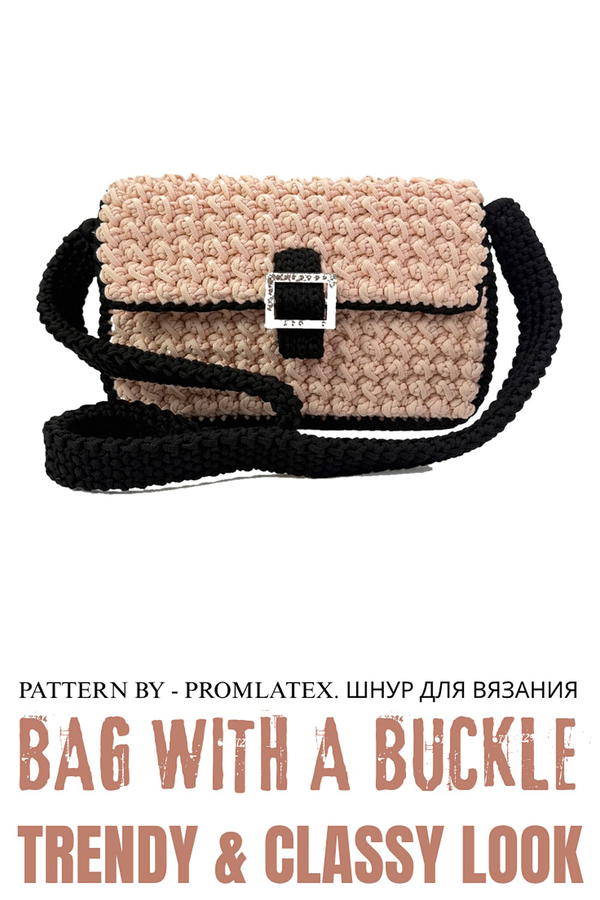
Textured Buckle Handbag with Strap – Crochet Pattern
Skill Level: Intermediate
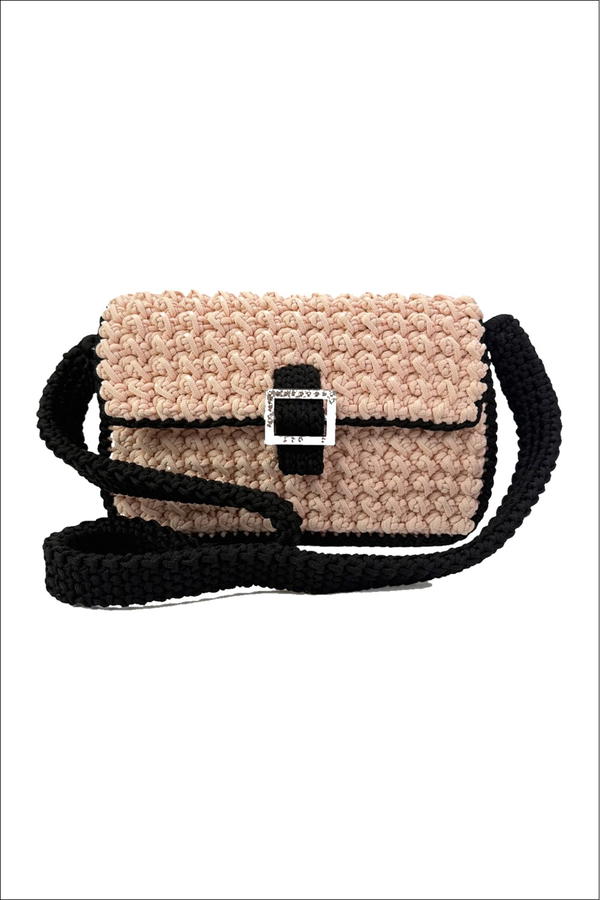
This textured crochet handbag features a structured body, decorative buckle, long detachable strap, and optional fabric lining. The finished bag measures approximately 26 x 15 x 9 cm, making it a compact yet practical accessory for everyday use. Worked with 4 mm polyester cord, the handbag maintains its shape while showcasing a distinctive textured pattern created by alternating relief stitches and slip stitches. The separate construction of the front and back panels, flap, sides, bottom, and strap allows for precise shaping, neat assembly, and easy customization of colors or hardware.
Materials
- Polyester cord (4 mm):
- ~180 m in the main color (e.g., “Powder”) for the panels.
- ~100–150 m in contrast color (e.g., black) for the sides and strap.
- Hook: 4 mm crochet hook.
- Hardware:
- Decorative buckle.
- Magnetic button for closure.
- Two detachable swivel clasps for the long strap.
- Tools and Notions:
- Stitch markers.
- Lighter (to seal cord ends).
- Scissors.
- Sewing kit, monofilament thread, and fabric pieces (if adding a lining).
Stitch Abbreviations (US Terminology)
- ch – Chain
- sc – Single crochet
- sl st – Slip stitch
The “relief stitch” described in the transcription is a special textured stitch; it will be explained in the pattern as a step-by-step action, rather than abbreviated.
Helpful Tips
- Consistent Texture: The fabric’s appearance relies on maintaining a strict alternation: one relief stitch, one slip stitch. Always start each textured row with a relief stitch and end with a slip stitch.
- Relief Stitch Execution: For the relief stitch: yarn over, insert the hook in the back loop of the next stitch, yarn over and pull through, yarn over and pull through the first loop only, then yarn over and pull through the remaining three loops. Keep your movements even for a uniform height.
- Working in Back Loops: The side and bottom strip, as well as some decorative parts, use back-loop-only stitches. This adds flexibility and a subtle ribbed effect, but it requires careful hook placement into the back loop only.
- Seaming Neatly: When joining panels with slip stitches, do not tighten excessively. A tight slip stitch seam can cause the bag to pucker. Aim for a firm yet flexible seam.
- Using Polyester Cord: Seal every cut end with a lighter to prevent fraying. Melt lightly and pinch carefully so the end is flat and can be hidden inside stitches.
- Lining: A neatly sewn lining gives the bag a professional look, hides the wrong side of the work, and prevents smaller items from poking through the textured fabric.
Pattern Instructions
The handbag is made in separate pieces: front panel, back panel with flap, side-and-bottom strip, lining (optional), buckle tab, and strap. These are then assembled into the final bag.
1. Front Panel
Size target: Approximately 26 cm wide and 15 cm high after blocking and assembly.
- Round 1 – Foundation Chain:
- ch 20 + 1 turning chain (total 21 chains).
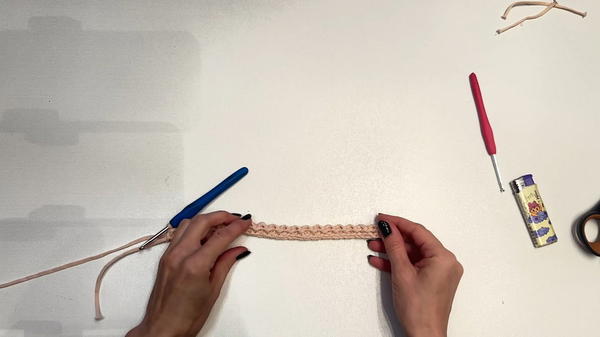
- ch 20 + 1 turning chain (total 21 chains).
- Rounds 2–30 – Rows 1–29 in Textured Pattern:
For every row from Row 1 to Row 29:- Turn your work.
- First stitch: Work 1 relief stitch into the back loop of the first stitch:
- Yarn over, insert the hook in the back loop, yarn over and pull up a loop.
- Yarn over, pull through 1 loop only (creating an extended loop).
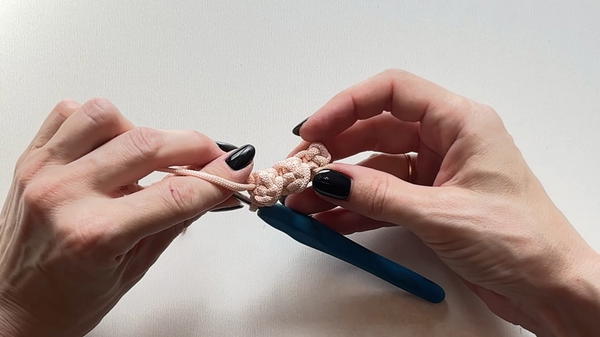
- Yarn over again and pull through all 3 remaining loops.
- Next stitch: Work 1 sl st into the next stitch.
- Continue across the row, alternating:
- 1 relief stitch in back loop,
- 1 sl st in the next stitch,
until you reach the end.
- Ensure you finish every row with a slip stitch.
This creates the full textured panel of 29 rows.
- Round 31 – Border Around Three Sides:
Work a single crochet border around three sides of the front panel: bottom and both vertical sides (leave the top edge free for assembly).- Along the bottom edge: Work 20 sc (one into each base stitch).
- Up the first side: Evenly place 29 sc, one for each row end.
- Across the top of the panel’s starting chain side: Work 20 sc.
- Down the second side: Work 29 sc.
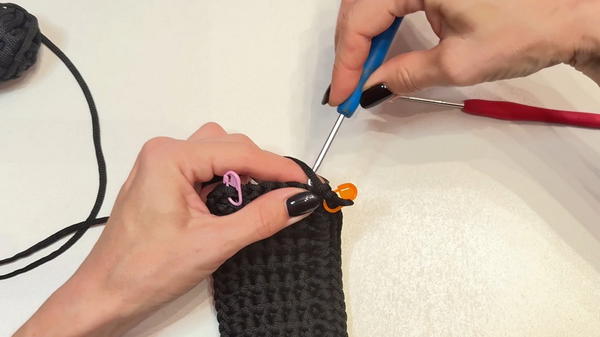
You should have 69 sc distributed evenly around those three sides. Place stitch markers at the corners if needed.
2. Back Panel and Flap
The back panel is wider than the front; the flap is centered over it.
- Round 32 – Foundation Chain:
- ch 38 + 1 turning chain (total 39 chains).
- Rounds 33–61 – Rows 1–29 in Textured Pattern:
- Repeat the same relief stitch + slip stitch pattern used in the front panel:
- Always begin each row with 1 relief stitch in the back loop,
- Alternate relief stitch and sl st,
- End each row with a slip stitch.
- Work a total of 29 rows.
- Repeat the same relief stitch + slip stitch pattern used in the front panel:
- Round 62 – Mark Flap Width:
- On the completed back panel, count from one side and mark the 20th stitch.
- Repeat from the opposite side and mark the 20th stitch.
- The stitches between these two markers define the width of the flap that will fold over the front panel.
- Round 63 – Border Around Sides and Flap:
- Work a single crochet border around the entire piece: sides and flap edges, using a total of 69 sc distributed evenly as per the tutorial.
- Ensure that the flap edge is neat, as this will remain visible on the finished handbag.
3. Side Panels and Bottom Strip
This is worked as one long strip that will form both sides and the bottom of the bag.
- Round 64 – Foundation Chain:
- ch 6 + 1 turning chain (total 7 chains).
- Rounds 65–131 – Side/Bottom Rows (67 Rows):
For each row (1 to 67):- Turn your work.
- Work 6 sc, all into the back loops only.
- This back-loop-only technique creates a flexible yet structured rib, ideal for curves at the corners.
- Round 132 – Side Strip Border:
- Border the long strip by working 69 sc along the first long side.
- Then work 69 sc along the opposite long side.
- Place markers at the four corners where the strip will meet the panels.
- Round 133 – Assembly with Slip Stitches:
Attach the side/bottom strip to the front and back pieces:- Align the marked corners of the strip with the bottom corners of the front and back panels.
- Working through the edge stitches of both the strip and the panel, join them using sl st.
- Continue along all relevant edges to form the bag’s body, ensuring that the front, bottom, back, and sides are smoothly joined.
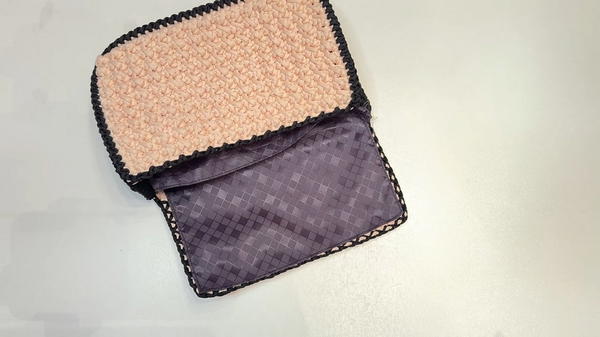
4. Lining and Interior Finishing (Optional)
If adding lining, cut and sew the fabric before attaching it to the crochet body.
- Fabric Pieces:
- Main body: 34 x 38 cm.
- Flap: 16 x 23.5 cm.
- Pocket: 15 x 20 cm.
- Lining Assembly:
- Sew the pocket onto the main lining piece.
- Fold and sew the body lining into a pouch that matches the bag’s interior dimensions.
- Attach the flap lining piece to the corresponding crochet flap section.
- Use monofilament thread and small stitches to sew the lining to the inside of the bag along the top and flap edges.
- Magnetic Button:
- Attach one part of the magnetic button to the inside of the flap.
- Attach the matching part to the front panel lining where the flap naturally falls.
5. Decorative Buckle and Strap
Buckle Tab
- Round 134 – Buckle Tab Foundation:
- ch 15.
- Rounds 135+ – Working the Buckle Tab:
- Turn and work rows of sl st in the back loops across.
- Repeat these rows until the tab reaches the desired length and width to wrap neatly through the decorative buckle and attach to the flap or front.
- Fasten off, secure the ends, seal with a lighter, and sew or attach through the buckle as shown in the tutorial.
Strap
- Round 136 – Strap Foundation:
- Attach the cord to the first swivel clasp.
- Create a small base and then work 4 sc to establish the strap width.
- Rounds 137+ – Long Strap Rows:
- For each row:
- Turn and work 4 sc, maintaining a straight, even band.
- Continue for 80–90 cm, depending on your desired strap length.
- For each row:
- Final Strap Step:
- Attach the second swivel clasp to the free end of the strap and secure firmly with additional sc or stitching.
- Seal all ends with a lighter and hide them in the stitches.
Conclusion
This textured handbag pattern brings together structured panels, a distinctive relief-and-slip-stitch fabric, a practical long strap, and optional lining for a refined finish. The combination of 4 mm polyester cord, clean slip-stitch seams, and thoughtfully placed hardware results in a durable and stylish accessory. With careful attention to the stitch pattern, assembly, and finishing details, this project produces a polished handbag that can be adapted in color, strap length, and lining style to suit a wide range of personal preferences.