I love brightening up my room with little handmade decorations that bring a smile to my face. One of my favorite projects is a cute, crocheted flower in a small pot. This charming item is called the Free Crochet Potted Flower Pattern. You can find this lovely pattern on the (Crochet Tutorials) YouTube channel, where the step-by-step lessons make it easy to follow along and enjoy.
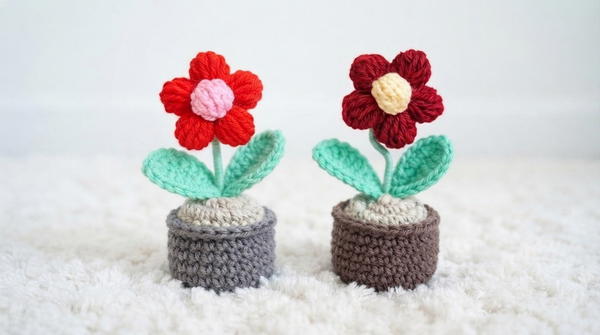
The crocheted potted flower looks sweet and cheerful. It has soft petals that are round and full, just like a real flower. The pot is a nice, sturdy shape that holds the flower up tall. The colors can be bright like reds, pinks, and yellows or soft pastels, making it easy to match your home’s style. The texture is smooth and cozy, perfect for adding a little warmth to your space. This small flower is great for desks, windowsills, or shelves, bringing nature inside without any fuss.
Free Potted Flower Pattern for Crochet Enthusiasts
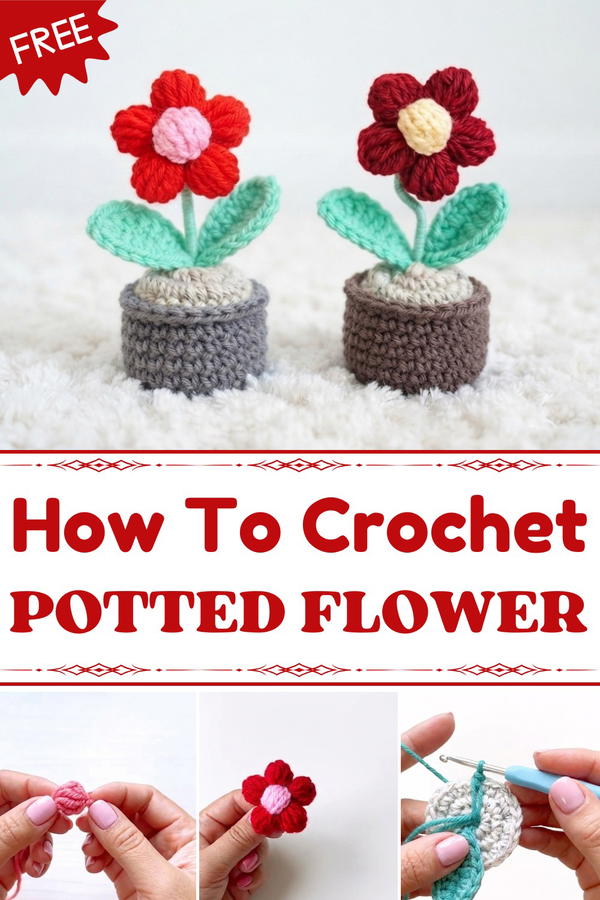
People love this project because it lasts forever and doesn’t need water or sunlight. It’s a lovely decoration that feels handmade and special. You can also make many flowers in different colors to create a whole bouquet! This makes the crochet potted flower a perfect gift for friends and family, a cheerful way to say you care. If you enjoy simple and fun crochet projects, this Free Crochet Potted Flower Pattern is a great choice. It’s easy to make and adds a happy, colorful touch to your home.
Crochet Potted Flower Pattern
Bring the beauty of spring indoors with this elegant crochet potted flower pattern. Crafted through components such as a golden flower center, bright yellow petals, graceful green leaves, a wrapped stem, and a neat flower pot, this project fuses simple stitches with detailed assembly. Whether for home decor, gift-giving, or as a delightful craft, this crochet flower combines color, texture, and structure into one charming miniature tableau.
Quick Overview of Pattern
- Flower Center: Created with gold yarn using a magic ring and unfinished double crochets for a textured core.
- Flower Petals: Bright yellow petals made using puff stitches for bloom fullness.
- Leaves: Two green crocheted leaves provide natural balance.
- Stem: A wire wrapped tightly with green yarn for stability and shape.
- Pot and Pot Cover: A sturdy pot and matching cover crocheted with dark gray and beige yarn using rounds and loop-only stitches for a polished finish.
- Final Assembly: Stem secured in the pot with stuffing, leaves attached, and the flower head affixed with backing for durability.
Notes
- Use consistent tension for even stitches and shape retention.
- Wrapping the wire tightly with yarn ensures the stem stays in place and remains flexible.
- Crocheting in back loops only (BLO) and front loops only (FLO) adds texture and dimension.
- Assembly involves sewing and gluing, so prepare needles and craft glue accordingly.
- Take care with stuffing the pot to ensure firmness without bulging.
- Use pliers carefully to curve the wire stem’s flower end.
Skill Level
- Intermediate beginner: Comfortable with basic crochet stitches, working in rounds, puff stitches, working in specified loops (BLO/FLO), and simple assembly techniques.
Materials
- pink yarn (for flower center)
- Red yarn (for petals)
- Green yarn (for leaves, stem wrapping)
- Dark gray yarn (for pot)
- Light grey yarn (for pot cover)
- 14 cm floral wire or craft wire
- Fiberfill stuffing or bundled yarn for pot filling
- Cardboard piece (for base and flower backing)
- Sewing needle and yarn needle
- Fabric or craft glue
- Pliers (for shaping wire)
- Scissors
Measurements / Sizing
- Finished potted flower stands approximately 15 cm (6 inches) tall (including stem and flower).
- Flower diameter about 5–6 cm, pot diameter roughly 6 cm, height 4 cm.
- Dimensions may vary slightly based on yarn thickness and tension.
Gauge and Stitch Pattern
- Gauge is adaptable since this is an amigurumi-style project focusing on shaping rather than strict measurement.
- Key stitch textures include puff stitches for petals, and rounds worked in either back loops only (BLO) or front loops only (FLO) for pot detail.
- Tension should be firm to hold structural integrity.
Stitch Abbreviations
| Abbreviation | Full Term | Description |
|---|---|---|
| ch | Chain | Yarn over, pull through loop |
| sc | Single Crochet | Insert hook, yarn over, pull through two loops |
| hdc | Half Double Crochet | Yarn over, insert hook, yarn over, pull through three loops |
| dc | Double Crochet | Yarn over, insert hook, yarn over, pull through two loops twice |
| ss | Slip Stitch | Insert hook, yarn over, pull through one loop |
| MR | Magic Ring | Adjustable ring for circular starts |
| BLO | Back Loops Only | Work stitch through the back loop only |
| FLO | Front Loops Only | Work stitch through the front loop only |
| puff stitch | Puff Stitch | 5 unfinished double crochets worked in same stitch, yarn over, pull through all loops |
Special Stitches
- Magic Ring (MR): An adjustable ring to begin rounds with a tight center.
- Puff Stitch: Creates a fluffy “puff” by working multiple unfinished double crochets into a single stitch before completing them all together.
- Working in Back Loops Only (BLO) and Front Loops Only (FLO): Used for shaping and texture, particularly in pot rounds.
The Crochet Pattern!
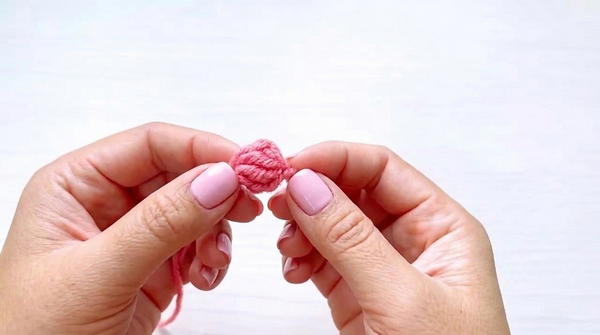
1. Flower Center (Pink Yarn)
- Step 1: Make a magic ring (MR).
- Step 2: Chain 2.
- Step 3: Work 4 unfinished double crochet (dc) stitches into the ring:
- Yarn over, insert hook, yarn over, pull up a loop (do not finish).
- Repeat 4 times into the ring leaving all loops on hook.
- Step 4: Yarn over and pull through all loops on hook to secure the stitches.
- Step 5: Pull tail of magic ring to tighten the center.
- Step 6: Cut yarn and fasten off. This forms the flower’s textured golden center.
2. Flower Petals (Red Yarn)
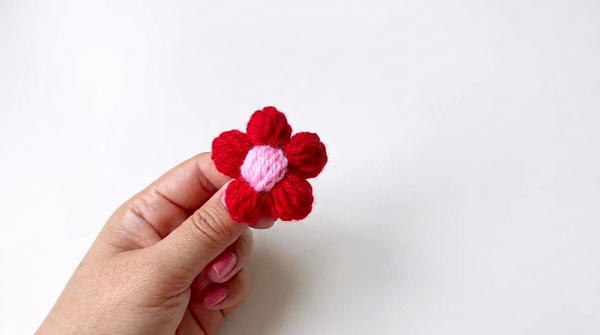
- Row 1:
- Make a magic ring (MR).
- Chain 1.
- Work 10 single crochets (sc) into the ring.
- Pull the tail tight to close the ring.
- Slip stitch (ss) to the first chain to join the round.
- Row 2:
- Chain 2.
- Work 1 puff stitch into the next stitch by:
- Making 5 unfinished double crochets (dc) into the stitch (yo, insert hook, pull up a loop, repeat without completing any dc).
- Yarn over, pull through all loops together to close puff stitch.
- Chain 3.
- Slip stitch into the next stitch to anchor.
- Repeat the puff stitch + ch 3 + slip stitch sequence five times total to create five petals that puff outward.
- Step 3: Secure and cut yarn.
- Step 4: Sew the pink flower center to the middle of this petal circle for a full flower.
3. Leaves (Make 2; Green Yarn)
- Step 1: Chain 8.
- Step 2: Slip stitch (ss) in the first chain to form a ring.
- Step 3: Work up one side:
- 1 single crochet (sc),
- 1 half double crochet (hdc),
- 1 double crochet (dc),
- 1 half double crochet (hdc),
- 1 single crochet (sc).
- Step 4: Slip stitch (ss) in the last chain.
- Step 5: Chain 1, then work down the opposite side:
- Slip stitch (ss),
- 1 sc,
- 1 hdc,
- 1 dc,
- 1 hdc,
- 1 sc,
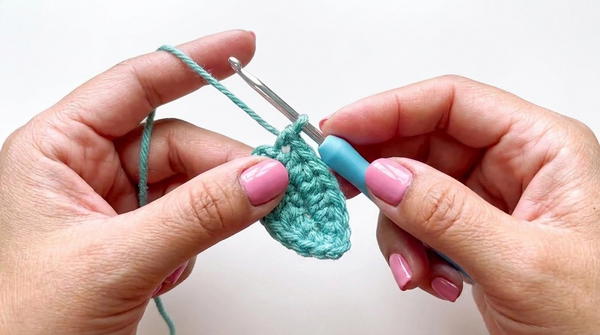
- Slip stitch (ss) into the starting chain.
- Step 6: Secure and cut yarn.
- Repeat to create a second leaf.
4. Stem
- Step 1: Bend a 14 cm wire into an L-shape at one end (this will be the flower attachment end).
- Step 2: Starting at one end, wrap green yarn tightly around the entire length of the wire.
- Step 3: Secure the yarn firmly at both ends to hold wrapping in place. The wrapped wire becomes a sturdy yet flexible stem.
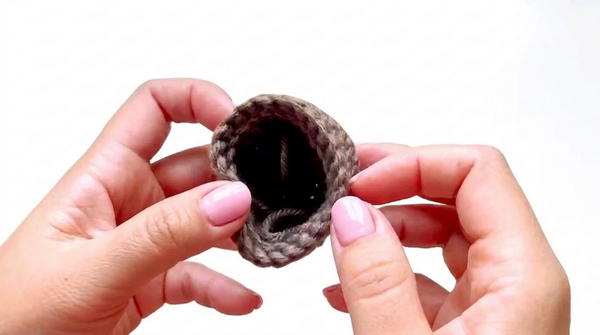
5. Pot (Dark Gray Yarn)
- Round 1:
- Create a magic ring (MR), chain 1.
- Work 8 single crochets (sc) into the ring.
- Slip stitch (ss) to join the round.
- Round 2:
- Chain 1.
- Work 2 sc in each stitch around (increases) — total 16 stitches.
- Slip stitch (ss) to join.
- Round 3:
- Chain 1.
- Alternate 2 sc in one stitch, then 1 sc in next stitch around — total 24 stitches.
- Slip stitch (ss) to join.
- Round 4:
- Chain 1.
- Work 1 single crochet (sc) in every stitch in back loops only (BLO).
- Maintain 24 stitches.
- Slip stitch (ss) to join.
- Rounds 5 to 7:
- Chain 1.
- Work 1 sc in every stitch (24 stitches) around.
- Slip stitch (ss) to join each round.
- Round 8:
- Chain 1.
- Work 1 sc in every stitch in front loops only (FLO).
- Finish with a seamless slip stitch (ss) join to close the pot edge cleanly.
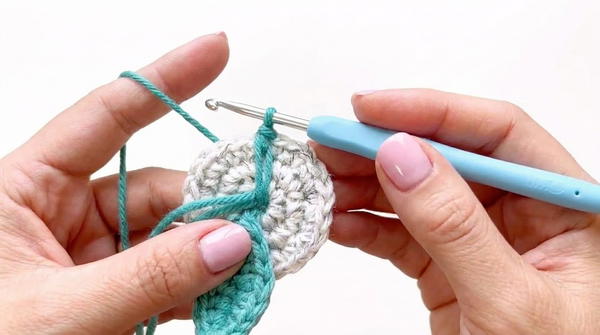
6. Pot Cover (Light grey Yarn)
- Round 1:
- Make a magic ring (MR); chain 1.
- Work 8 single crochets (sc) in the ring.
- Slip stitch (ss) to join.
- Leave a small hole in the ring.
- Round 2:
- Chain 1.
- Work 2 sc in each stitch around (total 16 stitches).
- Slip stitch (ss) to join.
- Round 3:
- Chain 1.
- Alternate 2 sc in one stitch, 1 sc in the next around (24 stitches).
- Slip stitch (ss) to join.
- Leave a long tail for sewing the cover to the pot.
Final Assembly
- Prepare Base:
- Glue the wrapped wire stem firmly to the center of a circular cardboard base, providing stability.
- Stuff Pot:
- Fill the crocheted pot with fiberfill stuffing or a tight bundle of wrapped yarn to maintain shape.
- Attach Stem:
- Insert and glue the stem into the center of the stuffed pot for a secure fit.
- Add Leaves:
- Sew or glue the two green leaves to the stem to give natural detail.
- Close Pot:
- Sew the beige pot cover to the edge of the dark gray pot using the long yarn tail left earlier for a neat finish.
- Add Flower:
- Using pliers, gently bend the top end of the wire stem to position the flower.
- Glue the flower head to the top of the stem wire.
- Attach a small piece of fabric or cardboard to the back of the flower to enhance security and durability.
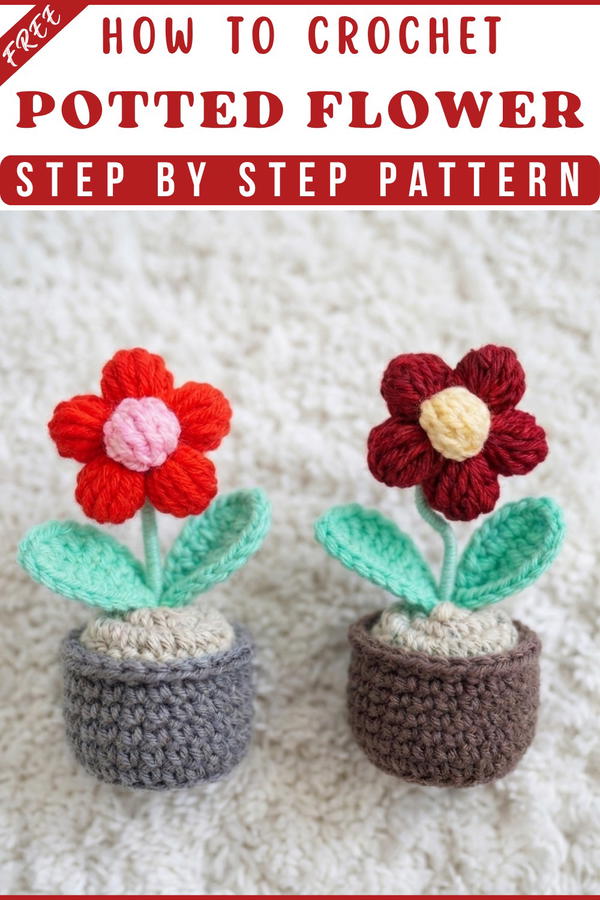
Finished Size
- The completed crochet potted flower stands approximately 15 cm (6 inches) tall, with vibrant yellow petals about 5–6 cm across.
- The sturdy felted pot measures about 6 cm wide and 4 cm tall.
- Compact and graceful, perfect for display or gifting.
Conclusion
This crochet potted flower project is an enriching blend of amigurumi and decorative crocheting, combining texture, color, and sculptural elements. From the intricate puff-stitched petals to the tightly wrapped wire stem and textured pot, each component is crafted to impart realism and charm.
Your dedication to each step — from foundational stitches to precise assembly — results in a stunning, handmade flower that brightens any space or heart. This project builds valuable skills like working in loops, managing tension, sewing pieces together, and creative finishing.