Carry your daily items with this Crochet Round Handbag Free Pattern and enjoy a pretty circular bag for shopping, outings, and summer days.
One wonderful crochet project comes from the original YouTube tutorial by Crochet with Olga Dyvinets!!!—full credit to Olga for her creativity and clear instructions. The Crochet Round Handbag is a stylish, circular-shaped bag that combines simplicity with elegance, making it a perfect accessory for everyday use or special occasions.
Pretty Crochet Round Handbag Free Pattern For Spring Fashion
This round handbag is known for its neat, compact shape and sturdy construction. Made from yarn, it’s lightweight yet durable, ideal for carrying essentials like your phone, keys, and wallet. Its beauty lies in the textured stitches that give the bag a charming, handmade appearance. You can personalize it with various colors, yarn types, or add special touches like tassels, buttons, or a lined interior to reflect your unique style.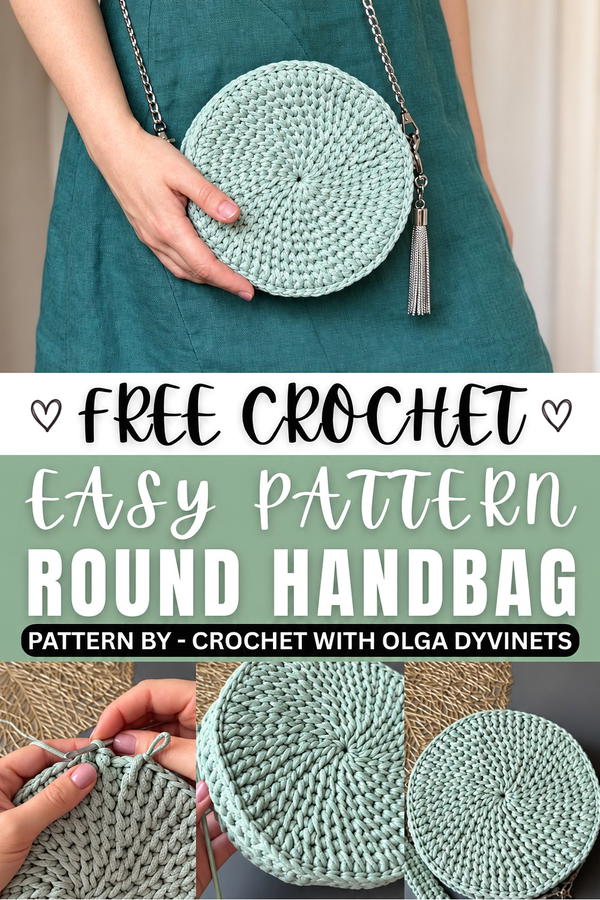 The Crochet Round Handbag is quite versatile—it can be used as a casual day bag, a chic evening accessory, or even a unique gift for a friend. It’s perfect for outings like brunch, shopping trips, festivals, or outdoor events where you want to carry just the essentials in style.
Creating the Crochet Round Handbag starts with crocheting a flat round base using simple stitches such as single crochet or half-double crochet. You then work upward in rounds to form the sides. The project often includes making a handle or strap—either a simple chain stitch strap or a more comfortable, padded option. Finishing details like adding a zipper or button closure make the bag both functional and one-of-a-kind.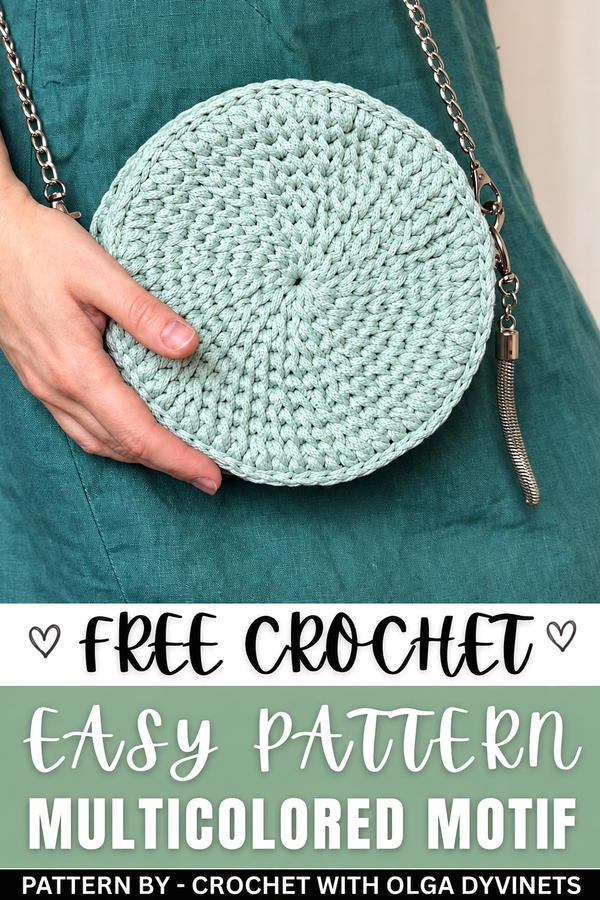 Overall, this project is enjoyable and accessible for crocheters at any level and results in a practical, beautiful accessory.
About the Pattern
A round crochet bag stands as an elegant and practical accessory, blending structure with a touch of artisanal charm. The motif centers around two sturdy hoop-like panels crafted from polyester cord and outlined with intricate slip stitch and cabled detailing. Side panels are carefully shaped for function and visual harmony, while the seamless addition of a zipper delivers a professional finish. A robust, textured strap—part crochet, part chain—provides an ergonomic compliment, enhancing durability and aesthetics. Utility, stability, and style merge in this piece, suitable as a reliable everyday companion or contemporary statement bag.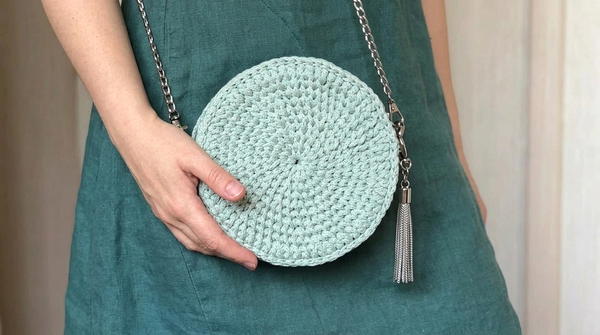
Pattern at a Glance
- Design: Circular bag with cabled side panel and functional zipped closure
- Construction: Two main circles joined with a dense, textured side section
- Strap: Combo strap using crocheted section attached to rings and chain
- Features: Fully enclosed with zipper, decorative rings, and sturdy build
- Techniques: Working in the round, twisted (cabled) single crochet, joining seams, attaching hardware
Important Notes
- Count your stitches carefully for clean assembly and symmetry.
- All joining (zipper, sides, strap) is done through the back loops or inner bridges for crisp, seamless edges.
- Use a firm hand when working with polyester cord to maintain neat stitch definition and bag shape.
- Sewing hardware securely is crucial for durability; pre-mark placement points for zipper and rings.
- Slight blocking can help settle the circle shape before assembly if necessary.
Difficulty Level
Intermediate
This bag is designed for crafters with experience in round construction, working into back loops, employing specialty stitches (twisted/cabled crochet), and basic hand sewing. Assembly demands attention to detail, especially when attaching the zipper and hardware for the seamless look.
Supplies Needed
- Yarn: Approximately 3mm diameter polyester cord (quantity depends on diameter, usually 2–3 skeins for bag and strap)
- Hook: 3 mm crochet hook
- Zipper: 50 cm zipper (fits circumference of main panels)
- Hardware: 2 semi-rings (D- or O-rings), chain segments for strap extension, decorative rings (optional)
- Notions: Yarn needle, scissors, pins or clips for zipper, sewing needle & strong matching thread
Size & Measurements
- Bag Diameter: Approximately 22–24 cm (after 11 rounds, before side construction)
- Side Panel Width: 2.5–3 cm
- Strap Length: 37 cm crochet portion + chain segments as desired
- Zipper Length: 50 cm (should match bag’s total circumference)
Gauge & Stitch Details
- Gauge: 10 cm ≈ 12 rounds in main circle; side panel in cabled stitch ≈ 3 cm wide
- Important for fitting zipper and strap evenly; match your tension with main circle sample
- Stitch Focus: Slip stitch, single crochet, twisted (cabled) single crochet—emphasizing back loop and post texture
Crochet Abbreviations
| Abbr | Term |
|---|---|
| ch | Chain stitch |
| sc | Single crochet |
| sl st | Slip stitch |
| blo | Back loop only |
| st(s) | Stitch(es) |
| yo | Yarn over |
| rep | Repeat |
| cm | Centimeter(s) |
Special Stitch Guide
- Slip Stitch (sl st): Insert hook, yo, pull loop through both stitch and loop on hook.
- Single Crochet (sc): Insert hook, yo, pull up loop, yo, pull through both loops.
- Twisted (Cabled) Single Crochet: Insert hook into indicated stitch, reach slightly back and under the previous row, yo and draw up a loop to cross the working yarn behind the stitch post; complete as for sc. This creates a raised, cabled texture.
- Back Loop Only (blo): Insert hook only into the back bar (“bridge”) of the indicated stitch, not through the full top V.
Complete Crochet Pattern
Main Panels: Finishing the Circles
- Complete the foundation circles (pre-existing 11 rounds from prior work).
- Edging Round (sl st):
- Attach yarn to any stitch on circle edge.
- Work sl st in each stitch around the full circumference, making sure to connect each loop to its corresponding loop for a tidy finish.
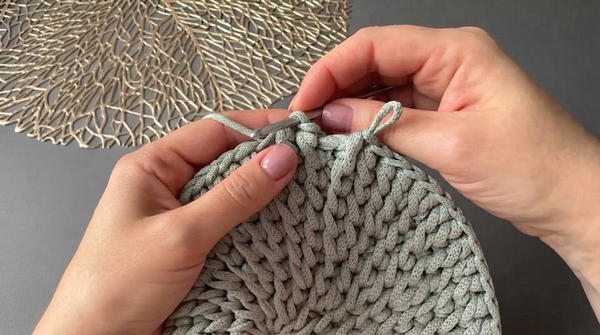
- Fasten off and thread tail through last sl st to secure. Weave in all ends.
Side Panel Construction
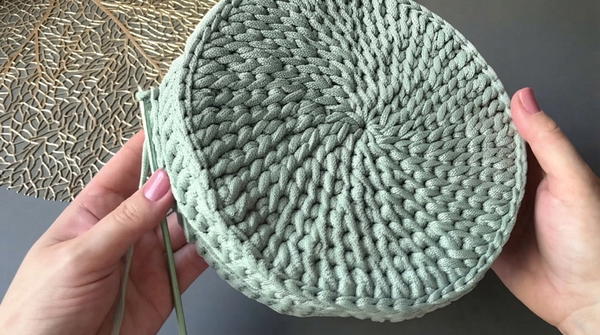
- Pick up stitches: Attach yarn to the back loop (inner ridge or “bridge”) of any stitch on the circle’s edge.
- Round 1 (sc):
- Sc in each back loop around the entire edge. Total—66 sc (ensure even spacing; adjust slightly on final stitches to match circle count).
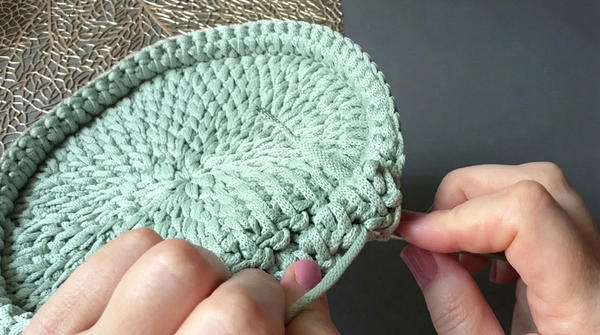
- Do not join; work in continuous spiral or mark start.
- Sc in each back loop around the entire edge. Total—66 sc (ensure even spacing; adjust slightly on final stitches to match circle count).
- Rounds 2 & 3 (Twisted/Cabled sc):
- For each stitch: Insert hook into st, reach back/cross under previous stitch, yarn over, pull up loop, yarn over, pull through both loops (as described above), creating a cabled look.
- Continue without increases; maintain stitch count.
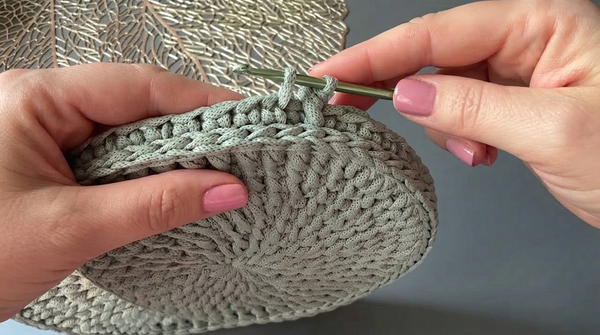
- Repeat for both rounds.
- Fasten off and secure ends.
- Repeat side panel attachment for second main circle panel.
Assembly & Hardware
- Zipper Insertion:
- Pin the 50cm zipper to the inside edge of one completed side panel (usually easiest to pin zipper tape to the vertical “wall” formed by side rounds).
- Keep zipper open while sewing for space.
- With sewing needle and matching thread, stitch zipper to the crochet edge using backstitch or whipstitch for sturdy hold.
- Repeat for other side, aligning both zipper tapes evenly for a balanced closure.
- Joining the Main Panels:
- Place both circle panels, wrong sides together, aligning the side panel edges.
- Starting at the center bottom, use the yarn tail remaining from side panel (or attach new cord).
- Join circles with sl st or invisible joining stitch, working only through the back loops (inner half) on each side, to the point where zipper starts/ends. This ensures the bag remains fully closable but opens flat when unzipped.
Combo Strap Construction
- Attaching to Semi-Ring:
- Join yarn at one semi-ring.
- Ch 1, work 3 sc into ring.
- Rows (forming the strap):
- Work back and forth in rows: Each row, sc in back loop only (blo) of each sc—this deepens the ridge and produces a dense, thick strap.
- Continue rows until strap measures 37 cm in length (or desired).
- Finish: Sew final end of strap securely around the second semi-ring.
- Complete: Attach metal chain segment to extend length if desired.
- Weave in all ends deeply for strength.
Final Touches
- Attach the finished combo strap to your bag:
- Thread each end (attached to semi-rings) through the decorative rings on the bag sides.
- Secure decorative rings to the outer edge, in line with zipper start/end, using strong yarn “figure eight” stitches or small sewn reinforcements.
- Ensure all fastenings are firm; test zipper movement, and gently reshape the bag as needed for symmetry.
Assembly & Finished Size
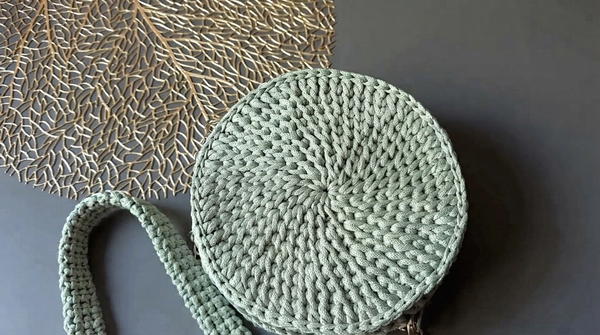
- The bag should now measure approximately 24–25 cm diameter with a dense 3 cm side wall.
- Zipper runs cleanly around 90% of the bag’s circumference, allowing wide access.
- Strap and chain length suits shoulder or crossbody carry based on personal adjustment.
- Double-check all ends are tightly woven in and that rings and zipper are secure for everyday use.
Conclusion
The round crochet bag blends architectural construction with thoughtful finishing details, from slip stitch edging to cabled side panels and seamless zipper integration. The resulting piece is both visually striking and practical, with its stable form, functional hardware, and comfortable strap. Every stage reinforces durability and visual harmony, making it an ideal choice for personal use or as a thoughtfully handmade gift. Working this pattern enriches experience in bag assembly, hardware integration, and textured crochet, rewarding the effort with a stylish, reliable accessory.