Add charm to your wardrobe with a unique handmade crochet bag made easy using this free pattern that guides you every step of the way.
A unique and stylish bag design is shared by Örgü Ütopyası on their YouTube channel, offering an easy way to create something truly special. This design stands out for its clean and modern look, making it ideal for everyday use or as a thoughtful gift for loved ones. The tutorial is simple to follow, ensuring that anyone can recreate this eye-catching bag with confidence.
Stylish and Simple Free Crochet Bag Patterns for Everyone
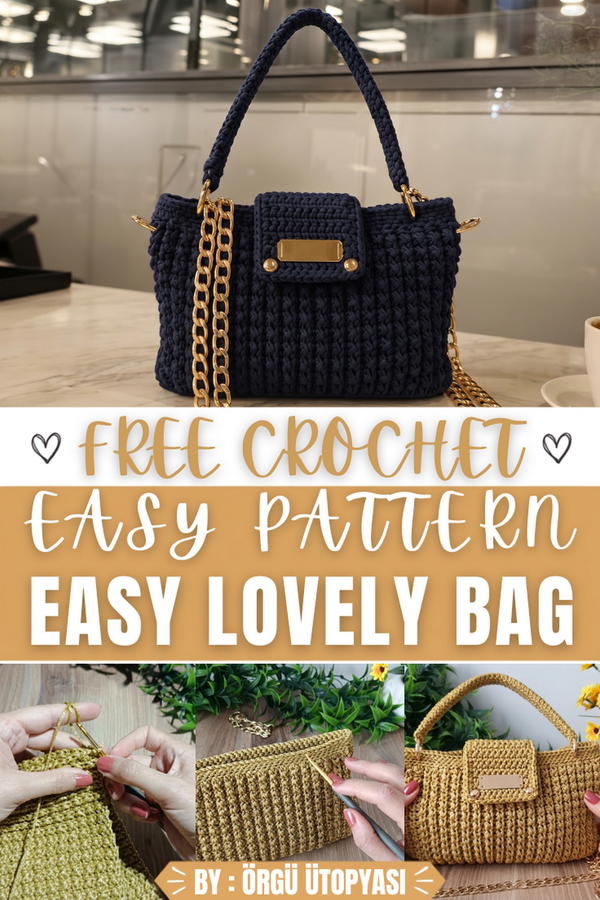
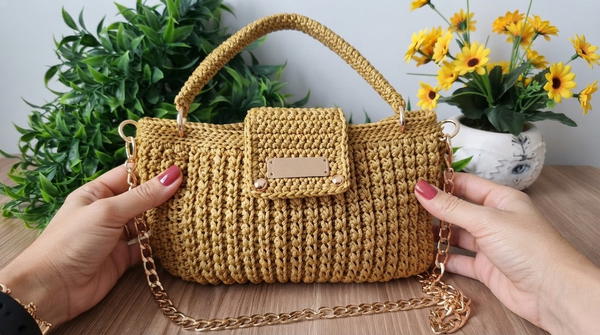
What makes this bag exceptional is its elegant shape and intricate pattern. Its rectangular form is neat and balanced, while the design adds texture and charm, giving it a professional appearance that rivals store-bought options. The handle is sturdy yet comfortable, allowing you to carry it for long periods with ease. This bag is not only stylish but also practical, offering plenty of space to keep your belongings organized while still looking fashionable.
Beyond its appearance, its working style is straightforward and consistent. The process includes repeating easy techniques that can be learned quickly, making it accessible for everyone without being overwhelming. This approach produces results that feel rewarding and look impressive, even for someone making a bag for the first time.
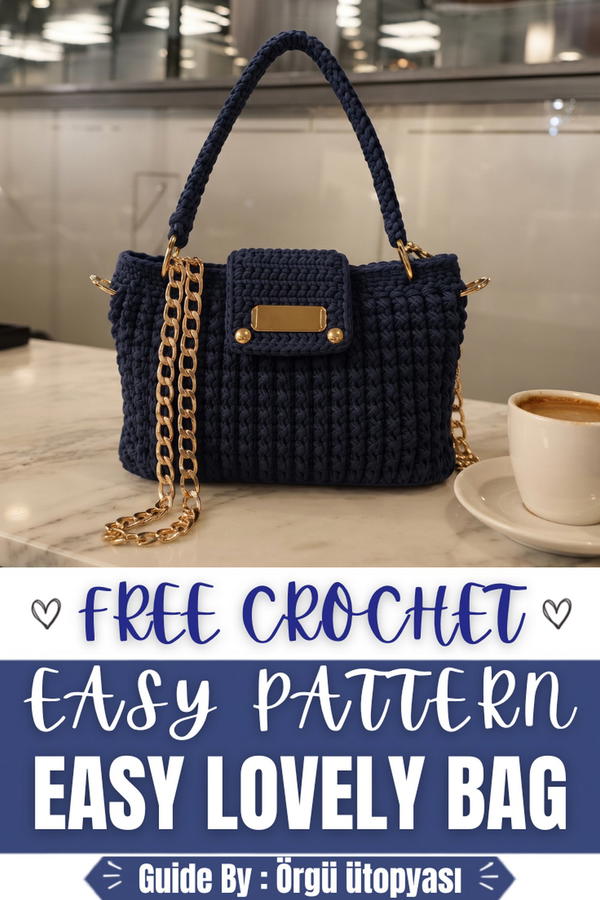
Crochet Mini Macrame Bag Pattern
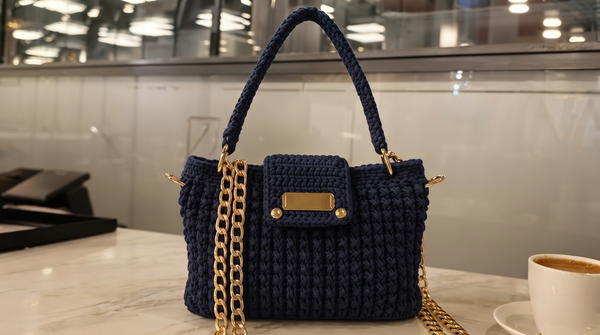
This crochet bag is a small, stylish, and practical accessory, worked in flat pieces with simple stitches and subtle shaping. It uses fine macrame polyester cord to achieve a neat, structured finish. With a fold-over flap, magnetic closure, decorative hardware, and optional chain strap, this bag is ideal as a shoulder, cross-body, or hand-held accessory. The pattern focuses on an easy, repetitive stitch sequence that builds quickly and is suitable for those who enjoy textured crochet work.
Skill Level
Intermediate
This pattern is classified as intermediate because it involves:
- Maintaining a consistent pattern of slip stitch and single crochet worked in the back loop
- Shaping the body with centered decreases
- Neat slip-stitch seaming
- Adding a flap, edging, and magnetic snap
- Working evenly along edges and managing stitch counts
Confident beginners who already understand basic stitches and simple shaping may also attempt this project with care.
Materials
- Yarn / Cord
- Macrame polyester cord, size 3 (approximately 1.5 mm thickness)
- Total usage: about 1.5 balls
- Crochet Hook
- Tulip 3.50 mm crochet hook
- Hardware and Notions
- Magnetic button (for flap closure)
- Decorative bag feet or studs (optional, for embellishment on flap or base)
- Bag tag / label (optional)
- Bag handle (double-sided crocheted strap; pattern referenced from a separate video)
- Chain strap and connectors (optional, for shoulder or cross-body use)
- Tools
- Scissors
- Yarn needle (for weaving in ends and attaching hardware)
Special Stitches Used
- Slip Stitch (sl st) in Back Loop
Used both in the stitch pattern and for the mouth border, creating a flat, neat edge and subtle texture. - Single Crochet in Back Loop (sc BLO)
All single crochets in the main pattern are worked into the back loop only, forming a ribbed, textured fabric. - Centered Decrease Over Three Stitches
For shaping the bag’s sides: three adjacent stitches are worked together as one single crochet to form inward shaping at the center of the panel.
Stitch Abbreviations
- ch – chain
- sc – single crochet
- sl st – slip stitch
- BLO – back loop only
- dec over 3 sts – decrease over three stitches worked together as one single crochet
Useful Tips
- Work Tightly: Macrame polyester can be slippery; a firm tension helps maintain the bag’s shape and stitch definition.
- Mark the Center: Always mark the central stitch clearly before doing decreases to keep symmetry.
- Do Not Skip Edge Stitches: The designer emphasizes not skipping the last stitch in rows; missing stitches will distort the panel and counts.
- Check Stitch Counts: After decreases, verify stitch numbers on each side of the center to maintain uniformity.
- Practice Slip-Stitch Seaming: Use both loops on each edge stitch for a strong seam and neat finish.
Pattern Instructions
Bag Body Panel
The bag begins as a flat rectangle, then is shaped with central decreases to form the gusset-like sides.
Foundation and Main Fabric
- Row 1 (Setup Row)
- Chain 63.
- Measure: approximately 33 cm in length.
- The first chain is used as a turning chain; you will work over 62 chains.
- Skip the first chain.
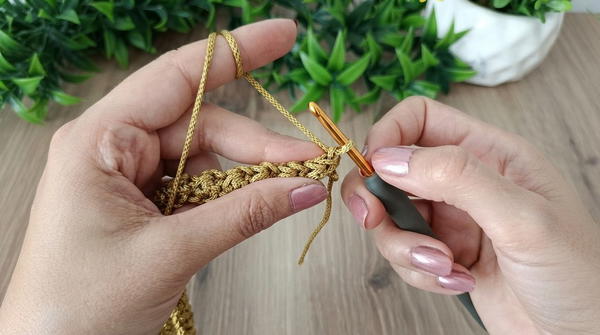
- In the second chain from the hook, work 1 sl st.
- In the next chain, work 1 sc.
- Continue the sequence:
- 1 sl st in next ch, 1 sc in next ch,
- repeat across to the end of the row.
- At the end, you should finish with 1 sc followed by 1 sl st in the last chains.
- Row 2 and Pattern Establishment
- Ch 1, turn.
- From now on, all stitches are worked in the back loop only (BLO).
- Begin in the first stitch:
- Where there was a slip stitch in the previous row, work sl st BLO.
- Where there was a single crochet in the previous row, work sc BLO.
- Maintain the sequence: sl st BLO in sl st, sc BLO in sc across the row.
- Do not skip the last stitch; finish with the correct stitch type as established.
- Continuing the Pattern
- Repeat Row 2 for the entire fabric:
- Always ch 1, turn, and work sl st BLO into sl st, sc BLO into sc.
- Continue until you have 18 pattern rows, counted from the first row.
- Measurements at this stage:
- Width: approximately 19 cm
- Length: approximately 31 cm
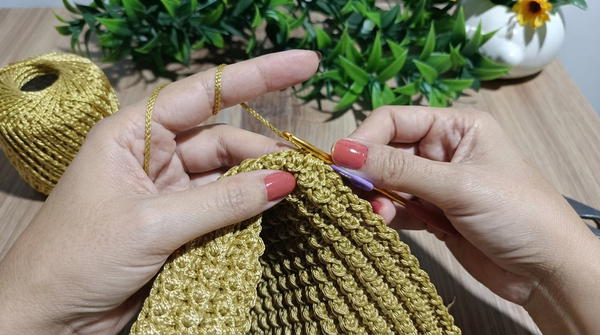
- Repeat Row 2 for the entire fabric:
Center Marking and Decreases
Now the panel is shaped by decreasing at the central stitch over several rows.
- Marking the Center
- Count from one side edge: there are 31 stitches from edge to near center, and 31 stitches from the other edge to near center, leaving 1 central stitch.
- Place a stitch marker in this central stitch.
- Decrease Row 1
- Work the established pattern (sl st BLO into sl st, sc BLO into sc) from the edge towards the center:
- Start with sl st, then continue with the usual sequence until you reach the marker.
- At the marker:
- You will work a center decrease over three stitches (the stitch to the right of the marker, the marked stitch, and the stitch to the left).
- Insert the hook into each of the three stitches in turn, pull up loops, then complete as one single crochet decrease over 3 sts.
- Move the marker up to the new decreased stitch.
- Continue to the end of the row following the established pattern sequence.
- End with a slip stitch if that matches the pattern.
- Ch 1, turn.
- Work the established pattern (sl st BLO into sl st, sc BLO into sc) from the edge towards the center:
- Decrease Row 2
- Again, work from the edge toward the center, maintaining pattern.
- Stop when you reach the three stitches around the marker area (as described: 1 stitch before the marker, the marked stitch, and 2 or 3 stitches after).
- Now perform another decrease over multiple stitches (again treated as a centered dec), drawing together the group of stitches around the marker into one sc.
- Reattach the marker to the newly formed central stitch.
- Continue the pattern to the end of the row.
- Further Decrease Rows
- Work a total of 6 decrease rows, always:
- Working in pattern up to the center group,
- Performing a centered decrease over the group of stitches,
- Continuing the pattern to the row end,
- Turning with ch 1 between rows.
- Work a total of 6 decrease rows, always:
After completing 6 decrease rows, the panel narrows. The stitch count between the two shaped sides becomes approximately 25 stitches on each side, plus 1 central stitch, which forms the bottom.
Side Seaming (First Side)
- With the panel folded so that the right sides face outward and the wrong sides inward, join one side:
- Insert hook through both loops of the first slip stitch on one edge and the corresponding slip stitch on the opposite edge.
- Pull up a loop and ch 1 to secure.
- Working down the side, join edge stitches with sl st:
- Take both loops of the next stitch on the near side and both loops of the next stitch on the far side.
- Work sl st through both.
- Continue seaming by slip stitch across the entire side length until you reach the end.
- Ch 1, cut the yarn, and secure the tail.
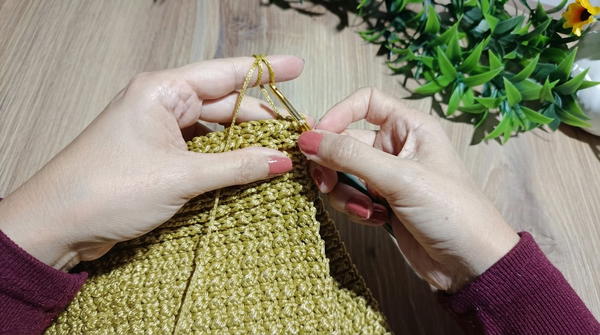
Second Side Decreases and Seaming
- Turn to the opposite side of the original rectangle and repeat:
- Identify the central stitch (here it is the 32nd stitch from the edge). Mark it.
- Reattach yarn at the first slip stitch on this side.
- Work in pattern (sl st BLO into sl st, sc BLO into sc) across the row.
- At the marker, perform the same centered decreases over 6 rows as before.
- Once decreases are completed, seam this side using the sl st through both loops method exactly as for the first side.
The bag body is now shaped and closed on both sides, forming a pouch.
Mouth Border
- Attach yarn at one side edge of the bag opening (starting slightly below the top if necessary to avoid difficult corners).
- Round 1 (sc Border)
- Ch 1, work sc evenly around the entire mouth of the bag:
- Place sc in each visible edge stitch or gap, spacing them evenly.
- Join with sl st to the first sc.
- Ch 1, work sc evenly around the entire mouth of the bag:
- Round 2 (sl st in BLO)
- Ch 1.
- Work sl st BLO in each sc around.
- At the join, continue in a spiral:
- Do not join; simply continue working sl st BLO into each stitch around and around.
- Use a marker to track the start of the spiral.
- Work approximately 4 rounds of slip stitch in BLO for a neat, rolled edge.
- At the end of the final round, cut the yarn and weave the tail downward into the fabric.
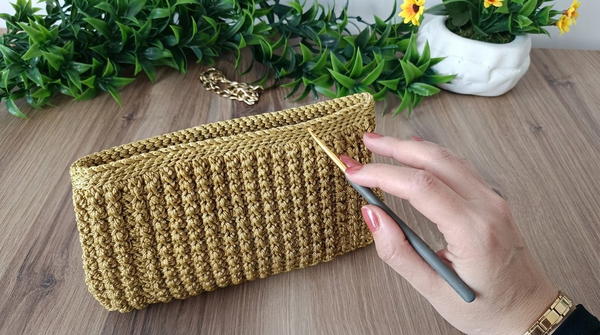
Flap (Lid)
The flap is worked over the center of the back side of the bag opening.
- Fold the bag so you can identify the exact midpoint of the back edge.
- Count total stitches along the back edge: approximately 34 stitches.
- The flap is worked over 11 central stitches, leaving balanced side stitches.
- Row 1 (Flap Base)
- From one side, count 17 stitches to reach the center.
- Attach yarn at this point.
- Work 11 sc across the next 11 stitches.
- Rows 2–14 (Flap Length)
- Ch 1, turn.
- Work 11 sc across.
- Repeat until you have 14 rows of 11 sc.
- Cut yarn and secure.
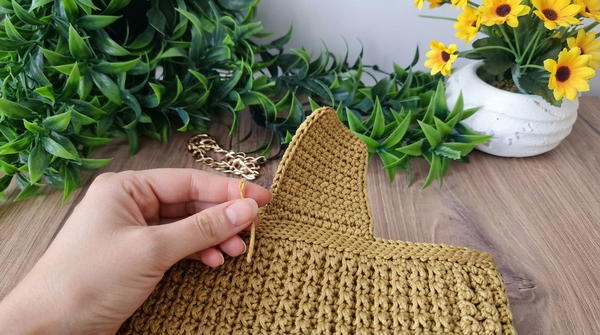
- Flap Edge and Bottom Connection
- Attach yarn at one corner of the flap.
- Work sc down the side of the flap:
- Place 1 sc in the edge of each flap row (total about 14 sc).
- At the bottom, work additional sc to bridge the flap bottom to the bag body edge, forming an anchored base:
- Work 14 sc along the bottom edge and attach to the opposite corner with sl st.
- Cut yarn, weave in ends.
Decoration and Closures
- Attach decorative studs or bag feet on the flap as desired.
- Sew a magnetic button:
- One side on the underside of the flap.
- The other side on the front body of the bag, aligned so the flap closes neatly.
- Sew or glue on a bag tag/label where desired.
Handles and Chains
- Attach a double-sided crocheted handle to the top sides of the bag via large loops or rings (pattern for this handle is from a separate tutorial).
- Optional: Attach an E-chain (metal chain strap) on both sides of the bag for shoulder or cross-body use, ensuring the chain is aligned and securely fixed.
Assembly and Sizing
- The finished bag, according to the transcription, measures approximately 19 cm wide and 31 cm tall before shaping; final dimensions after decreases and flap are slightly smaller in height but retain similar width.
- The structure is compact yet roomy enough for essentials like a phone, wallet, and small items.
- Once all seams, border, flap, hardware, and straps are in place, the bag presents a neat rectangular silhouette with a central flap and optional chain strap.
Conclusion
This crochet mini macrame bag offers a thoughtfully constructed design built from simple stitches used in an organized sequence. The alternating slip stitch and single crochet in the back loop create a distinctive texture and durable fabric, while central decreases give the bag elegant shaping without complex patterning. The addition of a flap, magnetic closure, decorative hardware, and optional chain strap transforms the piece into a versatile accessory suitable for everyday wear. By following the detailed steps and maintaining consistent tension and counts, this project results in a finely finished, modern bag that highlights both function and style.