Mint Design Blog


Delight your holiday with a Free Crochet Christmas Stocking with Granny Square Motifs Pattern featuring festive colors and easy seams for a cozy keepsake.
Decorating your home for the holidays with a cheerful stocking that’s not only beautiful but also handmade with love. You can easily learn how to create this festive piece by following the detailed tutorial on the YouTube channel Gülşah Özcan Filiz. The pattern is simple and straightforward, making it suitable for anyone, even beginners, to try.
Trending Crochet Christmas Stocking | Granny Motifs Tutorial
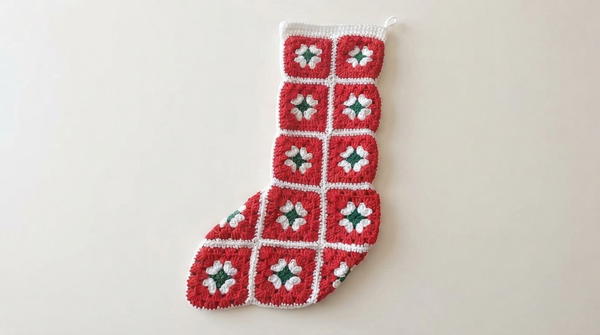
This stocking is perfect for spreading Christmas cheer, whether you hang it on your wall, over your fireplace, or even on cupboard doors. Its colorful and classic granny square design adds a pop of brightness to any space. You can also make it in different sizes by adjusting the yarn and hook size, letting you create matching sets for the entire family.
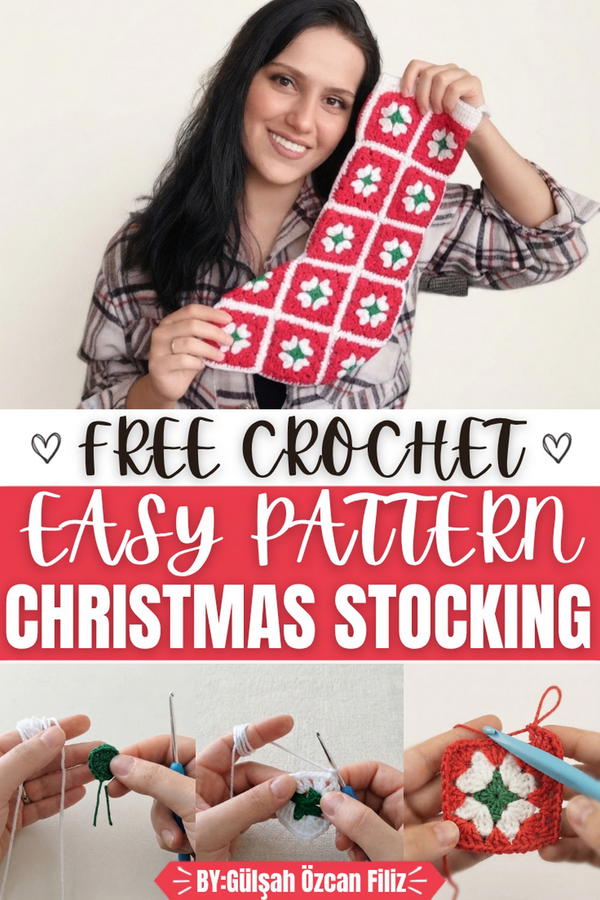
The working style begins by making 24 small square motifs, which are later joined together with a needle to form the stocking shape. Each granny square uses easy stitches like double crochet, chains, and slip stitches. The edges are neatly finished with single crochet stitches, giving it a polished and tidy look. For hanging, a simple chain loop is added at the top, making it easy to display.
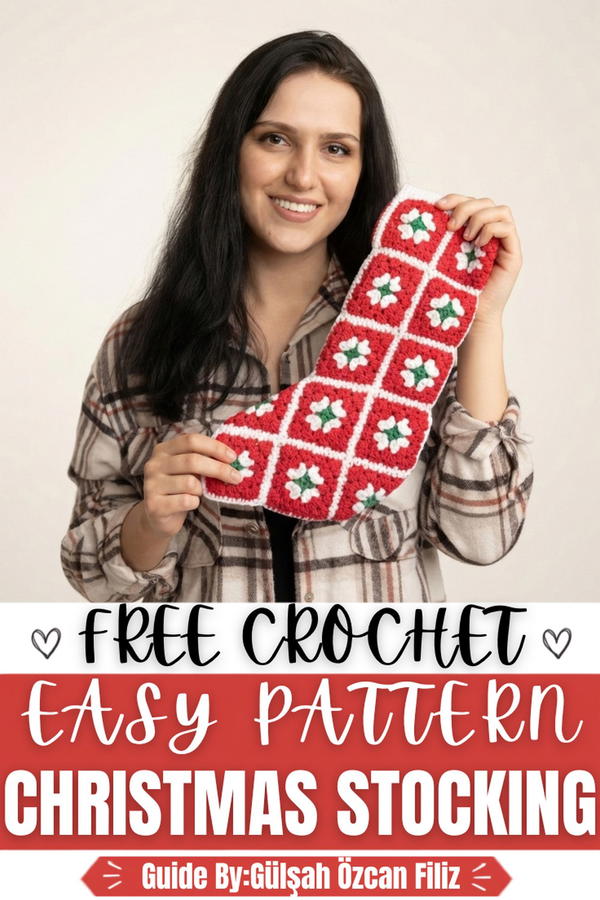
Crochet Motif Christmas Sock Pattern
This pattern creates a decorative crochet sock using individual granny square motifs joined together with a needle and thread. The finished piece makes a charming Christmas stocking suitable for hanging on a wall, cabinet door, or decorating a Christmas tree. The construction is based on the classic granny square motif, worked in multiple colors to create a cheerful and festive appearance. Leftover yarn in various colors can be used throughout, making this an economical and practical project that gives new life to yarn scraps while producing a visually appealing seasonal decoration.
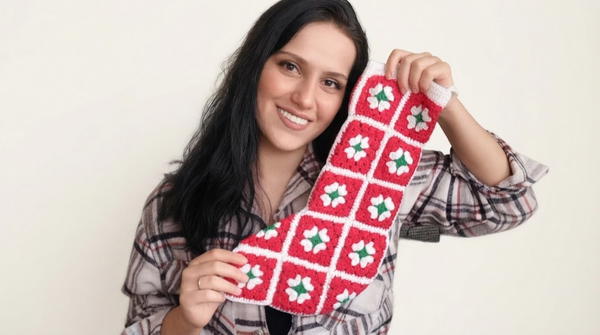
Skill Level: Beginner — This pattern is perfectly suited for those who are new to crochet or have only basic experience. The repetitive nature of the granny square motif and the straightforward assembly process make this an excellent first project for anyone building foundational crochet skills.
Materials
- Yarn: Cotton yarn or any leftover yarn of your choice in multiple colors (the original uses a red base with colorful accents)
- Hook: 3mm crochet hook (adjust size based on your chosen yarn weight)
- Tools:
- Tapestry needle for sewing motifs together
- Scissors
- Measuring tape
- Stitch markers (optional)
Special Stitches
- Magic Ring: An adjustable loop created by wrapping yarn around the finger, used to begin the motif from the center with a closeable, gap-free starting point.
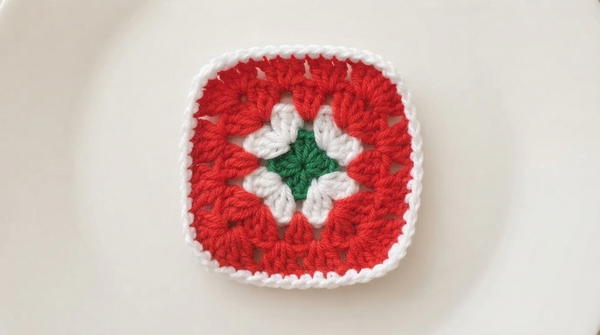
- Granny Square Cluster: Groups of 3 double crochet stitches worked into a chain space, separated by ch 1 between each cluster along the sides and ch 1, 3 dc, ch 1 at corners to build the classic square shape.
- Corner Increase: Worked as 3 dc, ch 1, 3 dc all into the same corner chain space, creating a defined right-angle corner that expands the motif outward with each round.
- Single Crochet Edging: A final round of single crochet stitches worked evenly around the entire perimeter of each completed motif to create a clean, uniform edge before assembly.
Stitch Abbreviations
- ch — chain
- sl st — slip stitch
- sc — single crochet
- dc — double crochet
- MR — magic ring
- sp — space
- st(s) — stitch(es)
- rep — repeat
- yo — yarn over
- RS — right side
- WS — wrong side
Useful Tips
- Use stitch markers to identify the four corner chain spaces from Round 2 onward, especially when working with multiple colors that may make it difficult to distinguish structural positions.
- When changing colors between rounds, always fasten off the previous color completely and join the new color fresh into any chain space to keep color transitions clean and tidy.
- Make all required motifs before beginning the assembly process to ensure consistency in size and tension across the full set.
- If using thinner yarn and a smaller hook, the motifs will produce a smaller, more delicate sock ideal for tree ornament use.
- For a larger decorative stocking, use thicker yarn with a larger hook and add additional rounds to each motif before the edging round.
- When sewing motifs together with a needle, use matching or neutral yarn to keep seams as invisible as possible on the right side of the finished piece.
- The hanging chain loop of 15 stitches can be adjusted longer or shorter depending on where and how the finished sock will be displayed.
Pattern Instructions
Motif Construction (Make 24 or as Required)
Round 1 — Magic Ring Foundation
- Create a MR.
- Ch 3 (counts as first dc).
- Work 2 dc into the ring.
- Ch 3.
- Work 3 dc into the ring.
- Ch 1.
- Work 3 dc into the ring.
- Ch 3.
- Work 3 dc into the ring.
- Ch 1.
- Sl st into the top of the beginning ch-3 to join the round.
- Pull the magic ring closed tightly.
- Fasten off and cut yarn.
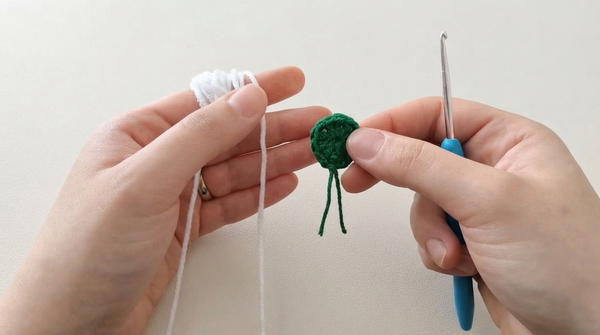
- Total: 4 groups of 3 dc with ch-3 at two opposite corners and ch-1 at the remaining two corners
Round 2 — Second Color Round
- Join new color yarn into any ch-3 corner sp with a sl st.
- Ch 3 (counts as first dc).
- Work 2 dc into the same corner sp.
- Ch 1.
- Work 3 dc into the same corner sp.
- Ch 1.
- Work 3 dc into the next ch-1 side sp.
- Ch 1.
- At the next corner sp, work 3 dc, ch 1, 3 dc.
- Ch 1.
- Work 3 dc into the next ch-1 side sp.
- Ch 1.
- Rep the corner and side cluster sequence around all four sides of the motif.
- Sl st into the top of the beginning ch-3 to join.
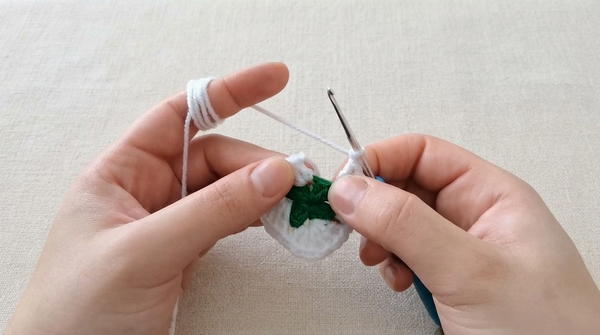
- Fasten off and cut yarn.
- Total: 8 groups of 3 dc with corners and side clusters established
Round 3 — Third Color Round
- Join new color yarn into any corner ch-1 sp.
- Ch 3 (counts as first dc).
- Work 2 dc into the same corner sp.
- Ch 1.
- Work 3 dc into the same corner sp.
- Ch 1.
- Work 3 dc into each ch-1 side sp along the side, placing ch 1 between each cluster.
- At the next corner sp, work 3 dc, ch 1, 3 dc.
- Ch 1.
- Rep around all four sides, working 3 dc with ch 1 into every side sp and 3 dc, ch 1, 3 dc into every corner sp.
- Sl st to join at the end of the round.
- Fasten off and cut yarn.
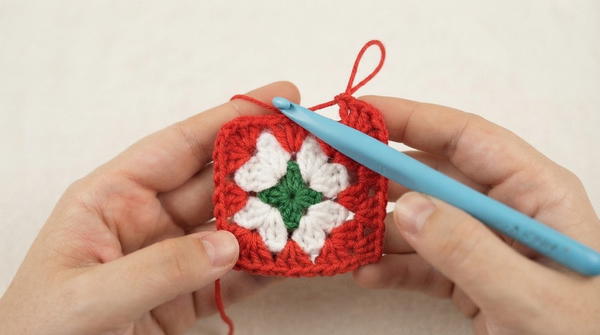
Round 4 — Fourth Color Round
- Join new color yarn into any corner sp.
- Rep the exact same process as Round 3, adding one additional 3 dc cluster with ch 1 to each side as the motif grows.
- Work 3 dc, ch 1, 3 dc at every corner sp throughout.
- Sl st to join at the end of the round.
- Fasten off and cut yarn.
- Continue adding rounds in new colors as desired until the motif reaches your preferred size.
Final Round — Single Crochet Edging
- Join white or main edging color yarn into any sp along the perimeter.
- Work sc into the top of each dc stitch around the entire motif.
- Work sc into each ch-1 side sp as encountered.
- At each corner, work 2 sc into the corner sp to keep the corner flat and well-defined.
- Continue working sc evenly all the way around all four sides.
- Sl st into the first sc to join the round.
- Fasten off and weave in all ends securely.
- Rep the full motif construction for all required motifs.
Assembly and Sizing
Arranging the Motifs
- Lay all completed motifs flat and arrange them in the sock shape:
- Position motifs to form the front and back panels of the stocking body.
- Arrange additional motifs to form the toe section, creating a triangular shape at the bottom front and bottom back of the sock.
- The heel section is formed by folding and sewing the base motifs into a triangular configuration on both the front and back lower edges.
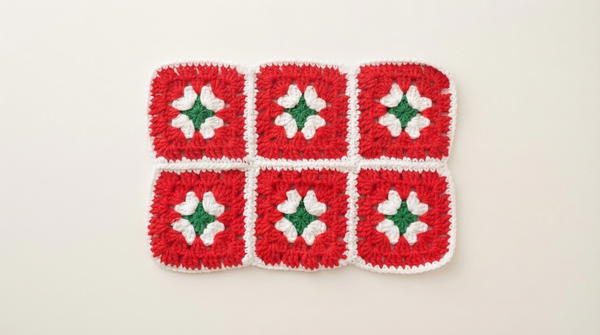
Sewing the Motifs Together
- Thread a tapestry needle with matching or white yarn.
- Begin at the heel section by folding the lower edge motifs and sewing the corner loops together to create the triangular toe and heel shaping.
- Hold two motifs together with wrong sides facing each other.
- Sew through the corresponding loops of the single crochet edging on both motifs simultaneously, stitching through each pair of opposing loops across the shared edge.
- Continue sewing all motifs together one by one, working from the heel upward and around the sock body until all edges are joined.
- Fold the assembled body and sew the back seam closed using the same loop-to-loop method.
- Weave in all remaining yarn ends and trim neatly.
Top Edging
- Join yarn at the top opening of the assembled sock.
- Work 2 rows of dc evenly around the top edge opening, working one dc into the top of each loop around.
- Sl st to join each row and fasten off after the final row.
Hanging Loop
- Join yarn at the top corner of the sock.
- Ch 15 and insert the hook back into the same starting stitch.
- Sl st to join the chain loop securely.
- Fasten off and weave in the end.
Sizing Notes
- For a standard decorative stocking, use 24 motifs as described.
- For a smaller Christmas tree ornament version, use thinner yarn with a smaller hook and reduce the number of rounds per motif to 2 or 3.
- For a larger display stocking, increase the motif count or add additional rounds to each motif before the edging round.
Conclusion
This decorative crochet sock pattern offers a straightforward and enjoyable approach to creating a festive seasonal piece using the timeless granny square motif. The modular construction allows complete freedom in color selection, making it an ideal project for using up leftover yarn while producing a cohesive and attractive finished item. The combination of the classic granny square technique with simple needle assembly results in a piece that is both structurally sound and visually pleasing. Whether displayed as a hanging decoration or used as a small gift pouch during the holiday season, this crochet sock stands as a versatile and enduring pattern that can be revisited and adapted year after year.