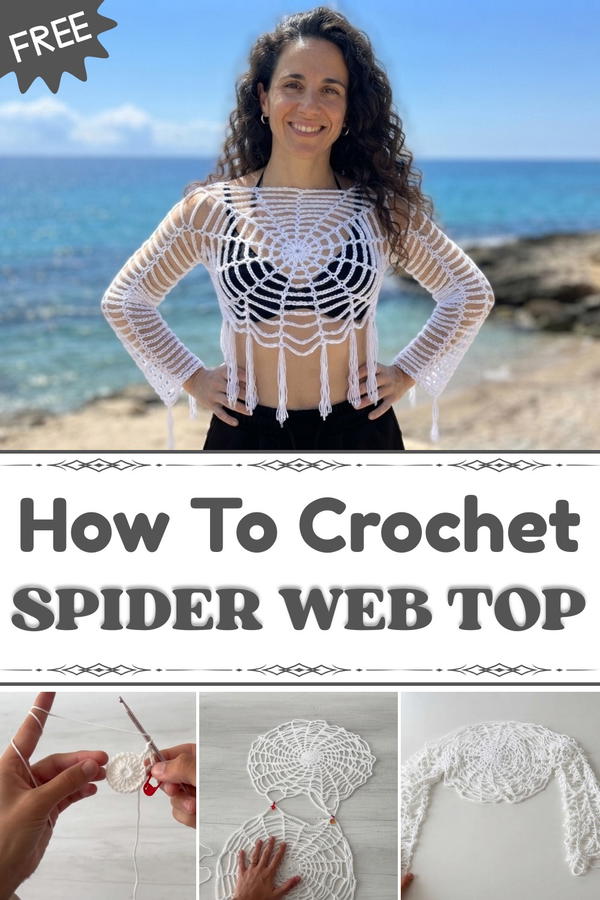
Style yourself this Halloween with a Free Crochet Spider Web Top Pattern that brings a bold and breathable design perfect for festive and seasonal flair.
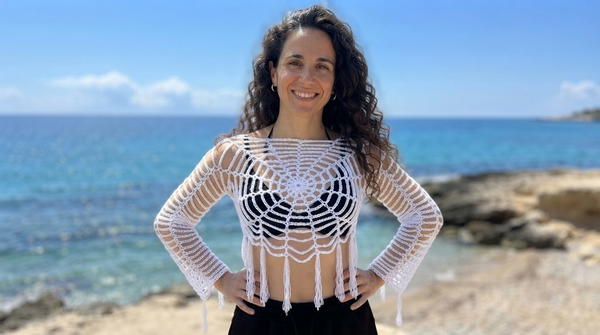
A spider web design can make clothes look very special and unique. The free crochet spider web top pattern lets you create a beautiful top that looks like a delicate spider web made from yarn. This top feels light and comfortable, perfect for wearing on warm days or dressing up for Halloween.
Cozy Free Crochet Spider Web Top Pattern for Autumn
The top’s beauty comes from its open, lacy design that mimics real spider webs. The pattern uses simple stitches to create loops and lines that give the top a delicate and stylish look. You can choose any color you like, classic black for a spooky feel, bright orange for a festive touch, or soft pastels for a more gentle appearance.
One great thing about this pattern is that you can change the size to fit anyone. Whether it’s for children or adults, the pattern can be adjusted so the top fits comfortably. The important stitches used in this pattern are chain stitches and double crochets. These create a sturdy yet flexible web shape that works well for clothing.
This spider web top pattern is perfect for people who love to make their own clothes. Beginners can easily learn the stitches, and experienced crocheters can add their own designs or make matching scarves, hats, or bags using the same web pattern. It’s a nice piece for Halloween parties, casual wear, or even gifts.
Making this crochet spider web top is a fun and creative way to enjoy crafting while wearing something special. It looks beautiful, feels good to wear, and shows off your handmade style in a unique way.
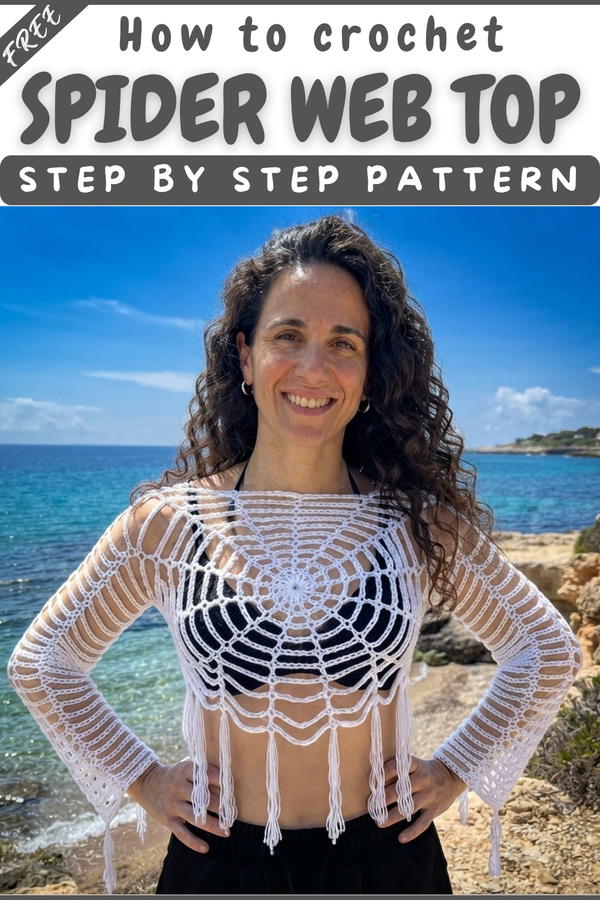
Crochet Halloween Spiderweb Top
Quick Overview Of Pattern
- Top is made from two identical filet-style spiderweb panels, seamed together at shoulders and sides with openings for head and arms
- Each web is created in the round, gradually increasing the separation chains to create the web effect
- Sleeves are worked in the round, using chain arches between web “spokes”
- Very little measurement is needed: you can try the work on as you go for a custom fit
- Pattern is easily adjustable for larger or smaller sizing
Notes
- Take a quick shoulder-to-shoulder measurement to estimate starting web diameter, but the project is very flexible and can be sized by trying on as you go
- Sleeves start from body join; you can adjust sleeve length and circumference
- The webs are worked as growing circular fillet motifs, with double crochets as “spokes” and an increasing number of chains between them in each round
- Sleeves are worked off the live stitches at the join, maintaining the web motif “around” the armhole
- You do not need to cut the yarn between panels and sleeves, unless you want to
- Use stitch markers to keep track of joins and starting chains
- Make both webs before beginning assembly
Skill Level
Confident Beginner / Intermediate:
Requires familiarity with working in the round, increasing, stitch markers, and seaming. Pattern is a good introduction to filet and motif construction.
Materials
- Yarn: 2 balls (50g each) of cotton yarn (or any yarn with good structure; about 100g total), color of choice
- Hook: 3.5 mm crochet hook
- Stitch markers: at least 4
- Scissors
Measurements / Sizing
- Panels: Diameter is adjustable—try on as you go.
(Viviana mentions laying the work on your chest and adjusting for width.) - Finished top size: Varies based on number of rounds and yarn. For reference, Viviana used about 16 rounds per web before joining, and ~30 rounds for each sleeve.
- Fit guidance: The webs should reach at least shoulder width before assembly.
- No schematic required—work is modular and adaptable.
Gauge
- Not critical.
- Adjust round count for desired diameter/fit.
- Each round increases sleeve circumference by 1 chain per arch.
Stitch Abbreviations
- ch = chain
- sl st = slip stitch
- dc = double crochet (UK: treble crochet)
- st(s) = stitch(es)
Special Stitches
- Magic Circle/Ring: Begin most rounds from a magic ring to create a tight, neat center.
- Increasing Arches: Each round adds 1 to the number of chains in the “arch” between double crochet posts, expanding the web.
- Slip Stitch Join: Used at the end of each round for closure, and at assembly points.
The Crochet Pattern
Spiderweb Motif (Make 2)
Round 1:
- Start with a magic circle.
- Ch 3 (counts as first dc).
- Work a total of 16 dc into the ring (counting initial ch3 as one dc).
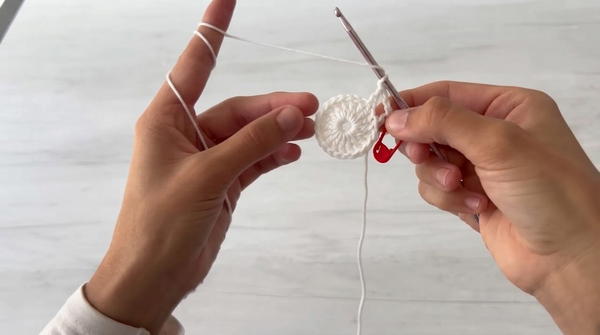
- (Tip: If circle expands, pull yarn tail tight only after all 16 dc are made.)
- Join to the third ch of starting ch3 with a sl st.
Round 2:
- Ch 3 (counts as first dc), mark third ch with stitch marker.
- Ch 1 (first separation chain).
- (Dc in next dc, ch 1) repeat around.
- You will have 16 dc each separated by ch 1.
- Join with sl st to marked third ch.
Round 3:
- Ch 3, mark third ch.
- Ch 2 (increase the separation: now ch2 between dc).
- (Dc in next dc, ch 2) repeat around.
- Join with sl st to marked ch.
Rounds 4 and Onward:
- Each new round begins with Ch 3, mark third ch, then ch N where N increases by 1 in every round (i.e., ch 3 then ch 3, then ch 4, and so on).
- (Dc in next dc, ch N) repeat around; continue increasing separation chains by 1 each round.
- Continue until the web reaches your desired diameter (for Viviana: up to 14 separation chains between dcs).
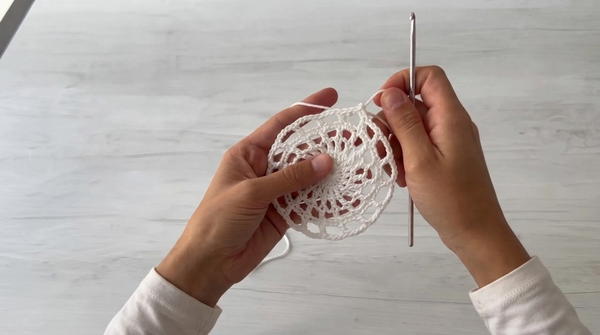
Last Round:
- Finish round as usual, join with sl st to starting marked ch-3.
- Do not cut yarn on the second motif; you'll use it for joining the front and back panels.
Assembly: Joining Web Panels
Step 1: Arrange Panels
- Place both spiderwebs with “right sides” together (Viviana suggests the center dc posts face out as “right side”).
- Align edges; pair final/dc posts of each web at the same place.
Step 2: Mark Shoulders (Neck Opening)
- Decide on the width to leave for the opening (suggested: 4 “spaces” or arches for the neck).
- Use stitch markers to hold panels together at the shoulders and at sides, as guides for armhole and body seams.
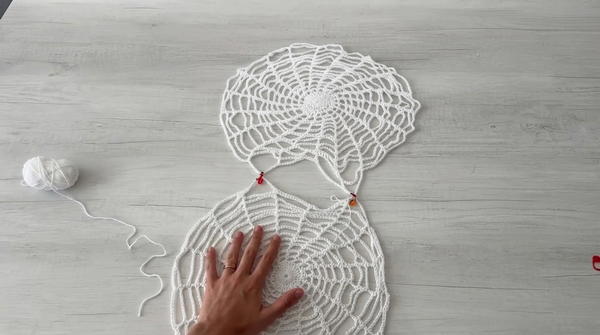
Step 3: Join Tops
- With yarn attached to one web at the join-point, insert hook through marked dc on both webs.
- Sl st to join; ch 3 for height.
- Mark the third ch; proceed to create the first sleeve.
Sleeves
Set-Up
- With body assembled and sleeves openings marked, begin working in the round at armhole.
Sleeve Rounds
- Ch 3 (counts as first dc), mark third ch.
- Ch S (S equals number of chains used in the last round of your web, e.g., ch 14 for a roomy sleeve).
- (Dc in each dc “spoke” from edges of the joined webs, ch S) repeat around the armhole.
- At the base of the sleeve (underarm), alternate joining through corresponding dc of each panel.
- Continue the pattern as on the last round of the web: dc “spoke”, separated by ch S (keep this number constant for straight sleeves or increase for bell sleeves).
Repeat
- Join each round with sl st to third ch.
- Work as many rounds as desired for sleeve length (Viviana worked 30 rounds).
- Repeat the whole process for the second sleeve on the other side.
Assembly & Finished Size
- Fasten off all yarn, weave in all ends securely.
- Block gently for a tidy, open appearance.
- The finished t-shirt features two “spiderweb” panels joined at shoulders/sides, with sleeves grown directly onto the armholes.
- Fit & size: Custom—try on as you go; adapt number of rounds and sleeve length for your preferred fit.
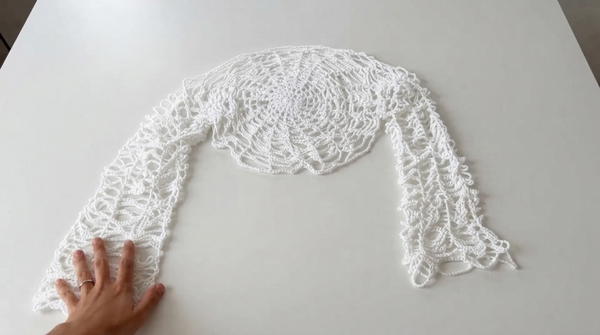
Conclusion
I hope you enjoyed this pattern for a unique Halloween spiderweb t-shirt. The design is simple, eye-catching, and easily adjusted for different body shapes or tastes.