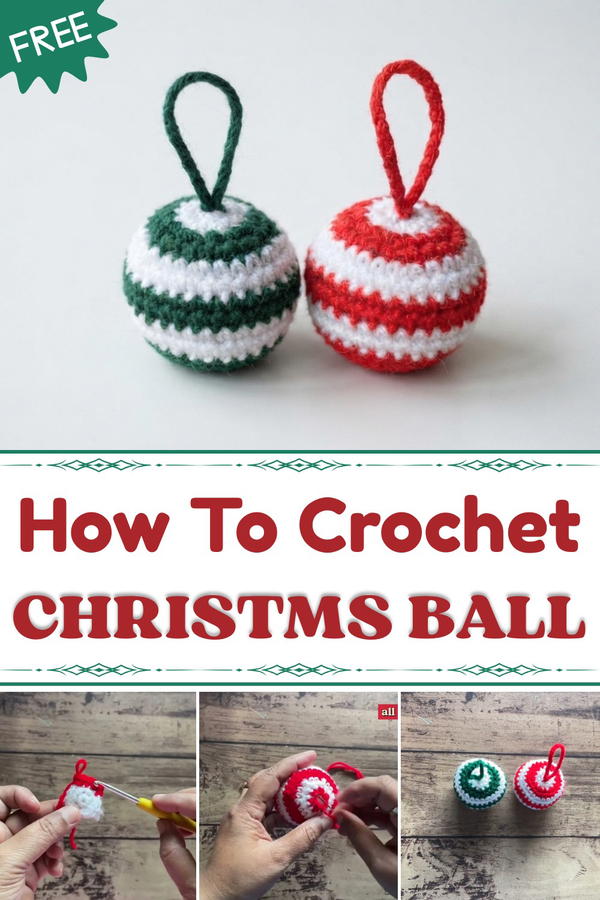
This project works well for all skill levels. If you’re new to crocheting, it’s a gentle way to get comfortable with working in the round, keeping consistent tension, and finishing up neat edges. More seasoned crocheters will enjoy playing with stitch patterns and embellishments to customize their creation even further.
Making this Christmas ball is not just about crocheting a pretty decoration—it’s also a chance to practice key crochet techniques in a relaxed and rewarding way. Whether you’re looking for a simple handmade gift or something cozy to jazz up your holiday home, this Free Crochet Christmas Ball Pattern is a sweet choice that captures the spirit of the season stitch by stitch.
Festive Crochet Ball Ornament Pattern
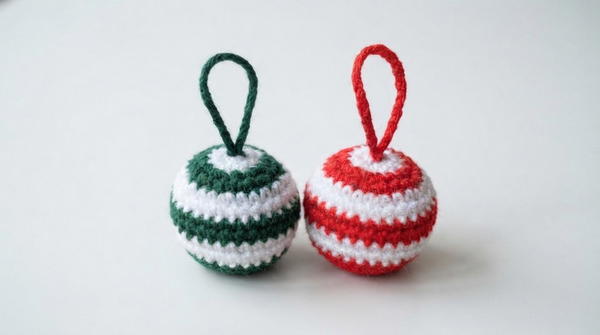
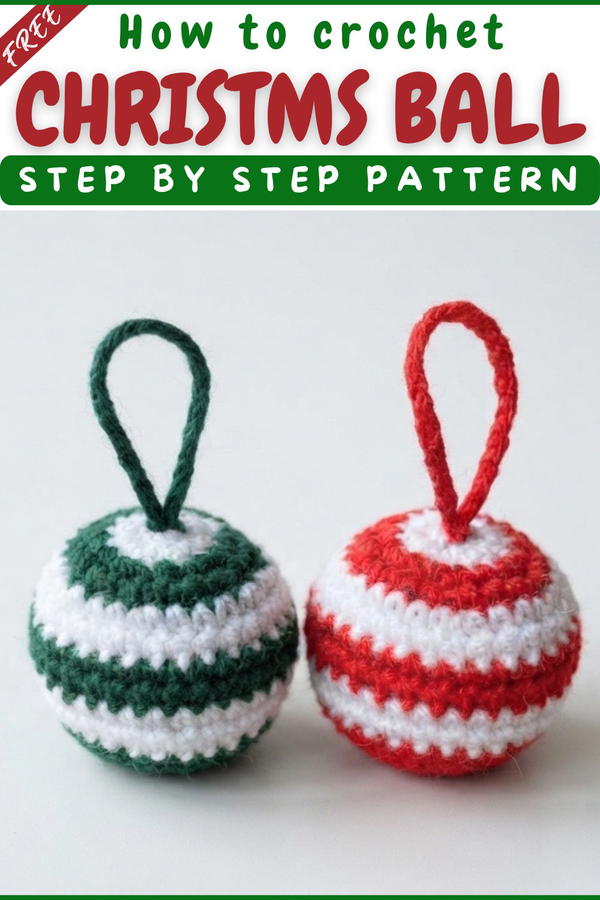
Celebrate the festive season by creating your own charming crochet ball ornament! This project uses 4-ply yarn combined with a 3.5mm crochet hook to form a small, beautiful sphere ideal for hanging on your Christmas tree or gifting. Alternating between two colors, the ornament features neat concentric stripes and a loop for easy suspension. Whether you're a beginner or have some crochet experience, this clear and thorough pattern will guide you through every step of making your own festive decoration.
Quick Overview Of Pattern
- Constructed in the round using single crochet stitches
- Begins with a magic ring and grows with increases
- Color alternates every two rows for a striped effect
- Shaping accomplished through increases and decreases
- Ends with closure and a crochet hanging loop
Notes
- This pattern is worked in continuous joined rounds.
- Change colors cleanly at the beginning of designated rows.
- Count stitches carefully each round to maintain the spherical shape.
- Use stuffing to achieve a firm but soft ornament.
- The hanging loop length can be customized.
Skill Level
Beginner to Intermediate
- Familiarity with basic crochet stitches and techniques (single crochet, magic ring, increases, decreases, slip stitch joins) required.
- Color changes and consistent tension important for neat stripes.
Materials
- 4-ply yarn in two contrasting colors (e.g., white and red)
- 3.5 mm (E) crochet hook
- Stitch marker to mark the beginning of rounds (optional but helpful)
- Yarn needle for weaving in ends and closing
- Polyester fiberfill or similar stuffing material
Measurements / Sizing
- Finished ornament measures approximately 6 cm (~2.4 inches) in diameter.
- Hanging loop measures about 13–15 chains or desired length.
Gauge
- Gauge is not critical for this project; focus on even tension so the ball holds a rounded shape.
- Stitch pattern: all rounds are worked in single crochet (sc) with evenly distributed increases or decreases as specified.
Stitch Abbreviations
| Abbreviation | Term | Description |
|---|---|---|
| ch | Chain | Yarn over, pull through loop |
| sc | Single Crochet | Insert hook, yarn over, pull through two loops |
| sl st | Slip Stitch | Insert hook, yarn over, pull through all loops on hook |
| dec | Decrease | Crochet two stitches together to reduce stitch count |
| MR | Magic Ring | Adjustable ring for starting rounds in the round |
Special Stitches
- Magic Ring (MR): A method to start crocheting in the round without a hole in the center.
- Increase: Working two single crochet (2 sc) stitches into one stitch to expand rounds.
- Decrease (dec): Single crochet two stitches together to reduce the stitch count smoothly and shape the ball.
The Crochet Pattern
Base (Rounds 1–5)
Round 1:
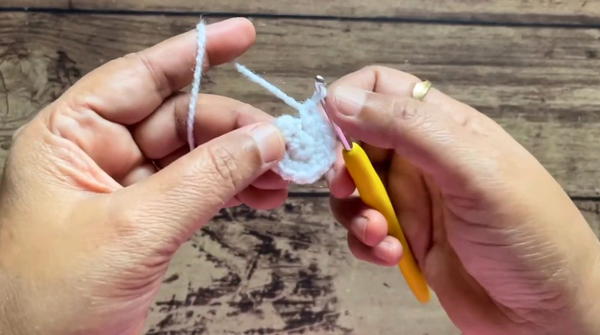
- Using color A (e.g., white), make a magic ring (MR).
- Work 6 single crochet (sc) stitches into the ring.
- Pull the ring tight to close the center hole.
- Join with a slip stitch (sl st) to the first sc.
- (6 stitches)
Round 2:
- Chain 1 to start.
- Work 2 sc in each stitch around (increasing).
- Join with a slip stitch.
- (12 stitches)
Round 3:
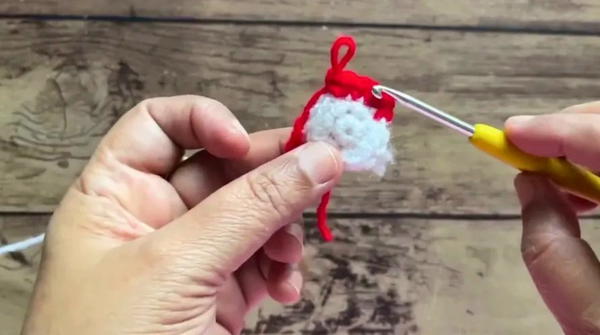
- Switch to color B (e.g., red).
- Chain 1.
- Work 1 sc in next stitch, 2 sc in following stitch; repeat from * to * around.
- Join with slip stitch.
- (18 stitches)
Round 4:
- Chain 1.
- Work 1 sc in each of the next 2 stitches, 2 sc in following stitch; repeat from * to * around.
- Join with slip stitch.
- (24 stitches)
Round 5:
- Switch back to color A (white).
- Chain 1.
- Work 1 sc in each of the next 3 stitches, 2 sc in following stitch; repeat around.
- Join with slip stitch.
- (30 stitches)
Middle Part (Rounds 6–14)
Round 6:
- Chain 1 at the start of each round.
- Work 1 sc in each stitch around (no increases or decreases).
- Alternate colors every 2 rounds following the established pattern: color B (red).
- Join round with slip stitch.
- (30 stitches)
Round 7:
- Chain 1 at the start of each round.
- Work 1 sc in each stitch around (no increases or decreases).
- Alternate colors every 2 rounds following the established pattern: two rounds of color B (red).
- Join round with slip stitch.
- (30 stitches)
Round 8:
- Chain 1 at the start of each round.
- Work 1 sc in each stitch around (no increases or decreases).
- Alternate colors every 2 rounds following the established pattern: color A (white).
- Join round with slip stitch.
- (30 stitches)
Round 9:
- Chain 1 at the start of each round.
- Work 1 sc in each stitch around (no increases or decreases).
- Alternate colors every 2 rounds following the established pattern: color A (white).
- Join round with slip stitch.
- (30 stitches)
Round 10:
- Chain 1 at the start of each round.
- Work 1 sc in each stitch around (no increases or decreases).
- Alternate colors every 2 rounds following the established pattern: color B (red).
- Join round with slip stitch.
- (30 stitches)
Round 11:
- Chain 1 at the start of each round.
- Work 1 sc in each stitch around (no increases or decreases).
- Alternate colors every 2 rounds following the established pattern: color B (red).
- Join round with slip stitch.
- (30 stitches)
Round 12:
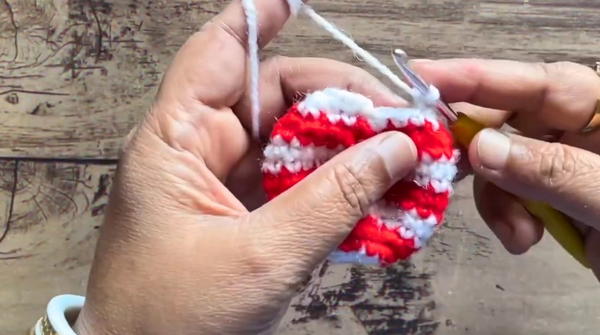
- Chain 1.
- Work 1 sc in next 3 stitches, then 1 decrease (dec); repeat around.
- Join with slip stitch.
- (24 stitches)
Round 13:
- Switch colors.
- Chain 1.
- Work 1 sc in next 2 stitches, dec; repeat all around.
- Join with slip stitch.
- (18 stitches)
Round 14:
- Chain 1.
- Work 1 sc in next stitch, dec all around.
- Join with slip stitch.
- (12 stitches)
Finishing and Hanging Loop (Rounds 15 and Loop)
Stuffing:
- Before the next round, firmly fill the ball with stuffing material. Keep the shape rounded and consistent.
Round 15:
- Use color B (red).
- Chain 1.
- Work decrease in every stitch around, closing up the ball.
- Join with slip stitch.
- (6 stitches remain)
Closing:
- Cut yarn leaving a long tail.
- Use yarn needle to pull the tail through the remaining stitches securely closing the top.
- Weave in the end neatly.
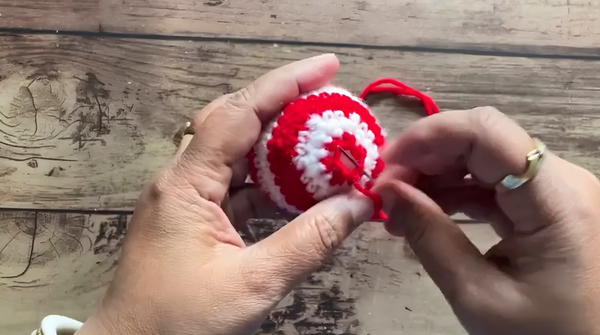
Hanging Loop:
- Insert hook through the center of the magic ring at the base of the ornament.
- Pull up a loop.
- Chain approximately 13 to 15 times, or desired length for hanging.
- Join chain back to base with slip stitch, forming a loop.
- Fasten off and weave in any loose ends.
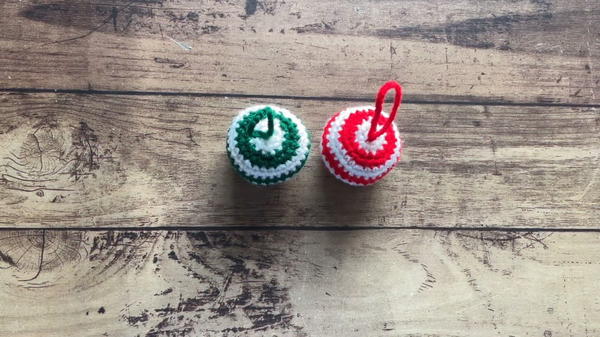
Assembly & Finished Size
- The ornament is approximately 6 cm (2.4 inches) in diameter.
- The hanging loop allows easy suspension on a tree branch or hook.
- The alternating color bands create a festive look perfect for the holiday season.
Conclusion
You’ve just completed your very own festive ball ornament! This pattern emphasizes simple stitches and clear instructions, alternating colors every two rounds to make a classic striped design. The magic ring start ensures a neat center, while the increases and decreases shape the sphere neatly. Stuffing the ball well maintains the firmness and fullness needed for a charming finished product.