Stitch a trendy accessory with this Free Crochet Granny Square Bag Pattern that turns colorful squares into a stylish, handmade tote for every occasion.
Creating a stylish and practical bag is made simple by following the clear instructions from Gülşah Özcan Filiz, whose detailed guidance helps anyone make a beautiful item from colorful square motifs joined together carefully for strength and charm. This bag is very useful for carrying many belongings because it is spacious and sturdy, with a design that allows you to make it larger or smaller depending on your needs.
Unique Free Crochet Granny Square Bag Pattern for All Skill Levels
The working style involves making small square pieces with easy stitches like double crochet, then connecting them with single crochet stitches to form the body of the bag. This approach makes the process manageable and enjoyable, while the joining method adds a neat raised edge that enhances the overall look.
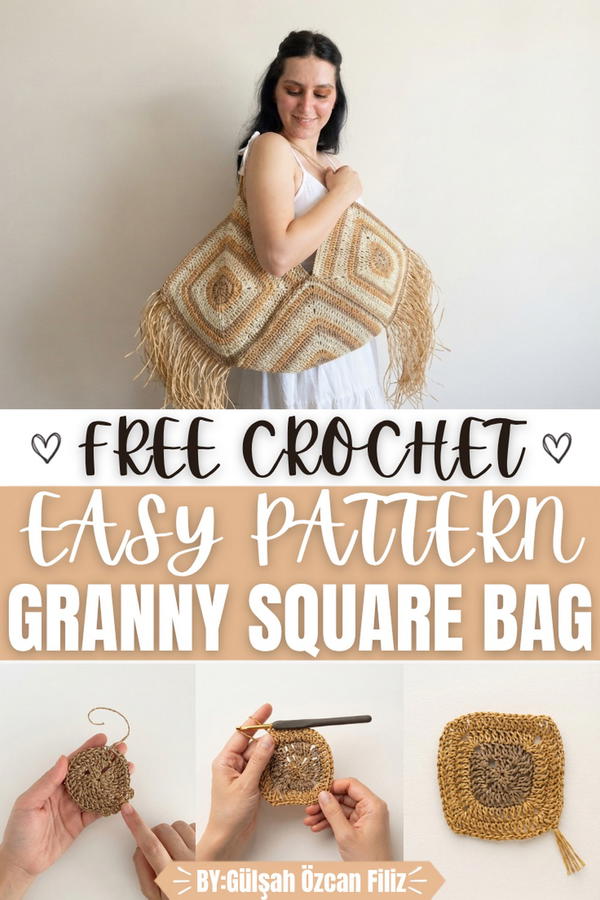
One of the best features of this bag is its large size, which is perfect for fitting everything you need without carrying extra bags, making it ideal for daily use or outings. The shape is smartly designed with multiple square motifs that fit together smoothly, creating a slightly textured surface full of vibrant colors. The edges are reinforced well, and the straps are made with simple chain stitches that look elegant and hold firmly. Tassels on the edges add a fun touch, but you can leave them off if you prefer a cleaner look.
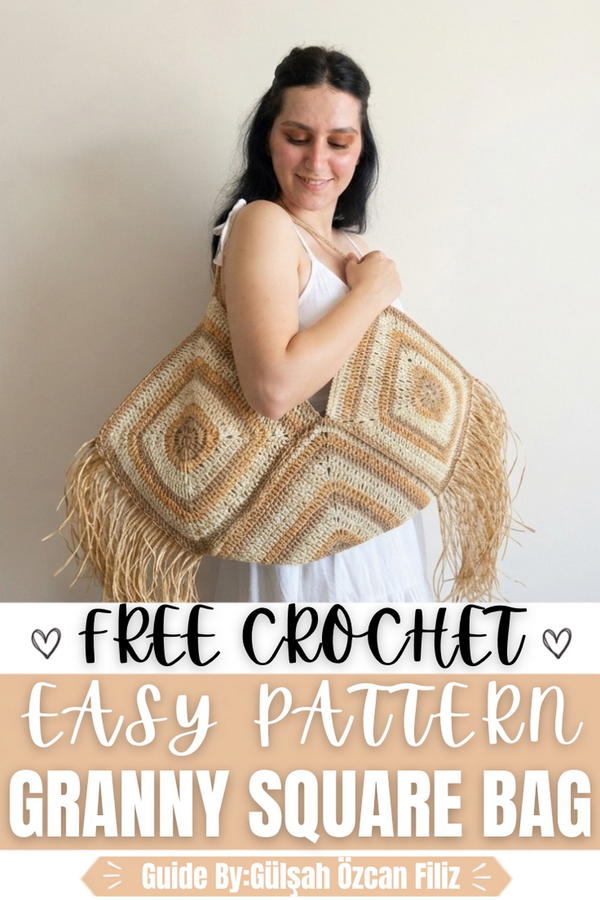
Crochet Bohemian Granny Square Bag Pattern
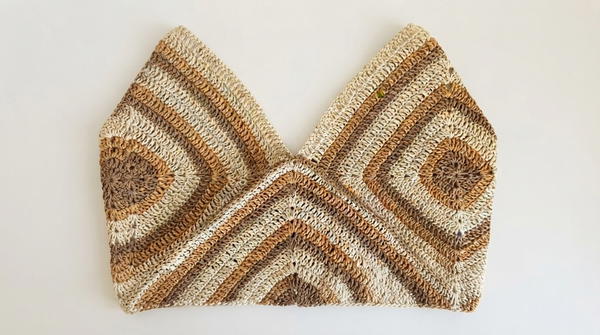
This pattern creates a structured and stylish bohemian-style bag constructed from five granny square motifs — four standard-sized squares and one larger center square — assembled together into a triangular folded bag shape. The motifs are worked in the round using double crochet clusters with corner increases, producing clean and defined squares that join together seamlessly using a single crochet edge joining method. The finished bag features two chain handles attached directly to the upper edge and optional corner tassels that enhance the bohemian aesthetic of the completed piece. The use of paper yarn gives the bag a firm and structured body that holds its shape well without requiring any internal lining or stiffening materials, making it both practical and visually appealing as an everyday accessory or market bag.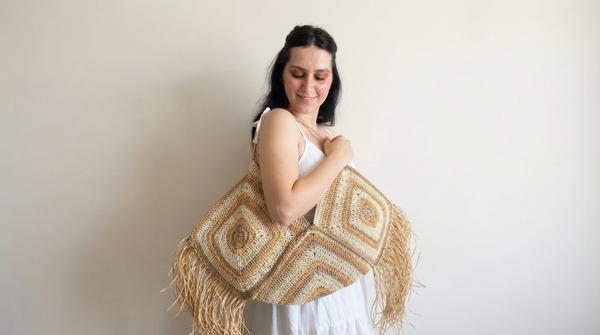
Skill Level: Beginner to Intermediate — This pattern is accessible to crocheters who are familiar with magic rings, double crochet stitches, working in rounds, and basic motif joining. The construction method is straightforward and repetitive, making it an excellent project for those building confidence with motif-based bag construction.
Materials
- Yarn: Paper yarn in three colors — creamy, orange, and brown (approximately 250g per color; total yarn requirement will vary depending on tension and motif size)
- Hook: 3.5mm crochet hook (use a 4mm hook if your tension tends to run tight)
- Tools:
- Tapestry needle for weaving in ends
- Scissors
- Measuring tape
- Stitch markers
Special Stitches
- Magic Ring: An adjustable starting loop formed around the finger that closes completely when pulled tight, eliminating any gap at the center of the motif and providing a neat and secure foundation for the first round of stitches.
- Double Crochet Cluster: Groups of 3 dc worked consecutively into the same space or stitch, forming the primary body texture of the granny square motif along all straight side edges.
- Corner Increase: Worked as 2 dc, ch 1, 2 dc all into the same corner chain space, creating a defined right-angle corner that expands the square outward evenly with each additional round.
- Single Crochet Join: A joining technique where a sc is worked simultaneously through corresponding stitches on two adjacent motif edges held together, creating a firm and flat seam that secures the motifs together into the final bag structure.
- Chain Handle: A long chain of 70 ch attached at both ends to the upper edge of the assembled bag to form a simple and sturdy carrying handle.
- Tassel: An optional decorative finish made by cutting multiple strands of yarn to equal lengths, folding them together, and attaching the folded center through a corner stitch of the bag to create a hanging fringe detail.
Stitch Abbreviations
- ch — chain
- sl st — slip stitch
- sc — single crochet
- dc — double crochet
- MR — magic ring
- sp — space
- st(s) — stitch(es)
- rep — repeat
- tch — turning chain
- inc — corner increase
Useful Tips
- Count the stitches and corner spaces carefully at the end of every round to confirm that all four corners are correctly placed and the stitch count is growing evenly before proceeding to the next round.
- Use stitch markers to identify the four corner chain spaces on each motif, particularly in the early rounds when the square shape is still forming and corners can be difficult to identify visually.
- Keep consistent tension throughout all five motifs to ensure that the standard motifs and the center motif lie flat and align correctly during assembly — paper yarn can be less forgiving than standard fiber yarn if tension varies significantly.
- When working the single crochet join, always insert the hook through both corresponding stitches on both motif edges simultaneously to keep the seam straight and prevent gaps from forming along the joined edge.
- Before attaching the handles, try folding the assembled bag into its final triangular shape to confirm that the handle attachment points are correctly positioned at an equal distance from the center fold point on both sides.
- Tassels can be made in any color combination — using all three yarn colors together in a single tassel creates a cohesive and visually rich bohemian detail that ties the overall color palette of the bag together.
- Paper yarn does not stretch significantly, so maintaining even tension from the first round of each motif is more important with this yarn type than with standard acrylic or cotton yarn.
Pattern Instructions
Standard Motif Construction (Make 4)
Foundation — Magic Ring
- Create a MR.
- Ch 3 (counts as first dc).
- Work 2 dc into the ring.
- Ch 1.
- Rep working 3 dc, ch 1 into the ring three more times.
- Sl st into the top of the beginning ch-3 to join.
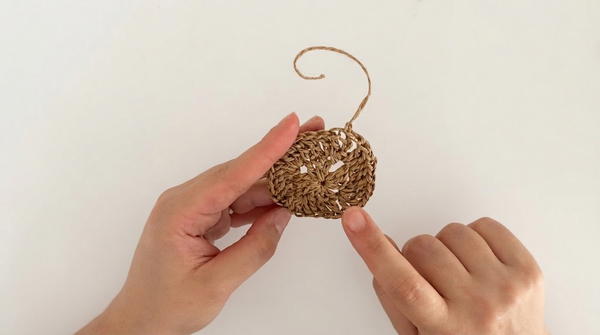
- Pull the ring closed firmly.
- Total: 4 clusters of 3 dc with ch-1 sp between each cluster forming the first corner foundation
Round 1 — Establishing the Square
- Sl st into the nearest ch-1 sp.
- Ch 3 (counts as first dc).
- Work 1 dc into the same sp.
- Ch 1.
- Work 2 dc into the same sp (first corner complete).
- Work 1 dc into each of the next 3 dc along the side.
- At the next ch-1 sp, work 2 dc, ch 1, 2 dc (second corner).
- Work 1 dc into each of the next 3 dc along the side.
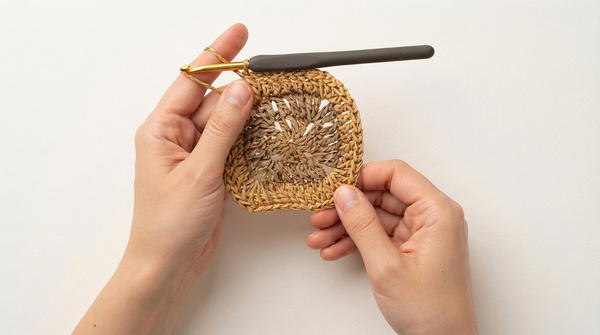
- Rep the corner and side sequence for the remaining two corners.
- Sl st to join at the top of the beginning ch-3.
- Total: 4 corners established with ch-1 sp at each corner and dc stitches along each side
Rounds 2 through 10 — Growing the Square
- Sl st into the nearest ch-1 sp.
- Ch 3 (counts as first dc).
- Work 1 dc into the same sp.
- Ch 1.
- Work 2 dc into the same sp (corner increase complete).
- Work 1 dc into every st along the side edge until reaching the next corner sp.
- At every corner ch-1 sp, work 2 dc, ch 1, 2 dc (corner increase).
- Work 1 dc into every st along each side between corners.
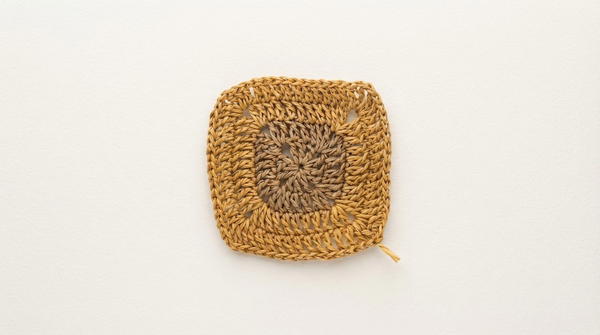
- Rep corner increases and side single dc stitches around all four sides.
- Sl st to join at the end of each round.
- Change colors between rounds as desired to create the multicolor stripe effect.
- Rep this same round structure for Rounds 2 through 10 without any variation — corner increases at every corner sp and single dc into every side st in every round.
- Fasten off after Round 10 and weave in all ends.
- Total completed standard motif: 10 rounds with clean corners and even sides
Center Motif Construction (Make 1)
Foundation — Magic Ring
- Create a MR and work the foundation round exactly as described for the standard motif.
- Ch 3, work 2 dc, ch 1, then rep 3 dc, ch 1 three more times into the ring.
- Sl st to join and pull the ring closed.
- Total: 4 clusters of 3 dc with ch-1 sp at each corner foundation
Round 1 — Establishing the Square
- Work Round 1 exactly as described for the standard motif.
- Work 2 dc, ch 1, 2 dc at every corner sp.
- Work 1 dc into every side st between corners.
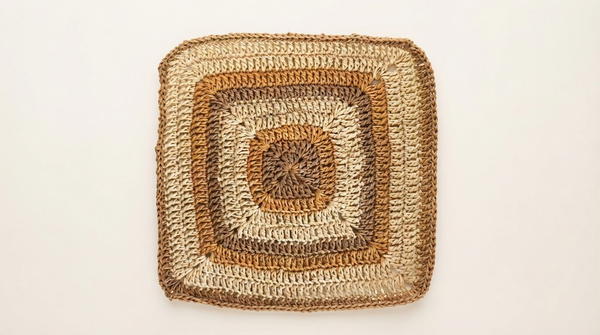
- Sl st to join.
Rounds 2 through 12 — Growing the Center Square
- Work the same corner increase and side single dc structure as the standard motif for every round.
- Work 2 dc, ch 1, 2 dc at every corner ch-1 sp in every round.
- Work 1 dc into every st along each side edge in every round.
- Change colors between rounds as desired.
- Rep for Rounds 2 through 12 — two additional rounds beyond the standard motif to produce the larger center square.
- Fasten off after Round 12 and weave in all ends.
- Total completed center motif: 12 rounds — slightly larger than the standard motifs
Assembly and Sizing
Motif Layout and Folding
- Place the 12-round center motif flat on a work surface.
- Fold the center motif in half diagonally to form a triangle shape — this fold line runs corner to corner and becomes the bottom fold of the finished bag.
- Arrange the four 10-round standard motifs around the sides of the folded center motif, one on each of the four exposed side edges, to complete the bag structure.
- Confirm that all motifs are oriented correctly before beginning the joining process — the outer edges of the standard motifs will form the upper opening of the bag on each side.
Single Crochet Joining
- Hold two adjacent motif edges together with their right sides facing outward.
- Join yarn with a sl st at the starting corner of the shared edge.
- Insert the hook through the corresponding st on the first motif edge and the corresponding st on the second motif edge simultaneously.
- Work 1 sc through both layers to join.
- Rep working 1 sc through both corresponding stitches across the full length of the shared edge, stitch by stitch.
- At the end of the shared edge, fasten off and weave in ends.
- Rep the single crochet join along every shared motif edge until all five motifs are fully assembled into the complete bag body.
Handle Attachment
- Identify the upper edge of the assembled bag on one side — the handle attachment point should be positioned away from the center fold point, toward the outer upper edge of the bag opening.
- Join brown yarn at the handle attachment point on one side of the upper bag edge using a sl st.
- Ch 70 (or adjust the chain length to achieve the desired handle length).
- Join the chain to the corresponding point on the opposite side of the same bag opening with a sl st.
- Fasten off and weave in ends.
- Rep on the other side of the bag opening to create the second matching handle.
- Confirm both handles are attached at equal distances from the center fold to ensure the bag hangs evenly when carried.
Tassel Finishing (Optional)
- Cut multiple strands of yarn in the desired color or color combination to a uniform length of approximately 15 to 20cm.
- Fold the bundle of strands in half to create a loop at the center.
- Insert the crochet hook through a corner stitch of the bag, draw the folded loop through, and pull all strand ends through the loop to secure the tassel with a firm knot.
- Trim the tassel ends evenly if needed.
- Rep at each desired corner of the bag — attaching tassels to all lower and side corners creates the full bohemian fringe effect.
Sizing Notes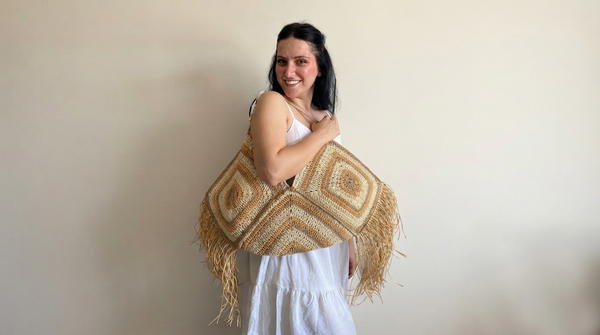
- The finished bag size is determined directly by the size of each individual motif — larger motifs worked with heavier yarn or a larger hook will produce a bigger bag.
- The standard motifs at 10 rounds and the center motif at 12 rounds are designed to proportion correctly against each other for the folded triangular bag structure.
- To produce a smaller bag, reduce both motifs by 2 rounds each while maintaining the 2-round difference between the standard and center motif sizes.
- To produce a larger bag, increase both motifs by 2 rounds each in the same proportional manner.
Conclusion
This bohemian granny square bag pattern offers a creative and satisfying approach to accessory construction that transforms a set of familiar crochet motifs into a fully functional and visually striking finished piece. The combination of the structured paper yarn, the multicolor stripe detail across each motif, and the decorative tassel finishing produces a bag with a handcrafted quality and character that sets it apart from more conventional crochet bag designs. The relatively small motif count keeps the project achievable within a reasonable timeframe, while the assembly and handle construction process introduces practical skills in motif joining and finishing that apply broadly to other crochet bag and accessory projects. The adjustable sizing and color options built into the pattern ensure that every finished piece can reflect the individual preferences and creative vision of the maker.