Handmade happiness shines bright in this free crochet New Year’s tiger cub pattern that blends festive spirit with adorable creative flair.
Welcoming the New Year with a delightful handmade creation adds a personal and joyful touch to celebrations. The Free crochet New Year's Tiger Cub Pattern offers a charming way to embrace the spirit of the year with a beautifully designed small toy. Thanks to the talented creator behind Oksana HandMade, this pattern has gained popularity for its warmth and charm.
Cute Handmade Free Crochet New Year's Tiger Cub Pattern
This adorable tiger cub amigurumi is more than just a cute figure, it serves as a perfect gift for loved ones, a sweet decorative piece for your home, or even a fun companion for kids. Its cheerful design makes it a meaningful keepsake that celebrates new beginnings and the symbol of the tiger’s strength and bravery.
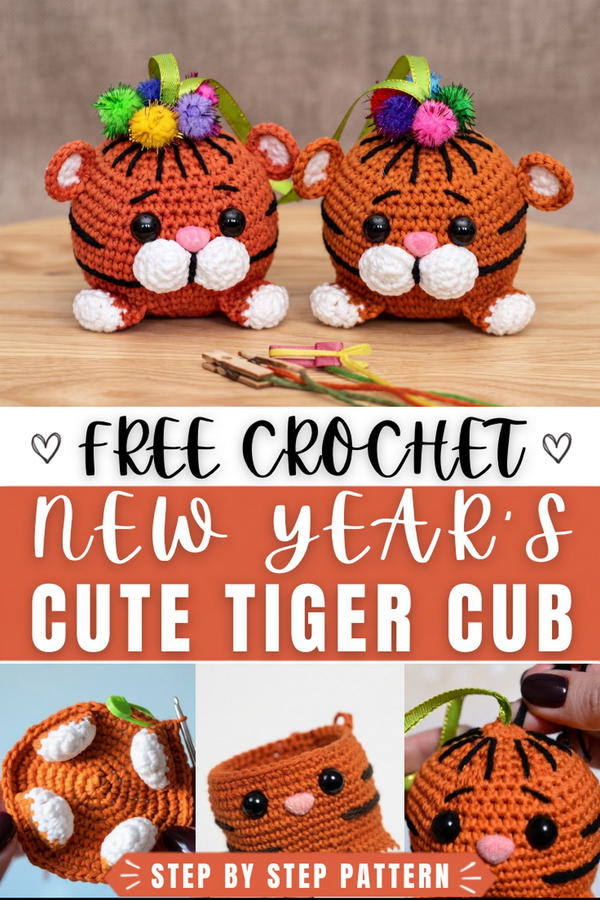
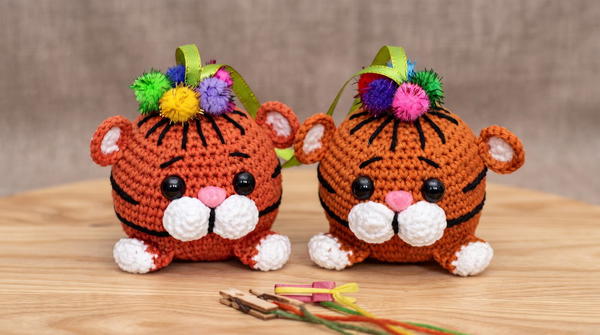
The appearance of the tiger cub is both playful and heartwarming. Featuring a round shape with carefully stitched stripes and expressive eyes, it captures the essence of a tiger cub’s playful spirit. The texture is soft yet sturdy, created through neat and consistent stitches that maintain the toy’s form while inviting touch.
Standout design elements include the detailed facial features, tiny ears, and striped body that bring this little tiger to life. Its compact size and vibrant colors make it a wonderful accessory for a festive display or a cozy shelf. Bringing this tiger cub into your New Year’s celebrations adds a handcrafted charm that shines with personality and warmth. 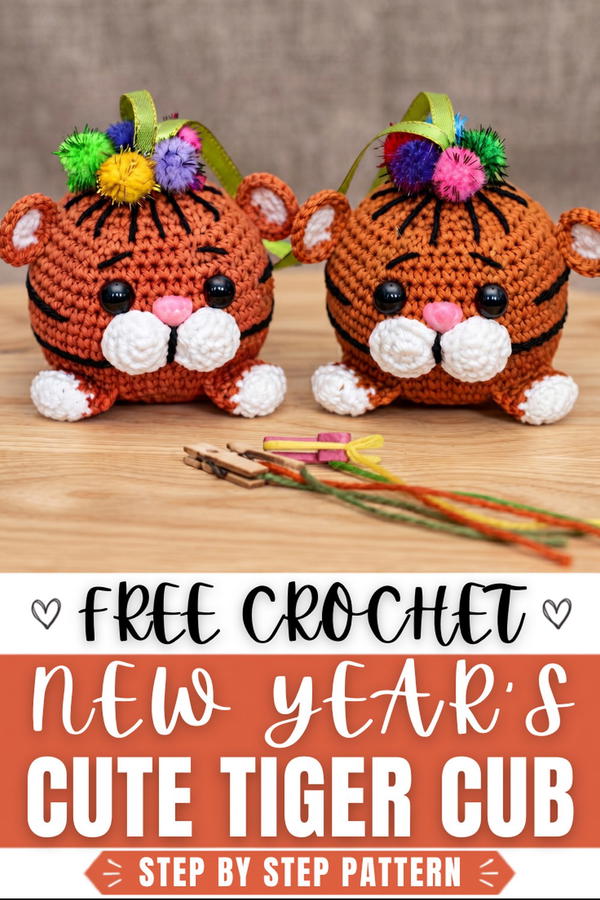
Crochet Pattern: New Year's Tiger Ornament
This crochet pattern is designed to make a delightful New Year's Tiger Ornament. With its adorable details like embroidered stripes, safety eyes, and a braided tail, this project is perfect for celebrating the charm of the year of the tiger. It can be used as a hanging ornament, a keychain, or a seasonal decoration.
Skill Level
Intermediate
This pattern is suitable for those comfortable working in rounds, managing color changes, and assembling small crochet projects. Basic embroidery and shaping skills are also recommended for adding the finishing touches.
Materials Needed
- Yarn:
- YarnArt Jeans (55% cotton, 45% polyacrylic):
- Yellow (No. 35): Main body
- Orange (No. 85): For details
- Small amounts of black yarn: For stripes, optional features
- Small amounts of white yarn: For the cheeks
- YarnArt Jeans (55% cotton, 45% polyacrylic):
- Crochet Hook: 2.5mm
- Accessories:
- Safety Eyes: 9mm (2 pieces)
- Safety Nose: (size and shape per preference)
- Small bead (7–8 mm): Optional for embellishment
- Satin Ribbon: For hanging/decoration
- Glittery Pom-Poms: Optional for decorative touch
- Filling Material: Fiberfill (hollowfiber) for stuffing
- Additional Tools: Scissors, stitch markers, yarn needle
Special Stitches Used
- Magic Ring (MR): A circular foundation used to start crocheted pieces working in the round.
- Single Crochet (sc): Insert the hook, yarn over, and pull through, then yarn over again, and pull through both loops.
- Increase (inc): Work two stitches into the same stitch to create an increase.
- Decrease (dec): Join two single crochets into one to create a decrease.
- Slip Stitch (sl st): Insert the hook, yarn over, and pull through both loops.
Stitch Abbreviations
| Abbreviation | Meaning |
|---|---|
| MR | Magic Ring |
| sc | Single Crochet |
| inc | Increase (2 sc into the same stitch) |
| dec | Decrease (combine 2 stitches into 1) |
| ch | Chain |
| sl st | Slip Stitch |
Useful Tips
- Even Tightness: Maintain consistent tension to ensure the shapes are even and that no stuffing is visible between stitches.
- Detailed Embroidery: Use a yarn needle for the stripes and ensure neat positioning for a polished finish.
- Color Changes: Change yarn colors cleanly to avoid noticeable transitions on your tiger ornament. Finish one stitch completely before introducing a new color.
- Safety Features: Double-check the attachments of safety eyes and nose to ensure they are securely fastened.
Step-By-Step Crochet Pattern
Legs (Make 4)
Each leg is worked in continuous rounds.
- Round 1: Start with a MR. Work 6 sc into the ring. (6 stitches)
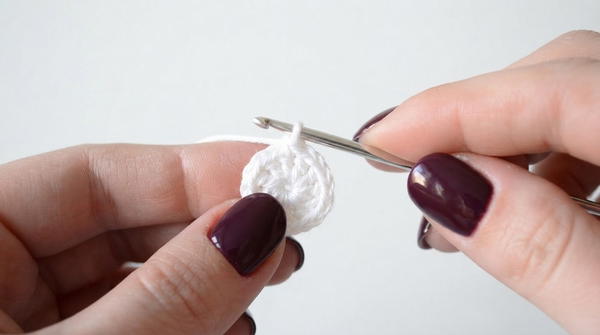
- Round 2: Work 6 inc (2 sc in each stitch). (12 stitches)
- Round 3: Work 12 sc around evenly. (12 stitches)
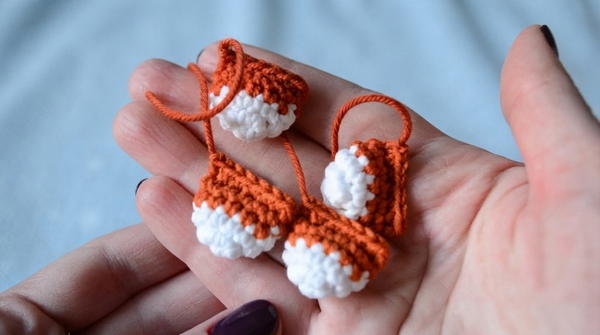
- Round 4-5: Switch to yellow yarn and work 12 sc in each round. (12 stitches per round)
- Assembly: Fold the leg in half and use 6 sc to crochet both layers together, closing the top.
Body and Head (Worked in One Piece)
The body and head are crocheted as a single continuous piece. Stuff as you go to maintain shape.
- Round 1: Begin with a MR and work 6 sc into the ring. (6 stitches)
- Round 2: Work 6 inc (2 sc in each stitch). (12 stitches)
- Round 3: (1 sc, inc) x 6. (18 stitches)
- Round 4: (2 sc, inc) x 6. (24 stitches)
- Round 5: (3 sc, inc) x 6. (30 stitches)
- Round 6: (4 sc, inc) x 6. (36 stitches)
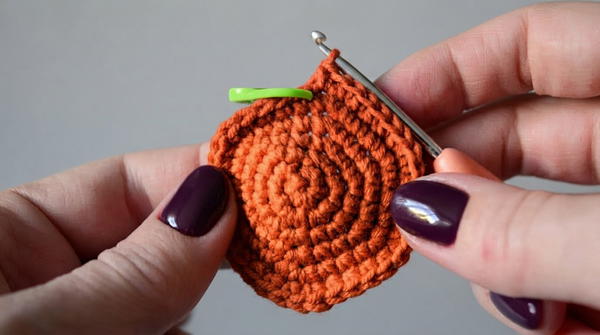
- Round 7: (5 sc, inc) x 6. (42 stitches)
- Round 8: (6 sc, inc) x 6. (48 stitches)
Integrating the Legs
- Round 9: (2 sc, inc, 3 sc, 6 sc working through both layers of the leg and body) x 4, working each leg into the body. This creates the appearance of four attached legs. (52 stitches)
- Rounds 10-17: Work 52 sc in each round to build height. (52 stitches per round)
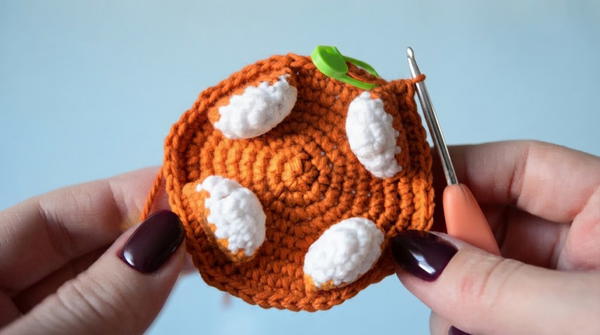
- Round 18: (11 sc, dec) x 4. (48 stitches)
- Round 19: (6 sc, dec) x 6. (42 stitches)
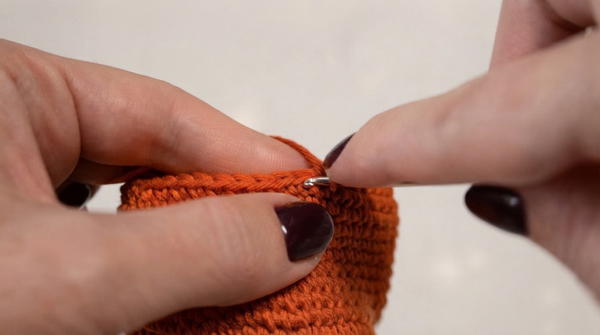
- Round 20: (5 sc, dec) x 6. (36 stitches)
Continue decreasing in the same manner for subsequent rounds until the top of the ornament is closed. Make sure to stuff the body with fiberfill as you decrease.
Finishing Touches
Stripes
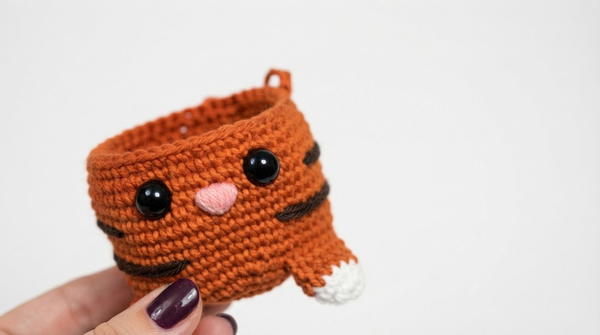
- Embroider Black Stripes: Use black yarn to add small stripes around the tiger’s body. Focus on rows 13–14, ensuring the stripes are evenly spaced.
Features (Eyes and Nose):
- Attach safety eyes between rows 16–17, ensuring they are evenly spaced.
- Attach the safety nose between rows 15–16, centering it below the eyes.
Ears
- Round 1: Begin with a MR and make 6 sc in the ring. (6 stitches)
- Round 2: Work 6 inc. (12 stitches)
- Round 3: Follow the specific pattern as described in the video (finishing with a sl st).
Leave a long tail of yarn for sewing. Sew each ear one row above the eyes.
Tail
- Cut three strands of yarn (about 20–25 cm each). Include one strand of black yarn to add contrast.
- Braid the strands together, then sew the tail securely to the back of the ornament.
Christmas Berries (Optional)
Use this step to make additional holiday-themed accents.
- Round 1: Start with a Magic Ring (MR). Ch 2, then work 4 hdc into the ring.
- Pull the ring tight and finish with a sl st to the first hdc, forming a small ball.
Add the berries as a festive decoration to your ornament.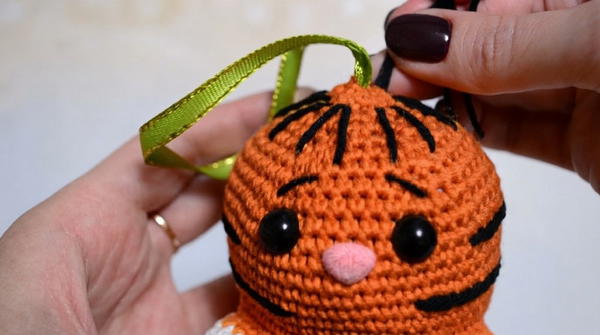
Conclusion
This New Year's Tiger Ornament Crochet Pattern is a versatile and decorative project to highlight the holiday season. Its compact size and intricate details, such as the legs, embroidered stripes, and braided tail, make it both fun to create and enjoyable to display. By following each step carefully, you’ll have a delightful ornament that captures the festive spirit and adds a playful charm to your space. This project also offers opportunities for customization, such as using different yarn colors or embellishments to personalize the tiger.
https://www.youtube.com/watch?v=J9dCK4t6sPQ