Make a statement with a handmade crochet one-piece jacket using this free pattern that combines comfort style and effortless elegance in one piece.
Adding a cozy yet stylish layer to your wardrobe can be both rewarding and practical. The Free crochet One-Piece Jacket Pattern offers a beautiful way to create a soft, wearable garment that combines comfort with a chic design. Thanks to the clear and detailed guidance from Zehranın Atölyesi, this jacket becomes an accessible project for anyone looking to add a handmade touch to their clothing collection.
Crochet a Beautiful One-Piece Jacket with This Free Pattern

This jacket features a smooth texture using half double crochet stitches, producing a fabric that is both warm and flexible. The pattern includes clever increases to shape the shoulders and armholes perfectly, ensuring a flattering fit. Its one-piece construction gives the garment a neat, flowing shape without seams interrupting the silhouette.
The style strikes a lovely balance between casual comfort and elegant simplicity, perfect for daily wear or as a thoughtful gift. Its versatility shines in how it can complement various outfits, adding warmth and a decorative touch to any look. The softly rounded edges and subtle detailing along the cuffs and collar further enhance the jacket's appeal.
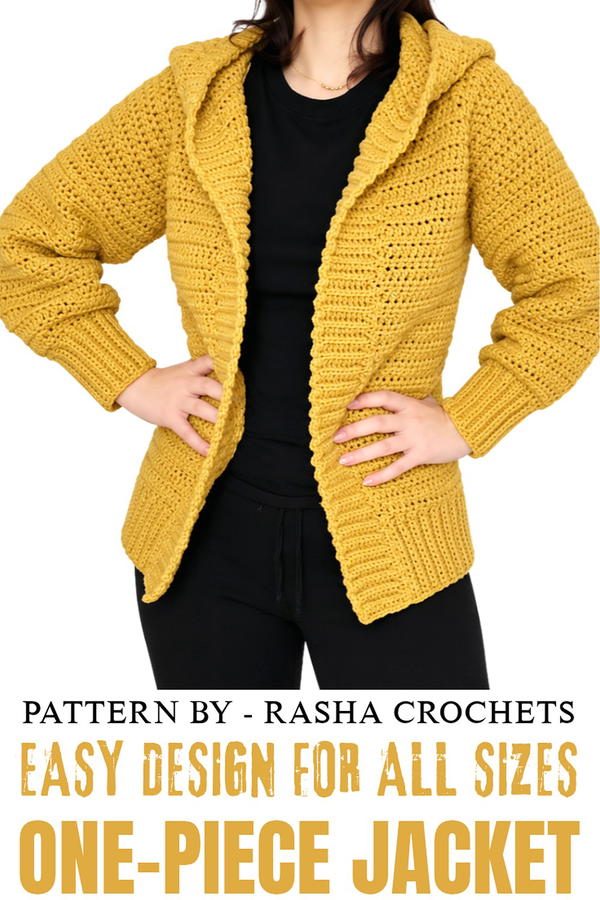
Crochet Jacket Pattern – One-Piece Construction
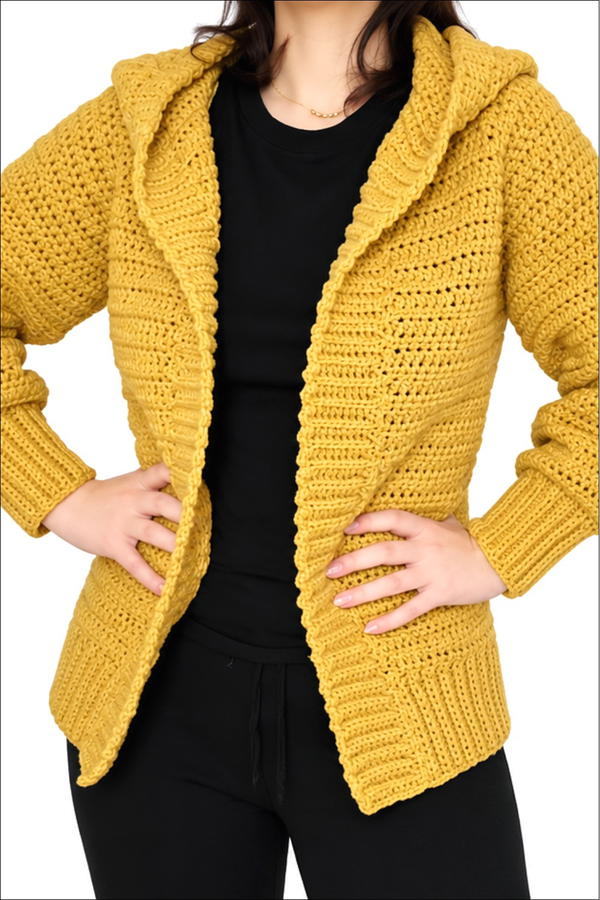
This crochet jacket is crafted as a single piece, ensuring a seamless design without the need for excessive sewing or joining. It features a clean and comfortable fit, with cuffs, a hood, and ribbed borders to enhance its structure and style. The step-by-step instructions below guide you through creating this versatile wardrobe staple.
Skill Level
Intermediate
This project is suitable for intermediate crocheters who are comfortable working with basic stitches, managing increases and decreases, and creating sections for sleeves and body.
Materials
- Yarn:
- 2 skeins of DMC Extra Value yarn (400g per skein) or any worsted-weight alternative suitable for a crochet gauge of 5mm.
- Crochet Hook:
- 5mm for the main body.
- 4mm for ribbing and cuffs to achieve a snug fit.
- Additional Tools:
- Stitch markers.
- Measuring tape.
- Scissors.
- Tapestry needle for weaving in ends.
Special Stitches Used
- Half-Double Crochet (hdc): Yarn over, insert the hook into the stitch, yarn over again and pull up a loop (3 loops on hook). Yarn over and pull through all three loops on the hook.
- Back-Loop Single Crochet (blsc): Insert the hook into the back loop of the stitch, yarn over and pull up a loop, yarn over again and pull through both loops on the hook.
Stitch Abbreviations
- ch: Chain
- hdc: Half-double crochet
- blsc: Back-loop single crochet
- sl st: Slip stitch
Useful Tips
- Use Markers for Sections: Place stitch markers for the front panels, sleeves, and back to help separate sections and keep track of corners.
- Clean Transitions: Work increases consistently into the chain spaces created at corners to maintain the design’s uniformity.
- Ribbing Tension: Use a smaller hook for ribbing and cuffs to create a snug and stretchy fit.
- Hood Shape: When constructing the hood, place a marker at the center to maintain symmetry while decreasing at the crown.
- Body Length: Adjust the length based on desired preferences before proceeding to the ribbing or finishing the edges.
Pattern Instructions
Part 1: Starting Foundation
Begin by defining sections for the front panels, back, and sleeves.
- Foundation Chain:
- Ch 67 (includes segments for front panels, sleeves, and back) + 2 turning chains.
- Layout:
- 8 stitches for front panel.
- 15 stitches for sleeve.
- 17 stitches for back.
- 15 stitches for sleeve.
- 8 stitches for the second front panel.
Part 2: Working the Body & Increases
The body is worked entirely in half-double crochet using a 5mm hook, with increases creating corners in the foundation.
Row 1:
- Begin in the third chain from the hook and hdc across the row, placing (hdc, ch 1, hdc) in each corner stitch to form increases.
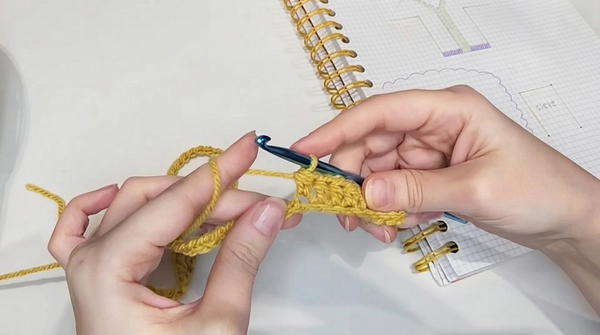
- Follow the stitch layout, working additional hdc in each subsequent section (front, sleeves, back, sleeves, front).
Subsequent Rows (Rows 2–8):
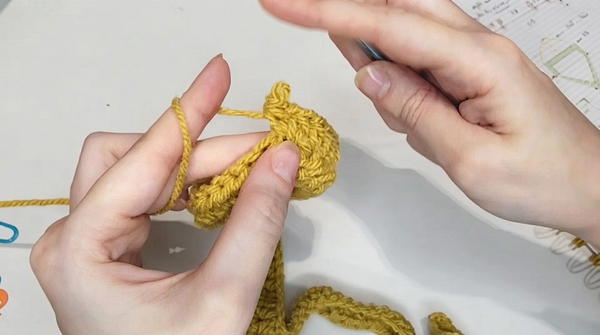
- Continue working rows of hdc, always placing (hdc, ch 1, hdc) in the chain spaces at the four corners of the foundation.
- Repeat this pattern for 8 rows, adding width to the body and shaping the sleeves.
Part 3: Separating Sleeves
Step 1:
- Fold the work at the armholes.
- Join the front and back sections together using hdc stitches while skipping over the sleeve sections.
Step 2:
- After joining, you will have the body sections combined as one continuous piece, while the armholes are open and ready for sleeves.
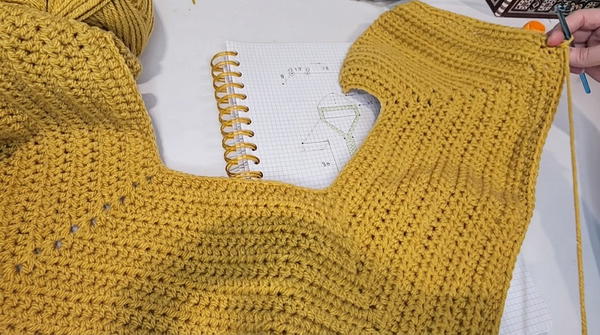
Part 4: Main Body Length
- Continue working rows of hdc evenly across the body until the desired length is achieved.
- The recommended length is hip-length or slightly longer, based on preference.
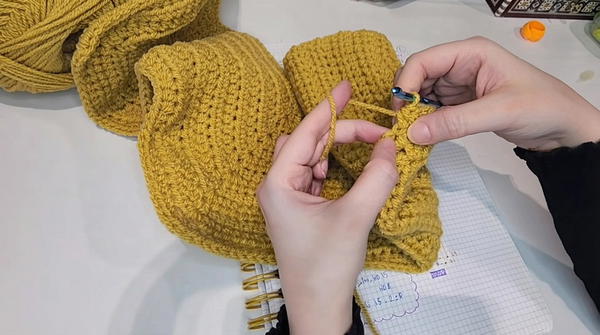
Part 5: Adding Sleeves
Step 1 (Cuffs):
- Switch to a 4mm hook for a snug fit.
- Work back-loop single crochets (blsc) into the sleeve opening for the cuff.
Step 2 (Sleeves):
- Attach yarn at the armhole and work rows of hdc in the round to form the sleeve.
- Continue until the sleeve reaches your preferred length, ending with a ribbed cuff using blsc or slip stitches.
Part 6: Hood Construction
The hood is worked directly from the neckline and shaped for symmetry.
Step 1 (Picking up Stitches):
- Using a 5mm hook, pick up an even number of stitches (approx. 68) around the neckline.
Step 2 (Building Height):
- Work rows of hdc until the hood height reaches approximately 22–23 cm, measured from the nape of the neck to the crown.
Step 3 (Shaping the Crown):
- Begin decreasing at the crown by dividing the hood in half with a center stitch marker.
- Work decreases on either side of the center marker every row until the hood closes at the top.
Part 7: Finishing Edges
Step 1 (Bottom Ribbing):
- Attach a 4mm hook to the bottom edge of the jacket and work rows of back-loop single crochet. Continue until the ribbing measures the desired width.
Step 2 (Front Border):
- Work a ribbed border along the front opening using blsc for structure.
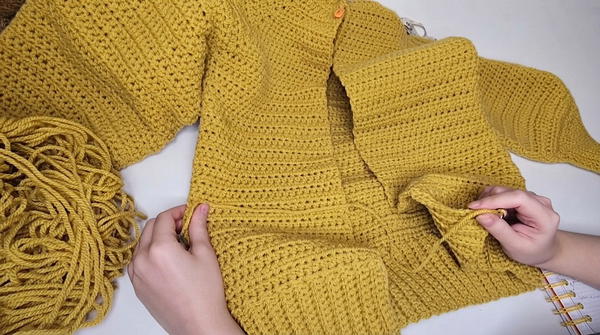
Step 3 (Final Touches):
- Weave in all loose ends using a tapestry needle and block your jacket to set the stitches evenly.
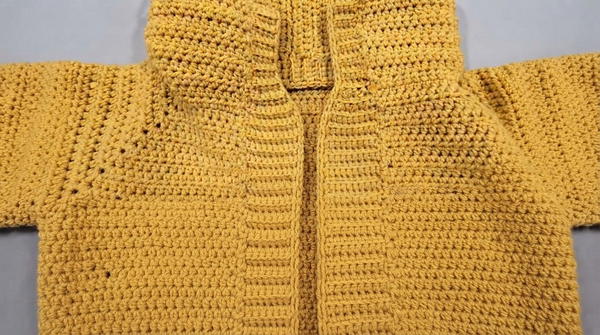
Conclusion
This crochet jacket, with its seamless one-piece construction, combines functionality and elegance. The tailored fit achieved through ribbing and the addition of a structured hood makes it a versatile addition to any wardrobe. This pattern allows for customization, making it easy to adjust sleeve length, body length, and hood height to suit personal preferences. The single-piece design ensures a clean, polished finish suitable for both casual and semi-formal occasions.