Wear a little bunch of flowers with the Crochet Rose Cluster Hair Clip Free Pattern, a cute hair detail for dresses, spring days, and outings.
A pretty hair accessory can give your hairstyle a new look without much effort. The Crochet Rose Cluster Hair Clip features several small rosebuds grouped together on one clip. Its soft texture and delicate arrangement give it a romantic style that works well with both modern and traditional outfits.
Sevginin Günlüğü presents this lovely hair decoration idea for anyone who likes simple accessories with fine details.
Free Crochet Rose Cluster Hair Clip Pattern For Cute Hairstyles
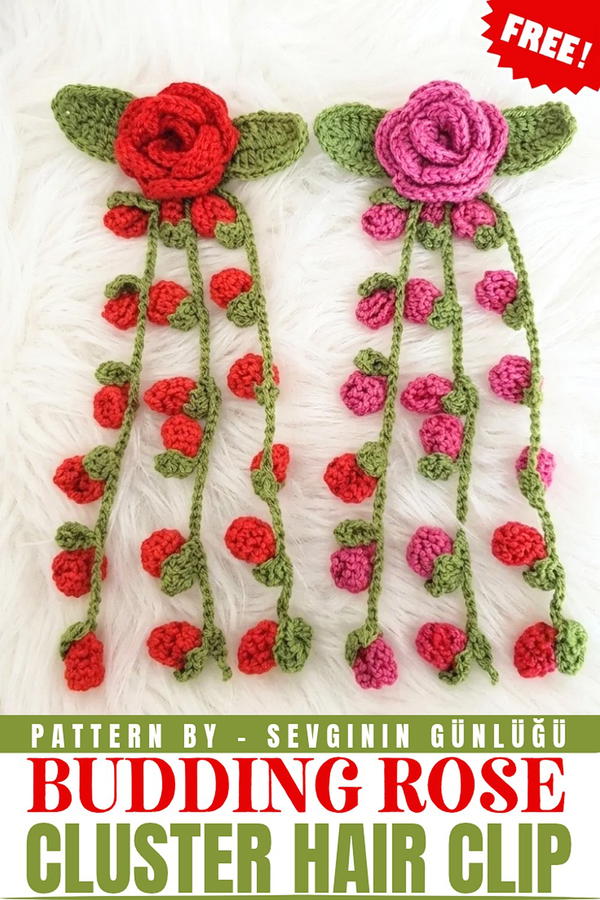 The tiny rosebuds have curved petals that overlap to form beautiful rounded shapes. Their close arrangement gives the accessory a fuller appearance without making it too large. Small green leaves between the buds can provide a natural contrast. You can choose dusty rose, ivory, or deep burgundy yarn for a classic look. Mixing two gentle shades can also give the arrangement more variety.
The individual buds can be worked using crochet stitches that form curved strips. These strips are rolled and secured to achieve their familiar shape. Once all the pieces are finished, they are placed together and attached to a suitable hair clip. Careful stitching helps keep everything secure during use.You can wear this accessory with a French twist, use it to secure loose strands near your temple, or pair it with a low bun. It also suits an engagement celebration, a family wedding, or a special dinner. A matching clip can be a thoughtful present for someone who loves hair accessories.
The grouped rosebud design gives this piece a graceful finish. It offers an easy way to style your hair while keeping your overall look neat and attractive.
About the Pattern
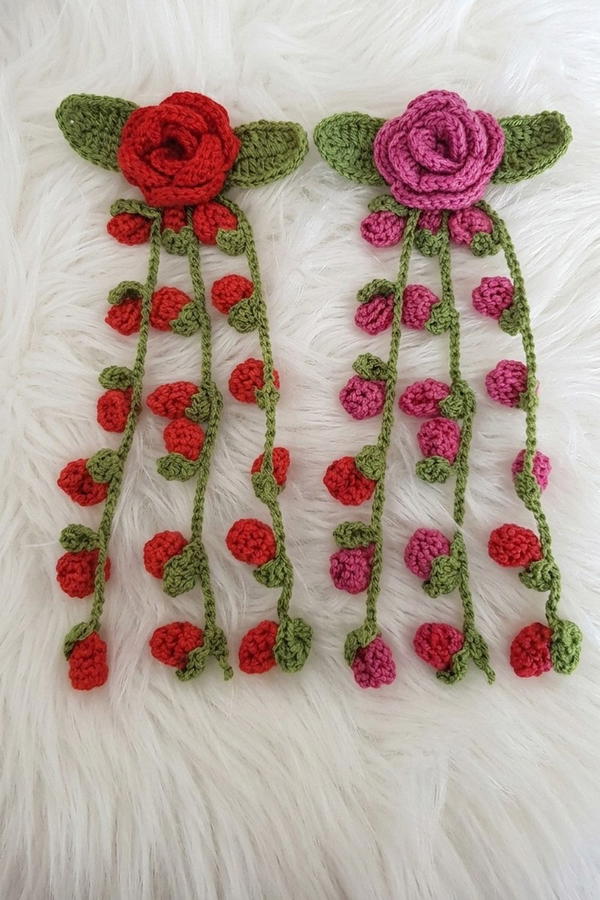
The bud cluster hair clip features a 3D rose adaptation as the centerpiece, accompanied by sculpted leaves and small bud clusters, all attached to a hair clasp for a delicate, nature-inspired accessory. The pattern focuses on dimensional crochet techniques to form layered petals and textured elements, offering an artful way to create botanical adornments for hair accessories or brooches.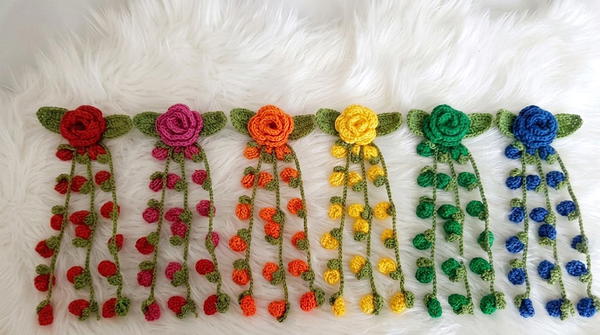
Pattern at a Glance
- Design: Central rose motif, distinctive leaves, and a cluster of miniature buds
- Construction: All elements are crocheted separately and assembled onto a clip
- Techniques: Magic ring start, layered petal formation, multi-stitch leaves, slip-stitched leaf veining, and small bud clusters
- Finishing: Secure attachment by sewing or gluing to a clasp, suitable for various hair accessories
Important Notes
- Each component relies on mastery of basic and decorative stitches; even tension ensures petal uniformity and neat leaf shapes.
- A strong, clean finish is achieved by weaving in all ends before assembly.
- When gluing components, silicone or strong craft glue ensures firm adhesion.
- Layer flower petals with care for a lifelike effect; stagger placement on each row of loops.
- Bud clusters are small but delicate—a gentle touch during assembly prevents distortion.
Difficulty Level
Intermediate
Experience with foundation rings, treble and triple stitches, and multi-step assembly is required. Some details—such as slip-stitch veining and layered petals—demand careful stitch placement and finishing.
Supplies Needed
- Cotton or acrylic yarn: red/pink/yellow for roses, green for leaves, other colors for buds if desired
- Crochet hook sized appropriately for yarn (typically 2.5 mm–3.5 mm)
- Yarn needle for sewing
- Scissors
- Silicone or craft glue (optional, for attaching to the clasp)
- Chosen hair accessory base: elastic band, snap fastener, or alligator clip
Size & Measurements
- Rose motif: Approx. 4–5 cm diameter, depending on yarn and hook size
- Leaves: Around 5–6 cm length per leaf
- Buds and clusters: Small details, individually about 1 cm wide
- Final assembled clip: 7–10 cm finished embellishment length, adjustable to preferred size
Gauge & Stitch Details
- Gauge is flexible but aim for a firm stitch. Rosette and leaves should hold their shape without flopping.
- Stitches used:
- Magic ring
- Single crochet (sc)
- Half double crochet (hdc)
- Double crochet (dc)
- Treble crochet (tr)
- Triple crochet
- Slip stitch (sl st)
- Chains (ch)
- Vein effect in leaves is produced with “yarn underneath, hook on” slip stitch
Crochet Abbreviations
- ch: chain
- sc: single crochet
- hdc: half double crochet
- dc: double crochet
- tr: treble crochet
- sl st: slip stitch
- st(s): stitch(es)
- MR: magic ring
Special Stitch Guide
Magic Ring (MR):
Make a loop, yarn over and draw up a loop, ch 1, work designated number of stitches into the loop, pull tail to tighten.
Treble Crochet (tr):
Yarn over twice, insert hook, yarn over and pull up loop, (yarn over and pull through 2 loops) three times.
Triple Crochet:
Yarn over three times, insert hook, yarn over and pull up loop, (yarn over and pull through 2 loops) four times.
“Yarn Underneath, Hook On” Slip Stitch:
Place the yarn beneath the work and slip the stitch using the hook, creating a raised leaf vein.
Complete Crochet Pattern
1. Rose Motif
Base (Magic Ring and First Round):
- Form a magic ring (MR).
- Work 9 sc into the MR. Pull ring tight.
- Join with a sl st to the first sc.
Row 2:
- Ch 2 (counts as first dc).
- 2 dc into each sc around. (18 dc)
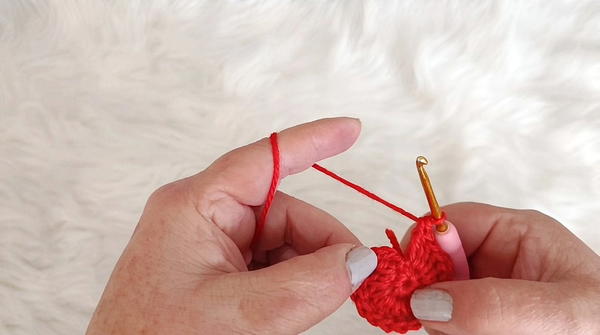
- Join with sl st.
Row 3 (Create Loops for Petal Rows):
- Ch 3, skip 2 dc, sl st in next dc; repeat from * to * around (creates 6 loops).
- Join with sl st at base of starting ch 3.
Rose Petals (Petal Rows):
- First Petal Row (Smallest):
- Into each loop: 6 tr
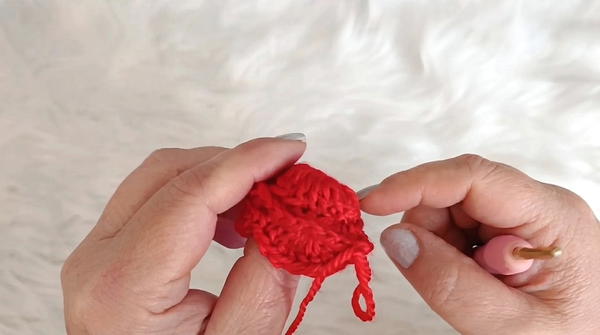
- [Into loop: yarn over twice, insert hook, work tr] 6 times per loop; repeat for all 6 loops.
- Into each loop: 6 tr
- Second Petal Row:
- Ch 4 (into back of previous petal row to create space)
- In each ch-4 space: 8 dc
- Repeat for each space.
- Third Petal Row:
- Ch 5 (again, behind previous petals)
- In each ch-5 space: 10 dc
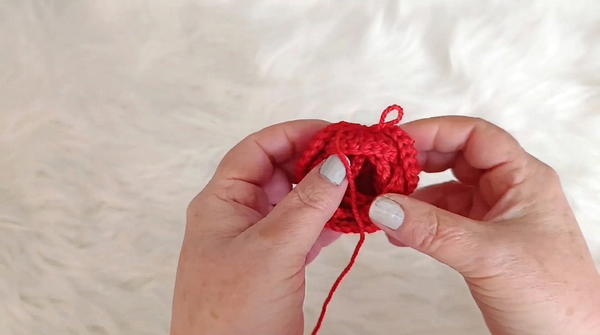
- Repeat for each space.
- Fasten off and weave in ends.
2. Leaves
- Ch 20.
- Starting in second chain from hook, work:
- 1 sc, 1 hdc, 3 dc, 5 tr, 3 dc, 1 hdc, 1 sc (one stitch per chain; this should fill the chain with a symmetrical leaf shape).
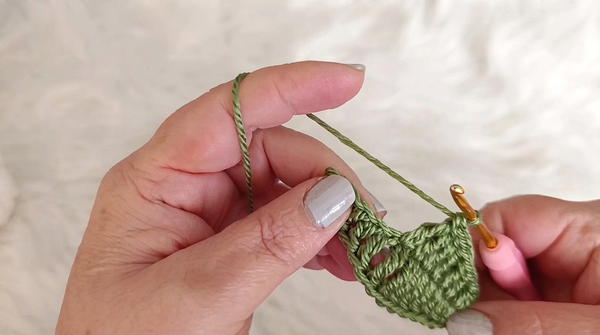
- 1 sc, 1 hdc, 3 dc, 5 tr, 3 dc, 1 hdc, 1 sc (one stitch per chain; this should fill the chain with a symmetrical leaf shape).
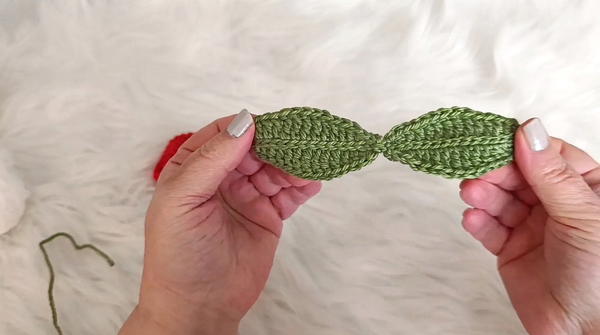
- Do not turn; work down the reverse side of the chain in the same stitch order for a double-sided leaf:
- 1 sc, 1 hdc, 3 dc, 5 tr, 3 dc, 1 hdc, 1 sc
- To define the central vein, sl st down the center of the leaf, using "yarn underneath, hook on" slip stitch technique (yarn under the work, hook above).
- Fasten off, leave tail for sewing.
3. Bud Cluster and Details
Cluster Base:
- Ch 15.
- In this chain, work: 1 sc, 1 hdc, 3 dc, ch 2.
- Fasten off, weave in or leave a tail for assembly.
Buds:
- For each bud:
- Ch 7,
- In chains: work 5 sc total (3 sc in each chain; this naturally curls to form a bud).
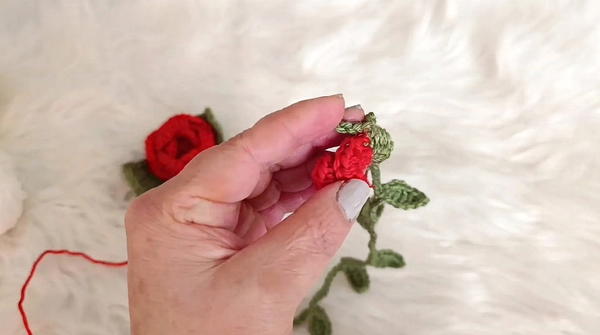
- Sew buds onto the cluster base at intervals. Make several small buds for a lush effect.
Assembly & Finished Size
- Layer rose petals gently, shaping as desired.
- Attach the rose motif at the center of the clip base using sewing or silicone glue.
- Use remaining leaf tails to position leaves radiating outward from the rose, sewing or gluing as desired.
- Arrange bud clusters beneath or beside the rose for a balanced, botanical look.
- Once all parts are attached firmly and dry (if using glue), the hair clip is ready to use.
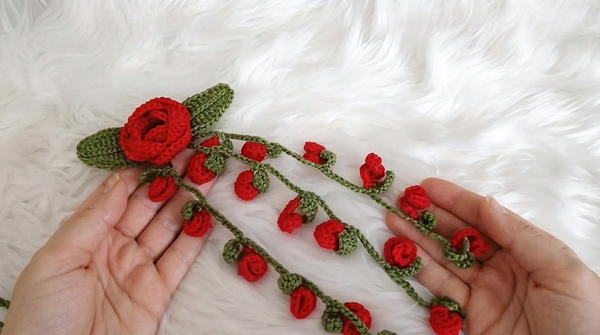
- Final size: 7–10 cm long, domed with layered petals and textured leaves and buds.
Conclusion and Ending Words
The bud cluster hair clip blends layered rose petals, sculpted leaves, and delicate bud details, resulting in a dimensional and elegant hair accessory. Strategic placement of each crocheted component creates lively structure and fullness while the mix of stitches provides realistic botanical shapes. Secure assembly ensures longevity, making this a beautiful handmade adornment for hair or as a statement brooch.