Mint Design Blog


Stitch vibrant granny squares together and add a comfy hood with this Free Crochet Granny Square Hooded Pattern for stylish warmth all season long
Gratitude goes to Gülşah Özcan Filiz for sharing an easy-to-understand guide that helps anyone create a warm and attractive garment featuring a soft hood made from vibrant square pieces. This design keeps you comfortable during chilly weather by combining softness with a great fit. The process involves making small squares with simple stitches, which are then joined carefully to build both the body and the hood. This method is suitable for beginners and experienced makers alike and allows for simple size changes.
Trendy Free Crochet Granny Square Hooded Pattern with Step-by-Step Tutorial
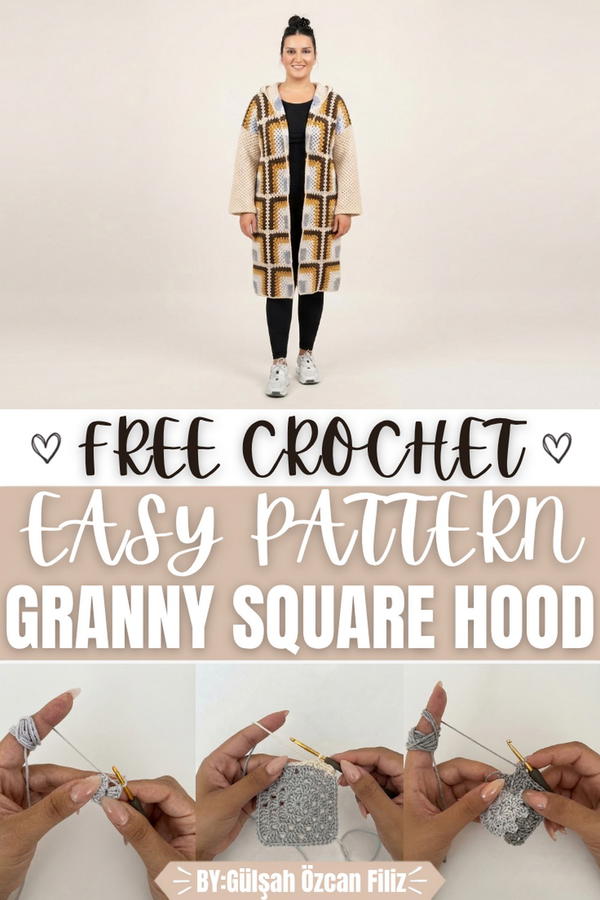
This piece is perfect for staying cozy while adding a unique and colorful touch to your wardrobe. Its fit hugs the shoulders comfortably without restricting movement, making it practical for daily wear. The cardigan provides extra warmth for the head and adds a stylish element that enhances the overall look, creating a mix of comfort and charm.
The most striking feature of this design is the bright, patchwork look formed by the connected squares. This pattern adds texture and classic appeal that never goes out of style. The shape fits the body well, while the hood offers both function and fashion.
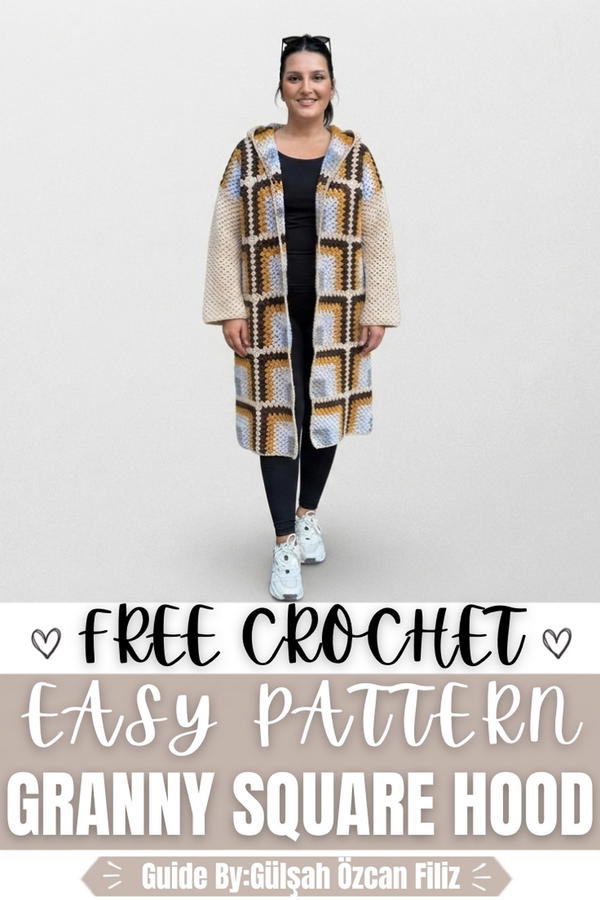
Crochet Granny Square Cardigan with Hood Pattern
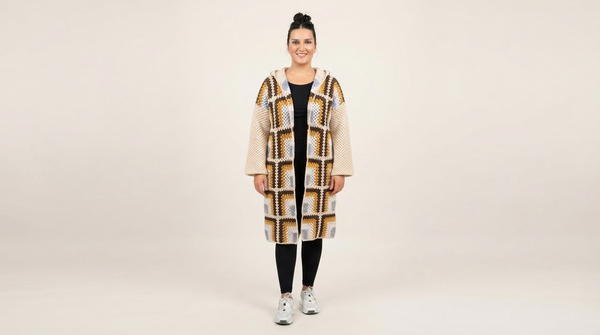
This pattern constructs a long, wearable cardigan with an optional hood using individually worked granny square motifs joined together during the knitting process. Each motif is built from a magic ring center outward using double crochet clusters and corner chain spaces, then assembled in a modular format to create the back panel, front panels, sleeves, and hood. The cardigan reaches below the knee in its full-length version and can be adjusted to a mini or midi length by reducing the number of motif rows. The construction uses a color-change technique across the motif rows to create a striped and textured surface that gives the finished garment a rich, handcrafted appearance suitable for spring and transitional seasonal wear.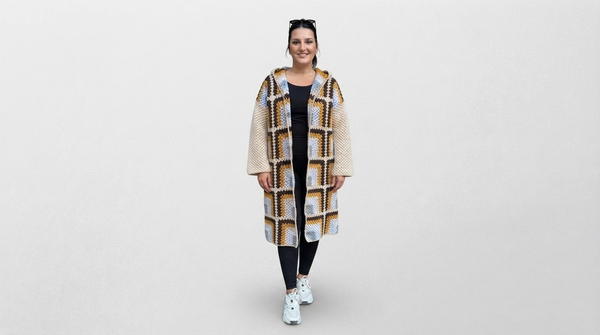
Skill Level: Intermediate — This pattern suits crocheters who are comfortable working magic rings, double crochet clusters, corner increases, and basic motif joining techniques. The assembly process requires careful attention to motif orientation and joining direction, making prior experience with modular garment construction helpful before beginning this project.
Materials
- Yarn: Any yarn suitable for a 3.25mm hook in multiple colors (the creator used brown, mustard, beige, white, light gray, and dark gray; 100-gram balls with approximately 4.5 balls total — 2 balls each of brown and mustard, 2 balls of beige, 1.5 balls of white, and 1 ball each of light and dark gray); cotton or wool yarn may also be substituted
- Hook: 3.25mm crochet hook
- Tools:
- Tapestry needle for shoulder and side seaming
- Scissors
- Measuring tape
- Stitch markers
Special Stitches
- Magic Ring: An adjustable starting loop worked around the finger that closes completely when pulled, eliminating any gap at the center of the motif.
- Double Crochet Cluster: Groups of 3 dc worked into the same chain space or gap between existing clusters, forming the primary texture of the granny square motif on every round.
- Corner Increase: Worked as 3 dc, ch 1, 3 dc all into the same corner chain space, creating a defined right-angle corner that expands the motif outward with each additional round.
- L-Shape Construction: A partial motif border technique where only two sides of the square are worked in a given round rather than completing the full perimeter, allowing individual motifs to be extended and connected into a continuous panel without cutting yarn between pieces.
- Crochet Join: A joining method worked simultaneously through corresponding gaps on two adjacent motifs by threading the hook through both layers and pulling a chain through, securing the pieces together without a separate seaming step.
- Needle Join: An optional alternative joining method where a tapestry needle and matching yarn are used to sew corresponding loops on adjacent motif edges together, used specifically for shoulder seaming in this pattern.
Stitch Abbreviations
- ch — chain
- sl st — slip stitch
- sc — single crochet
- dc — double crochet
- MR — magic ring
- sp — space
- st(s) — stitch(es)
- rep — repeat
- tch — turning chain
- inc — corner increase
Useful Tips
- Work all motifs to a consistent size and tension before beginning assembly to ensure that the joining rows lie flat and the finished panels are even throughout.
- Pay careful attention to motif orientation during assembly — the starting point of each motif should face outward on the outer edges of each panel, with adjacent motifs facing each other along shared interior edges.
- Use stitch markers to identify corner chain spaces on each motif during the joining process to avoid accidentally skipping corner increases when working across multiple motifs simultaneously.
- The color sequence across rows can be freely adjusted — the creator used 3 rows of each color with variations at the start, but any personal color arrangement will work equally well.
- When joining the front panels to the back body, work from the bottom of the motif upward rather than from the top down on the left front panel to maintain correct motif orientation relative to the back body.
- For a cardigan version, leave the center front edges completely open and unjoined. For a pullover version, sew the front opening closed using a tapestry needle and matching yarn after all panels are assembled.
- If the crochet join method feels too complex during panel assembly, all joining can be completed using the needle join method after all individual panels and motifs are finished.
Pattern Instructions
Individual Motif Construction
Foundation — Magic Ring
- Create a MR and lock with a sl st chain.
- Ch 3 (counts as first dc).
- Work 11 dc into the ring (total of 12 dc including beginning ch-3).
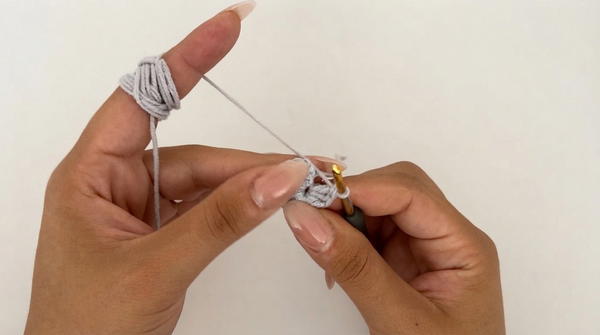
- Sl st to close the ring and pull center tight.
- Total: 12 sts in the ring divided into 4 groups of 3
Round 1 — First Square Round
- Ch 2 to begin.
- Work 3 dc into the first gap between groups (corner cluster).
- Ch 1 (corner chain sp).
- Work 3 dc into the same gap.
- Work 3 dc into the next gap (side cluster).
- At the next gap, work 3 dc, ch 1, 3 dc (second corner).
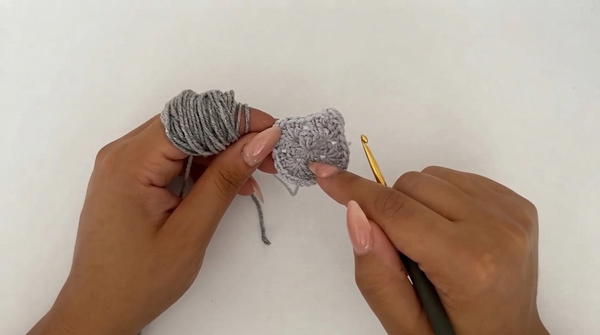
- Work 3 dc into the next gap (side cluster).
- Rep corner and side cluster sequence for remaining two corners.
- Sl st to join at the top of the beginning ch-2.
- Fasten off first color and join second color.
- Total: 4 corners with ch-1 sp and 4 side clusters
Round 2 and Subsequent Rounds — Expanding the Square
- Join new color yarn into any corner ch-1 sp.
- Ch 3 (counts as first dc).
- Work 2 dc into the same corner sp.
- Ch 1.
- Work 3 dc into the same sp (corner complete).
- Work 3 dc into each sp along the side between corners.
- At each corner sp, work 3 dc, ch 1, 3 dc.
- Rep around all four sides.
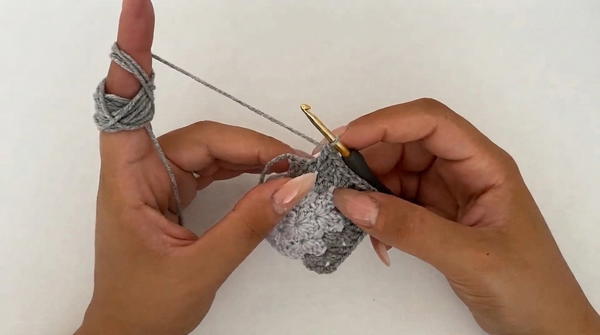
- Sl st to join and change color as desired.
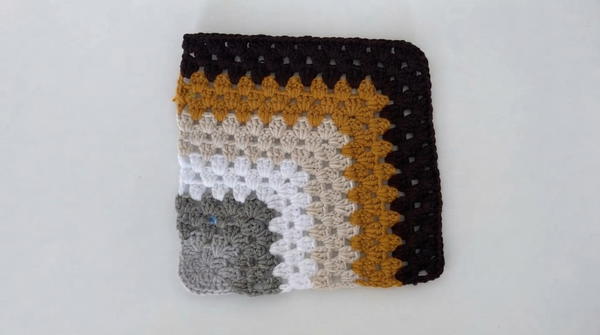
- Continue adding rounds with color changes every 3 rows (or adjust to personal preference) until the motif reaches the desired size.
- The creator worked a total of 17 rows on each motif using the color sequence of light gray, brown, mustard, beige, and white.
- Fasten off and weave in all ends on each completed motif.
Panel Construction
Back Panel
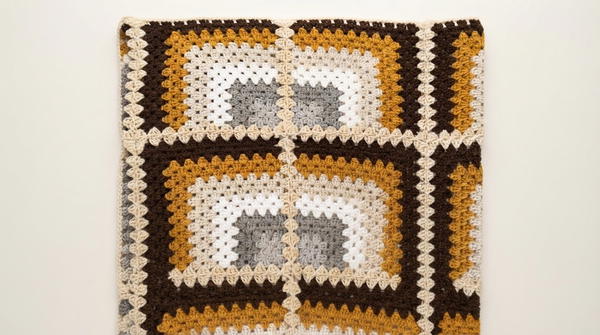
- Arrange 4 motifs side by side horizontally to form the first row of the back.
- Join each motif to the adjacent one using the crochet join method:
- Work the final round of each motif normally on all unshared edges.
- When reaching the shared edge with the adjacent motif, thread the hook through the corresponding gap on the adjacent motif and pull a chain through to join, then continue working 3 dc into the next gap of the current motif.
- Rep across the full shared edge until both motifs are completely joined.
- Continue attaching additional rows of 4 motifs each directly below the first row using the same join method.
- Work a total of 6 rows of 4 motifs each for the full back panel.
- Total back panel: 24 motifs
- After all motifs are joined, work a framing round of 3 dc into every gap along all outer edges of the assembled back panel.
- Fasten off.
Front Panels (Make 2)
- Each front panel consists of 2 motifs wide by 6 rows tall.
- Assemble each front panel using the same crochet join method as the back panel.
- Total per front panel: 12 motifs
- Total for both front panels combined: 24 motifs
- Work a framing round of 3 dc into every gap along the outer edges of each assembled front panel.
- For the right front panel, begin joining from the shoulder downward toward the hem.
- For the left front panel, begin joining from the bottom hem upward toward the shoulder to maintain correct motif orientation when worn.
- Fasten off both front panels.
Sleeves (Make 2)
- Join yarn at the armhole opening on one side of the assembled body.
- Work 3 dc into every gap around the entire armhole opening in continuous rows.
- Ch 3 at the end of each row and turn.
- Continue working straight dc rows of 3 dc per gap until the sleeve reaches the desired length.
- Fasten off at the end of the final row without working any cuff edging.
- Rep on the opposite armhole opening.
Hood (Optional)
- Join yarn at the neckline edge of the assembled cardigan.
- Work 3 dc into every gap across the neckline opening in rows.
- Ch 3 at the end of each row, turn, and continue working 3 dc into every gap.
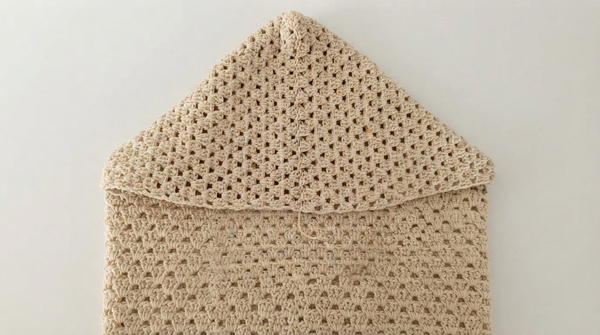
- Work a total of 41 rows straight in this manner.
- On Row 42, work only halfway across the row to the center point, then fasten off.
- Rejoin yarn at the opposite edge and work the second half of Row 42 to the center point.
- Join the two halves at the center top using the needle join method, threading a tapestry needle through corresponding loops on both sides and sewing across the full center seam.
- Fasten off and weave in all ends.
Assembly and Sizing
Garment Assembly Sequence
- Complete all individual motifs and assemble the back panel, both front panels, sleeves, and hood as individual sections before beginning final assembly.
- Join the front panels to the back panel along the side edges using the crochet join method or needle join method, working from the hem upward and leaving the armhole openings unjoined at the upper sides.
- Join the shoulder edges of the front and back panels using the needle join method, threading the tapestry needle through corresponding loops on both shoulder edges and sewing across.
- Leave 7 groups of 3 dc open at the center of each shoulder edge to create the neckline opening for hood attachment.
- Attach the hood at the neckline opening after shoulder seaming is complete.
- Attach the sleeves from the armhole openings after all body seaming is finished.
Sizing Notes
- The pattern as written using 46 motifs total fits a size 40 to 42 (European sizing) and reaches below the knee.
- For a shorter cardigan, reduce the number of motif rows in the back and front panels — 4 rows produces a waist-length version and 5 rows produces a knee-length version.
- For a longer cardigan, add additional rows beyond 6 to reach maxi length.
- For a larger size, add one additional motif to the width of the back panel (5 motifs wide instead of 4) and adjust the front panels to match.
- For a smaller size, reduce the number of rounds worked on each individual motif, or use 4 rows per panel instead of 6.
- The center front edges remain open throughout for the cardigan version. No button bands or closures are included in this pattern, consistent with the creator's original design.
Conclusion
This granny square cardigan pattern offers a highly adaptable and visually striking approach to modular garment construction, producing a garment that can be customized in length, width, color arrangement, and finishing details to suit individual preferences and sizing requirements. The repetitive nature of the motif construction makes it a satisfying and meditative project to work through, while the assembly process introduces practical skills in panel joining and garment shaping that are transferable to a wide range of future crochet projects. The optional hood addition provides an extra layer of functionality and style that makes the finished cardigan suitable for cooler seasonal wear as well. The absence of cuff and hem edging keeps the overall silhouette clean and relaxed, contributing to the effortless and contemporary character of the completed garment.