Keep your bus card within easy reach with this Free Crochet Pattern for a bag with an outer pocket and simple stitches suited to a first handbag project.
Digging through a bag for a bus card can hold you up when you’re in a hurry. This Free Crochet Pattern for a Bag with Outer Pocket gives that one item a place you can reach from the outside. The pocket also breaks up the front of the crocheted body and gives the surface an extra edge to follow with your eye.
Free & Simple Crochet Bag with Outer Pocket Pattern
Related Bag Projects From Promlatex
Promlatex. Шнур для вязания. is another place to browse cord bag projects. Its lined purses include examples with narrow flaps, short handles and shoulder straps. Those details suit different ways of carrying a bag, so they’re worth comparing whenever you want to plan where your things will go within it.
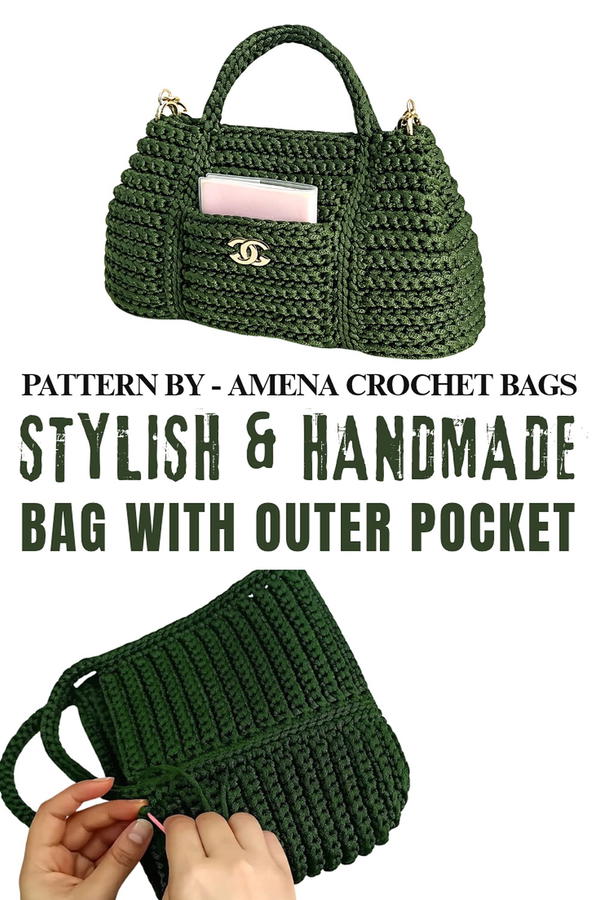
What goes in that pocket depends on your day. A folded shopping list can sit there until you reach the store, while a pack of tissues might be the better choice on a walk. Keep larger items inside so the pocket stays easy to use. It helps to pick one thing you reach for often and keep it in the same spot each time.
The bag uses simple stitches worked with 3 mm chain yarn and a 5 mm hook. As you work, pay attention to how the front section sits against the main body. The edge of the pocket is part of the finished look, and it’s also where your hand goes when you need something quickly. Try sliding a card or folded list into the finished pocket to see how easily you can take it out. That small test can help you decide what to keep there from day to day.
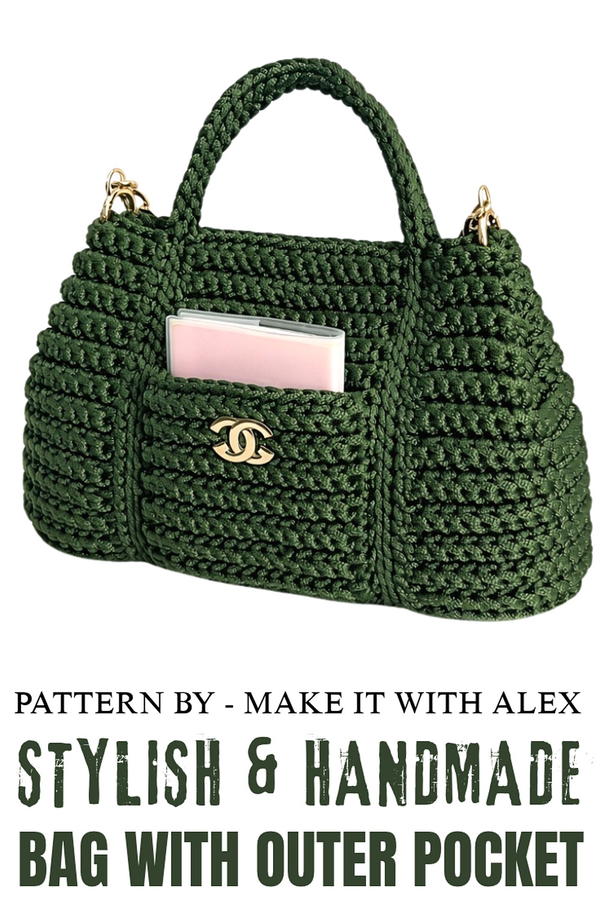
Chain-Yarn Rectangular Bag with Built-In Pocket
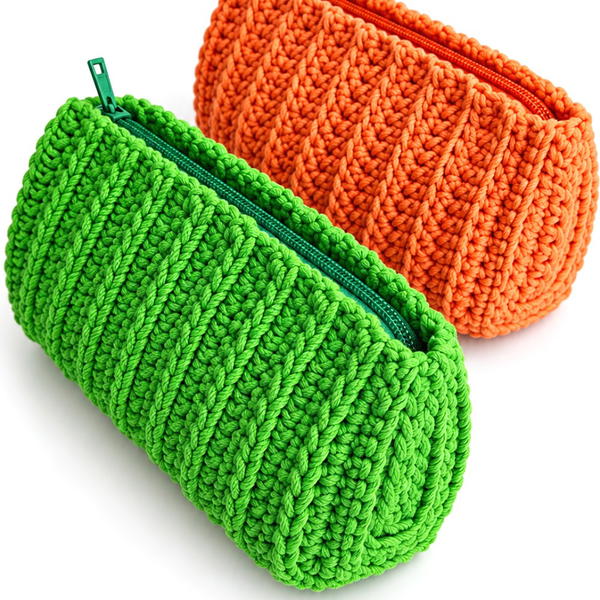
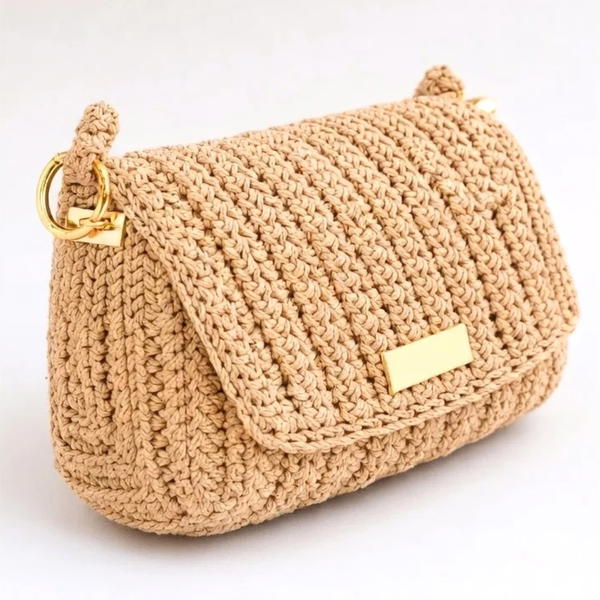
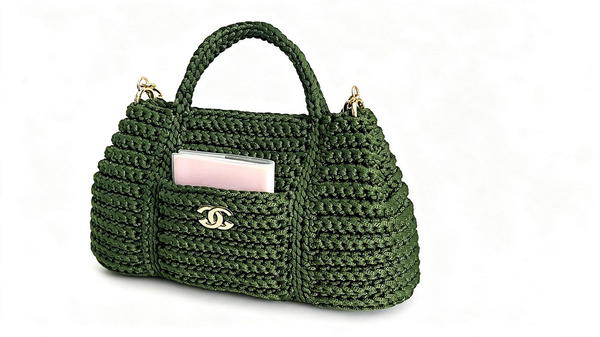
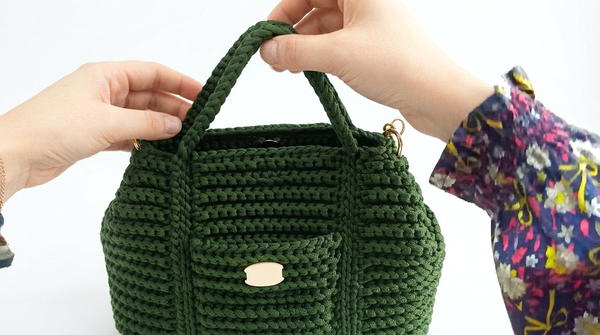
This structured handbag is worked flat and in the round using chain yarn and single crochet in the back loop, giving a modern ribbed texture. The construction includes a long main panel with an integrated pocket, a continuous strap/base section formed by chains, and two shaped side pieces sewn on for volume. The design can be finished with a zipper, magnetic snap, or loop closure according to preference.
Skill Level
Intermediate
The stitches are basic, but the pattern involves:
- Working consistently in the back loop only (BLO).
- Picking up stitches along row edges.
- Shaping curved side pieces with planned increases.
- Precise counting and seaming.
Materials
- Yarn: 3 mm chain yarn
- Approx. 700 g (about 300 m)
- Hook: 5 mm crochet hook
- Notions:
- Yarn needle for sewing and weaving in ends
- Stitch markers (optional, for counting sections)
- Scissors
- Optional finishing:
- Zipper, or
- Magnetic closure, or
- Button and loop closure
Approximate finished dimensions:
- Width (front panel): about 12 cm
- Length of body: about 44 cm
- Side height: about 21 cm
Stitch Abbreviations
(Only those present in the transcription)
- ch – chain
- sc – single crochet
- sl st – slip stitch
Useful Tips
- Back loop only: Most rows are worked in the back loop of the sc to create a flexible, textured rib. Insert your hook under the back loop only (the loop farthest from you).
- Row and stitch counts: The main body depends on exactly 15 sc across and 60 rows along the length. The side pieces depend on precise stitch counts at each shaping row. Keep a row counter or tally.
- Pocket joining: The pocket is joined to the body by working through both layers at once. Make sure the pocket edge and body edge rows align correctly.
- Side piece sewing: Sew “row-to-stitch” so that 60 rows on the body match 30 stitches of the side panel (each stitch on the side piece corresponds to two rows on the body).
Pattern Instructions
1. Main Body Panel
This forms the long rectangle that becomes front, back, and base, and contains the built-in pocket section.
Row 1 (Foundation)
- Make a slip knot.
- ch 16 (this will give a panel about 12 cm wide).
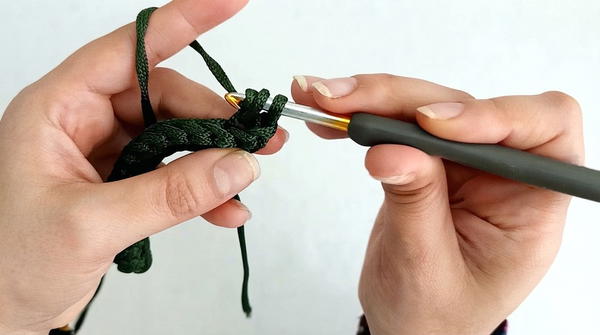
- Starting in the 2nd ch from the hook, work:
- 15 sc (1 sc in each remaining chain).
- 15 sc (1 sc in each remaining chain).
You now have 15 sc.
Rows 2–60
- For each row:
- ch 1, turn.
- Work 15 sc in BLO, starting from the first stitch.
Continue until you have 60 rows, all 15 sc wide.
This strip will measure about 44 cm in length.
Do not cut the yarn.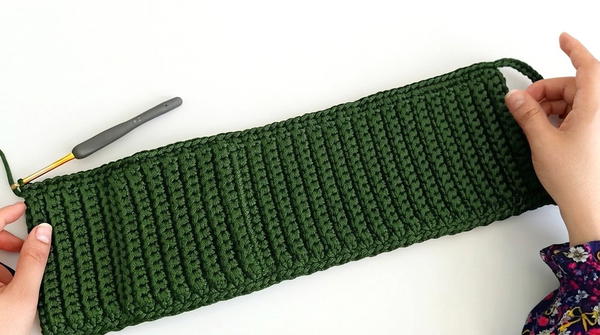
2. Built-In Pocket
The pocket is formed by picking up stitches along one part of the panel.
- With yarn still attached, count 24 rows from one end of the long strip.
- On the 25th row:
- Insert the hook into the first loop of that row edge.
- Pull up the yarn and work across that row edge, making sure to form:
- 15 sc along the loops (no fewer).
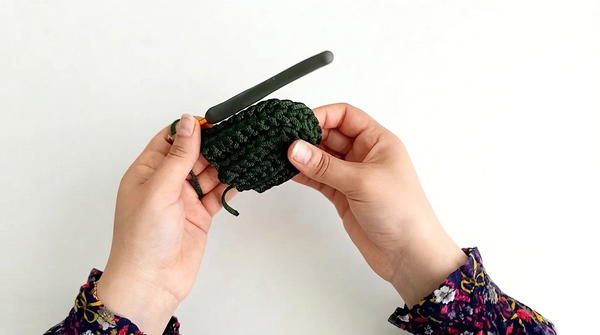
- 15 sc along the loops (no fewer).
- From these 15 sc, work the pocket height:
- Pocket Rows 1–15
- ch 1, turn.
- Work 15 sc in BLO.
After completing 15 rows for the pocket, cut the yarn.
You now have a long panel with a pocket section attached along part of one side.
3. Side Edge Stitches and Pocket Join
You will work along the long edge of the panel, forming stitches that will later be part of the round, while also joining the pocket.
- Reattach yarn along the side of the main panel near the pocket area.
- Begin with:
- ch 1, then skip the first row edge, and
- Work 1 sc into the second row edge.
- Continue working sc along the row edges up the side:
- After the first 10 sc (counting the first sc after the ch), you start joining the pocket.
- Joining the pocket:
- For the next 15 sc:
- Insert the hook through the edge row of the pocket and the corresponding row of the body together.
- Work sc through both layers.
- This joins the pocket to the main panel.
- For the next 15 sc:
- After those 15 joined stitches, continue:
- Work 35 sc, one sc per remaining row edge up the side.
You should have a total of 60 sc along this side:
- 10 single-layer sc,
- 15 sc joining the pocket,
- 35 more single-layer sc.
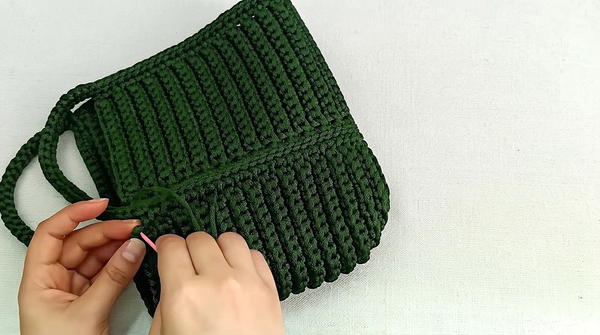
4. Forming the Perimeter Round and Handle Chains
You will now turn this long panel into a closed loop with chain sections.
- After confirming you have 60 sc along the side, ch 30.
- This chain will form part of the top/handle section.
- At the end of the chain:
- Begin working along the opposite side in the same manner:
- On the first row edge, place the first sc.
- Work 35 sc along this side.
- Then 15 sc to join the opposite pocket edge (in the same way as before: through both pocket and body).
- Then 10 sc along the remaining row edges.
Again, you should have 60 sc along this side.
- Begin working along the opposite side in the same manner:
- After these 60 sc:
- ch 30 again to mirror the first chain section.
- Join to form a round:
- Make a sl st into the starting chain (the beginning of the work) to close the loop.
Now your round consists of:
- 60 sc (one long side),
- 30 ch (first chain),
- 60 sc (other long side),
- 30 ch (second chain).
Total stitches around:
60 + 30 + 60 + 30 = 180 stitches.
5. One Round in Slip Stitch (BLO)
- Work 1 full round of sl st in BLO:
- This includes all 180 stitches: each sc and each chain loop worked in the back loop only.
- After completing the round:
- Cut the yarn and finish by pulling through the last loop to secure.
This completes the main body loop of the bag.
6. Side Panels (Work 2)
Each side panel is an elongated oval that gives the bag its depth.
Foundation (Side Panel 1 & 2)
- Make a slip knot.
- ch 8.
Round 1
- Starting from the 2nd ch from the hook:
- 6 sc (1 sc into each of the next 6 chains).
- In the last ch:
- Work 3 sc (this forms the rounded end).
- Work back along the opposite side of the chain:
- 6 sc along the remaining chain loops.
You now have 15 sc in this first oval round.
Row 2 (worked flat, BLO)
- Turn the work.
- Work in BLO:
- 6 sc,
- Then 3 increases over the central 3 stitches:
- Each increase = 2 sc in the same stitch, for a total of 6 sc over 3 sts.
- Then 6 sc.
You now have 18 sc in Row 2.
Row 3
- Turn, work 18 sc in BLO, 1 sc in each stitch across.
Row 4 (increase row)
- Start with 6 sc in BLO.
- Then across the rounded part:
- Work 6 sc and 3 increases, repeated so that:
- You effectively work 9 sts over 6 original sts (3 increases spaced between sc).
- Work 6 sc and 3 increases, repeated so that:
- Finish with 6 sc.
At the end of this row, you will have 21 sc.
Row 5
- Turn and work 21 sc in BLO.
Row 6 (increase row)
- Start with 6 sc in BLO.
- Then over the central rounded section:
- Work 6 increases and 2 sc, arranged in 3 repeats such that:
- You work 12 sts over 9 sts (each repeat adds extra stitches).
- Work 6 increases and 2 sc, arranged in 3 repeats such that:
- Finish with 6 sc.
At the end of this row, the stitch count increases to 24 sc.
Rows 7–30 (side wall height)
- Work 24 sc in BLO on each row.
- Continue until you have a total of 30 rows in the side panel.
The panel height will be approximately 21 cm.
Before cutting the yarn, leave a long tail for sewing the side panel to the body.
- Repeat all steps to make a second identical side panel.
7. Sewing the Sides to the Body
- Position one side panel at one end of the bag opening.
- Align:
- The 60 rows of the body panel with
- The 30 stitches of the side panel (so that each side-panel stitch corresponds to two rows of the body).
- Using the long tail and yarn needle:
- Sew row-to-stitch, on the outer side, in exactly one direction so the seam lies neatly around the edge.
- Sew all around the side panel edge to join fully.
- Repeat the same process with the second side panel at the other end of the bag.
When both sides are sewn, the bag body will be fully formed.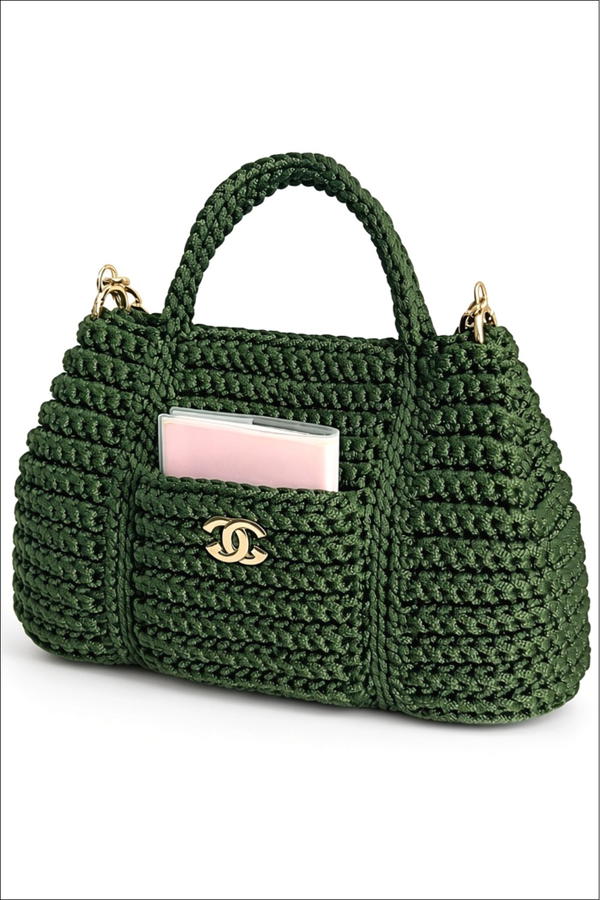
Conclusion
This chain-yarn bag combines simple stitches with thoughtful construction to create a clean, structured accessory. The ribbed texture, built-in front pocket, and shaped side panels give it both functionality and visual interest. The open top allows for versatile finishing: it can be left as is, closed with a magnetic snap, fitted with a zipper, or enhanced with loop closures, depending on the intended use.