Combine two fan favorites with our free crochet Spiderman X Hello Kitty pattern perfect for creating adorable superhero charm with a cute twist.
Bringing two iconic characters together into one adorable creation that sparks joy and nostalgia. This project beautifully merges playful charm and superhero spirit, making it a heartwarming gift or a whimsical decor piece. The free crochet Spiderman x Hello Kitty pattern offers a unique blend of cuteness and adventure, perfect for fans of all ages who appreciate creative, small-scale artistry.
Unique Free Crochet Spiderman X Hello Kitty Pattern
Designed for year-round enjoyment, this charming amigurumi can brighten a child’s room, serve as a fun companion for playtime, or even become a standout collectible on your shelf. Pair it with themed accessories or place it alongside other handmade figures to create a joyful display that celebrates both innocence and heroism.
Giving Credit to the Artist
We are grateful to the creator behind Zehranın Atölyesi for sharing artistic ideas and creative inspiration. We give full credit to the channel owner for the original work and recognize the talent involved in every project. Please visit the original YouTube channel to appreciate the creator's skills and explore more wonderful handmade creations.
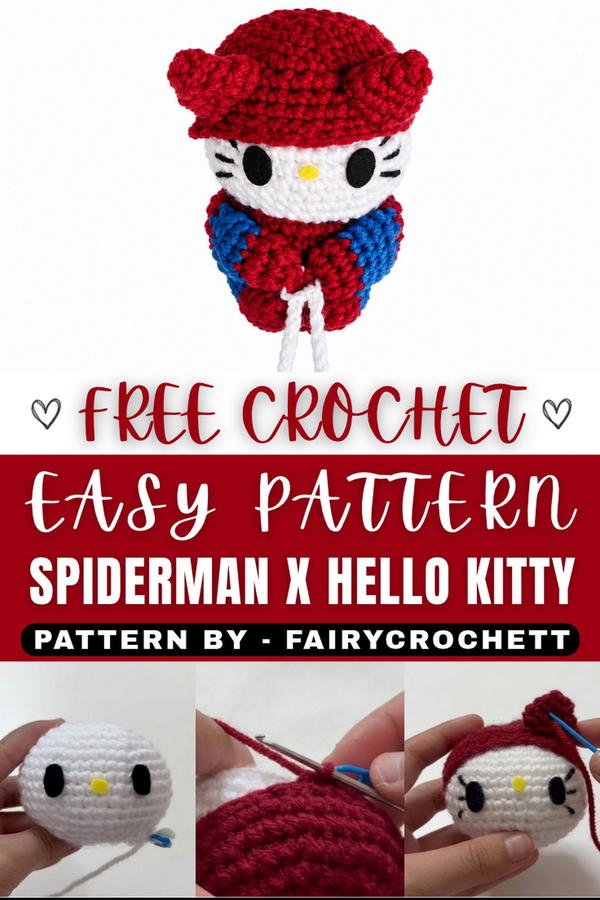
The texture of this piece is delightfully soft yet firm, achieved through tight single crochet stitches that hold the shape impeccably. The combination of vibrant red, blue, white, and black yarns highlights the distinctive elements of both Spiderman’s suit and Hello Kitty’s iconic features. The pattern carefully integrates intricate increases and decreases, producing a smooth, rounded form that fits perfectly for a toy or decoration.
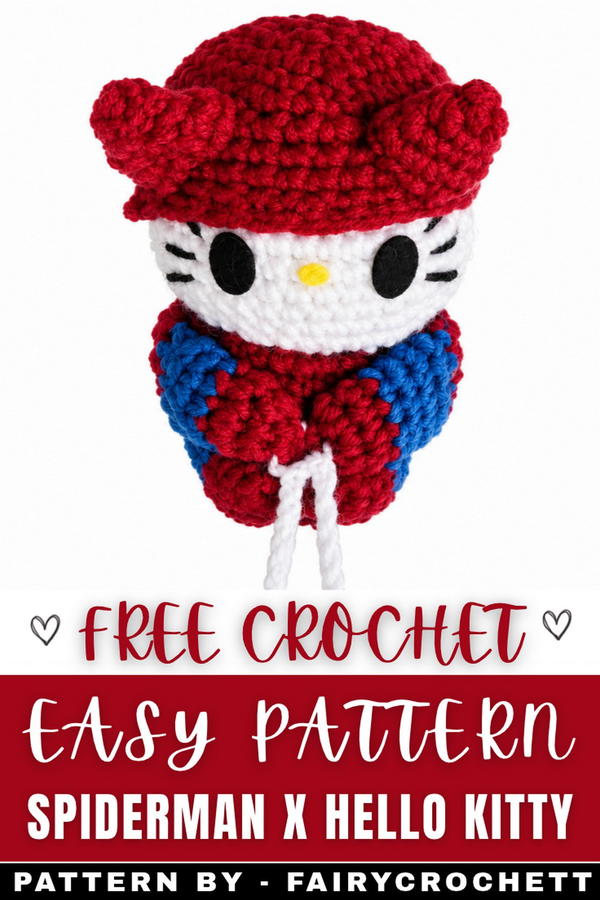
Standout design features include the lovingly embroidered whiskers, felt eyes and nose, and the cleverly attached hood that recalls Spiderman’s iconic mask while maintaining Hello Kitty’s sweetness. This fusion pattern transforms two beloved characters into one captivating figure, delivering comfort, charm, and creativity in every stitch. Embrace this delightful project to celebrate fandom and handmade artistry alike.
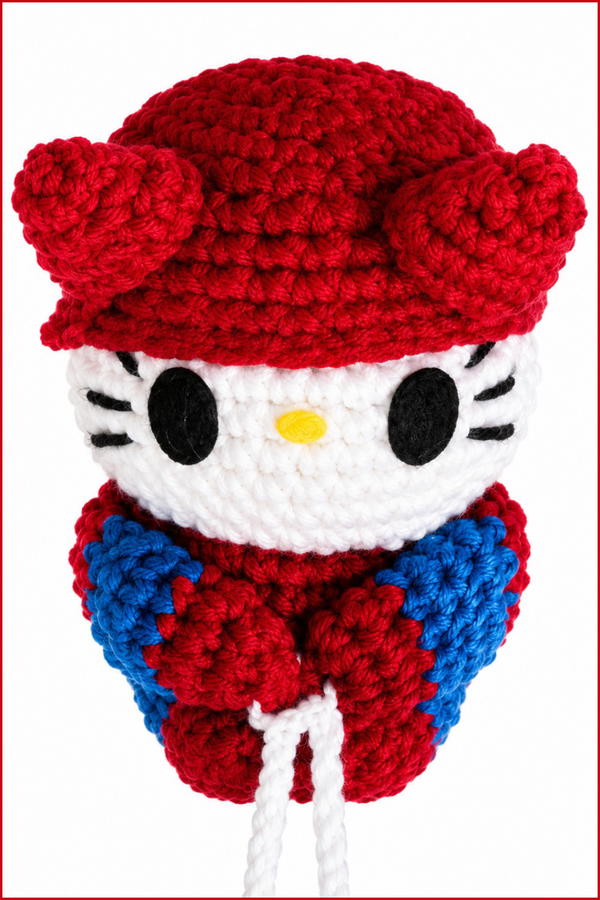
Hello Kitty x Spiderman Crochet Keychain Pattern
This crochet pattern blends Hello Kitty's classic charm with Spider-Man's iconic superhero aesthetics, resulting in a cute and creative keychain design. Following this pattern, you will learn to create the individual amigurumi parts for the character and assemble them into a lovable finished piece.
Skill Level
Intermediate
This pattern is designed for those with a working knowledge of basic crochet stitches, magic rings, increases, decreases, color changes, and assembling amigurumi components.
Materials
- Yarn:
- White yarn: For Hello Kitty's head.
- Red yarn: For Spider-Man’s hood, arms, legs, and web.
- Blue yarn: For Spider-Man's torso and parts of the limbs.
- Black yarn: For embroidering webbing and whiskers.
- Additional Supplies:
- Crochet hook: Recommended size is 2.5mm–3mm for tight stitches.
- Stuffing/Fiberfill: To stuff the head, body, arms, and legs.
- Felt paper: In black, white, and pink/yellow for Hello Kitty's facial details (eyes and nose).
- Tapestry needle: For assembling parts and adding embroidered details.
- Scissors: For cutting yarn and finishing pieces.
- Stitch marker: Helpful for tracking rounds in continuous crochet.
Special Stitches
Magic Ring (MR):
- Wrap the yarn around two fingers twice to create a circle.
- Insert the hook under the loops, pull up the working yarn, and twist to secure the loop.
- Yarn over and pull through to form a stable loop and start working single crochets into the ring.
- Pull the yarn tail to tighten the ring securely.
Increase (Inc):
Work two single crochet stitches in the same stitch.
Decrease (Dec):
Insert the hook into the front loops of the next two stitches. Yarn over and pull through the first two loops, then yarn over and pull through the remaining two loops to finish the decrease.
Stitch Abbreviations
| Abbreviation | Meaning |
|---|---|
| MR | Magic Ring |
| SC | Single Crochet |
| Inc | Increase (2 SC in the same stitch) |
| Dec | Decrease (SC2tog) |
| Ch | Chain |
| Sl St | Slip Stitch |
Useful Tips
- Tight Tension: Keep your stitches tight and uniform to ensure the finished product is well-shaped and prevents stuffing from showing.
- Use a Stitch Marker: Place a stitch marker at the beginning of each round to help track your progress in continuous rounds.
- Firm Stuffing: Evenly and firmly stuff the pieces for a smooth and professional look.
- Color Changes: To switch colors seamlessly, pull the new yarn through during the last yarn-over of the previous stitch.
- Assembly Prep: Leave long tails when fastening off, as they will be used to sew pieces together.
Detail Pattern
2. Head (White Yarn)
- Magic Ring: Leave a yarn tail, wrap the yarn around two fingers twice, go underneath, pull the working yarn, twist, and yarn over to form a magic ring -.
- Round 1: Crochet 8 single crochets in the magic ring, then pull the tail and working yarn to tighten -. Place a stitch marker in the closest stitch.
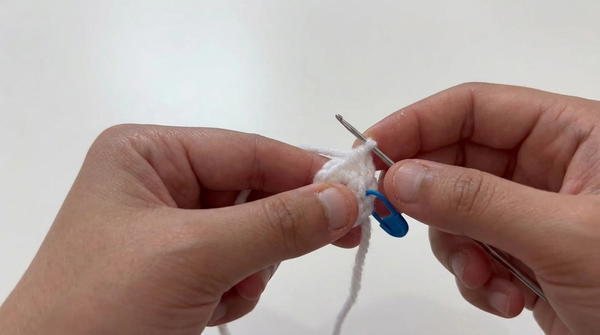
- Round 2: 8 increases (2 single crochets in each stitch around).
- Round 3: [1 single crochet, 1 increase] all around.
- Round 4: [2 single crochets, 1 increase] all around.
- Round 5: [3 single crochets, 1 increase] all around.
- Rounds 6–13 (8 rounds): 1 single crochet in each stitch around.
- Round 14: [3 single crochets, 1 decrease] all around. (Note: Stuff the head firmly here and attach felt eyes, nose, and embroidered black whiskers).
- Round 15: [1 single crochet, 1 decrease] all around.
- Round 16: 8 decreases.
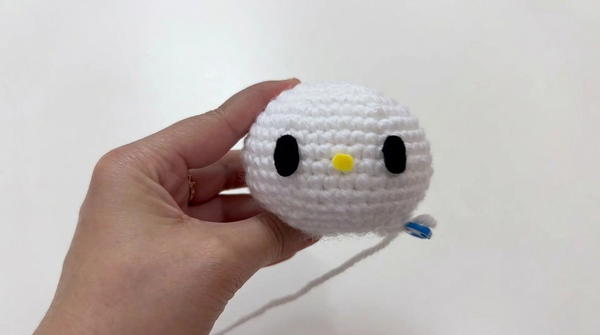
- Fastening Off: Slip stitch, leave a tail, thread it through the top loops of the remaining stitches, pull gently to sew closed, and secure/hide the yarn tail inside -.
3. Hood (Red Yarn)
- Follow the exact same steps as the head up until the [3 single crochets, 1 increase] round -.
- Rounds 6–7: 1 single crochet in each stitch -.
- Round 8: [3 single crochets, 1 decrease].
- Round 9: [2 single crochets, 1 decrease] -.
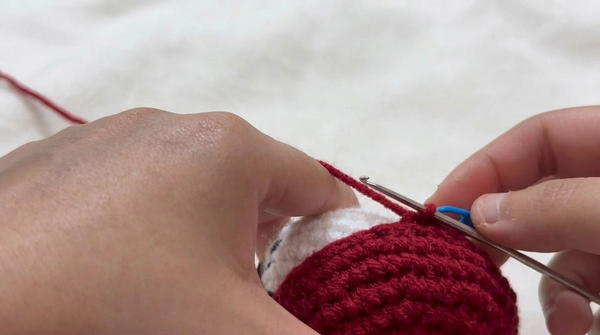
- Place the hood onto the head, crochet [1 single crochet, 1 decrease] all around while it is fitted on the head, and finish off with a slip stitch -.
4. Ears (Red Yarn)
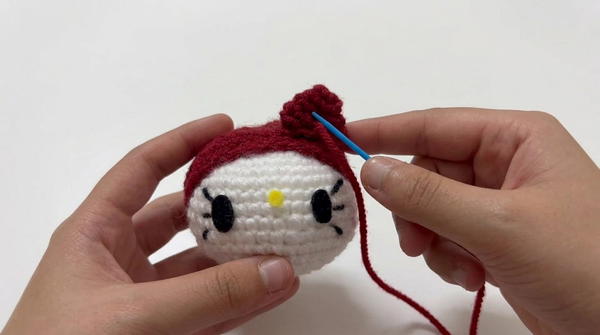
- Round 1: 4 single crochets in a magic ring -.
- Rounds 2–3: [1 single crochet, 1 increase] -.
- Round 4: [2 single crochets, 1 increase] all around, cut yarn, and fasten off with a slip stitch -.
5. Body (Blue & Red Yarn)
- Round 1: 8 single crochets in a magic ring (Blue) -.
- Round 2: Increase 8 times (Blue).
- Round 3: [1 single crochet, 1 increase] all around (Blue) -.
- Round 4: [2 single crochets, 1 increase] (Blue).
- Rounds 5–6: 1 single crochet in each stitch (Blue) -. (Switch to Red on the final stitch of Round 6) -.
- Rounds 7–10 (4 rounds): 1 single crochet in each stitch (Red) -.
- Fasten off with a slip stitch, leaving an extremely long tail to sew the body onto the head -.
6. Arms & Legs — Make 4 Total (Red & Blue Yarn)
- Base: 6 single crochets in a magic ring (Red) -.
- Rounds 1–2: 1 single crochet in each stitch (Red) -. (Switch to Blue on the last stitch of Round 2) -.
- Rounds 3–5: 1 single crochet in each stitch (Blue) -. (Switch to Red on the last stitch of Round 5) -.
- Round 6: 1 single crochet in each stitch (Red) -.
- Slip stitch, cut yarn, and stuff lightly. Repeat to make 2 arms and 2 legs -.
7. Spider Web / Whip (White Yarn)
- Make a slip knot and chain 60 -.
- Join back to the first stitch with a slip stitch and leave a long tail for attachment -.
8. Assembly Instructions
- Ears: Sew the ears to the front top of the hood by alternating stitches between the hood and the ear -.
- Body to Head: Use the long tail left from the body to sew the body securely to the head -.
- Limbs: Attach the arms to the top right/left edges and the legs to the bottom right/left edges of the body -.
- Spider Web Attachment: Thread the white yarn tail, anchor it through the middle of the arms and legs, weave through multiple stitches around the web to secure it firmly, and trim any excess yarn -.
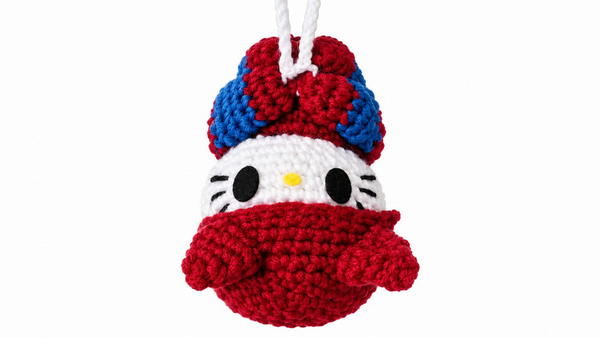
6. Assembly and Attaching Parts
- Attach the Ears: Sew the ears to the hood, placing them evenly on top of the head. Alternate stitches between the hood and ear for secure attachment.
- Sew Head to Body: Using the tail from the body, attach the body securely to the head. Ensure alignment.
- Attach Limbs: Sew the arms to the top right and left sides of the torso and the legs to the bottom edges. Even spacing ensures stability.
- Secure the Web: Loop the web through the arms and legs using the white yarn tail, securing it tightly to the body.
- Final Details: Add any additional embroidery or details, such as the Spider-Man webbing on the hood and keychain loop attachment.
Final Notes
This Hello Kitty x Spiderman crochet keychain is a perfect project for fans of both characters. Its manageable size makes it a great handmade gift or collectible. Customize further by experimenting with color schemes and accessories!