Mint Design Blog


Stay cool and chic in a handmade oversized mesh tunic crocheted from an easy-to-follow free crochet pattern suited for all skill levels and occasions.
Looking for a stylish yet simple project that merges creativity with practicality? The Free crochet Oversized Mesh Tunic Pattern, shared by Gülşah Özcan Filiz, might just be the perfect match. This easy-to-follow pattern guides you to create an elegant and versatile garment ideal for layering, beach days, or casual wear. Whether you're making it for yourself or as a thoughtful gift, this tunic offers beauty, comfort, and timeless appeal.
Free Oversized Mesh Tunic Crochet Pattern – Perfect for Beach Days
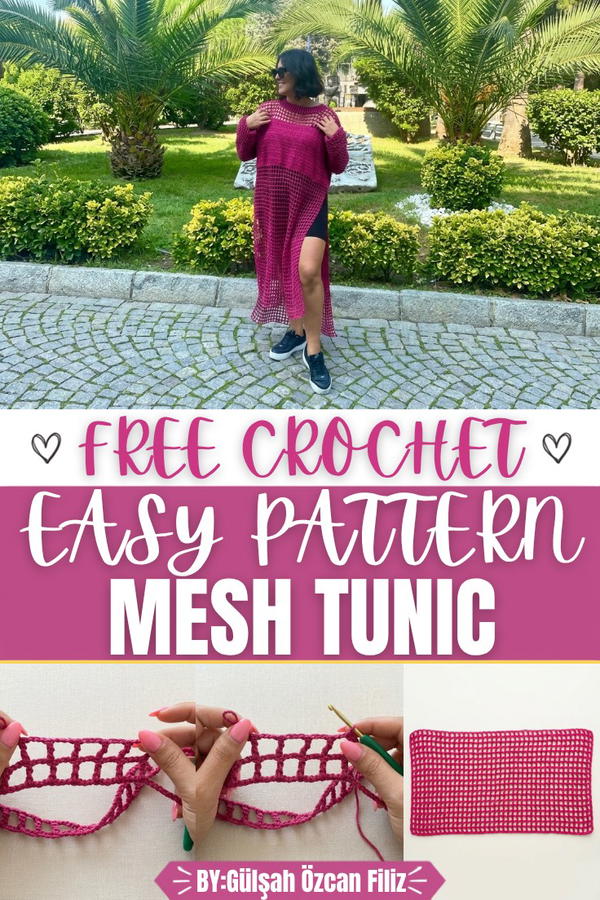
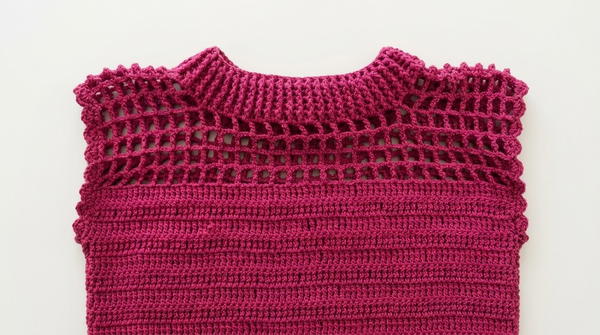
The tunic features a lightweight open-mesh design with intricate triple treble stitches that give it a breathable and airy texture. Its relaxed, oversized fit flatters all body shapes and ensures all-day comfort. With charming scalloped edges on the sleeves and a ribbed neckline, this piece exudes sophistication while remaining easy to style for any occasion.
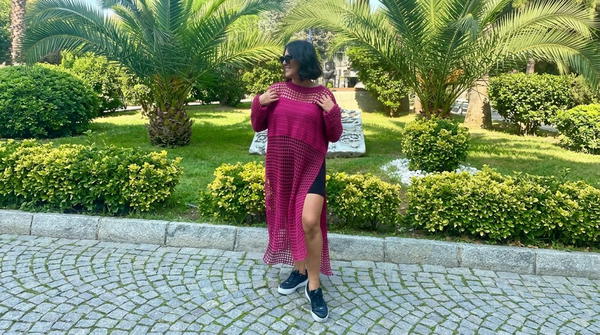
What makes this tunic even more special is its versatility. Dress it up with jeans and accessories, layer it over a sundress, or use it as a breezy swimsuit cover-up. The pattern also allows you to customize the size, so you’ll end up with a perfect fit. Combining elegance with purpose, this crochet project is sure to become a favorite in your crafting repertoire.
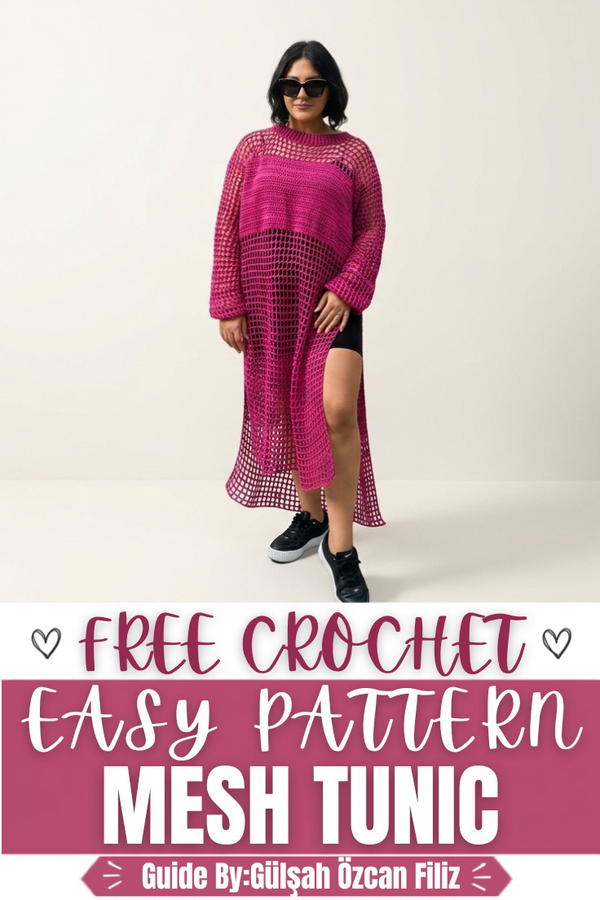
Crochet Tunic Pattern
This crochet tunic is a versatile and comfortable piece that can be styled for casual or semi-formal occasions. With its simple construction and elegant design, the tunic is made in two large panels joined at the shoulders and sides, followed by the addition of sleeves and a ribbed collar. Crocheted in airy mesh stitches, this tunic offers a light and breathable fit while maintaining a stylish appearance. The pattern can be adjusted to suit different sizes and yarn types, making it a customizable garment.
Skill Level
Intermediate: This pattern incorporates basic stitches such as chains, treble crochet, and double crochet stitches, as well as shaping techniques like decreasing and assembly. Prior knowledge of crochet is recommended.
Materials
- Yarn: Thick mercerized yarn (or yarn of your choice, such as cotton or wool, depending on the desired texture)
- Crochet Hook: 3.25 mm crochet hook for the main work and 3 mm crochet hook for the ribbed collar
- Stitch Markers: To help mark measurements (optional)
- Scissors: For cutting yarn as needed
- Yarn Needle: To weave in loose ends and for assembly
Special Stitches
- Treble Crochet (TR): Yarn over twice, insert the hook into the stitch, yarn over and pull up a loop (four loops on the hook), yarn over, pull through two loops (three loops remain), yarn over, pull through two loops (two loops remain), yarn over and pull through the last two loops.
- Double Crochet (DC): Yarn over, insert the hook into the stitch, yarn over and pull up a loop (three loops on the hook), yarn over, pull through two loops (two loops remain), yarn over and pull through the remaining two loops.
- Slip Stitch (Slst): Insert the hook into the stitch, yarn over, and pull through both loops on the hook in one motion.
Stitch Abbreviations
- Ch: Chain
- TR: Treble Crochet
- DC: Double Crochet
- Slst: Slip Stitch
Useful Tips
- Gauge Customization: Adjust the hook size or yarn weight to achieve the desired fit and texture. Ensure you maintain consistent tension throughout the project.
- Sizing Flexibility: To increase or decrease the size, adjust the number of chains in the starting row and/or the number of rows.
- Armhole Measurements: Customize the armholes to fit your preference and comfort by leaving adequate space during the assembly step.
- Blocking: Consider blocking the panels to even out the stitches and ensure a polished appearance.
Detailed Pattern
1. Front and Back Panels
Both panels are worked flat in a mesh stitch.
- Foundation Chain: Create a loose foundation chain. Measure the chain against your shoulders to achieve the desired width. For a loose fit, extend the chain slightly beyond the shoulders.
- Example: For a size 48, create a chain approximately 40 boxes wide.
- Row 1:
- After completing the foundation chain, yarn over twice, skip 6 chains, and TR into the 7th chain from the hook.
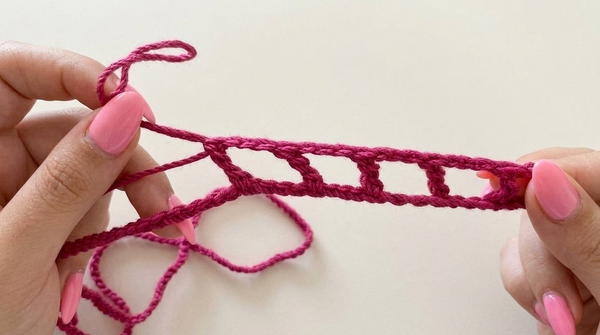
- Ch 3, yarn over twice, skip 3 chains, TR into the next chain.
- Repeat the sequence of Ch 3, skip 3 chains, TR in the fourth chain until you reach the end of the row.
- Turn.
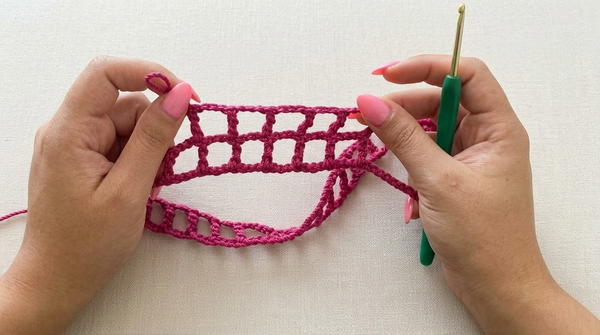
- After completing the foundation chain, yarn over twice, skip 6 chains, and TR into the 7th chain from the hook.
- Row 2 (and all mesh rows):
- Ch 6 (counts as 1 TR + Ch 3). Yarn over twice, TR into the top of the next TR from the previous row. Continue the sequence of Ch 3, TR into the top of next TR until the end of the row.
- At the end of the row, TR into the top of the turning chain.
- Repeat this row for the desired length.
- Note: For a size 48 tunic, approx. 38 rows are needed for the front and back panels. Adjust as needed for your height and styling preference.
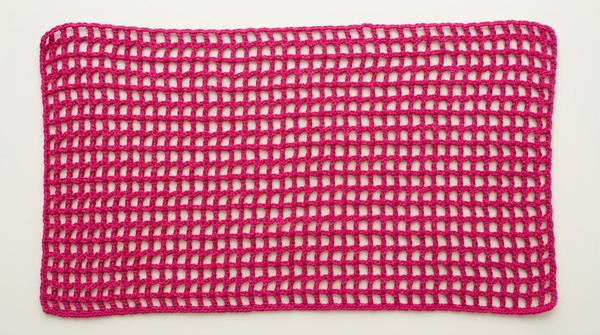
2. Chest Section
After completing the mesh for the desired tunic length, the chest section is worked in treble crochet to provide additional coverage.
- Row 1:
- Ch 4, turn, TR into each open box (work 2 TR into each box) and into every TR across the row. At the end of the row, you should have filled all boxes with two TR each.
- Rows 2-15:
- Ch 4, turn, TR into each stitch across. This creates a solid chest area. Adjust the number of rows to fit your desired coverage.
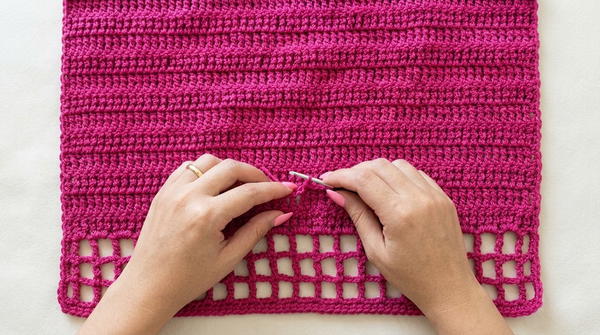
- Ch 4, turn, TR into each stitch across. This creates a solid chest area. Adjust the number of rows to fit your desired coverage.
3. Shoulder Sections
The shoulder sections are worked in mesh.
- Divide the Width: Divide the stitches of the chest section into three parts: 15 boxes for each shoulder and the remaining stitches for the neck opening.
- Work One Shoulder (3 Rows):
- Attach yarn to the first box of the designated shoulder section. Work the mesh stitch: Ch 6, TR into the corresponding TR, and continue until only 14 boxes are complete. Work 3 total rows of mesh stitch. Fasten off.
- Work the Other Shoulder:
- Repeat the same steps for the second shoulder on the opposite side.
4. Assembly of Front and Back Panels
- With the wrong sides facing each other, align the front and back panels. Use the following steps to join the shoulders and sides:
- Join Shoulders: Work single crochet stitches to join the 14 boxes on each shoulder. Insert the hook into the stitches at the top of the TR of both panels, yarn over, and complete an SC to secure. Repeat until the entire shoulder section is joined.
- Join Sides: Leave a gap for the armholes. Starting at the lower edges, join the sides with SC stitches as described above. Leave at least 10-12 inches open for armholes. Adjust according to your size preference.
5. Sleeves
- Attach Yarn:
- With the tunic turned inside out, join the yarn under the armhole.
- Work mesh stitch (as per the tunic body) in the round.
- Rounds 1–31 (or until the desired length):
- Ch 6, TR into the TR of the previous round, Ch 3, continue around the sleeve. At the end of each round, join with a slst into the top of the starting chain.
- Final Round (optional tapering):
- To create a fitted cuff, work SC stitches into each stitch evenly around the final row. Insert the hook into the gaps and railings, and pull through a loop—crocheting one SC in each.
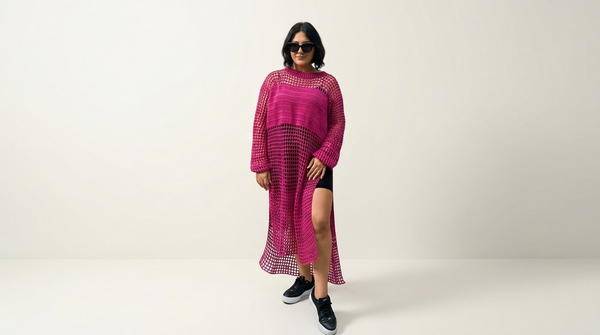
- To create a fitted cuff, work SC stitches into each stitch evenly around the final row. Insert the hook into the gaps and railings, and pull through a loop—crocheting one SC in each.
6. Ribbed Collar
- Row 1 (Base Row):
- Attach yarn to the neckline and work DC evenly into each stitch and along chains. Continue in a circle, ensuring rows do not twist, and join with a slst.
- Row 2: Work ribbing by alternating the following:
- Front Post Double Crochet (FPDC): Yarn over, insert the hook around the post of the DC from the front, yarn over, pull through, and complete as a regular DC.
- Back Post Double Crochet (BPDC): Yarn over, insert the hook around the post of the DC from the back, yarn over, pull through, and complete as a regular DC.
- Alternate FPDC and BPDC stitches around the entire row.
-
Rows 3–5: Repeat Row 2. Use a smaller hook (e.g., 3 mm) on the last two rows to create a tighter ribbed texture.
Assembly and Sizing
- Block Individual Pieces: Before assembly, block each panel to flatten and shape the stitches.
- Join Components: Refer to the assembly steps to seam the panels and sleeves together.
- Adjust Fit: Leave the tunic unjoined at the sides for a slit, letting the tunic drape elegantly.
Conclusion
Crafting this tunic offers the opportunity to create a simple yet fashionable garment. Its breathable mesh and relaxed design make it versatile for layering or wearing as a standalone piece. Adjust the size and yarn choice to suit your preferences, and enjoy creating a wearable piece that showcases your crochet skills.