Delight in versatile style with Free Crochet GLOVE Pattern and master easy stitches to create cozy fingers friendly warmth for chilly days ahead this season
A special thanks to Gülşah Özcan Filiz for sharing a very simple and clear tutorial that shows how to create warm and comfortable gloves using two square pieces joined together, along with a stretchy ribbed edge at the wrist. This method is easy enough for anyone, even beginners, to follow and complete quickly, usually within one or two hours. The gloves are made with yarn and a 3 mm crochet hook, but can also be adapted to different yarns and hook sizes for a perfect fit based on your hand measurements.
Quick & Simple Free Crochet Glove Pattern for Beginners
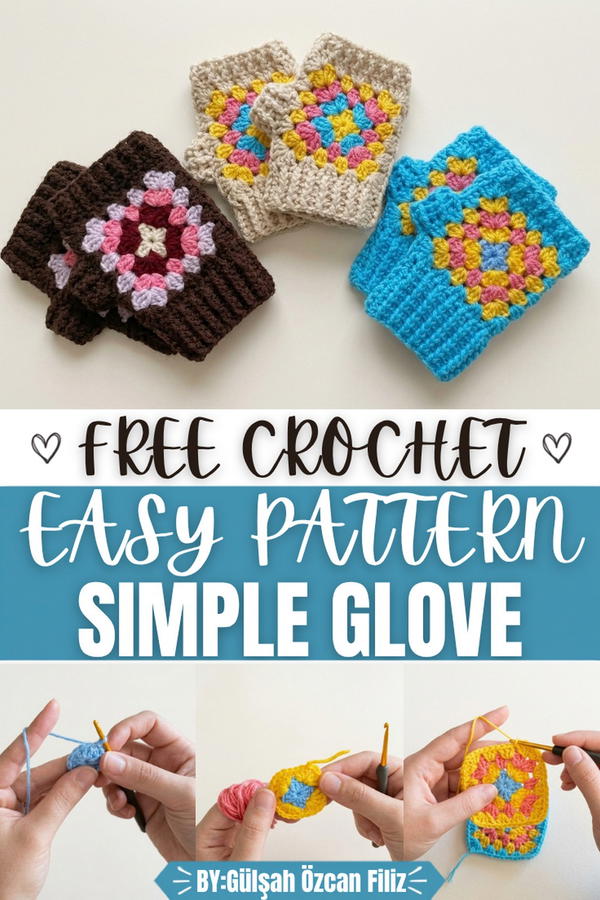
These gloves are very useful for keeping hands warm during cold weather and can be worn daily or given as thoughtful gifts. The working style involves making two motifs, one slightly larger than the other by adding rows, which form the front and back parts of the glove. The motifs are connected with a tidy seam, leaving a small gap for the thumb, allowing for comfortable movement. The ribbed edge is created by working stitches that alternate between front and back loops, giving a stretchy finish that gently hugs the wrist and fingers.
What stands out in this design is the raised motif that wraps around the hand, creating a neat texture while fitting snugly. The ribbed wristband adds both style and function, helping the gloves stay in place without feeling tight. This simple approach produces gloves that look clean, fit well, and provide gentle warmth, making them a favorite for many who want an easy and reliable way to keep their hands cozy.
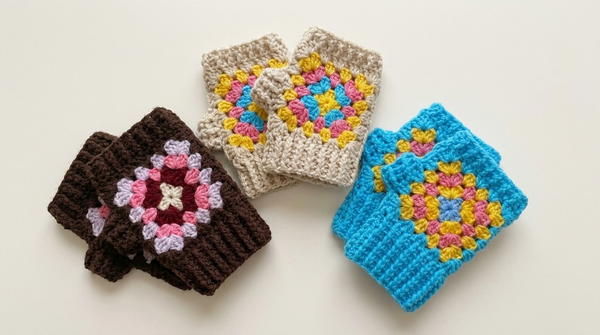
Crochet Granny Square Fingerless Gloves Pattern
This pattern creates a pair of cozy and stylish fingerless gloves using the classic granny square motif. Each glove is constructed from two individual granny square motifs that are joined together, leaving a deliberate opening for the thumb. The edges are then finished with rows of double crochet and a ribbed elastic band that provides a comfortable and secure fit around the wrist and finger openings. The construction is straightforward and repetitive, making it an accessible and enjoyable project that can be completed within one to two hours per glove once the motifs are mastered.
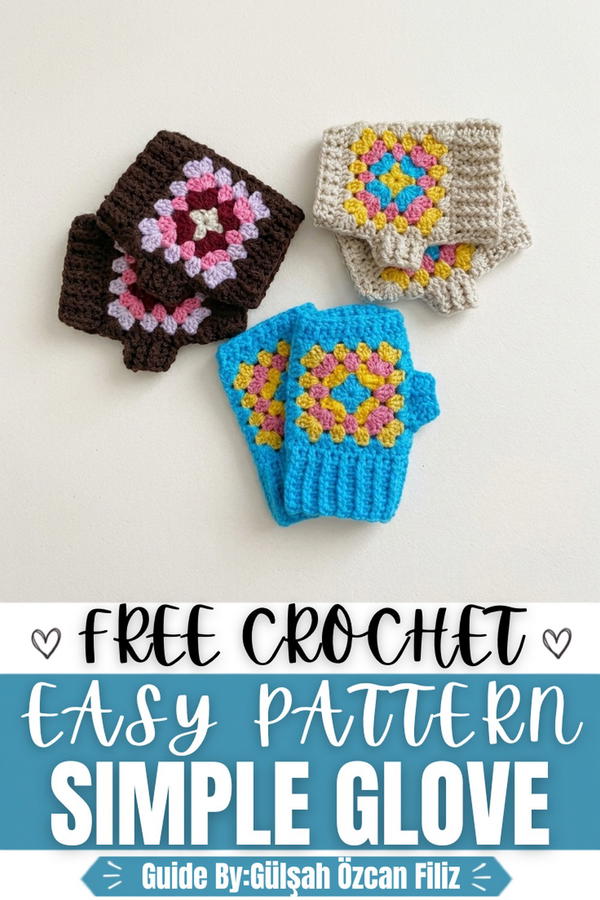
Skill Level: Beginner to Intermediate — This pattern is well suited for crocheters who have basic familiarity with chain stitches, double crochet, and slip stitches. The joining and ribbing sections introduce slightly more advanced techniques, but the overall construction remains simple enough for newer crocheters to follow with care and patience.
Materials
- Yarn: Acrylic yarn in two or more colors (cotton or wool yarn may also be used depending on personal preference and season)
- Hook: 3mm crochet hook (adjust hook size to match your chosen yarn weight)
- Tools:
- Tapestry needle for weaving in ends and optional needle joining
- Scissors
- Measuring tape
- Stitch markers (optional)
Special Stitches
- Granny Square Cluster: Groups of 3 double crochet stitches worked into a chain space or gap between stitch groups, forming the classic granny square texture used throughout both motifs.
- Corner Construction: At each of the four corners, work 3 dc, ch 1, 3 dc all into the same corner space to create a defined right-angle corner that expands the motif outward with each round.
- Front-Post Double Crochet (FPdc): Insert the hook from the front and around the post of the stitch below, then complete the double crochet normally. Used in the ribbing rows to create raised ridges on the fabric surface.
- Back-Post Double Crochet (BPdc): Insert the hook from behind and around the post of the stitch below, then complete the double crochet normally. Alternated with FPdc across ribbing rows to produce the elastic ribbed texture at the wrist and finger openings.
- Joining Round: A round worked simultaneously through corresponding stitches on two separate motif edges using a crochet hook, securing both pieces together without the need for a needle.
Stitch Abbreviations
- ch — chain
- sl st — slip stitch
- sc — single crochet
- dc — double crochet
- FPdc — front-post double crochet
- BPdc — back-post double crochet
- sp — space
- st(s) — stitch(es)
- rep — repeat
- tch — turning chain
- MR — magic ring
Useful Tips
- Make both motifs for one glove before joining to confirm that they are equal in size and tension before proceeding with assembly.
- When working the corner construction, always place a stitch marker in each corner chain space from Round 2 onward to avoid losing track of corner positions, especially when working with multiple colors.
- The number of rows per motif can be adjusted to fit different hand sizes — use 4 rows for smaller hands and 6 rows for larger hands, with 5 rows being the standard size as described in this pattern.
- When joining the two motifs, leave one corner space deliberately unjoined to create the thumb opening. This space should be positioned at the side of the glove where the thumb naturally rests.
- For the ribbing sections, maintain consistent tension when alternating FPdc and BPdc stitches to keep the elastic band even and stretchy throughout.
- Adjust the number of ribbing rows at the wrist and finger openings according to personal preference — a longer cuff can be achieved by adding additional ribbing rows beyond the standard 8 rows described in this pattern.
- If joining the motifs with a needle is easier for your skill level, hold both motifs with wrong sides facing and sew through corresponding loops along the shared edges, leaving the thumb gap open as instructed.
Pattern Instructions
Motif Construction (Make 2 per Glove — 4 Total)
Foundation — Chain Ring Setup
- Ch 5.
- Insert the hook into the first ch made and sl st to form a ring.
- Ch 3 (counts as first dc).
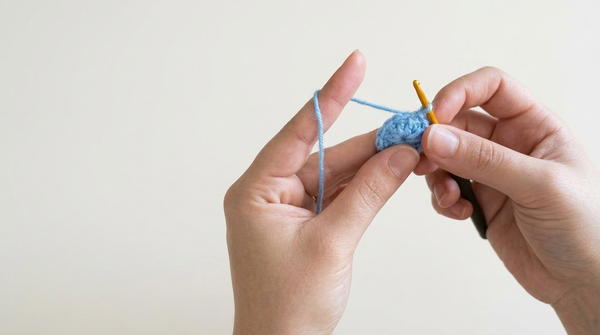
Round 1 — Center Cluster
- Work 2 dc into the ring (completing the first cluster of 3).
- Ch 1.
- Work 3 dc into the ring.
- Ch 1.
- Work 3 dc into the ring.
- Ch 1.
- Work 3 dc into the ring.
- Ch 1.
- Sl st into the top of the beginning ch-3 to join.
- Fasten off and cut yarn.
- Total: 4 clusters of 3 dc with ch-1 sp between each cluster
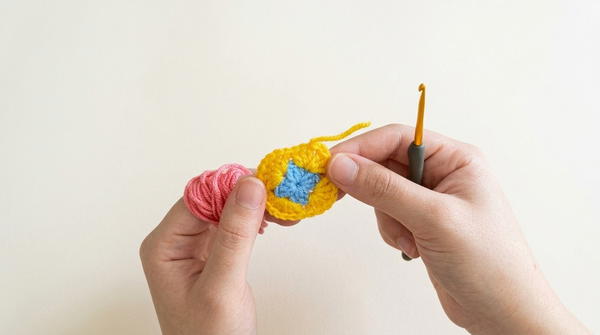
- Total: 4 clusters of 3 dc with ch-1 sp between each cluster
Round 2 — Second Color
- Join new color yarn into any ch-1 sp between clusters.
- Ch 3 (counts as first dc).
- Work 2 dc into the same sp.
- Ch 1.
- Work 3 dc into the same sp (corner made).
- Ch 1.
- Work 3 dc into the next ch-1 sp (side cluster).
- Ch 1.
- At the next ch-1 sp, work 3 dc, ch 1, 3 dc (corner made).
- Ch 1.
- Work 3 dc into the next ch-1 sp (side cluster).
- Ch 1.
- Rep corner and side cluster sequence around all four sides.
- Sl st to join at the top of the beginning ch-3.
- Fasten off.
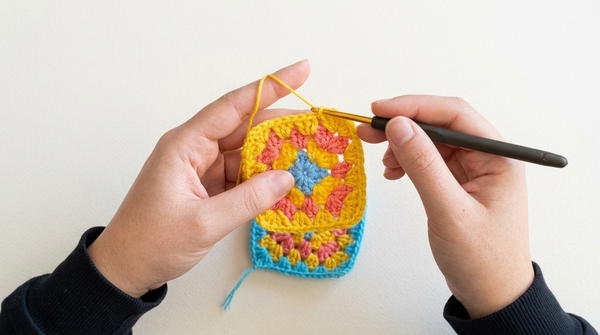
Third Round
- Join new color yarn into any corner ch-1 sp.
- Ch 3.
- Work 3 dc, ch 1, 3 dc into the same corner sp.
- Ch 1.
- Work 3 dc into each ch-1 side sp, placing ch 1 between each cluster.
- At each corner sp, work 3 dc, ch 1, 3 dc.
- Ch 1 between all clusters.
- Rep around all four sides.
- Sl st to join.
- Fasten off.
Fourth Round
- Join new color yarn into any corner sp.
- Rep the exact same process as Round 3.
- Work 3 dc, ch 1, 3 dc at every corner sp.
- Work 3 dc with ch 1 into every side sp.
- Sl st to join.
- Fasten off.
- For the first motif of each glove, work one additional Round 5 using the same process to bring the total to 5 rows before the joining round.
- The second motif will be joined to the first motif during its 5th round, so work only 4 complete rounds independently and leave the 5th round for the joining step.
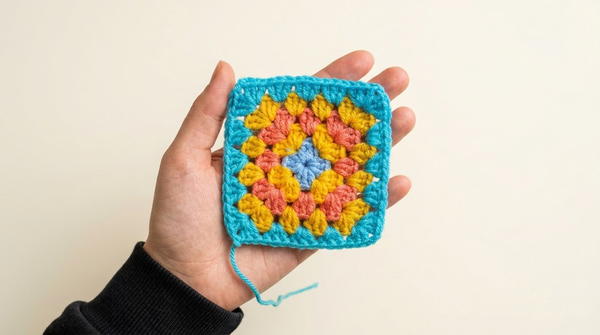
Joining the Two Motifs
Preparing for the Join
- Lay both completed motifs flat and identify the edges that will be joined.
- Position the motifs so that the thumb opening — one corner space — is deliberately left unjoined on the side edge of the glove.
Joining Round — Crochet Hook Method
- Begin working Round 5 on the second (4-row) motif.
- Work ch 3 and begin the corner cluster as normal.
- When the working edge reaches the shared edge with the first motif, begin joining:
- Work 3 dc into the current sp on the working motif.
- Ch 1, then insert the hook through the corresponding corner sp on the first motif and pull the loop through to join.
- Continue working 3 dc clusters along the working motif, joining each cluster to the corresponding sp on the first motif with a ch 1 connection after each group.
- At the thumb opening position, skip the joining step and work the cluster freely without connecting to the opposite motif, leaving that space open.
- Continue joining along the remaining shared edge, then complete the rest of Round 5 independently around the unjoined sides.
- Sl st to join and fasten off.
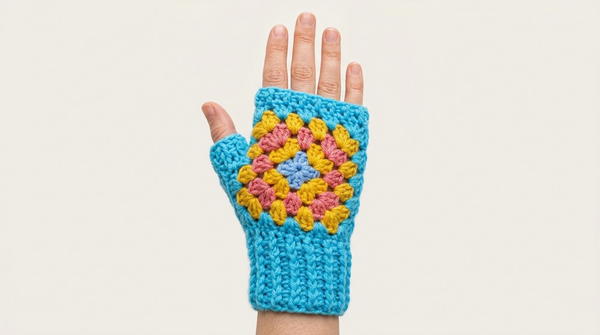
Assembly and Sizing
Sizing Notes
- The standard glove as described uses 5 rows on each motif and is sized to fit an average adult hand.
- For a smaller fit, reduce to 4 rows per motif.
- For a larger fit, increase to 6 rows per motif.
- The thumb opening is created naturally by leaving one corner space unjoined during the joining round — no additional shaping is required.
Wrist Ribbing
- Join yarn at the wrist edge of the assembled glove.
- Work 1 row of dc evenly around the entire wrist opening, working 1 dc into the top of each stitch and 2 dc into any corner gaps to fill the edge evenly.
- Sl st to join and ch 3.
- Begin the ribbing by alternating FPdc and BPdc across the round, working one of each in sequence around the full wrist opening.
- Continue alternating FPdc and BPdc for 8 rows total, or adjust to the desired wrist cuff length.
- Sl st to join after the final ribbing row.
- Ch 3 and sl st into the adjacent loop to finish, then fasten off and cut yarn.
Finger Opening Ribbing
- Join yarn at the finger opening edge of the assembled glove.
- Work 1 row of dc evenly around the finger opening edge.
- Sl st to join and ch 3.
- Work 2 rows of ribbing by alternating FPdc and BPdc around the finger opening.
- Sl st to join after the final ribbing row and fasten off.
- Weave in all remaining ends throughout both gloves.
- Rep the full construction process to make the second glove.
Conclusion
This fingerless glove pattern demonstrates how a simple and familiar motif format can be adapted into a practical and wearable accessory with minimal additional shaping or construction complexity. The granny square foundation provides a stable and attractive fabric base, while the ribbed wrist and finger edging adds both functionality and a polished finished appearance. The adjustable row count and flexible ribbing length mean that this pattern can be easily tailored to fit a wide range of hand sizes without requiring significant modifications to the core construction method. The relatively quick completion time makes it an ideal pattern for gift making or for exploring motif-based garment construction for the first time.