Make a stylish accessory today using our free crochet wallet pattern designed for easy stitching and unique personalized flair.
A beautifully designed accessory can brighten everyday moments and keep essentials neatly organized. Among these, a handcrafted wallet stands out as both practical and charming. The Free crochet Wallet pattern offers a wonderful way to create a versatile piece that combines elegance with functionality. Thanks to the creative efforts shared by Örgü ütopyası, this design has become a favorite for those looking to add a personal touch to their accessories.
Small and Stylish Free Crochet Wallet Pattern to Try
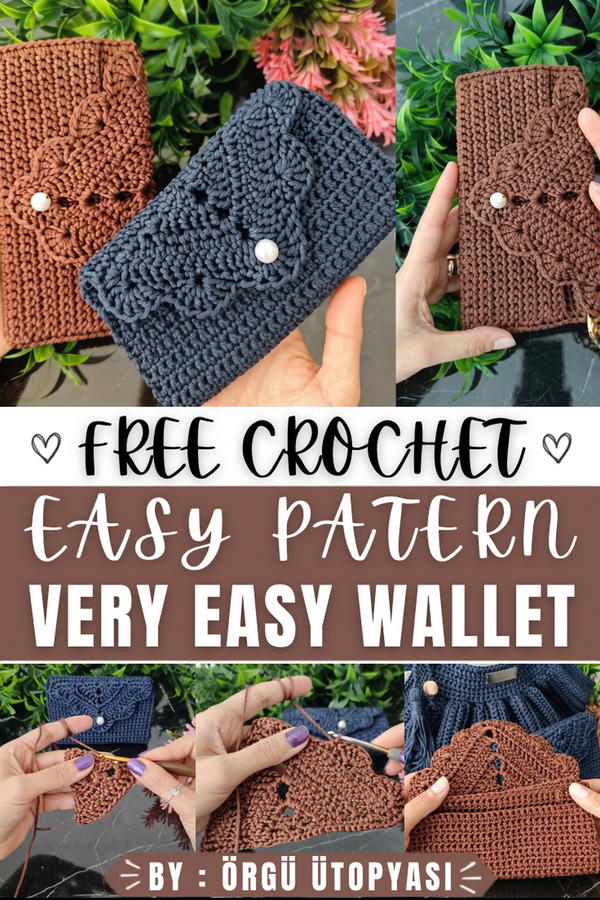
This wallet is much more than a simple container for cards and cash. Its compact size and clever compartments make it perfect for carrying not only money but also your phone, keys, and other small items. Its thoughtful design includes a secure button closure, providing peace of mind while adding a delicate decorative detail. The style is sleek yet cozy, with a soft texture that invites touch and a structured shape that keeps everything in place.
Visually, the wallet exudes subtle charm through a neat combination of stitches that create a refined pattern. The neutral tones and careful finishing make it suitable for any occasion, whether as a gift for a loved one or as a stylish accessory for everyday use. Its elegant yet practical design makes it a treasured item that is easy to carry by hand or slip inside a bag.
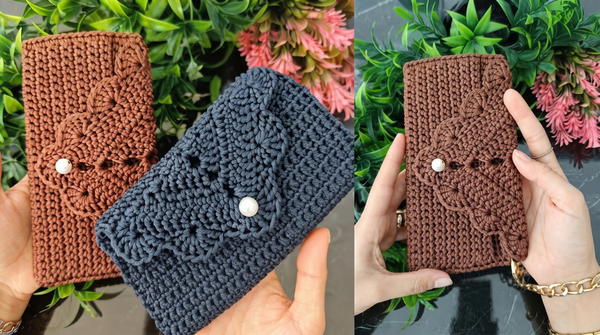
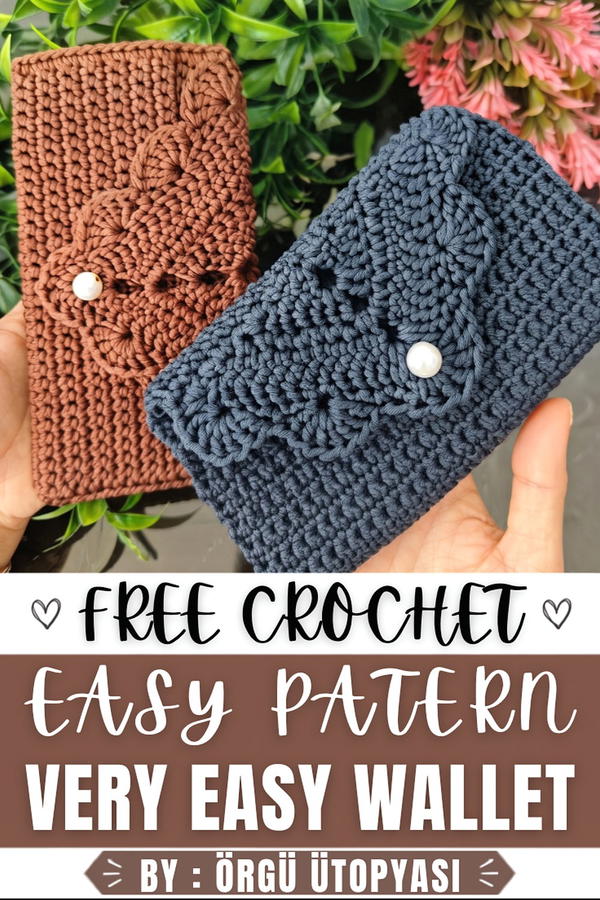
Crochet Wallet Pattern
This crochet wallet is designed with a simple yet elegant construction, providing a compact utility item that is both functional and decorative. Crafted using durable polyester macramé cord, the wallet incorporates a solid base, decorative edging, and practical pockets for neatly organizing your essentials. With an optional clasp and detachable strap, this project is an excellent way to combine functionality and style.
Skill Level
Beginner to Intermediate
The pattern uses basic stitches like double crochet and single crochet while incorporating slight variations like working in the back loop. It is beginner-friendly but includes assembly techniques that require some attention to detail.
Materials Needed
- Yarn: 2mm Polyester Macramé Cord (durable and perfect for structured projects)
- Crochet Hook: 3mm crochet hook
- Extras:
- Button or magnetic clasp for securing the wallet flap
- Chain for an optional strap
- Scissors & Lighter: To trim and seal the cord ends, preventing fraying
Special Stitches Used
- Magic Ring (MR): A circular foundation used to start crocheted pieces worked in the round.
- Double Crochet (dc): Yarn over, insert the hook into the stitch, yarn over and pull through, yarn over and pull through the first two loops, yarn over again and pull through the last two loops.
- Single Crochet (sc): Insert the hook, yarn over, pull through, yarn over again, and pull through both loops on the hook.
- Decorative Edging (Flower Motif): Worked by incorporating 6 dc into a single stitch, skipping 2 stitches, and securing with an sc.
- Back Loop Only (BLO): A variation where the stitch is worked only into the back loop of the previous stitch, creating a ridge effect.
Stitch Abbreviations
| Abbreviation | Meaning |
|---|---|
| MR | Magic Ring |
| dc | Double Crochet |
| sc | Single Crochet |
| ch | Chain |
| sl st | Slip Stitch |
| BLO | Back Loop Only |
Useful Tips
- Consistent Tension: Polyester macramé cord is easy to handle, but maintaining even tension is essential for neat results.
- Securing Loose Ends: Carefully seal the ends of the polyester cord using a lighter to prevent fraying.
- Pocket Volume: For larger pockets, add a few extra rows in Steps 4 and 5.
- Button Placement: Test the positioning of your button or clasp before fully sewing it in place to ensure proper alignment.
- Durability: Single crochet seams provide a sturdy structure that will withstand daily handling.
Step-by-Step Crochet Wallet Pattern
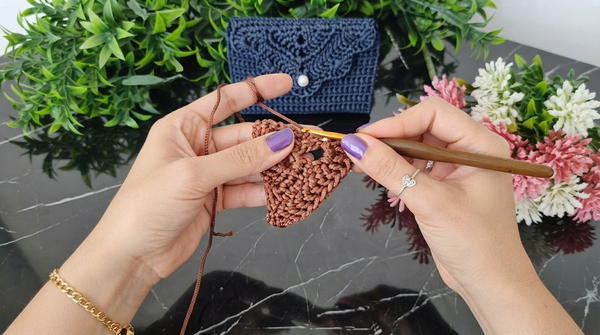
1. The Lid (Magic Ring)
The base forms the starting framework for the wallet.
- Step 1: Create a magic ring (MR).
- Step 2: Chain 3 (counts as the first dc) and work: 3 double crochets (dc), chain 3 (ch 3), and another 3 double crochets into the magic ring.
- Pull the ring tight to close the circle.
2. Expanding the Lid
The wallet is constructed with increasing rows to achieve the desired size.
- Row 1:
- Chain 3 and turn.
- Work 2 dc into the first stitch, then continue with dc across the row.
- In the chain-3 space, work 2 dc, chain 3, and another 2 dc.
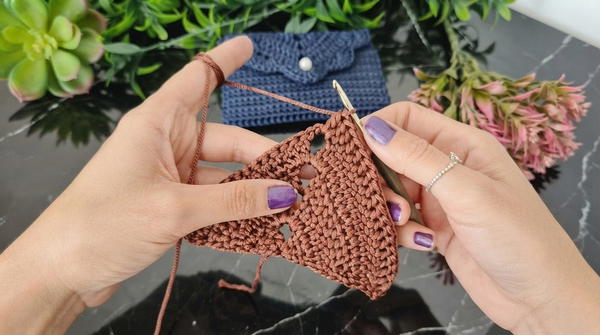
- Finish the row with double crochet and turn the work.
- Repeat this Pattern: Continue increasing at the center chain-3 space to expand the body of the wallet. Add rows until the desired width is reached.
3. Border and Decorative Detail
To add a polished appearance, create a border and a flower-like decorative edge.
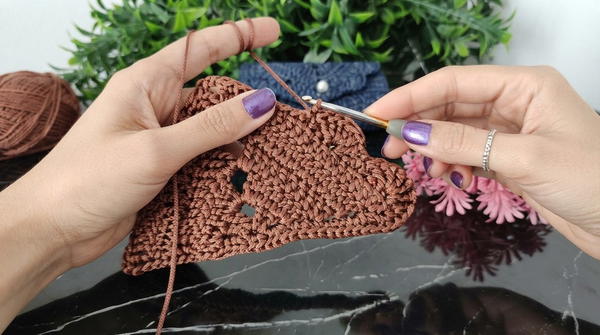
- Step 1: After completing the desired size, work a row of single crochet (sc) around the entire perimeter of the wallet. Use even stitches to ensure the edges are smooth and consistent.
- Step 2: For the decorative flower motif:
- Work: 6 dc into every 3rd stitch, skip 2 stitches, and secure with an sc into the following stitch.
- Continue this pattern around the perimeter for a scalloped edge.
4. Creating the Pockets
The wallet features dual pockets made by working in layers.
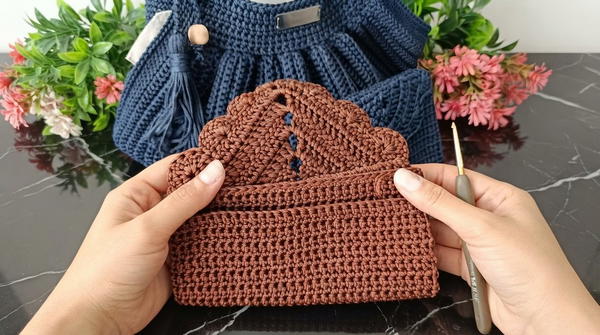
- Main Pocket:
- Begin the first row of the wallet body by working into the back loops only (BLO) to create a subtle ridge for folding.
- Continue working 9 rows of sc to form the outer pocket. Adjust the number of rows depending on the depth required.
- Inner Pocket:
- Reattach the yarn to the front loops that were left unworked in the first row of the body.
- Work 7 rows of sc to form the inner pocket.
5. Assembly and Finishing
To complete the wallet, the pockets and flap are sewn and secured.
- Assembly:
- Fold the wallet into its final shape by aligning the pockets.
- Use sc stitches along the edges to sew the pockets together, ensuring they are perfectly aligned on both sides.
- Sealing Loose Ends:
- Tie any loose ends securely; use a lighter to carefully seal the cut ends of the polyester cord, preventing fraying.
- Fastening:
- Attach a button or magnetic clasp to the center of the wallet flap. Ensure it aligns properly with the body for secure closure.
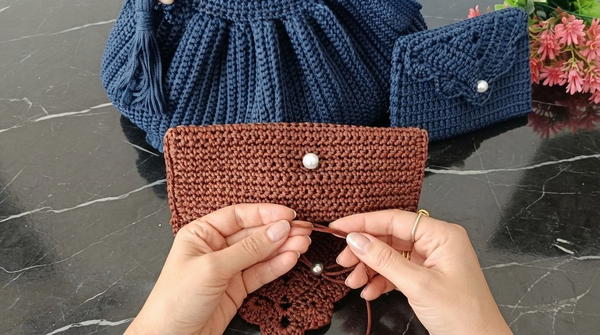
- Attach a button or magnetic clasp to the center of the wallet flap. Ensure it aligns properly with the body for secure closure.
Customization Tips
- Strap Attachment: Add rings to the side of the wallet and attach a detachable chain or strap for carrying convenience.
- Decorative Options: Use contrasting yarn colors for different sections, such as the decorative edge, for a personalized look.
- Size Variations: Adjust the pattern by adding or reducing the number of rows in the body to accommodate larger or smaller wallets.
Conclusion
This crochet wallet pattern is a practical and stylish option for various uses, from storing small essentials to making a thoughtful handmade gift. The structure's simplicity ensures a smooth crafting experience, while the decorative edging and practical pockets lend character and functionality to the design. By paying attention to detail during assembly and finishing, you’ll create a durable and elegant accessory perfect for everyday use.