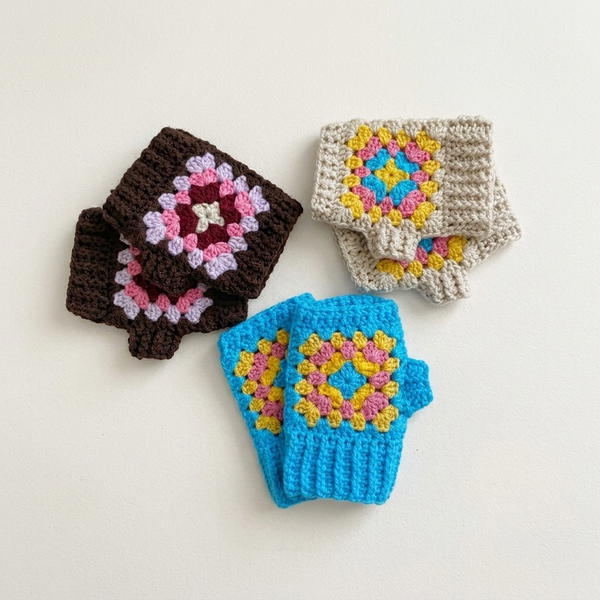
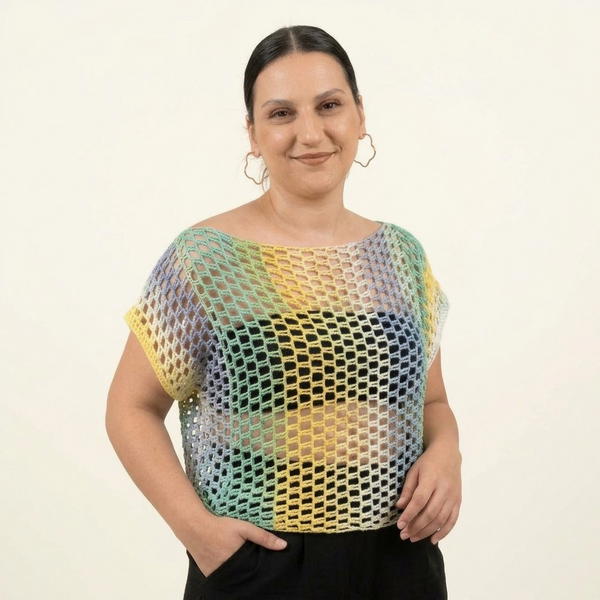
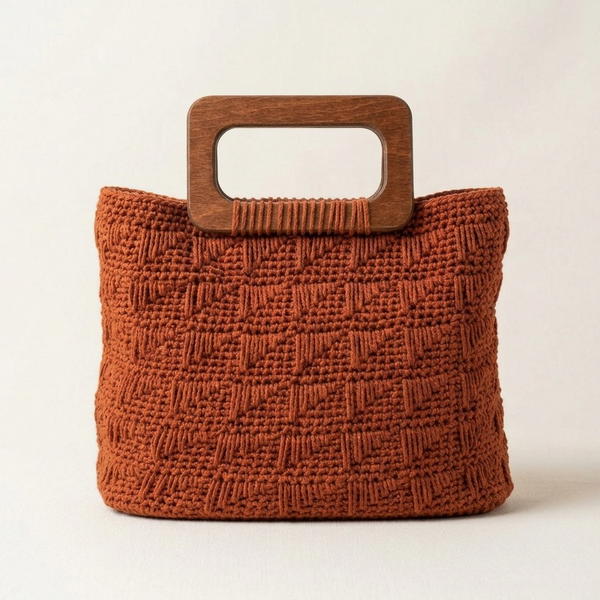
Wrap yourself in warmth with this Free Crochet Granny Square Sweater Pattern featuring vibrant squares and easy stitches perfect for cozy fall days.
Many thanks to Gülşah Özcan Filiz for sharing a simple and detailed guide that helps anyone create a cozy and attractive sweater by connecting colorful granny squares. This easy-to-follow method suits beginners and experienced makers alike, explaining every step in a clear way that results in a warm and stylish piece for various occasions. The sweater comes together by making several square pieces, which are then joined to shape the front, back, and sleeves. Using basic stitches and bright colors makes the process fun and the final garment vibrant and unique.
Easy Free Crochet Granny Square Sweater Pattern for Beginners
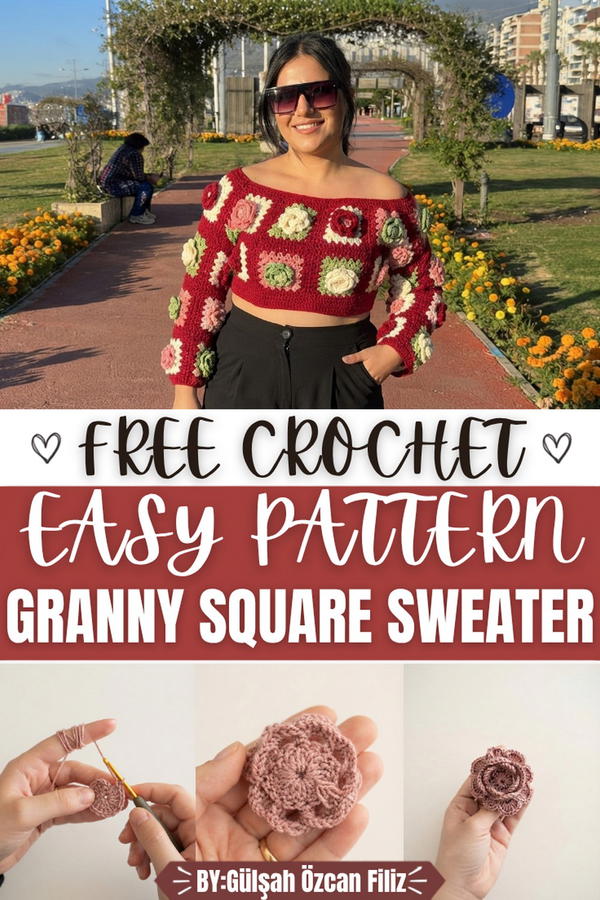
This sweater is ideal for cooler days because it provides warmth without feeling heavy, allowing you to layer it easily over other clothes. The technique involves crocheting each square following a straightforward pattern and then carefully connecting them to form the complete sweater. This design allows for simple adjustments to fit different sizes comfortably. What makes the sweater stand out is the timeless granny square pattern combined with a relaxed and loose fit. The patchwork of colorful squares creates an appealing texture and look that never goes out of style.
The loose shape of the sweater offers comfort and freedom of movement while keeping you warm. The way the squares are joined gives the garment durability and flexibility so it can be enjoyed for a long time. This vibrant and easy method makes the pattern a fantastic option for anyone wanting a warm, eye-catching, and personal sweater.
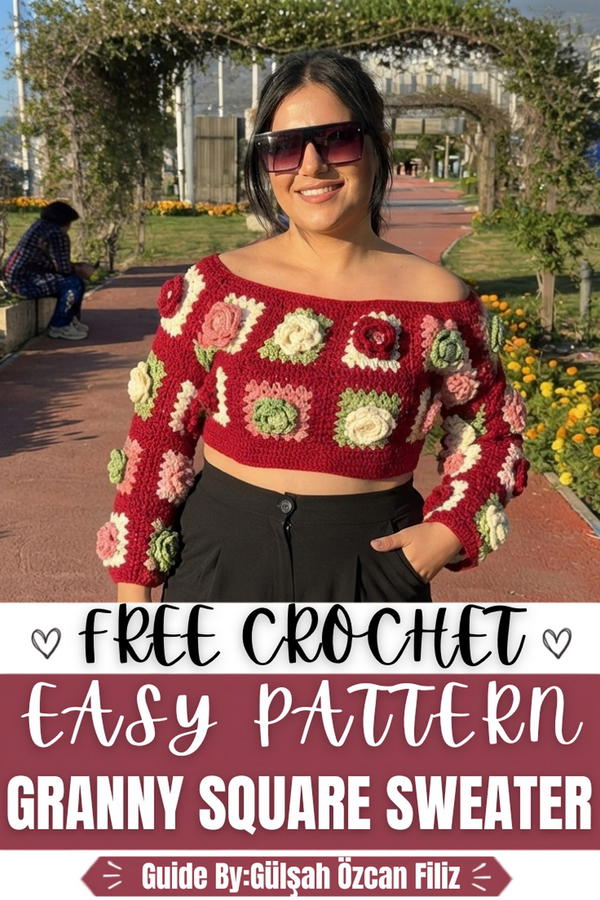
Crochet Rose Motif Sweater — Complete Pattern
This pattern produces a fully wearable pullover sweater constructed from 40 individually worked rose motifs, each shaped into a square and joined together to form the complete garment. The rose motif is built through multiple layers of petals worked in the round, progressing from the center ring outward through three distinct petal layers before being framed into a granny-style square using double crochet clusters and corner chain spaces. The two-part construction process covers both the individual motif creation and the full garment assembly, including neckline shaping, cuff finishing, and hem edging. The result is a textured and dimensional sweater with a striking surface pattern that showcases the beauty of modular crochet garment construction.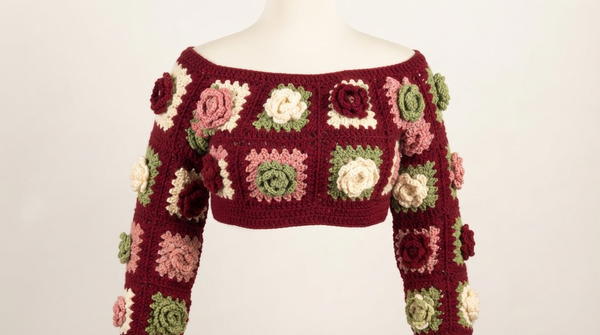
Skill Level: Intermediate to Advanced — This pattern is best suited for crocheters who are comfortable working in the round, managing back loop chain construction behind existing stitch layers, executing seamless crochet joins, and working basic garment shaping. Prior experience with motif-based garment construction is strongly recommended before attempting this project.
Materials
- Yarn: Acrylic yarn in a main rose color and a contrasting color for the square border and finishing (cotton or wool yarn may be substituted)
- Hook: 3.5mm crochet hook
- Tools:
- Tapestry needle for seaming and weaving in ends
- Scissors
- Measuring tape
- Stitch markers
Special Stitches
- Chain Ring: A ch-5 loop closed with a sl st, forming the center foundation of the rose into which the first round of stitches is worked.
- Petal Loop: A ch-4 or ch-5 arch anchored at each end with a sc, creating an open loop that holds a full cluster of petal stitches in the following round.
- Back Loop Chain: A chain loop formed by working behind existing petal layers, threading the hook through back stitches of a previous round to anchor each new loop without disturbing the front petals.
- Petal Cluster: Multiple dc stitches worked entirely into a single petal loop to form one complete rose petal.
- Shaped Final Petal: Worked as 1 hdc, 8 dc, 1 hdc into the same loop to create a wider and more rounded outermost petal shape.
- Granny Corner Increase: Worked as 3 dc, ch 2, 3 dc into the same corner chain space to build the square frame with a defined right-angle corner on each round.
- Seamless Crochet Join: During the final border round of any motif, a standard ch is replaced with a sl st worked directly into the corresponding corner or chain space of the adjacent motif, joining both pieces without a separate seaming step.
Stitch Abbreviations
- ch — chain
- sl st — slip stitch
- sc — single crochet
- hdc — half-double crochet
- dc — double crochet
- dec — decrease (insert hook through 2 sts and draw through together)
- sp — space
- st(s) — stitch(es)
- rep — repeat
- BL — back loop
- tch — turning chain
Useful Tips
- Count all stitches carefully at the end of the foundation ring round to confirm 17 total stitches before beginning the petal loop round, as this count determines accurate petal spacing throughout all subsequent rounds.
- Use stitch markers to identify the anchor points for each back loop chain to avoid accidentally skipping or doubling any anchor stitches when working behind existing petal layers.
- Block every motif individually before joining to ensure all 40 squares are uniform in size, which directly affects how neatly the finished garment lies flat.
- When working the seamless crochet join, always join into the corresponding corner or space of the adjacent motif at the exact point where the standard chain would normally be placed to keep the join invisible and tight.
- Plan the full motif layout on a flat surface before beginning any joining work to confirm that armhole and neckline positions are correctly identified before motifs are permanently connected.
- When working the neckline and cuff decrease rounds, distribute decreases evenly around the opening rather than clustering them in one area to maintain a smooth and symmetrical finished edge.

- The bottom hem does not require decreases — working straight hdc rows along the lower edge is sufficient to produce a clean and professional hem finish.
Pattern Instructions
Rose Motif Construction (Make 40)
Foundation — Chain Ring
- Ch 5.
- Insert the hook into the first ch and sl st to close the ring.
- Ch 3 (counts as first dc).
- Work 16 dc into the ring.
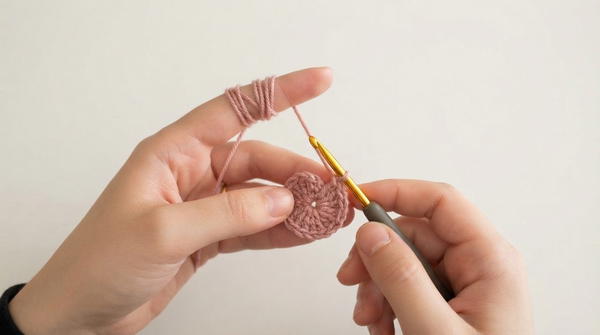
- Sl st into the top of the beginning ch-3 to join.
- Total: 17 sts including beginning ch-3
Round 1 — Petal Base Loops
- Ch 4.
- Skip 1 st, work sc into the next st.
- Rep the sequence of ch 4, skip 1 st, sc into the next st around the full ring.
- Continue until 8 total ch-4 loops are evenly formed around the center.
- Sl st to join at the base of the first ch-4 loop.
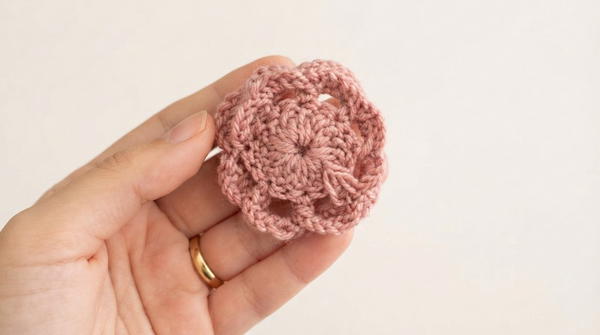
- Total: 8 petal base loops
Round 2 — First Petal Layer
- Into the first ch-4 loop, work 8 dc.
- Work 1 sc into the sc between loops to join petals.
- Rep working 8 dc into each remaining ch-4 loop with 1 sc between each petal around.
- Sl st to join at the end of the round.
- Total: 8 petals of 8 dc each with sc joins between
Round 3 — Second Layer Back Loops
- Turn the work to access the back side of the first petal layer.
- Working behind the petals, insert the hook through the back of a sc from Round 1.
- Ch 5 and anchor with sc into the next corresponding back stitch.
- Rep creating ch-5 loops behind each of the 8 petals, securing each loop with a sc anchored into back stitches of Round 1.
- Continue until 8 ch-5 back loops are formed behind the first petal layer.
- Total: 8 back loops of ch-5 each
Round 4 — Second Petal Layer
- Into the first ch-5 back loop, work 9 dc.
- Work 1 sc between petals to join.
- Rep working 9 dc into each remaining ch-5 loop with 1 sc between each petal around.
- Sl st to join.
- Total: 8 petals of 9 dc each with sc joins between
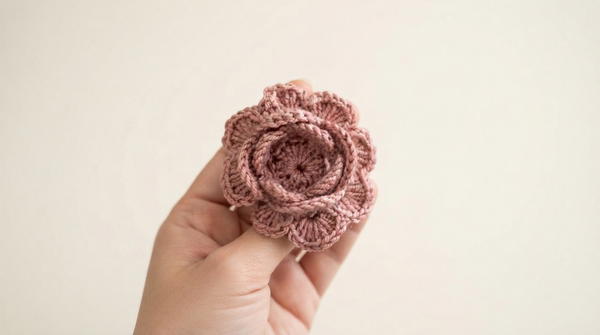
- Total: 8 petals of 9 dc each with sc joins between
Round 5 — Third Layer Back Loops
- Turn the work again to access the back of the second petal layer.
- Working behind the second petal layer, create 8 new ch-5 loops using the same back loop anchoring method as Round 3.
- Secure each loop with a sc anchored into the corresponding back stitches of Round 3.
- Total: 8 back loops of ch-5 each
Round 6 — Final Petal Layer
- Into the first ch-5 back loop, work 1 hdc, 8 dc, 1 hdc (shaped final petal).
- Work 1 sc between petals to join.
- Rep working 1 hdc, 8 dc, 1 hdc into each remaining ch-5 loop with 1 sc between petals around.
- Sl st to join.
- Total: 8 shaped petals each of 1 hdc, 8 dc, 1 hdc
Back Support Loops — Square Preparation
- Turn the work to access the back of the final petal layer.
- Working behind the outermost petals, create a final set of 8 ch-5 loops using the same back anchoring technique.
- Secure each loop with sc into the corresponding back stitches.
- These 8 loops form the foundation attachment points for the square border.
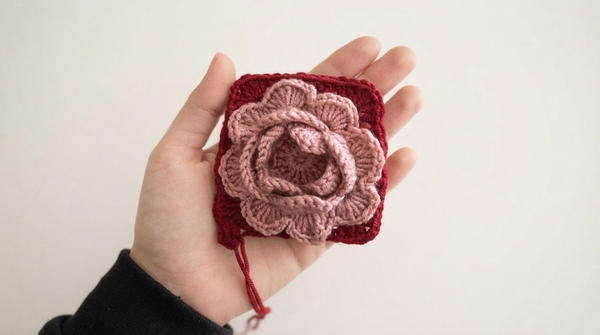
- Total: 8 back loops of ch-5 each
Converting the Rose to a Square Motif
Square Foundation Round
- Join contrasting color yarn into any of the 8 back support loops.
- Ch 3 (counts as first dc).
- Work 2 dc into the same loop.
- Ch 2 (corner chain sp).
- Work 3 dc into the same loop (first corner complete).
- Work 3 dc into each of the next 2 consecutive loops (side clusters).
- At the next loop, work 3 dc, ch 2, 3 dc (second corner).
- Rep the pattern of 3 dc into each of the next 2 side loops followed by 3 dc, ch 2, 3 dc at corner loops for all four corners.
- Sl st to join and fasten off.
- Total: 4 defined corners with ch-2 sp at each and 3 dc clusters along sides
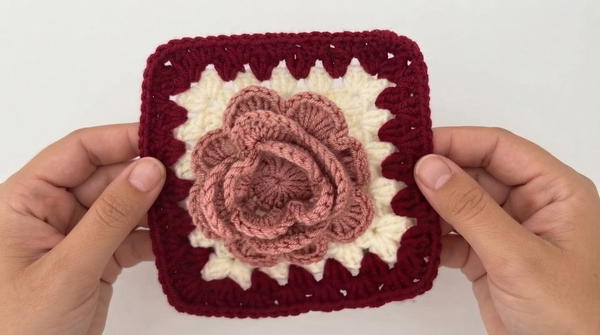
- Total: 4 defined corners with ch-2 sp at each and 3 dc clusters along sides
Square Expansion Round 2
- Join yarn into any corner ch-2 sp.
- Ch 3.
- Work 3 dc, ch 2, 3 dc into the same corner sp.
- Work 3 dc into each sp between existing clusters along each side.
- At each remaining corner ch-2 sp, work 3 dc, ch 2, 3 dc.
- Rep around all four sides.
- Sl st to join.
Square Expansion Round 3 and Beyond
- Rep the same process as Square Expansion Round 2.
- Work 3 dc, ch 2, 3 dc at every corner sp.
- Work 3 dc into every side sp between clusters.
- Continue adding rounds until the motif square reaches the desired size.
- Fasten off and weave in all ends.
- Rep full motif construction for all 40 motifs.
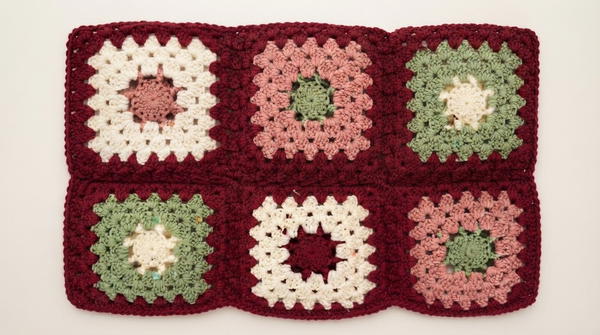
Assembly and Sizing
Back Panel Construction
- Arrange 4 motifs horizontally to form the first row of the back panel.
- Attach a second row of 4 motifs directly below the first row.
- Total for back panel: 8 motifs
- Use the seamless crochet join method during the final border round of each motif:
- When the working edge of one motif reaches the shared edge with an adjacent motif, replace each standard ch in the corner or side sp with a sl st worked directly into the corresponding sp of the adjacent motif.
- Continue working the border round normally on all non-shared edges.
- This produces a flat and invisible seam without requiring a separate joining step.
Front Panel Construction
- Assemble the front panel using the same 4-motif wide by 2-row arrangement as the back panel for a total of 8 motifs.
- For a pullover, join the front panels together along the center front edge using the tapestry needle and matching yarn.
- For a cardigan, leave the center front edges unjoined to create an open front.
Shoulder and Side Joining
- Connect the front and back panels at the shoulder edges using either the seamless crochet join method or the tapestry needle sewing technique.
- Join the side edges of the front and back panels together from the lower hem upward, leaving the armhole openings unjoined at the upper sides.
- Confirm that armhole openings are large enough to accommodate the wearer's arm before finalizing all side seams.
Neckline Shaping
- Join yarn at the neckline opening edge.
- Work 1 round of dec evenly around the neckline by inserting the hook through 2 sts simultaneously and drawing the yarn through to reduce the total stitch count and tighten the opening.
- Work 3 to 4 rows of hdc evenly around the neckline following the decrease round.
- Sl st to join each round and fasten off after the final hdc row.
Cuff Finishing
- Join yarn at one sleeve opening (armhole edge).
- Work 1 round of dec evenly around the cuff opening using the same method as the neckline decrease round.
- Work 3 to 4 rows of hdc evenly around the cuff following the decrease round.
- Sl st to join each round and fasten off.
- Rep on the opposite sleeve opening.
Bottom Hem
- Join yarn at the lower edge of the assembled sweater body.
- Work 3 to 4 rows of hdc evenly along the entire lower edge without any decrease stitches.
- Sl st to join each row and fasten off after the final hdc row.
- Weave in all remaining ends throughout the completed garment.
Sizing Notes
- The pattern as written using 40 motifs is designed for a standard adult sweater size.
- To increase the garment size, add additional expansion rounds to each individual motif square before assembly.
- To add length to the body, include additional rows of motifs in the front and back panels.
- To adjust sleeve length, add motif rows around the armhole openings before working the cuff finishing rounds.
Conclusion
This rose motif sweater pattern brings together dimensional floral crochet construction and practical garment assembly into a single cohesive project that rewards careful and methodical work at every stage. The layered petal technique produces a motif of genuine visual richness, and the seamless joining method ensures that the finished garment has clean and professional seam lines throughout. The combination of decrease shaping at the neckline and cuffs with straight hdc edging at the hem provides a balanced and well-finished silhouette that suits the decorative surface texture of the rose motifs. The flexibility built into the square expansion and layout sections means the pattern can be scaled to accommodate a variety of body measurements while preserving the integrity of the motif-based design.