Step into the world of cuteness with this free crochet elephant amigurumi pattern and create a lovable handmade companion for yourself or a loved one.
Creating small handmade animals can bring a lot of happiness and a special sense of accomplishment. The YouTube channel U R Unik offers a unique and detailed tutorial that guides you through making an adorable elephant amigurumi. The clear instructions and step-by-step demonstrations make it easy for crocheters of various skill levels to follow along and enjoy the process.
Quick & Easy Free Crochet Elephant Amigurumi Pattern
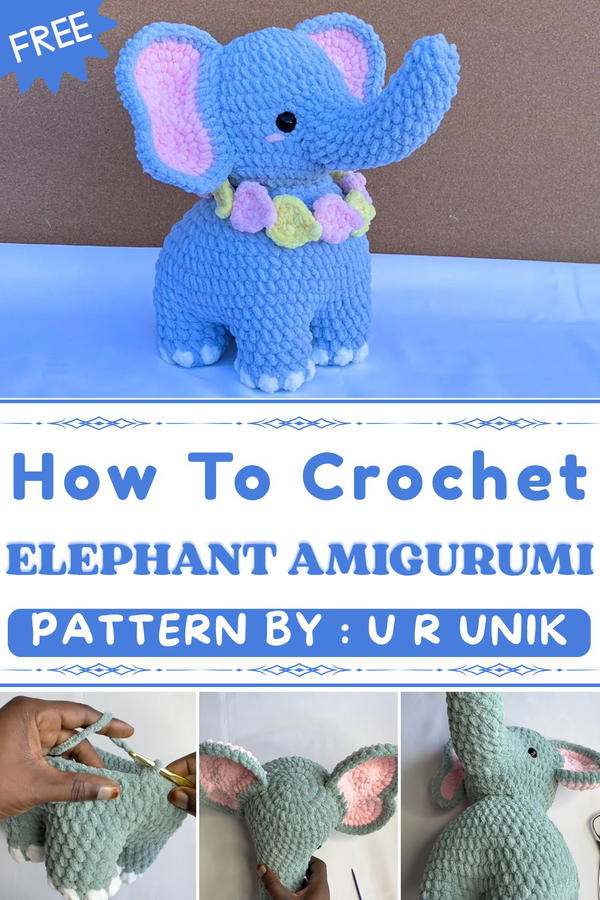
This elephant amigurumi is beautiful because of its soft, rounded shapes and thoughtful details. The design uses chunky, super bulky yarn in gentle colors, giving the elephant a cuddly and sturdy feel. One of the most attractive parts is the carefully shaped trunk, which curves naturally and adds personality to the little toy. The large ears made from two pieces joined together create a realistic and charming look. Soft safety eyes give the elephant a friendly expression, while a small flower detail can be added around the neck for a cute finishing touch.
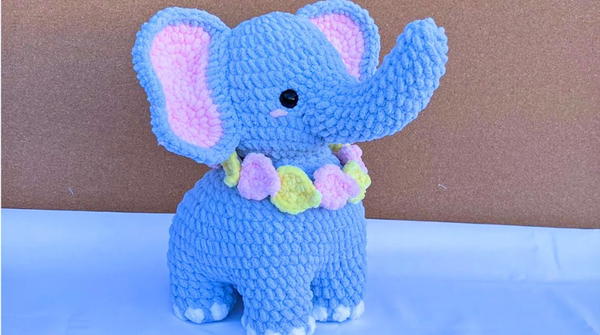
The working style involves crocheting the body and limbs separately, then joining them together carefully. The pattern includes special stitches like single crochet, increases, decreases, and creative techniques such as crocheting in back loops to make textured details. Stuffing the amigurumi while shaping it ensures a firm yet huggable toy. The step to sew the ears and trunk on, plus adding the small hair detail on top of the head, brings the elephant to life.
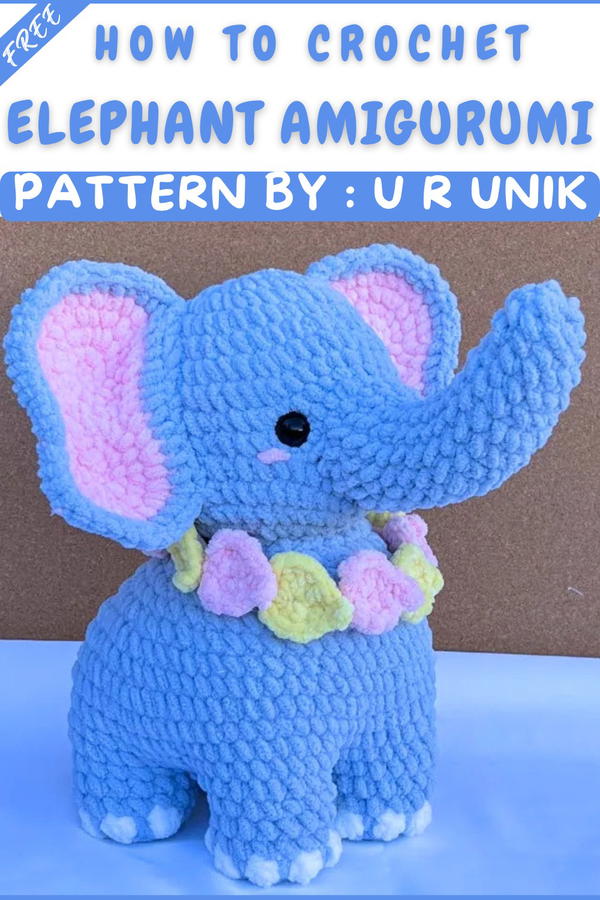
Medium-Sized Elephant Amigurumi Pattern
This pattern creates a soft, huggable elephant amigurumi with playful details, including bobble-textured feet, a gentle trunk, large layered ears, and a decorative flower accent. The use of super bulky yarn ensures a plush finish, making this a standout addition to any collection of handmade toys or gifts.
Pattern Important Tips
- Yarn Selection: Bernat Blanket yarn or equivalent super bulky yarn gives the elephant its large and plush feel. Lighter yarn and smaller hooks will create a smaller result.
- Join-as-you-Go: The legs are joined directly to the belly, so be sure to follow the joining instructions carefully for even attachment.
- Stuffing: Firm but even stuffing is crucial throughout all parts for shape and stability, especially in the trunk.
- Marking Placements: Use stitch markers to mark eye, ear, and limb positions for symmetry before sewing.
- Color Changes: For bobble toes and contrasting ear borders, carry unused yarn inside the work to minimize cutting and joining.
Skill Level
This is an intermediate pattern. It uses standard amigurumi shaping along with bobble stitches, color changes, and sewing of multiple large parts. Beginners with some practice may also follow.
Materials
- Bernat Blanket Yarn (Super Bulky):
- Blue (main body and ears)
- White (toes and ear details)
- Pink (inner ears and ear border)
- Yellow (flower accessory, optional)
- 5 mm crochet hook
- 24 mm safety eyes (or plastic/felt alternatives)
- Polyester fiberfill stuffing
- Yarn needle (for assembly)
- Stitch markers
- Scissors
Gauge
Exact gauge is not critical for amigurumi, but use a hook size that creates tight, gap-free stitches. With super bulky yarn and a 5 mm hook, expect the finished elephant to be about 25–30 cm (10–12 inches) tall when seated.
Stitch Abbreviations
- MR: Magic ring
- SC: Single crochet
- INC: Increase (2 SC in the same stitch)
- DEC: Decrease (single crochet two stitches together)
- BLO: Back loops only
- DC: Double crochet
- SL ST: Slip stitch
- CH: Chain
Special Stitches
- Bobble Stitch (for toes): Yarn over, insert hook, yarn over and pull through, yarn over and pull through first two loops; repeat two more times (for a total of 3 DC in same stitch), then yarn over and pull through all loops on hook.
- Joining Legs: Work into both the belly and the leg stitches at the same time to attach seamlessly.
Notes for Starting the Pattern
- Work in continuous spirals unless otherwise noted; use a stitch marker to keep track of the first stitch of each round.
- All increases and decreases are performed in single crochet unless specified.
- Join pieces and change colors as instructed; weave in yarn tails for a neat finish.
Pattern Instructions
Feet (Make 4)
R1: 8 SC in MR. [8]
R2: 8 INC. [16]
R3: BLO — With Blue: 2 SC. (With White: Bobble (3 DC in same stitch); with Blue: 1 SC) repeat 6 times, Blue 2 SC. [16]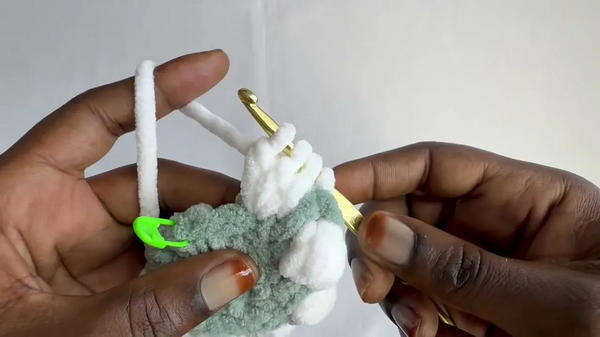
R4–R5: SC in each stitch around for 2 rounds. [16]
Do not close. Leave a long tail for joining to the belly.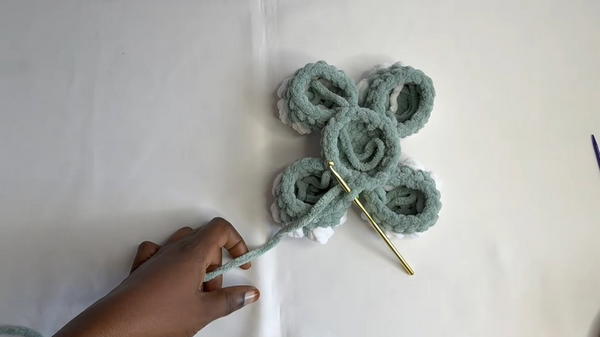
Belly & Body
R1: 8 SC in MR. [8]
R2: 8 INC. [16]
R3: (3 SC, INC) x 4. [20]
Connecting Legs: Position four feet evenly around and join to the belly in Round 4 (work through both the foot and body edges to connect).
R4–R10: SC in each stitch around, continuing over joined feet to form a large round for the body. [68]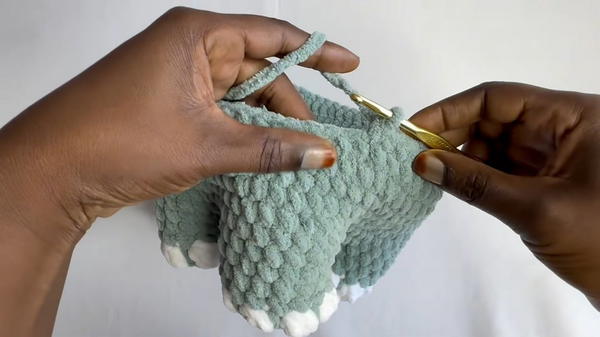
Stuff as you work.
R11: 10 SC, (6 SC, DEC) x6, 10 SC. [62]
R12–R20: SC rounds and gradual decreases to shape the body, ending with 16 stitches.
Head
R1: 6 SC in MR. [6]
R2: 6 INC. [12]
R3: 12 INC. [24]
R4: (1 SC, INC) x12. [36]
R5–R6: SC all around. [36]
R7: (2 SC, INC) x12. [48]
R8–R10: SC all around. [48]
R11: CH 10 (for trunk gap), skip next 10 stitches, SC in remaining 38. [48]
R12: SC around, including into top loops of 10 CH (completing 48 stitches). [48]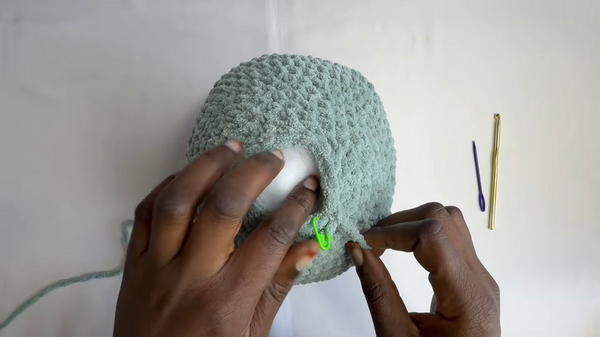
R13–R17: Continue with rounds of decreases (as in 4 SC, DEC; 3 SC, DEC; etc.) until only 8 remain.
Stuff as you close, then fasten off.
Trunk
R1: Work 20 SC around the chain gap on the head. [20]
R2–R4: SC all around. [20]
Insert safety eyes between R9 & R10 of the head.
R5–R17: Work decreasing rounds as instructed (e.g., 4 SC, 2 DEC in a round, etc.), shaping the trunk, until 8 stitches remain.
Fasten off and close tip.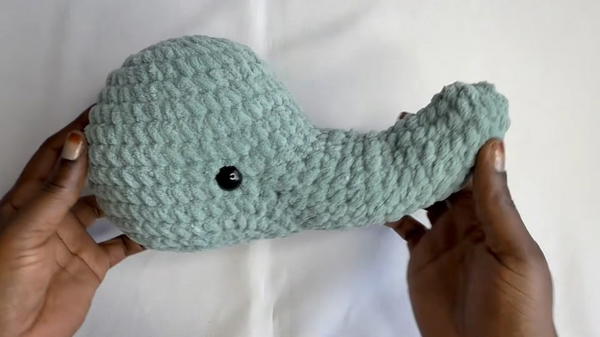
Ears (Make 2)
Under Part (Inner Ear, Pink):
- R1: 6 SC in MR. [6]
- R2: (1 SC, INC) x3. [9]
- R3: (2 SC, INC) x3. [12]
Upper Part (Outer Ear, Blue):
- R1: 6 SC in MR. [6]
- R2: (1 SC, INC) x6. [18]
- R3: (2 SC, INC) x6. [24]
- R4: 24 SC around. [24]
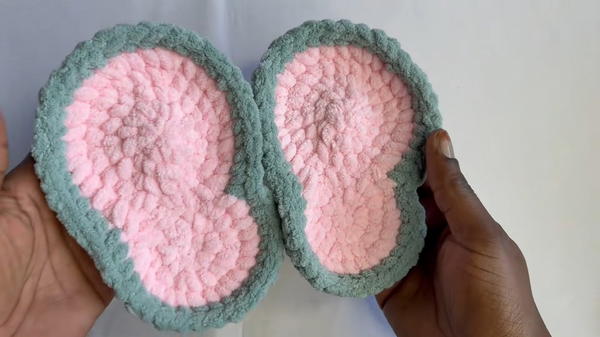
Assembly:
- Lay under part on top of the upper part, align edges.
- With pink, crochet around both layers, alternating (2 SC, INC) pattern.
- For a bold outline, finish with a round of blue SC around the perimeter.
Tail
R1: 6 SC in MR. [6]
R2–R9: SC straight for 9 rounds. [6]
Fasten off and leave a tail for sewing.
Assembly and Sizing
- Body Assembly:
- Join the feet to the belly as you crochet, referencing leg position for balance.
- Firmly stuff the body section as you fasten off.
- Sew the head onto the body using whip stitch.
- Features:
- Attach ears symmetrically to each side of the head.
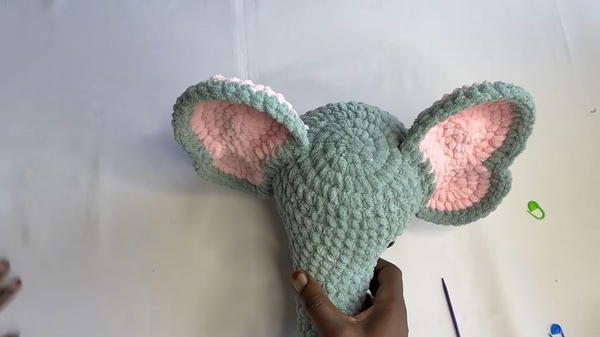
- Insert and secure safety eyes between rounds 9 and 10 of the head.
- Position and sew trunk beneath the eyes.
- Attach ears symmetrically to each side of the head.
- Tail:
- Attach tail centered on lower back.
- Finishing Touches:
- Optionally, create a small flower using yellow yarn and sew beside one ear for extra charm.
- Hide any remaining yarn ends by weaving inside the body.
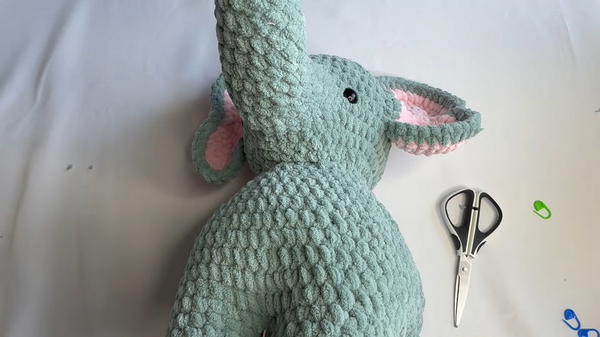
Finished Size:
With super bulky yarn and 5mm hook, the elephant will measure approximately 25–30 cm (10–12 inches) in height, with large floppy ears and a gentle trunk.
Conclusion
The medium-sized elephant amigurumi brings together several intermediate techniques such as bobble stitch toes, layered ears, and a prominent trunk to create a plush, expressive toy. Working with super bulky yarn results in a sumptuously soft texture, and the combination of gentle colorwork and large safety eyes gives the finished elephant a true personality. This pattern is a rewarding way to practice joining techniques, color transitions, and assembling shaped amigurumi components into a cohesive, lovable figure—perfect for gifting or treasuring as a display piece. The addition of a flower accessory personalizes the project and adds a creative finish to this unique, handcrafted animal.