Add festive charm to your holiday décor with a Free Crochet Christmas Tree Pattern, offering a simple and creative way to elevate your seasonal decorations.
Handmade holiday decorations bring a warm and personal touch to any festive space, especially when crocheted with care and creativity. Among these, a small crocheted Christmas tree stands out as a charming and versatile project that beautifully captures the spirit of the season.
Beginner-Friendly Crochet Christmas Tree – Free Pattern
The Free Crochet CHRISTMAS TREE pattern offers a delightful way to create a three-dimensional tree with a classic conical silhouette formed by textured, layered stitches that mimic branches. This piece combines simplicity and elegance, featuring a slightly bumpy texture that adds depth and interest. Its size can be easily adjusted, from tiny ornaments perfect for the tree to larger versions that brighten up a mantel, by changing yarn weight and hook size, making customization effortless.
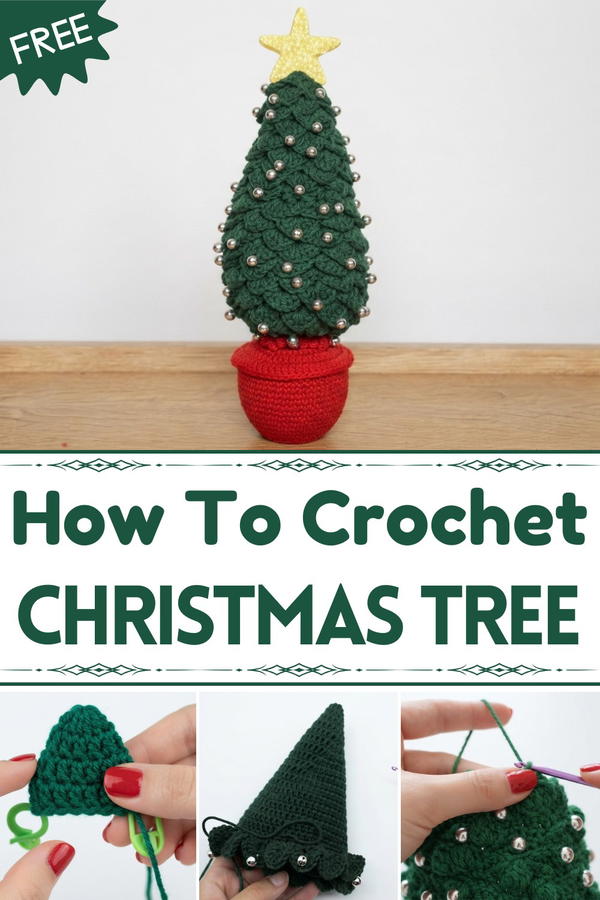
Constructed in continuous rounds, the project starts at the base and gradually shapes upwards, finishing with a sturdy trunk for stability. Using yarns that have a soft yet resilient quality, such as cotton blends or acrylic, helps accentuate the stitch definition while allowing the tree to stand firm. The inspiration behind this design comes from the desire to blend nostalgic holiday imagery with the inviting texture of handmade crochet, creating a piece that feels both timeless and cozy.

These little trees make wonderful gifts or festive additions to centerpieces, garlands, and wreaths. They also invite playful creativity, try experimenting with unexpected colors, metallic threads, or tiny embellishments to put your own unique spin on the tradition. For anyone wanting a joyful and customizable holiday project, this pattern provides a perfect and rewarding crochting experience.
Amigurumi Crochet Christmas Tree Pattern
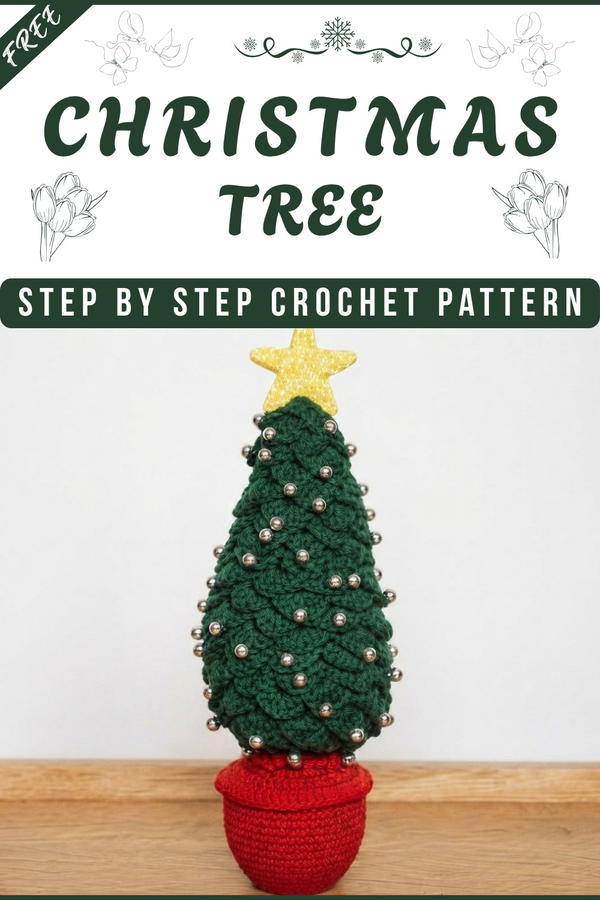
Decorate your home with this adorable Amigurumi Crochet Christmas Tree, perfect for the festive season! This fun and easy pattern uses textured stitches and decorative beads, making it both charming and customizable. The tree sits nicely in a small pot and can be finished with a crochet star for a classic touch. This pattern is ideal for beginners and intermediate crocheters looking to practice shaping and textured stitches.
Skill Level & Terminology
Skill Level: Beginner/Intermediate
Terminology: All instructions use US crochet terms.
Materials & Tools
- Yarn:
- White cotton yarn (or any preferred color)
- Brown cotton/acrylic yarn for the trunk
- Hook:
- 3 mm crochet hook
- Decorations:
- Gold and silver beads
- Other:
- Small pot
- Toy stuffing
- Tapestry needle
- Stitch marker
- Scissors
- Hot glue (optional, for star attachment)
Gauge
For a standard amigurumi, gauge isn’t critical, but for reference:
- 12 double crochets = 2” (5 cm).
- 3 rounds of double crochet = 1” (2.5 cm).
Tip: If the tree feels too loose or too tight, change the hook size up or down accordingly.
Abbreviations
- ch = chain
- sl st = slip stitch
- sc = single crochet
- dc = double crochet
- inc = increase (2 dc/sc into same stitch)
- dec = decrease (single crochet two stitches together)
- st(s) = stitch(es)
- fpdc = front post double crochet (for crocodile stitch)
Special Stitch Instructions
Crocodile Stitch:
Worked over two double crochet posts. Work 5 front post double crochets down one side of a post, chain 1 with bead, then 5 front post double crochets up the other side. This creates the textured “scale” effect.
Invisible Decrease (sc):
Insert hook into front loops of next two stitches, yarn over, pull through both loops, yarn over again, pull through two loops to finish.
Stitches Used
The pattern uses Basic Double Crochet, Single Crochet, Invisible Decrease, Slip Stitch, Crocodile Stitch, and Front Post Double Crochet. If you know these, you can easily work this tree from start to finish.
Finished Size
Tree is approximately 7 inches (18 cm) tall (including trunk), with a diameter of 3 inches (7 cm) at the base, depending on your yarn and stuffing amounts.
How To Start
Begin with a chain and worked rounds of double crochet, regularly increasing as described. Decorate with beads and scales, stuff, and finish with a single crochet trunk. The tree is assembled as one seamless item, then finished with a trunk stand and holiday embellishments.
Pattern
Tree Body
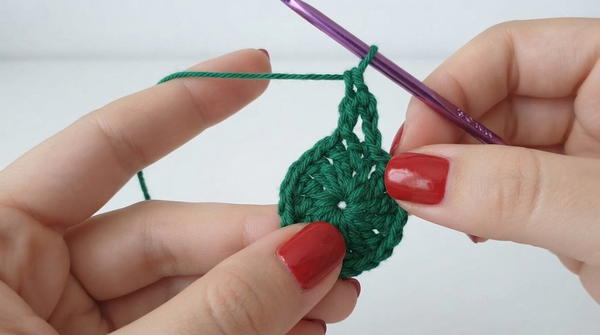
Step 1: Foundation & Rounds
- Make a slip knot, chain 4.
- Join to first chain with a sl st to form a ring.
Round 1:
- Ch 3 (counts as first dc), 11 dc in ring. (12 dc total)
- Join with sl st to top of ch-3.
Round 2:
- Ch 3, dc in each st around. (12 dc)
- Join with sl st.
Round 3 (First Increase):
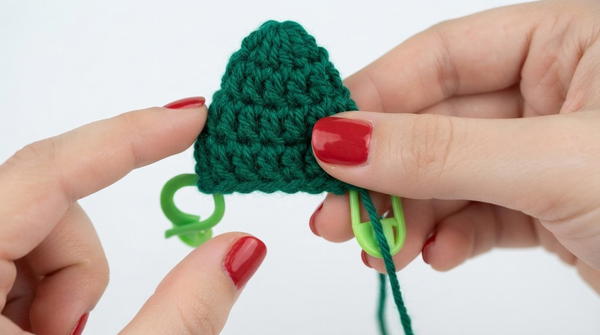
- Ch 3, dc in same st (inc), place stitch marker in this st.
- Dc in next 5 sts.
- Inc in next st, place stitch marker.
- Dc in next 5 sts.
- Join with sl st.
- (14 dc)
Round 4:
- Ch 3, dc in same st (inc), dc in each st to next marker.
- Inc at next marker.
- Dc in rest of sts.
- Join with sl st.
Rounds 5-20:
Repeat Round 4, placing increases at both markers each round.
Continue until desired height (about 20 rounds).
Start by making a chain and forming a circle. You will crochet double crochets around and gradually increase the number in each round, making the tree bigger and taller. Repeat this process until your tree reaches the desired size (around 20 rows).
Adding Beads & Crocodile Stitch
Step 2: Decorating with Beads & Crocodile Stitch
- Start at the bottom edge.
- Insert your hook, chain 3 (counts as first dc).
- Work 4 more dc (total 5 dc), chain 1, add bead, chain 1.
- Work 5 fpdc up next post to form a “scale”.
- Skip 2 posts, repeat.
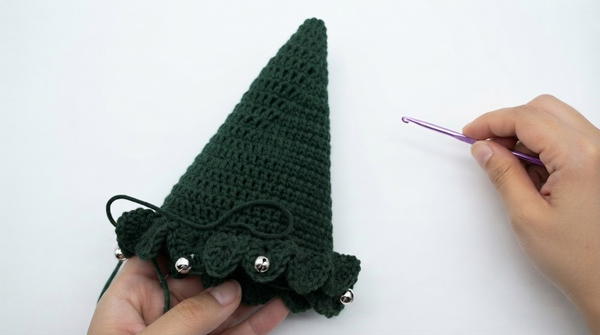
Alternate beads (gold, silver, etc.) as you work each scale.
- Continue around the base.
- Cut yarn, sew in ends.
Repeat Crocodile Stitch:
- Start next round anywhere you like.
- As before: chain 3, 4 dc, add beads, 5 fpdc; skip 2 posts, repeat for each round.
- Continue up the tree, stopping short of the very top.
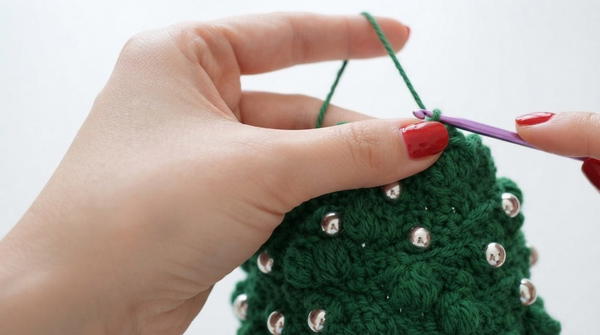
Attach beads to the tree as you crochet. Use a special textured stitch called the crocodile stitch to make scales. Decorate the tree with this pattern until you reach near the top.
Stuffing
- Fill the tree with toy stuffing for a plump, amigurumi shape.
- Stuff firmly but don’t overfill; shape as you go.
Simply fill your tree with toy stuffing, making sure to distribute it evenly so the tree is nicely rounded.
Trunk
Step 3: Trunk (Brown Yarn)
- Insert hook in any st at the tree base.
- Attach brown yarn with a slip knot.
- Round 1: sc in same st and in next 5 sts (6 sc total).
- Invisible decrease over next 2 sts.
- Repeat (6 sc, inc dec) until round done.
Round 2:
- 5 sc in next 5 sts, invisible decrease; repeat.
- Continue for a few rounds, reducing by 1 sc per round (i.e., 4 sc, dec; 3 sc, dec…)
- Last round: 1 sc, dec around.
Step 4: Trunk Stand
- Work 4 rounds of sc to make trunk longer for stability.
- Fasten off, sew in all ends.
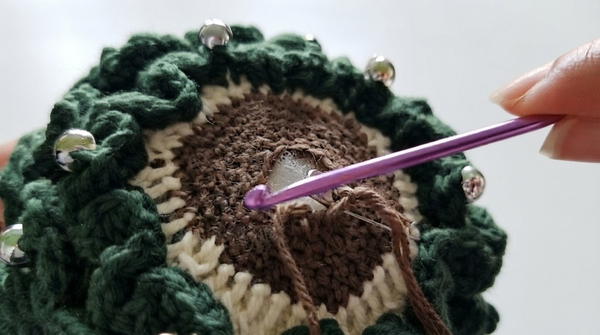
Switch to brown yarn for the trunk. Crochet single crochets around, making the trunk smaller by decreasing until you have a narrow stick. Add extra rows to create a sturdy stand.
Assembly & Finishing
Step 5: Pot & Final Touches
- Place trunk inside a small pot or cover with yarn as desired.
- Secure tree with hot glue if necessary.
- Attach a crochet star (see tutorial link) to the top with glue.
Add extra beads if you want more sparkle.
For Non-Pattern Readers:
Put your finished tree into a small pot for display. Add a star decoration to the top, glue in place for secure attachment, and add beads or other holiday decorations as you wish.
Tips for Success
- Customize colors, beads, and tree height for your own unique look.
- Practice the crocodile stitch separately if new to you.
- Add more stuffing for firmer shape.
- Make several for a festive display!