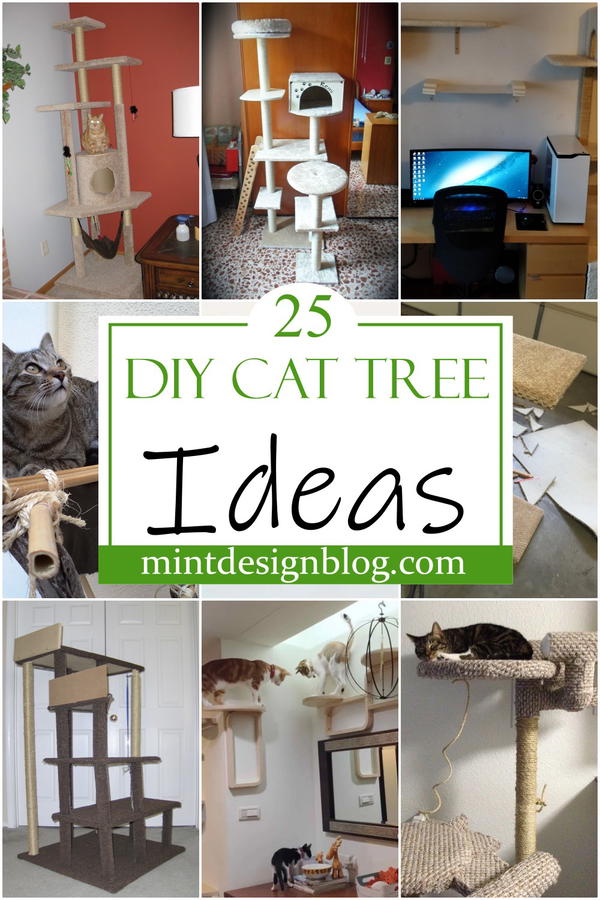
Keep your cat happy, healthy, and entertained with the right tree. They are the perfect addition to any home; these DIY Cat Tree Ideas will let your feline climb and explore in style. These amazing cat trees offer multiple levels, ladders, and platforms so your kitty can climb, scratch, and explore however they please.
DIY Cat Tree Ideas
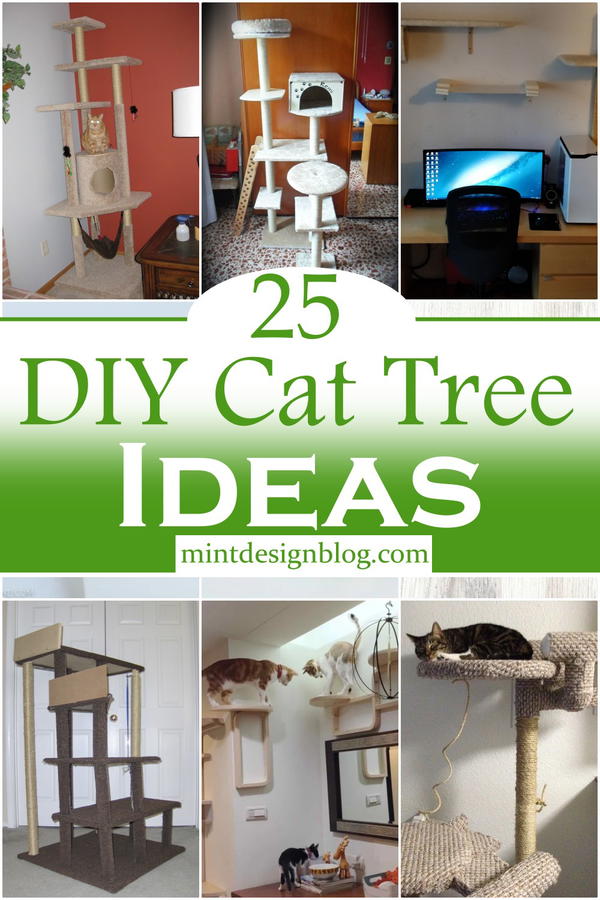
They are very functional and can be used as climbers, loungers, and even a place for playtime. Regardless of the purpose you want to use it for, building one that is sturdy enough is important. The DIY Cat Tree ideas we picked below are efficient but will provide your pet with great fun. All these projects are doable by anyone, even if you are inexperienced in carpentry work.
How To Build A Cat Tree
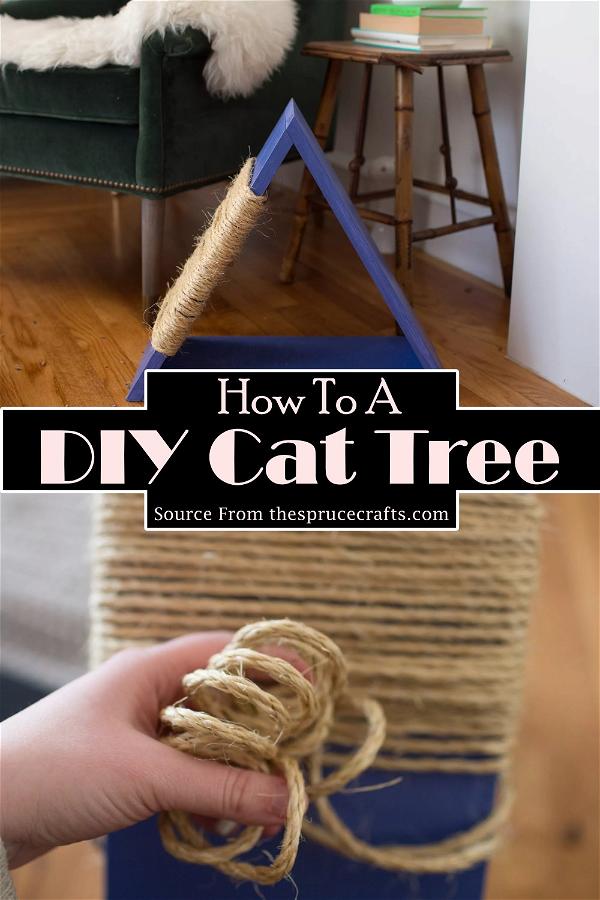
A sturdy cat tree can be built in a quick and easy weekend project with few tools. Building a strong base is essential to building a strong cat tree so you can comfortably rest assured that your furniture will endure the daily wear and tear of lounging and playing. This base is constructed with plywood, the most economical option for the bottom of the tree. It's also one of the most durable materials you can use. Plywood can withstand pressure up to 200 pounds per square inch, so it will hold well against your curious fur babies.
The design of this base includes four legs to maximize stability, two-by-four wood for strength, a bit of carpet for comfort, and rope for structure. The carpeted wrap on this structure will keep your kitty from clawing at it, which will help extend its life even further. It's also important that the posts are secured together by rope. This will prevent them from twisting on themselves, which could weaken the structure's integrity over time.
Ultimate DIY Cat Tree
If you're looking for a fun project, look no further! This DIY cat tree will provide your cat with hours of entertainment and a cozy place to rest. The best thing about this project is it's totally customizable. You can use any box that fits your house and cat. That's right! Your house! You can even modify the height of the boxes so they fit your space better. We made two sizes from one template, which we will show you how to do. We also used recycled materials for this project which was both eco-friendly and cost-effective.
Amazing Cat Tree Build Idea DIY
If you have a cat or two, it's natural to want to give them a place they can climb and scratch. You might even want to give them a space in the house. A tree branch that's sturdy enough is an obvious choice, but if you're looking for something a little fancier, this idea will do nicely. If you can find a sturdy-looking tree branch that's the right size and shape, you only need to drill some holes for lag screws. Ensure your branch can handle your cat's weight — you don't want it to break!
Once you have the base attached to your branch, take some time to carve out spots on the branch for platforms your cats can sit on. If you have access to a lathe, that'll make it easier. Otherwise, use your hands and an ax or chisel, then smooth the edges. Carve cat faces and other decorations wherever you like — these are just suggestions — and finally, add rope or string for scratching posts. Your cats will love you for it!
The Survivalist Cat Tree DIY
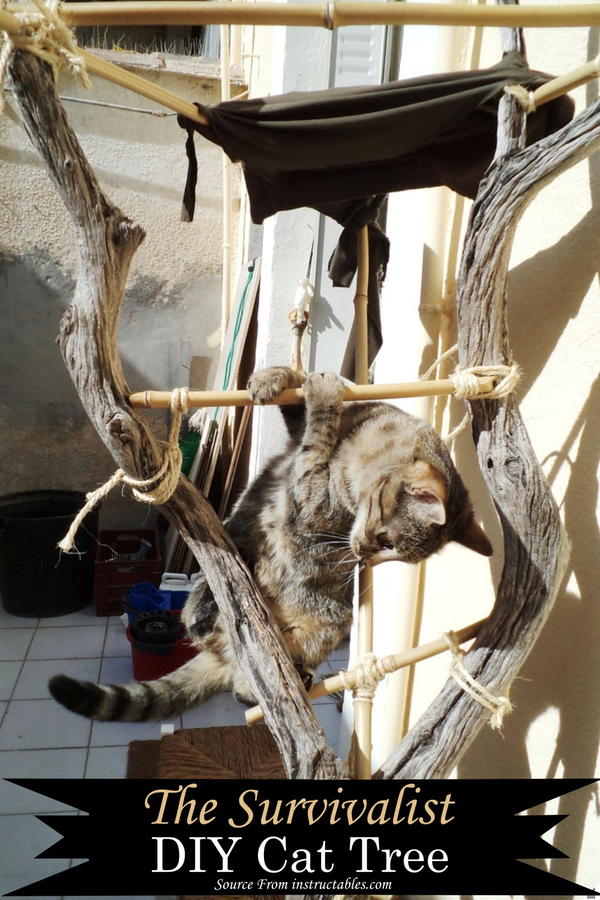
When it is time for your cat to have a new tree, you might want to consider this DIY project. Not only does it look good, but it is also durable and long-lasting. To make your own tree, take a branch off a tree and remove leaves or use branches of a dead tree. Position in front of your house, and attach bamboo to create a platform. Weave net inside, add a life of cloth to soften the platform, and your outdoor style is set! What do you think? Is this the right DIY project for your cat? If you like this article, share it with others as well!
Cat Tree Build DIY
Building your cat tree is possible, but just because it's your first time doesn't mean you have to make it your most difficult project. This project is more upcycling than building from scratch. It consists of cans/tins, fluffy fabric, twine, a t-shirt, a ladder, and wood. Glue small tins together to form a four-sided post for the base; make a longer post with the same dimensions and wrap it up with rope to conceal the can. Cover platforms with fabric. The end product will amaze you.
DIY Cat Tree Using Real Branches
This DIY cat tree not only looks great, but it's also really easy to make and costs nothing! It's made from the real branches of a tree. You can pick them up for free at local parks and gardens or neighborhoods that are having yard work done. The branches are bigger than you might think and will last for years if you care for them properly. It took about an hour to find the right ones, cut them down, sand them, and assemble them. This is not only a great DIY project, but it also makes your home feel like a real home.
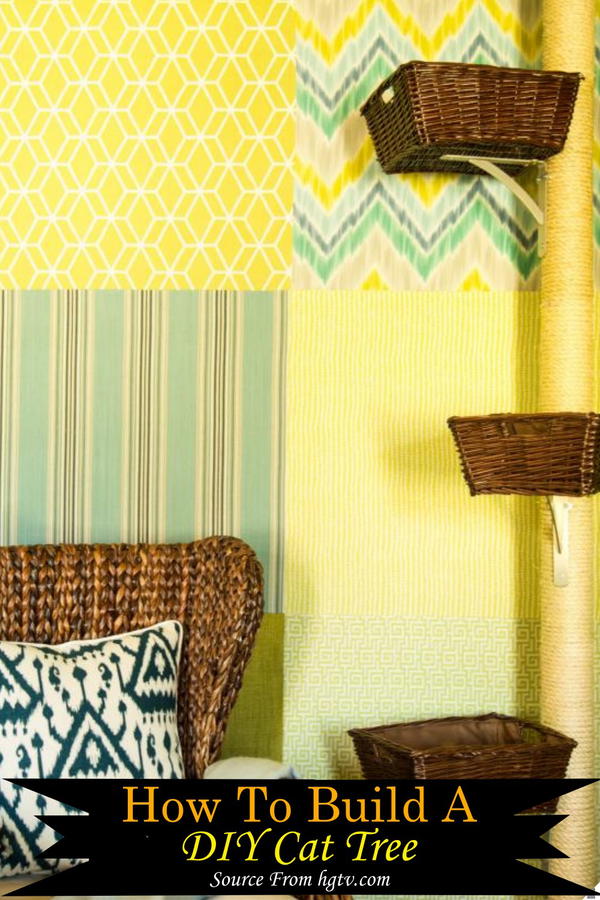
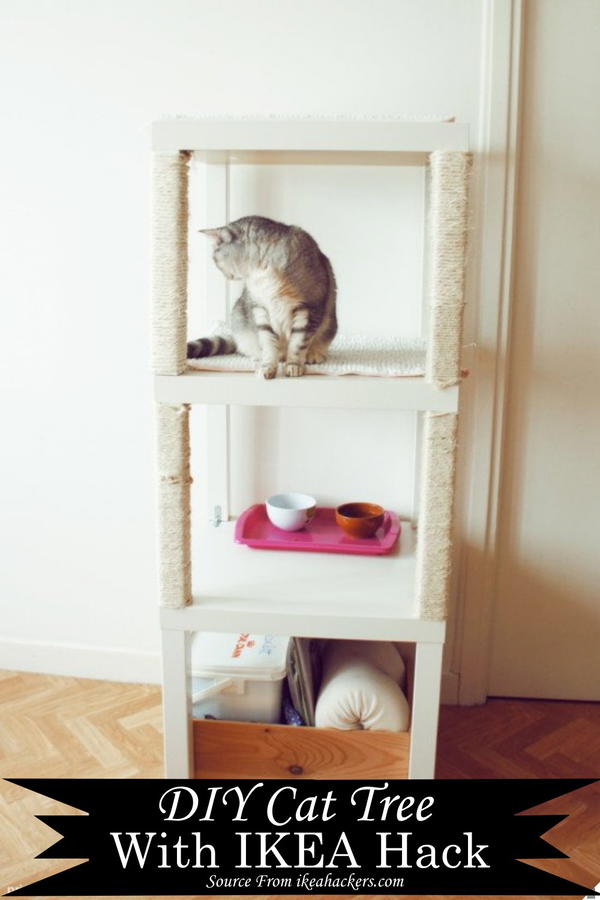
DIY Cat Tree IKEA Hack
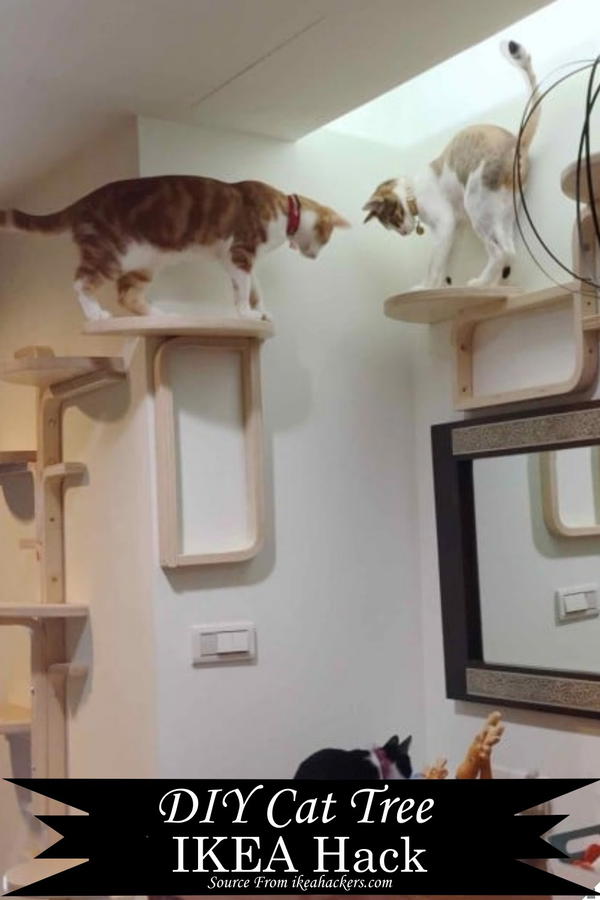
IKEA is the king of DIY hacks. The Swedish giant's products have inspired brilliant craftsmanship, from creating a desk out of Lack tables to building a kitchen island out of the company's Billy bookcases and Kallax shelving units.
Tired of your cat scratching up your furniture? Make your own cat tree using IKEA stools and some DIY know-how. The best part about this hack is that it requires no tools. You could probably even stick it on the wall without nails using double-sided carpet tape and silicone, but that wouldn't look nearly as nice as the finished product we've pictured above.
You can also see: DIY Hall Tree Ideas
How To Make A Cat Tree From Home
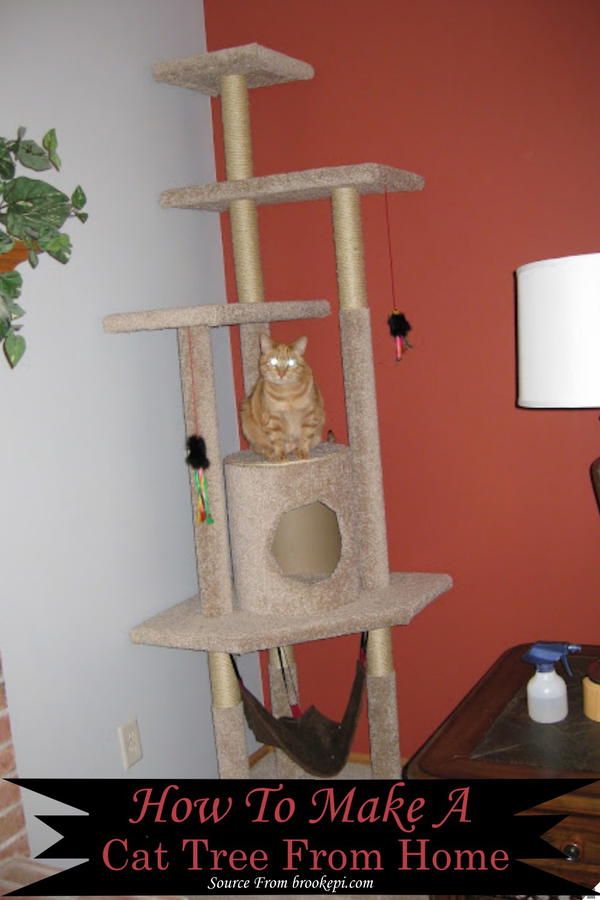
Cats love to climb and scratch. It is also a good way for them to exercise, especially for young or older arthritic cats. You will want to make sure that your cat has a place to scratch that is both safe and appealing. The PVC pipe tree is a great choice because it offers them a fun and challenging place to play, jump and sharpen their claws.
You can build This nice, sturdy cat tree with minimal tools and skills. It's also a lot of fun to make, and the cats love it. The main idea behind this project is to create something that looks more like your conventional furniture piece than a traditional cat tree, which makes it look more appealing in the living room.
Cat Tree DIY
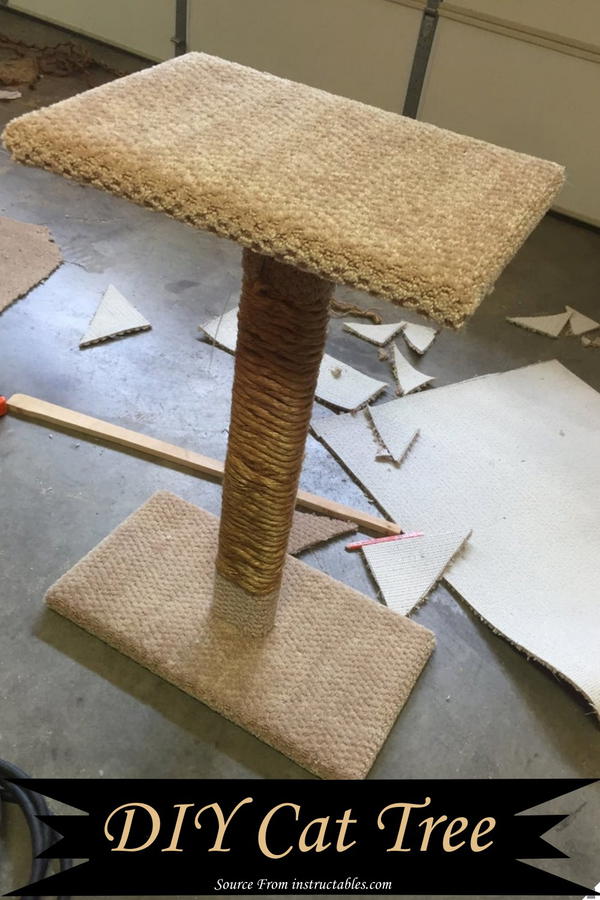
First, measure the area where you want to put your cat tree. Then cut your wood to suit. Next, place the floor base on the floor and secure it with a screwdriver or drill. Attach the post to this base and secure it with bolts. Staple the carpet to the floor base, then tie your rope around the post from top to bottom. Continue this process until you have covered all the rope with tree carpeting. Finally, attach the top base to your post, secure it with bolts, and cover it with more carpeting. Voila! Your cat tree is done!
DIY Cat Tree Near Desktop
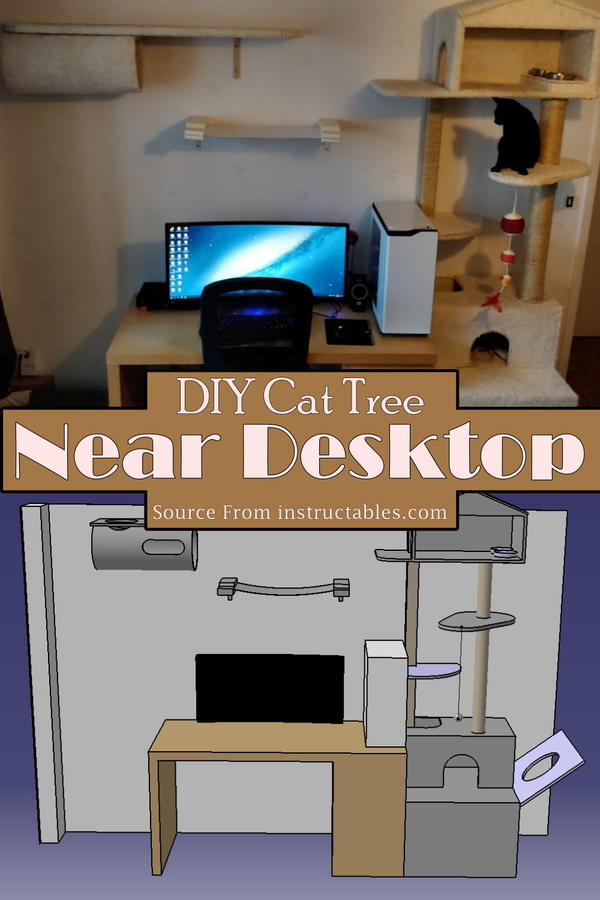
Just take a look at this clever DIY cat tree. It's built more like a home with compartments. Construct the bottom house and top house. Wrap your PVC tube with sisal rope and carpet the cat house and base. This keeps your cats closer while busy with your desktop. Gather these materials to begin; Wood, Sisal rope, PVC tube, Hose clamps, Angle brackets, Flexible fences, Carpet flooring, Staples, Hinges, and Screws. Start today!
DIY Cat Tower
Make your own cat tower! You will need to use the tools and materials listed above. Remember, if this is for your cat, you should adjust the size and design to fit their needs. Depending on whether you are using wood, a cardboard box, or both, and based on the size of your furniture, choose the best combination of box and wood to make it as strong as possible. The post should be long enough for your kitty to stretch and hang from, with plenty of room for her paws to grip. The platforms should allow her to jump up independently and be deep enough to climb in and get comfortable. If you want a scratching post, wrap it with rope and spray paint it first.
$14 Cat Tree
Are you looking for an inexpensive cat tree, but they are too expensive where you live? Then you may want to try this DIY version on how to build one yourself. This cat tree is made out of poster board which is not as sturdy as wood. So don't let your cat jump from heights with it. And also, when you let your cat use the top platform, don't leave them alone for too long. This cat tree cost $14 and took roughly 35 minutes to complete.
DIY Multi-Level Cat Tree
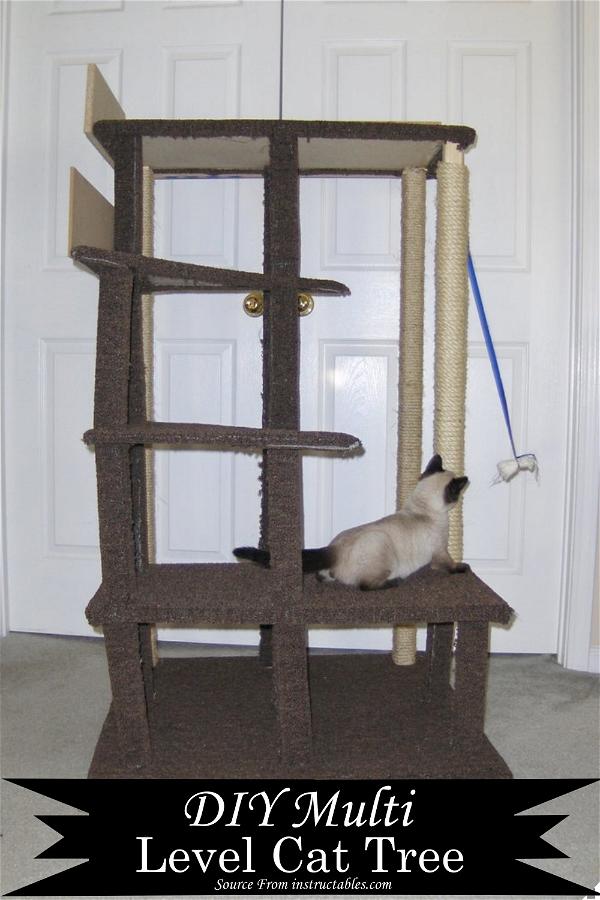
This cat tree is a great DIY project that can be made for under $100. It's ideal for small spaces, especially if your cat likes climbing and clawing to the sun. Cats need exercise, and climbing is a great way to help them keep fit and burn off energy. This tree will also provide them a safe place to rest and hang out.
Instructions:
1 - 4ft x 8ft x ¾" Particleboard for the base and two rectangular levels, 1 - 2ft x 4 ft x ¼" MDF board, 4 - 2" x 2" x 8ft boards for the posts, Sisal rope, 1 - 3ft x 12ft piece of carpet, 2 - cans of spray adhesive, 9 - 2" or 2 ½" long dowel screws, 18 - 2" wood screws, Tape measure, Electric drill & drill bits, Utility knife, Circular saw, Pliers. Prepare board and post, then wrap rope on post and carpet boards. Assemble your tower together.
DIY Star Trek Cat Tree
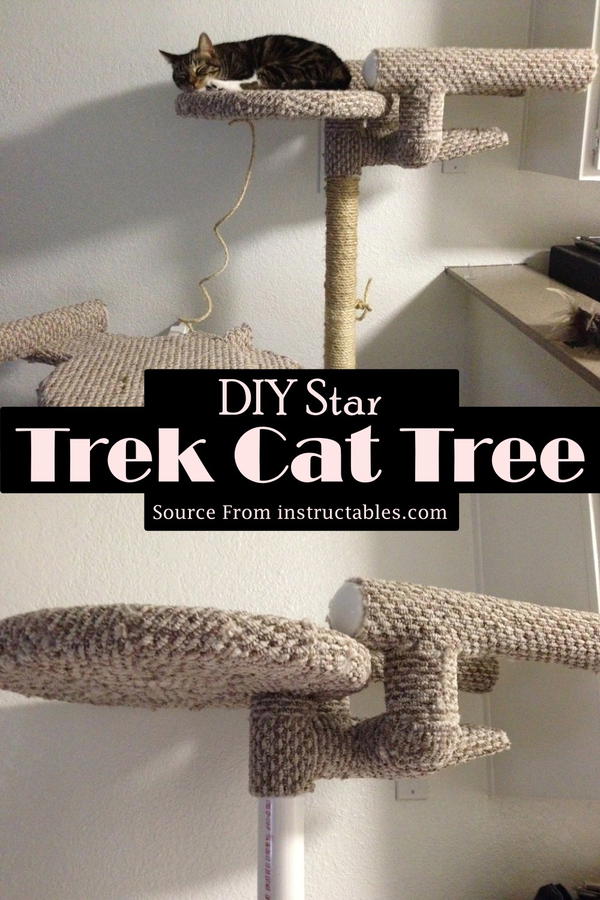
This DIY is a cat tree made of PVC pipe, panels, and lumber. Easy to construct and take apart, as well as lightweight. The basic materials needed here are a pipe and a board; everything else is optional. A ratchet wrench is useful to tighten the nuts. The template only shows you which pieces to cut, meaning you have total design freedom or can just follow the picture. If your cat likes its tall scratching post, this might prove a bit difficult, but it keeps the cat busy for a long time.
DIY Cat Tree House
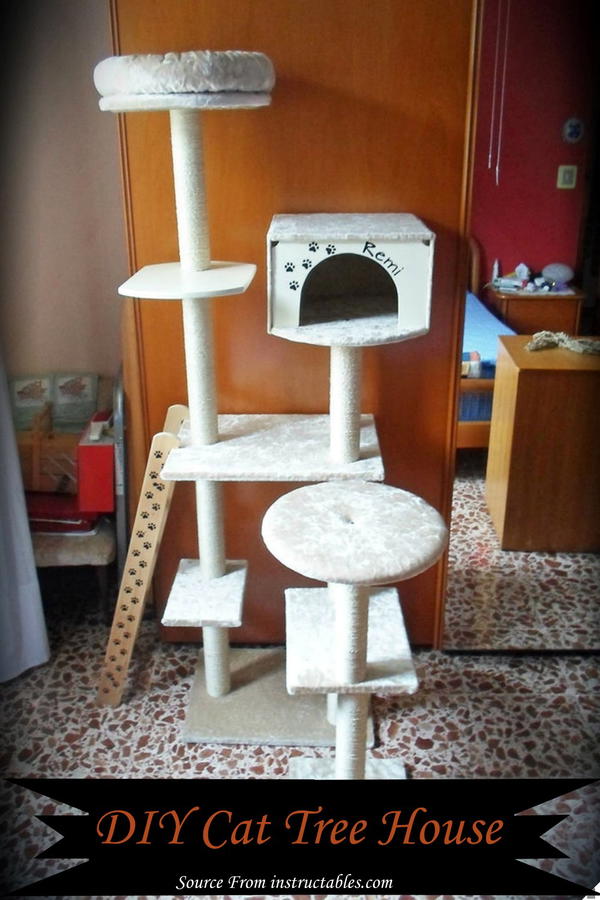
After getting different sizes of wood, thick cardboard tubes, 4 curtain wooden rods -diameter: 3cm (1.18 inches), fabric - velvet/plush, 12 screws, thin nails, staples, and staple gun, lots of twines, black acrylic paint, paintbrush, hot glue, white glue, cutter, drill with hole cutter and Forstner bit, screwdriver and jigsaw.
Wind twine around tubes and upholstery fabric on platforms, then install your cat home. When you're done assembling the cat tree house you can screw it to the wall or put a hook in the ceiling to hang it from. Depending on the location you've chosen for your cat's new playground, you can add some nice finishing touches to the outside as well -maybe some carpeting so it feels comfortable for your kitty or some planters where you can grow a couple of plants for her/him to enjoy.
How To Make The Ultimate Cat Tree
Having a cat tree to provide a safe, enclosed space for your feline friend is key to keeping them happy and healthy. Cats with an adequate place to play and scratch will experience less stress and enjoy a longer life. A cat tree is a must-have for any household with more than one cat. The lack of suitable places to play and rest can cause problems such as territorial fights, scratching on furniture, and stress-related illnesses. A good cat tree can be the solution to all of these issues.
The Ultimate Cat Tree is an innovative design that provides the most options possible in creating the perfect cat furniture piece. Its unique "floating" base allows it to fit any wall or corner and gives it a strong base that's tough enough to hold the weight of even the largest cats. The carpeted platforms on either side make it impossible for your kitty to resist scratching, giving them hours of fun. With this cat tree, you can finally give your cats their little corner of paradise that they'll love spending time in - just like they deserve!
DIY Cat Castle
This cat tree is an interesting idea but a bit expensive. You can use upside-down plastic food containers or glass vases to make the legs to save money. You'll need to add some weight on the bottom of each leg or it will tip over. A good option is to glue a brick inside the bottom of each leg.
Also, if you want to make the carpeted area more solid, you can attach it with Gorilla Glue and screw it together with wood screws and a drill. This will hold it together better than just the gorilla glue alone. The carpeting that was used in construction was just leftovers from other projects that were laying around. You can also use nice rugs from a store to give your cat a fancy room. Tape measure and carpenter square are optional for ensuring everything is square, but it makes for a much better-finished product.
DIY Cat Tree Out Of Wooden Crates
If you have a cat, you must be wondering how to make a cat tree at home. Well, it is not difficult to make one. If you have seen pet store cat trees, you will realize that they are very costly, and also, it is not easy to find the perfect one for your kitten or cat. If you want to save money and like DIY projects, this will be really helpful for you.
You can easily make a cheap cat tree out of wooden crates at home. All you need is wooden crates, pillows, blankets, flat boards, rope, drill, screws, wood glue, staple gun, and wood stain. First of all, get all these things ready. Then mark the spots on your flat board where the screws need to go and make holes with a drill. Now use a rope to fix the crates on the flat board by screwing them in place. After your cat tree is ready, use wood stain to paint it with any color you choose.
DIY Cat Tree Build
This is a very nice and elegant cat tree that can be made by anyone with woodworking skills. As shown in the video, it is unnecessary to be a great carpenter to make this tree as long as you have the right plans. It has all the features you would ask for, like a comfy bed at the top, a sisal rope scratching post, and even a ramp that makes climbing easier for your cat. The required materials are also described in the video and are quite cheap and easy to get. The only tool you will need is a circular saw with a blade size of ⅝ inches. Besides that, you all need common hand tools like a hammer, a tape measure, and some sandpaper for the finishing touches.
How To A DIY Cat Tree
Cat trees can be expensive, but building your own is very simple. All you need are a few simple supplies and a little know-how. This will make for a great DIY project with your family or friends.
Take the 18-inch pre-primed boards and miter them 30 degrees at the top. You can either cut them with a table saw or a miter saw. Then connect the boards together. Screw the pieces together with 1 ¼-inch trim head screws. Once everything is built, use wood glue and a rubber mallet to secure the pieces together.
Add up to 6 two-foot pieces of rope on each level, alternating between top and bottom, for climbing. Apply paint to the entire tree using warm water, a paintbrush for the base coat, and spray paint for the finish coat. Use U-fasteners to secure the carpeting to the bottom of the tree. Use hot glue around any edges that need added support so they don't fray. To hang it on your wall, drill two holes in the back of each board that you can run the rope through to secure it to your wall with a U-fastener.
How To Build A DIY Cat Tree
Did you know that cats sleep 70% of their lives? That equals out to 16 hours a day. The remaining 8 hours are spent playing, eating, grooming, and occasionally napping. A great investment for any cat owner is building your own cat tree. Not only does this give the kitty something fun to do, but it also allows them to be more active.
Once you complete the build, you will notice increased activity and playfulness from your kitty, which will be more eager to explore its new kingdom. There are several DIY cat trees on the internet, but we aimed to make ours as cheap as possible while still being fun for the kitty. We were able to make our cat tree for under $50!
DIY Cat Tree
A cat tree is a tall piece of furniture that allows your cat to climb and play. The good news is that they're very easy to make, so you can build your cat yourself!
Here's what you'll need:
- 2cm thick MDF or blockboard
- Thick plywood board
- Untreated landscape posts
- Natural carpet for upholstery and flooring
- Posts and sisal rope for scratching and playing
- Safe cup hooks for hanging toys and other items from the posts
- Multi-purpose, thick, long screws
Before construction, upholsters stages with carpet and wind post with sisal rope. Once that is done assemble your tower.
How To Make A Cat Tree
You'll need basic carpentry skills to build a cat tree. The project will consume much of your time and money. But you'll enjoy a result that will be the focal point of your home for the rest of your life. Building a cat tree is like any other project. There are some basic steps you can follow to ensure its success. Buy the necessary materials and tools. Assemble the base. Choose a place where you want to install it. Install it while ensuring enough space around it for cats to move comfortably.
DIY Cat Tree With IKEA Hack
This is a simple and cheap DIY cat tree you can assemble in less than an hour. If your cats are just climbing on the chairs, giving them more space to play and explore might be nice.
You will need:
4 Ikea Lack tables, 12 brackets chairs, 24 screws, A screwdriver, Sisal (optional), Ikea Mat Bathroom (optional).
The first thing to do is to overlap the tables. Then, secure the brackets on each table's outer edge with a screw on each side. You should have 6 brackets per table. Next, wrap the Sisal around the feet of the table with glue. You do not want to wrap the legs completely because you want some kind of grip for your cats to walk on it. If you do not like using glue, you can also use small stick-on pads.
Finally, wrap one or two lines of the Ikea mat bathroom around the top of each table. Depending on what size you want your cat tree to be, either overlap them or not. And you are done! It's so easy and cheap, you don't have any excuse for not doing this! Your cats will thank you for it.
See Other Projects
- DIY Chicken Feeder Plans: If you want to save money and work part-time, then a homemade chicken feeder is the way. Our DIY Chicken Feeder Plans require no tools or special expertise - just manual labor and a willingness to learn.
- DIY Headache Rack Plans: Our DIY headache rack plans greatly upgrade your truck's storage. The headache rack holds up to 5 cans, saving you money and making it easier to find the item you need when you need it most.
- DIY Standing Desk Plans: Are you looking for a way to get an extra boost in your day? Look no further than this standing desk plan! It's easy to build, using common tools. And yes, it can help you stand up more often and feel better throughout the day.
- DIY Table Runners: These DIY table runners are made of a durable, washable cotton material that will be useful for many occasions. Great for summer picnics and fall dinners, these table runners add enough color to create an eye-catching display at your next gathering.