Mint Design Blog


Keep cozy style with Free Crochet Granny Square Sweater Pattern guiding you through cheerful blocks to stitch a warm layered garment you can wear anywhere.
One of the most vibrant ways to stay cozy is by wearing a sweater made from colorful granny squares, a timeless and cheerful design. You can learn how to make this stylish sweater by following the detailed instructions on the YouTube channel Gülşah Özcan Filiz. The tutorial is step-by-step and easy to understand, making it accessible for all skill levels.
Free Granny Square Sweater Pattern | Easy Crochet Tutorial
This sweater is perfect for cooler days when you need extra warmth but want something playful and modern. Made from individual squares joined together, it provides endless possibilities for customizing colors to match your personality or wardrobe. You can wear it casually at home, on outings, or even to brighten up gloomy winter days with its lively and unique look.
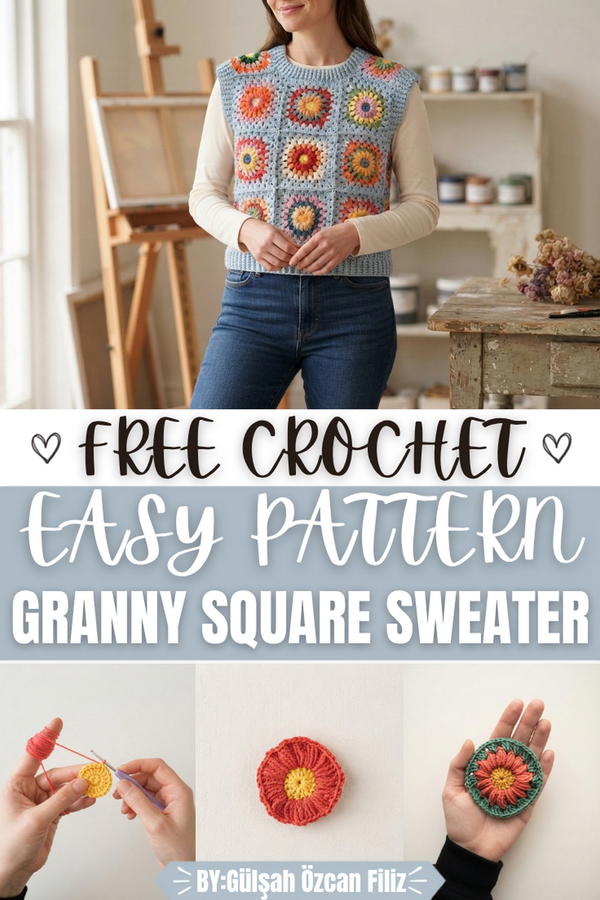
The working style of this pattern is straightforward and relaxing. Each square is created individually using simple stitches, and they are later attached seamlessly to form the sweater’s body, sleeves, and edges. What's special about this pattern is how effortlessly the squares come together, making it easy to adjust the size and fit as needed.
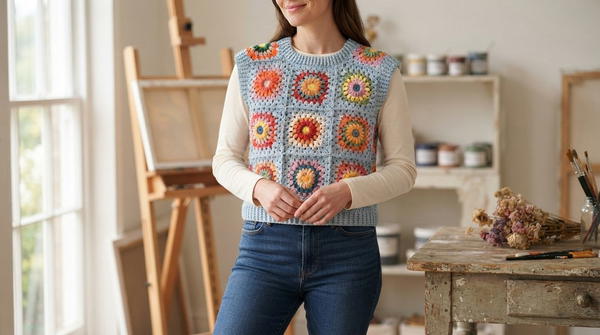
The most attractive design feature of this sweater is the versatility of the granny squares. You can experiment with bold color combinations or stick to classic tones for an elegant finish. The shape is well-proportioned, with a comfortable fit that doesn’t feel bulky.
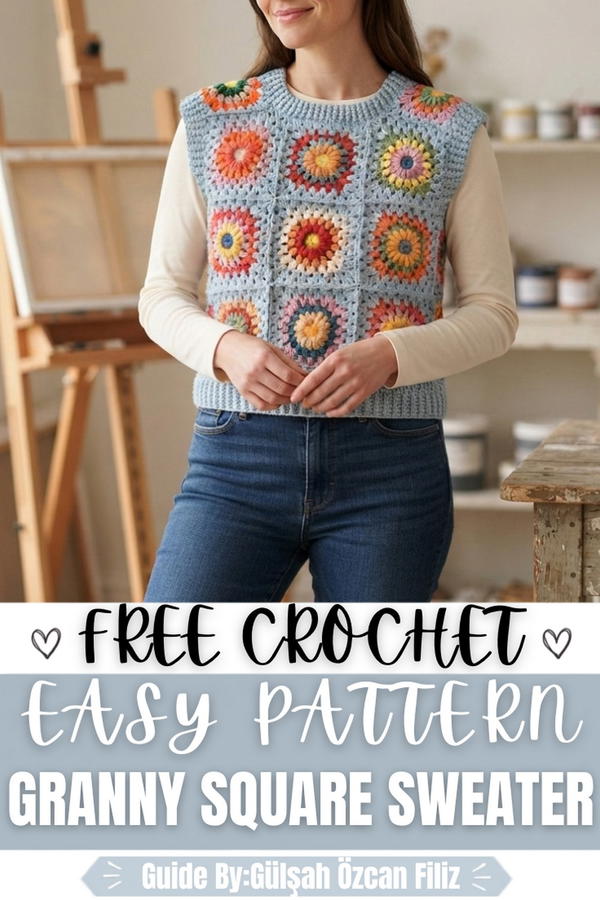
Crochet Motif Sweater Pattern
This pattern constructs a full sweater using individual square motifs joined together with a crochet hook, eliminating the need for a sewing needle during assembly. Each motif is built from the center outward, beginning with a magic ring and progressing through textured puff stitches and structured double crochet rounds to form a firm, well-defined square. The motifs are then connected using a single crochet join method, and the finished garment is completed with ribbed cuffs, a shaped neckline, and an elastic waistband. The design is highly adaptable in terms of sizing, yarn weight, and color arrangement, making it a flexible and satisfying project from start to finish.
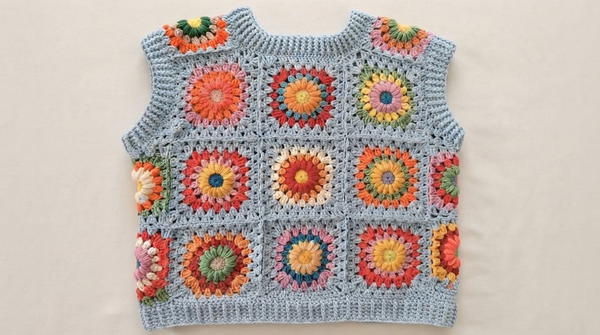
Skill Level: Intermediate to Advanced — This pattern is best suited for crocheters who are comfortable working in the round, executing color changes, forming puff stitches, and joining motifs. Experience with basic garment shaping and ribbing techniques is strongly recommended before beginning.
Materials
- Yarn: Cotton yarn for a lighter spring version or acrylic/wool blend for a warmer, winter-weight garment (no specific brand required; use any yarn suitable for your preferred weight)
- Hook: Primary crochet hook appropriate for your yarn weight; a 3mm hook and a 2.5mm hook for ribbing sections
- Tools:
- Tapestry needle (optional, for alternative seaming)
- Scissors
- Measuring tape
- Stitch markers
Special Stitches
- Puff Stitch: Insert hook into stitch, pull up a loop, repeat 3–4 times into the same stitch, then yarn over and pull through all loops on the hook at once. Creates a rounded, raised texture referred to as a pistachio stitch in this pattern.
- Triple Treble Crochet (ttr): Yarn over three times before inserting into stitch, pull through two loops at a time four times. Used at corners to build height and structure.
- Ribbing Stitch: Worked by alternately inserting the hook through the front loop of one stitch and the back loop of the next stitch across a row, creating a stretchy ribbed band for cuffs and collar.
- Single Crochet Join: Two motifs are held together and joined by working single crochet stitches through corresponding spaces along both edges simultaneously using a crochet hook.
Stitch Abbreviations
- ch — chain
- sl st — slip stitch
- sc — single crochet
- dc — double crochet
- ttr — triple treble crochet
- MR — magic ring
- ps — puff stitch
- sp — space
- st(s) — stitch(es)
- rep — repeat
- BLO — back loop only
- FLO — front loop only
- yo — yarn over
Useful Tips
- Pull the magic ring tightly closed after Round 1 to prevent any gap at the center of each motif before proceeding.
- Use stitch markers at each of the four corner chain spaces from Round 3 onward to easily identify corner positions in subsequent rounds.
- Make all motifs before beginning the joining process and measure each one to confirm consistency in size throughout.
- When joining motifs, skip corner chain spaces and begin joining from the stitch immediately beside the corner to maintain a clean and even seam line.
- For sizes 40–42 as demonstrated, prepare 14 motifs for a shorter sweater or 20 motifs for a longer version.
- Adjust the number of joining rows between motifs to control the overall size — use two joining rows for a standard fit and three joining rows for a larger size.
- Switch to the smaller 2.5mm hook for the final rows of ribbing to tighten the elastic band sections at the cuffs and collar.
Pattern Instructions
Motif Construction (Make 14 for Short / 20 for Long)
Round 1 — Magic Ring Center
- Create a MR.
- Ch 3 (counts as first dc).
- Work 15 dc into the ring for a total of 16 dc including the beginning ch-3.
- Sl st into the top of the beginning ch-3 to join.
- Pull the ring closed tightly and fasten off.
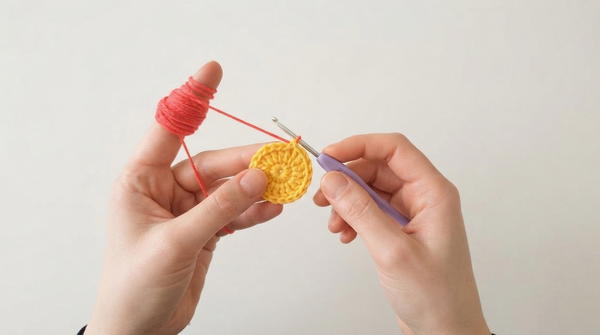
Round 2 — Puff Stitch Round
- Join new color yarn into any stitch with a sl st.
- Ch 1, then work ps into the same stitch.
- Work ps into each of the remaining 15 sts around.
- Total: 16 puff stitches
- Sl st into the first ps to join.
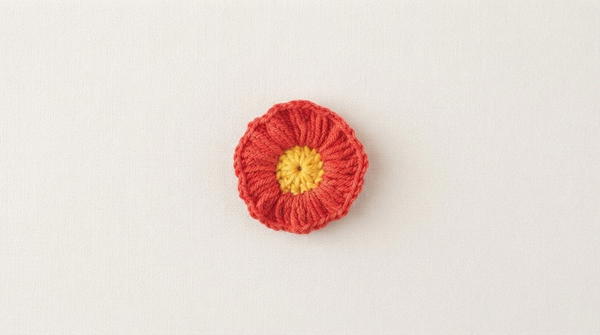
- Fasten off and join next color.
Rnd 3 — Square Shaping Round
- Join new color yarn into any chain space between puff stitches.
- Ch 3 (counts as first dc).
- Work 2 dc into the same sp (3 dc total in first sp).
- Work 3 dc into each of the next 2 spaces.
- At the corner position, work 3 ttr, ch 2, 3 ttr all into the same sp.
- Rep the sequence of 3 dc in each side sp and 3 ttr, ch 2, 3 ttr at each corner sp around all four sides.
- Sl st to join at the end of the round.
- Fasten off.
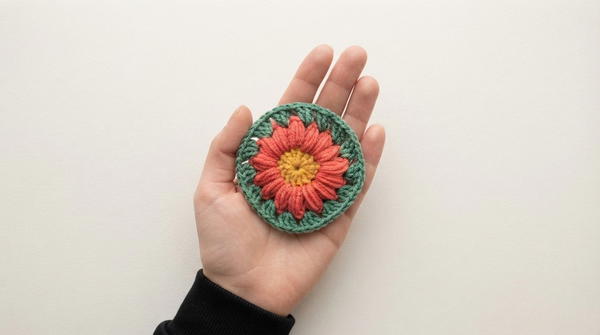
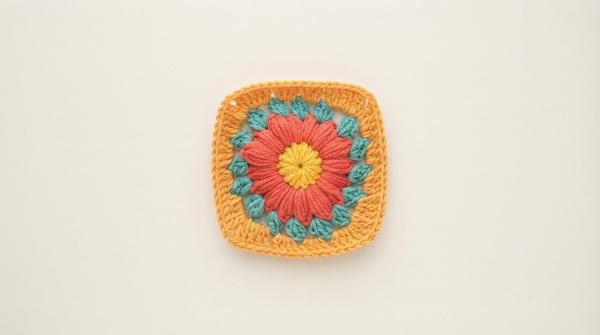
Rnd 4 and Subsequent Rounds — Granny Square Expansion
- Join yarn into any corner ch-2 sp.
- Ch 3, work 2 ttr into the same sp, ch 2, then 3 ttr into the same sp (corner made).
- Work 3 dc into each chain sp along each side.
- At each corner ch-2 sp, work 3 ttr, ch 2, 3 ttr.
- Rep around all four sides, adding one additional group of 3 dc per side with each completed round.
- Sl st to join and fasten off at the end of each round.
- Continue until each motif measures the desired size for your intended sweater fit.
Joining the Motifs
Preparing for Assembly
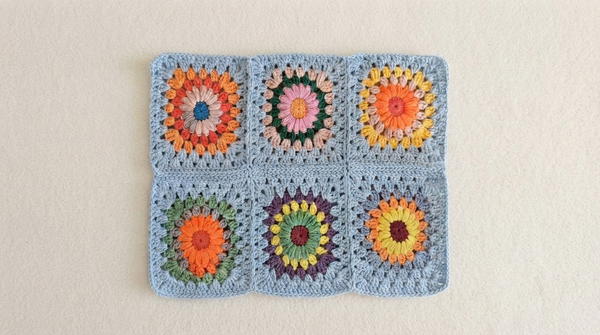
- Arrange all completed motifs in the layout required for the front and back panels.
- Begin with the first motif and work two joining rows around its perimeter using the granny square method before connecting additional motifs.
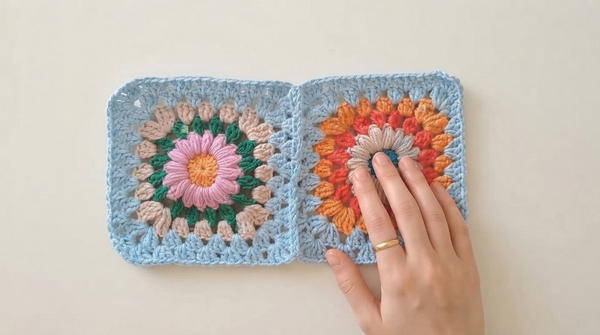
Single Crochet Join Method
- Hold two motifs together with their wrong sides facing inward.
- Join yarn and work sc through corresponding spaces along both shared edges simultaneously.
- At corners, skip the corner ch-2 space and begin joining from the stitch immediately beside the corner on both motifs.
- After joining along one full shared edge, return to the individual motif and continue working the remaining sides independently.
- Rep this process to connect all motifs according to your layout, joining side edges and then top and bottom edges to form the body panels.
Shoulder Seam
- Hold the front and back panels together at the shoulder edges.
- Join yarn and work sc through corresponding stitches along the shoulder edge, skipping the corner stitches to allow a slight natural opening for ease of fit.
- Fasten off and weave in ends.
Side Shaping and Gap Filling
- After joining all side motifs, identify any gaps between upper and lower motifs along the sides.
- Join yarn at the gap and work 3 dc into the open space, then ch 1 and connect to the adjacent space with a sc stitch.
- Work additional 3 dc groups and connecting sc stitches to fill all remaining gaps and create a smooth, continuous edge.
- Fasten off and weave in ends securely.
Ribbing and Finishing
Sleeve Cuffs
- Join yarn at the sleeve opening.
- Work one full round of dc evenly around the entire sleeve edge, skipping chain spaces as needed to prevent excess fullness.
- Sl st to join and ch 3.
- Work 2 rows of ribbing using the 3mm hook by alternating dc worked into the front loop of one stitch and dc worked into the back loop of the next stitch across.
- Switch to the 2.5mm hook and work 1 additional row of the same ribbing to tighten the cuff edge.
- Fasten off.
Neckline
- Join yarn at the neckline edge and work one full round of sc evenly around the entire collar opening, working 2 sc into corner gaps and 3 dc into any larger spaces to fill and shape the neckline into a rounded oval form.
- Work 2 rows of ribbing with the 3mm hook as done for the sleeves.
- Work 1 final row with the 2.5mm hook to close and tighten the collar.
- Fasten off and weave in all ends.
Assembly and Sizing
- The pattern as described is sized for 40–42 using the specified motif count and joining method.
- For a smaller size, join motifs using a single joining row rather than two rows between each motif.
- For a larger size, add a third joining row between motifs or incorporate additional motifs into the layout.
- Always measure the assembled body panels against your own measurements before joining shoulders and sides to confirm fit.
- The front and back panels are identical in construction; the neckline shaping is achieved through the single crochet edging round rather than during motif construction.
Conclusion
This motif-based sweater pattern demonstrates how a modular construction approach can produce a complex and beautiful garment through a series of manageable, repeatable steps. The combination of puff stitches, granny square expansion, and a crochet hook join method creates a textured, structured fabric with a handcrafted character that is difficult to replicate through conventional flat construction. The ribbed finishing at the cuffs and neckline adds a polished and professional detail that elevates the overall appearance of the finished sweater. With careful attention to motif sizing and joining tension, this pattern yields a garment that fits beautifully and wears comfortably across a wide range of body types.