Bring blooming style to your outfits with this Crochet Flower Granny Square Bag Free Pattern and enjoy a colorful accessory full of floral charm.
Adding a splash of creative charm to your accessory collection can uplift any outfit while offering practicality. Recently featured on the channel Örgü ütopyası, a delightful project captures this essence perfectly through the creation of a vibrant and unique bag. This accessory merges creativity with usefulness, making it an excellent addition to your handmade items.
Free Crochet Flower Granny Square Bag Pattern for Everyday Style
The Free crochet Flower Granny Square Bag pattern brings to life a stunning piece characterized by its eye-catching floral granny squares. Each square blooms with intricate petals that create texture and visual interest, giving the bag a lively yet cozy appearance. The playful combination of color and design offers a mix of vintage charm and modern style, making it suitable for a variety of settings, from casual daily errands to garden parties.
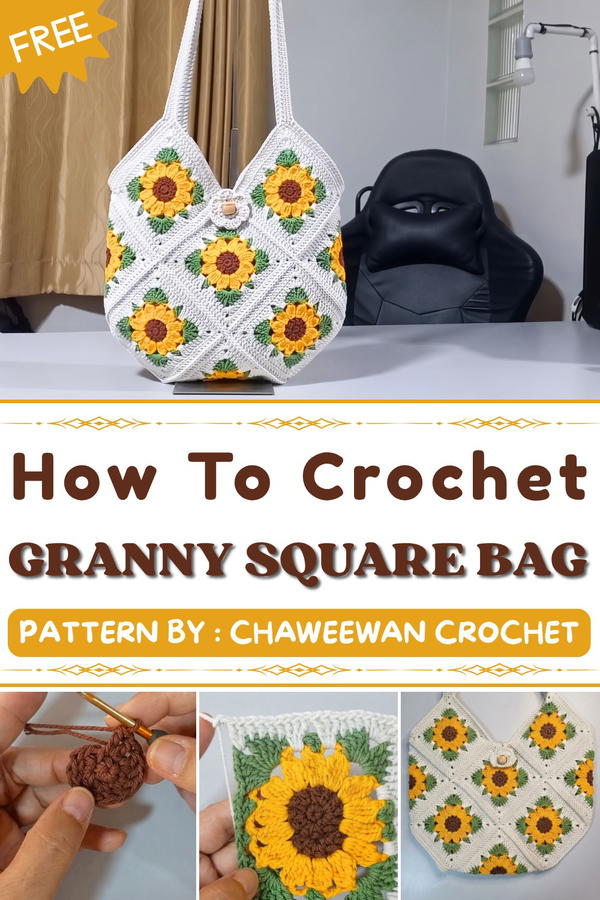
More than just a pretty exterior, this bag offers ample space and durability, making it a practical choice for carrying essentials like your wallet, phone, and keys. Its sturdy construction ensures longevity while the floral motifs add a unique touch that stands out beautifully in a crowd. Whether gifted to someone special or kept as a distinctive staple in your wardrobe, this crochet bag holds both sentimental and functional value.
Ideal for spring and summer outings, the bag's fresh, cheerful vibe makes it a standout piece that pairs well with casual dresses or jeans alike. The thoughtfully designed strap offers comfortable carrying options, while the roomy interior makes organization easy.
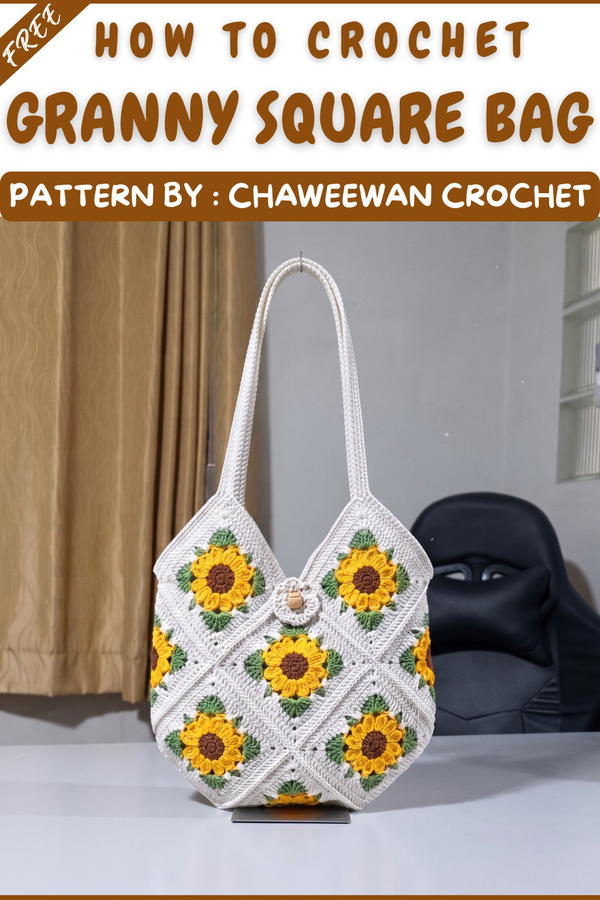
Flower Granny Square Bag – Crochet Pattern
This Flower Granny Square Bag combines classic floral motifs with a structured, modern layout. Each square features a textured flower center framed by a clean granny-style border, then assembled into a practical shoulder bag with a decorative closure. The finished piece has a light, airy look and works well as a casual everyday bag.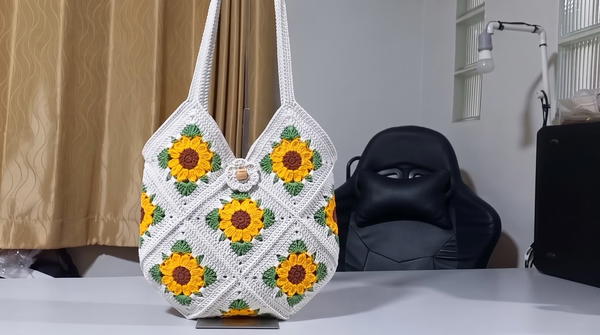
Skill Level
Intermediate
The pattern uses basic stitches (sc, dc, ch, ss) but also includes working in rounds, joining motifs neatly, shaping petals and leaves, and constructing straps and a closure. An adventurous advanced beginner with some experience making granny squares can also follow this pattern carefully.
Materials
- Yarn: 2mm Chueak Fok (process rope)
- Bright yellow (flower petals)
- Leaf green (leaves/round 4)
- Dark brown (center/pollen)
- Off-white (square border and joining; can also be used for straps)
- Hook: Size 5/0 crochet hook (Japanese sizing; approx. 3.0–3.5 mm)
- Notions and Extras:
- Scissors
- Wooden button with holes
- Stitch markers
- Darning/tapestry needle
Finished Dimensions:
- Bag width: 34 cm
- Bag height: 27 cm
- Strap length: 31 cm
- Each flower square: approx. 12 cm wide
Special Stitches Used
- Magic Ring (MR): Adjustable loop used to start crocheting in the round, allowing you to pull the center tightly closed.
- Petal Cluster: Multiple dc worked into the same space, then pulled together (as per the tutorial) to form a single petal.
- 3-Single-Crochet-Together (3-sc-cluster at corners): Insert hook into first stitch, pull up a loop; repeat in next 2 stitches; yarn over and pull through all loops on the hook. Used to secure strap corners.
Stitch Abbreviations
| Abbreviation | Meaning |
|---|---|
| MR | Magic Ring |
| ch | Chain |
| sc | Single Crochet |
| dc | Double Crochet |
| ss / sl st | Slip Stitch |
| st(s) | Stitch(es) |
| sp | Space |
(US crochet terminology is used.)
Useful Tips
- Gauge & Size: All squares should match in size (about 12 cm). If your squares are smaller or larger, adjust hook size slightly.
- Color Changes: Fasten off and weave in ends neatly at each color change to keep the wrong side tidy, especially since the bag interior will be visible.
- Square Consistency: Count your stitches at the end of each round in the square to ensure the borders align correctly for joining.
- Joining Layout: Arrange all 13 squares flat and pin into the bag layout before joining to avoid mistakes.
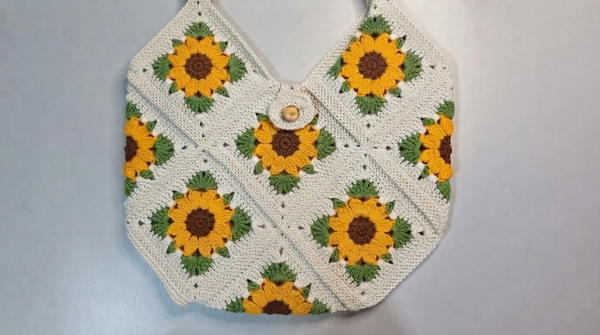
- Strap Stability: Because the strap is part of the crochet edge, work with firm tension and reinforce corners with the 3-sc-together clusters as described.
Flower Granny Square Pattern
You will make 13 flower squares in total.
Round 1 – Center / Pollen (Dark Brown)
- Start with a MR.
- Ch 1 (counts as first stitch), then work 5 sc into the ring.
- You now have 6 sts (1 ch + 5 sc treated as 6 sc around).
- Pull the ring tight and ss to the first stitch to join.
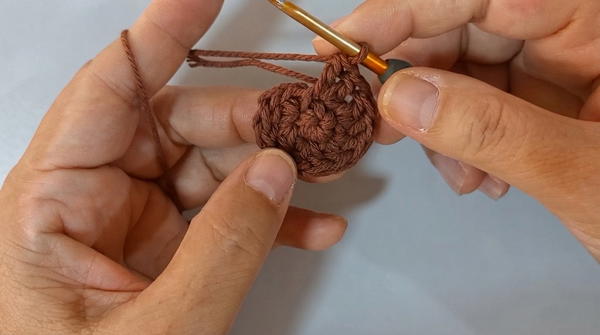
Round 2 – Build the Base for Petals
- Ch 1, then work 2 dc in each stitch around.
- You should have 12 dc total at the end of this round.
- Join with a hidden join or a regular ss to the first dc.
Round 3 – Flower Petals (Bright Yellow)
Change to bright yellow yarn.
Each petal is made as a cluster of dc with a chain on top:
- Join yarn in any stitch from Round 2.
- For the first petal:
- Ch 3 (counts as 1 dc).
- Work 3 dc into the same stitch or space, then pull all loops through as indicated in the tutorial to form one petal cluster.
- Ch 3 to complete the petal.
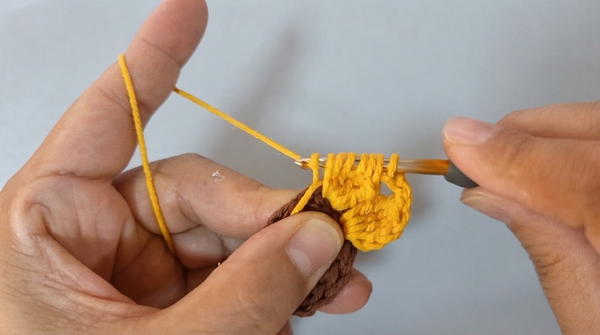
- Repeat this petal construction around until you have 12 petals in total:
- (Petal cluster of 4 dc pulled together, ch 3) × 12.
- Join to the base of the first petal with a ss.
Round 4 – Leaves / Transition to Square (Leaf Green)
Change to leaf green yarn.
You will begin squaring off the round by using dc and chain spaces:
- Work into the chain spaces and/or designated spaces behind petals:
- In each corner position: 2 dc, ch 2, 2 dc into the same space to form square corners.
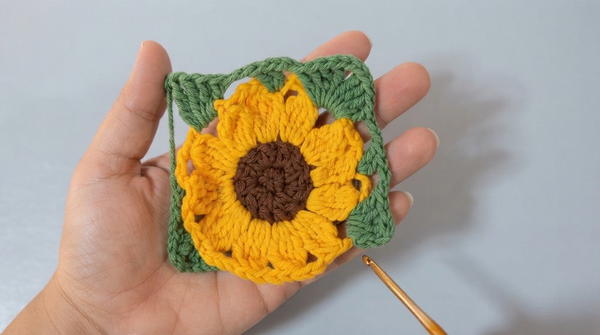
- Between corners, place dc stitches evenly as shown in the tutorial to form “leaf” sections and build a square outline.
- In each corner position: 2 dc, ch 2, 2 dc into the same space to form square corners.
Continue around, ensuring you form 4 corners in total with (2 dc, ch 2, 2 dc) in each corner space. Join with a ss to finish the round.
Rounds 5–6 – Square Border (Off-White)
Change to off-white yarn.
You will now expand and define the square:
- Round 5:
- Start in any corner ch-2 sp.
- Work (2 dc, ch 2, 2 dc) into each corner space.
- Work 1 dc in every dc across the sides between corners.
- Join with ss to the first dc.
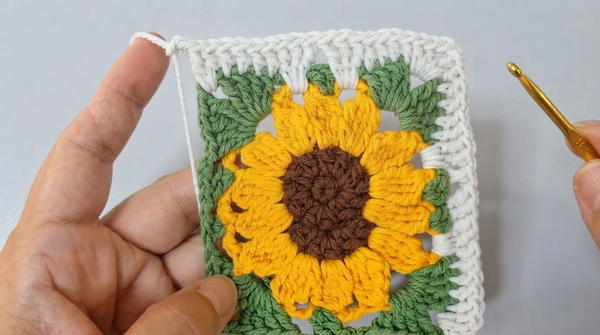
- Round 6:
- Repeat Round 5: (2 dc, ch 2, 2 dc) into each corner space and dc in each st along the sides.
- Join with ss.
Your square should now measure approximately 12 cm.
Make 13 squares following the same color layout.
Assembly of Bag
Bag Layout
- Lay the 13 squares on a flat surface.
- Arrange them in the desired bag shape (front, back, sides, bottom). A common layout:
- Front: several squares wide and high
- Back: same as front
- Bottom and sides: shared edges formed by squares positioned along the lower and side edges.
- Pin or clip them using stitch markers to hold the shape (as indicated around 31:43 – 36:48).
Joining the Squares
- Use off-white yarn and a slip stitch (ss) join:
- Place two squares right sides together.
- Working through the back loops of both squares, join with ss along the edge.
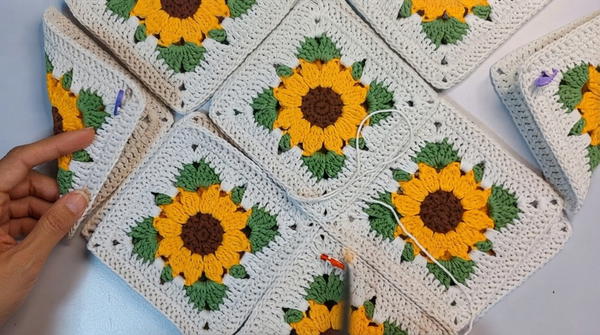
- Continue joining square edges until the full bag shape (base + sides + front + back) is formed.
- Turn the bag right side out; the joins will appear neat and slightly raised on the inside.
Straps and Bag Opening
Edging and Strap Base
- With off-white yarn, attach at any stitch along the bag opening.
- Work sc evenly around the entire bag opening, including over the tops of all squares.
Strap Construction
- During this round (or at the designated points), when you reach one top side where a strap will begin:
- After completing the last sc at the edge, ch 100 to form the first shoulder strap.
- Join the end of the chain to the opposite strap point with sc, ensuring that the strap is not twisted.
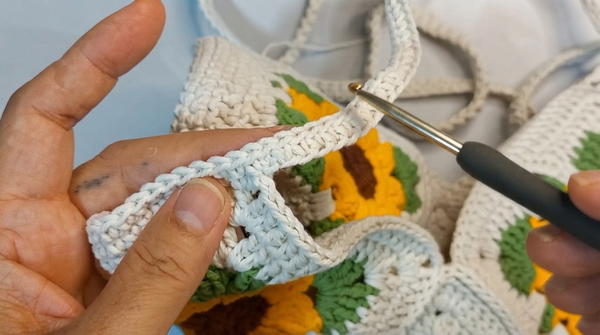
- Work a reinforcing round:
- Along each strap attachment point, work a 3-sc-together (3-sc-cluster) across the corner stitches to strengthen the connection.
- Continue sc around the opening and along both sides of the chain straps to add thickness and durability if desired, or leave strap as a single chain if indicated in your version.
Adjust the strap length by changing the initial chain 100 based on personal preference; the tutorial indicates a strap length of 31 cm when finished.
Closing Mechanism
Flower-Shaped Lock
- Create a small decorative flower (similar in style to the petals used in the squares) that functions as a loop or lock:
- Begin with a central loop (e.g., MR or several chains joined into a ring).
- Work small petals or decorative loops around this ring, leaving a center opening large enough to go around the wooden button.
- Attach this flower lock to the back side of the bag opening (centered), so it can pull over the button onthe front.
Button and Loop
- On the opposite side (front panel), sew the wooden button securely at the center top.
- Optionally, form an 8-chain loop if additional fastening is needed (as per the tutorial timing 1:06:45 – 1:08:44) and attach it near the decorative flower or behind it for extra security.
Conclusion
This Flower Granny Square Bag pattern blends structured granny-square construction with decorative floral elements to create a visually appealing and practical accessory. With careful attention to consistent square sizing, neat joining, and well-finished straps and closure, the resulting bag is sturdy, functional, and stylish, suitable for everyday use or as a distinctive handmade gift.