Create a cute and spooky Crochet Ghost that adds a playful touch to your Halloween decorations and makes a charming handmade gift .
Adding a little fun to your yarn work is easy with small, charming projects that brighten any space. The Crochet Amigurumi Ghost is one such creation, with a soft, round shape and simple features like tiny eyes that give it a friendly, light spooky look.
Free Crochet Amigurumi Ghost Pattern That Adds Fun to Seasonal Displays
This crochet ghost is small and easy to make. You can change its size by using different yarn or hook sizes. It is made with basic single crochet stitches worked in a circle. Using smooth yarn keeps it soft and neat. Stuff it firmly so it keeps its shape.
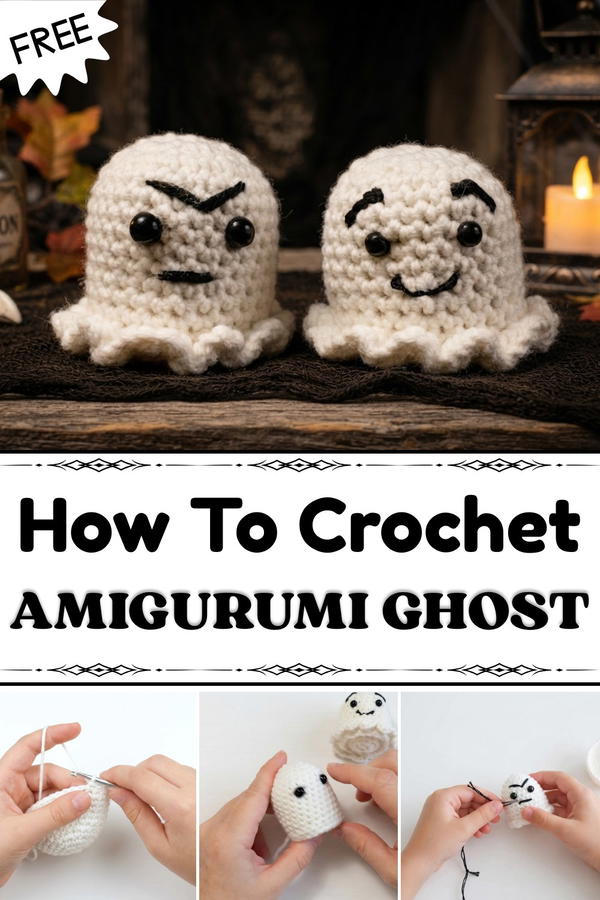 The crochet ghost is perfect for Halloween decorations, gifts, or even as a keychain or bag charm. It can also be a cute toy or part of a handmade collection. You can add colors or small details to make your ghost special.
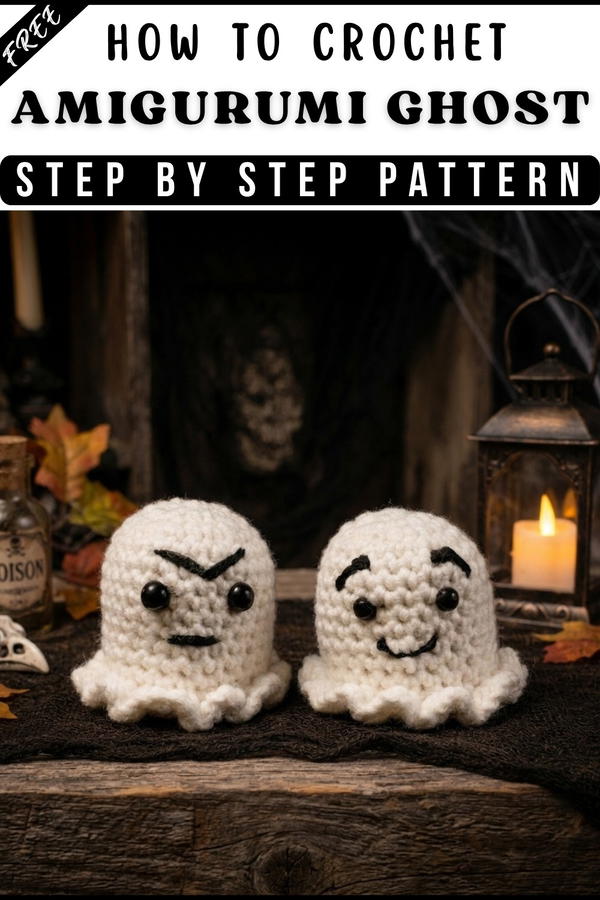 In short, this ghost is a fun and simple project that quickly makes a cute and useful item.
Amigurumi Ghost Crochet Pattern
In this pattern, you'll learn how to make an adorable and easy-to-customize ghost using basic amigurumi techniques. The pattern includes details for the body, frill, facial embroidery, and assembly tips. This ghost is perfect as a Halloween decoration, cute toy, or quirky desk companion, and you’ll discover how to give it unique expressions with simple embroidery.
Quick Overview Of Pattern
- Crocheted in a continuous spiral (rounds) using single crochet stitches.
- Features an amigurumi body, a frilled base, embroidered eyebrows, and a mouth.
- Safety eyes or embroidered eyes can be used.
- Simple colorwork and shaping create a standing ghost with lots of character.
Notes
- US crochet terms are used (single crochet = sc).
- The pattern is worked in a continuous spiral; use a stitch marker to keep track of rounds.
- The body increases evenly, then is worked straight to form a "tube", finished with a shaped, stuffed base.
- You can modify eye size or facial features for enhanced personality.
- The frill is worked into the front loops left on the base for a decorative edge.
Skill Level
Confident Beginner to Intermediate
Familiarity with amigurumi basics, working in the round, increases, decreases, stitching pieces together, and simple embroidery is recommended.
Materials
- Yarn: Worsted weight yarn (or 8-ply, soft blend such as acrylic/nylon/rayon/angora blend recommended; exact yarn not specified)
- Hook: 4.5mm crochet hook (or size to match yarn for a tight amigurumi fabric)
- Safety Eyes: 3–8mm, depending on preference (bigger eyes for more expression)
- Embroidery Cotton: Black (for eyebrows and mouth)
- Stuffing: Fiberfill (polyester stuffing)
- Scissors
- Yarn Needle: For joining & embroidery (use a thinner, sharp metal needle for face details)
- Stitch Marker: Or safety pin/paperclip
Measurements / Sizing
- Finished Height: Variable depending on yarn and hook, approx. 8–10 cm (3–4") tall
- Body Diameter (at base): Approx. 4–5 cm (1.5–2")
- Schematic: The ghost is a standing tube with a slight dome top, frilled skirt at the base, and embroidered facial features.
Gauge (and Stitch Pattern if applicable)
- Gauge: Exact gauge is not critical; ensure stitches are tight enough to prevent stuffing from showing.
- Stitch pattern: All in single crochet, with increases and worked in a spiral.
Stitch Abbreviations
- mr: Magic ring
- sc: Single crochet
- inc: Increase (2 sc in one stitch)
- dec: Decrease (sc 2 together)
- ch: Chain
- sl st: Slip stitch
- st(s): Stitch(es)
Special Stitches
- Magic Ring (mr): Adjustable ring for amigurumi.
- Working in Spiral: Do not join at end of round; continue in a spiral and use a stitch marker to mark the start.
- Frill: 3 sc worked into each exposed front loop to create the ruffled base.
Crochet Guide
Body
Round 1:
- Make a magic ring, ch 1, 6 sc into ring. (6 sts)
- Pull tail to close ring.
Round 2:
- 2 sc in each stitch around (inc in every st). (12 sts)
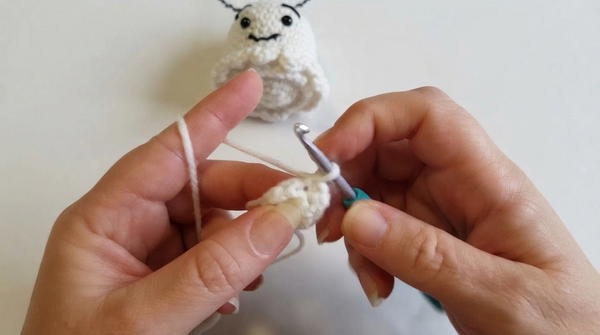
- Insert stitch marker at the first stitch of the round.
Round 3:
- (1 sc in next st, 2 sc in the next st) repeat around. (18 sts)
Round 4:
- (1 sc in each of next 2 sts, 2 sc in the next st) repeat around. (24 sts)
Rounds 5-9:
- Sc in each stitch around. (24 sts for 5 rounds)
Pause: Insert safety eyes between rounds 7 and 8, leaving 3 stitches between the eyes. Fasten backs inside.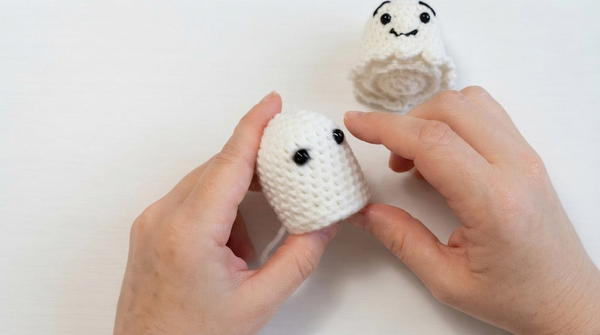
Rounds 10-13:
- Continue sc in each stitch around. (24 sts for 4 rounds)
At the end of Round 13, fasten off, leaving a tail for sewing.
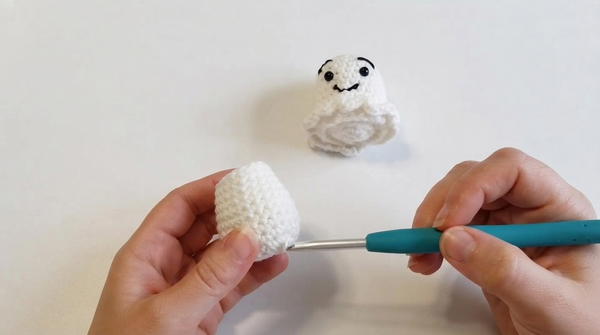
Base
Round 1:
- Make a magic ring, ch 1, 6 sc in ring. (6 sts)
Round 2:
- 2 sc in each st around. (12 sts)
Round 3:
- (1 sc, 2 sc in next st) repeat around (inc every second stitch). (18 sts)
Round 4:
- (1 sc in next 2 sts, 2 sc in next st) repeat around (inc every third stitch). (24 sts)
Do not fasten off.
Joining the Base to the Body:
- Place base to the open end of the body, matching up the stitches.
- Using the working yarn, slip stitch through both loops of the base and the back loop only of the body.
- Continue in this way completely around the edge, forming a slight ridge; pause partway to stuff the ghost with fiberfill (do not overstuff). Complete joining all the way around. Fasten off and weave in any tail.
Frilly Skirt
- With the ghost upside down, locate the exposed front loops from the body’s last round.
- Attach yarn if needed.
- In each front loop, work 3 sc (for a ruffled effect).
- Continue all the way around, sl st to join to the first sc.
- Fasten off and weave in the end.
Embroidered Face (Eyebrows and Mouth)
- Thread a sharp, thin needle with black embroidery cotton.
- Insert needle from the back and embroider desired facial features:
- For eyebrows: Use straight or angled stitches above the eyes, double layering as needed for thickness.
- For mouth: Straight or curved line, as pleased.
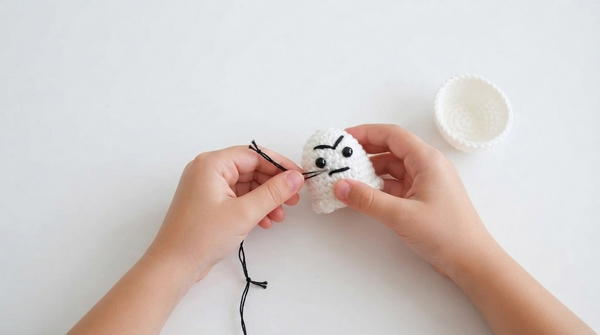
- Secure ends with small knots. Pass thread through the head to hide the tail inside; trim end so it disappears in the stuffing.
- Add optional blush to cheeks for extra character.
Assembly & Finished Size
- Ensure all tails are securely woven in and embroidery thread is anchored.
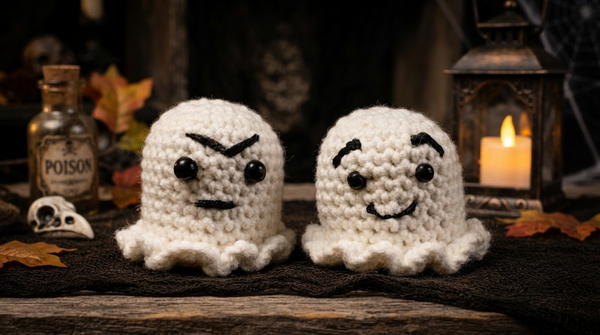
- Finished ghost stands on the base due to the frilled skirt and can be made "happy," "angry," or with any desired expression.
Finished size: 8–10 cm tall, 4–5 cm wide, depending on materials.
Conclusion
A adorable amigurumi ghost using this step-by-step pattern. By working in continuous spirals, adding a ruffled frill, and personalizing with simple embroidery, you achieve an expressive and sturdy little friend ready for Halloween or year-round fun. Feel free to experiment with size, color, or facial features to make it uniquely yours.