Add a special touch to your holiday décor by following this free crochet Christmas tree angel pattern that offers simple steps for beautiful results.
Creating holiday decorations with your own hands brings a special kind of joy, especially when the finished piece feels both delicate and full of character. Bringing to life an elegant angel that captures the spirit of Christmas, soft yet structured, charming yet simple. This delightful project invites you to turn that vision into a reality using crochet.
Crochet Your Own Stunning Christmas Tree Angel – Free Pattern
The free crochet Christmas tree angel pattern is a beautifully detailed amigurumi that makes a perfect gift, decoration, or collectible for the festive season. With a modest size that’s easy to display on mantels, shelves, or even as a hanging ornament, this angel adds a graceful touch to any holiday setting.
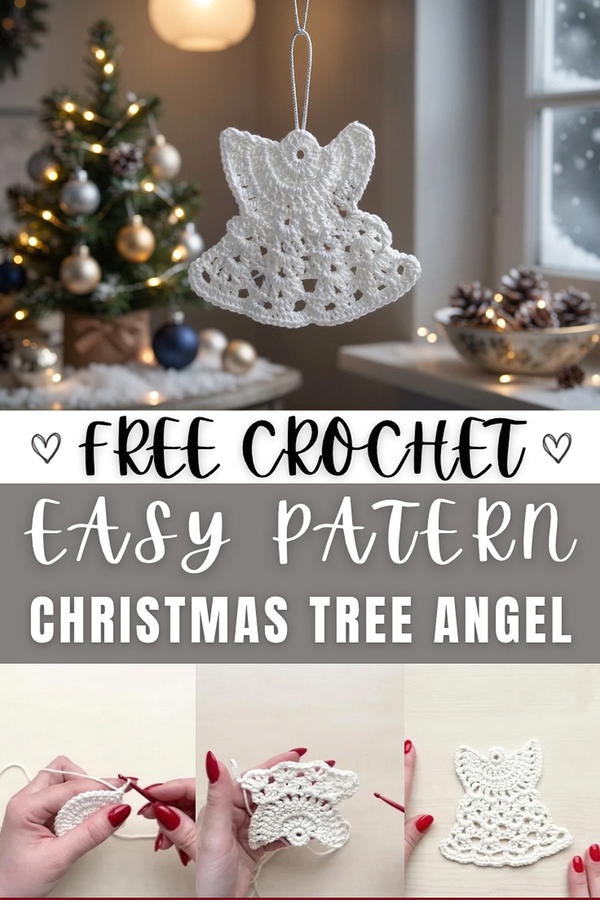
Designed for beginner to intermediate skill levels, the pattern guides you through working in the round, single crochets, double crochets, and chain stitches to create the angel’s distinct shape and intricate lace-like wings. Using a polyester cord or fine yarn with about 2 mm thickness, combined with a size 2 crochet hook, ensures a crisp structure without being bulky. The airy openwork combined with firm shaping techniques gives the angel an ethereal texture that holds its form beautifully.
The charming design features gentle scalloped edges on the wings and a smooth body, classic elements that embody the warmth and elegance of Christmas décor. Plus, the pattern includes useful tips like finishing techniques and blocking advice to give your creation a polished look.
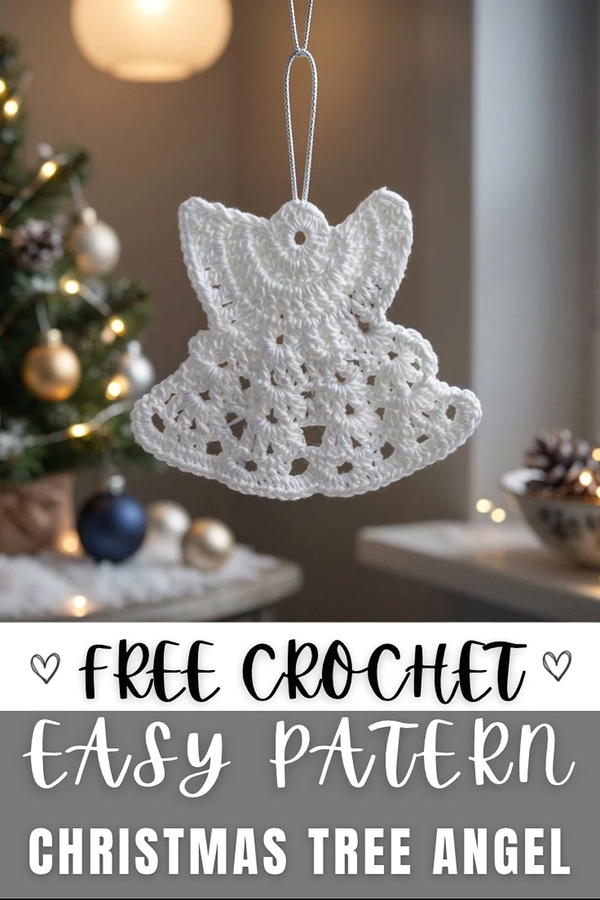
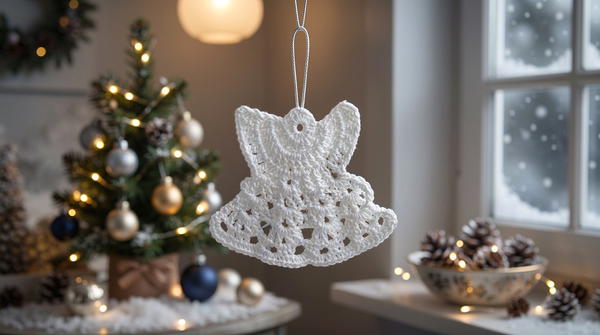
Crochet Pattern: Lacy Angel Ornament
This crocheted angel ornament is a timeless decorative piece, perfect for Christmas trees, festive centerpieces, or as thoughtful holiday gifts. With a circular base, gracefully expanding lacework, and a charming flared skirt, the project combines structural intricacy and elegance. Craft it using a delicate yarn or cord to create a sophisticated ornament that brings a handmade touch wherever it’s displayed.
Skill Level
Intermediate – This pattern requires familiarity with working in the round, increasing stitches, using decorative lace techniques, and shaping fan motifs. It is suitable for crocheters who are experienced with basic stitches, joining in rounds, and creating intricate shaping using chain spaces and motifs.
Materials
- Yarn/Cord: Polyester cord or any yarn with a diameter of up to 2 mm, approximately 20–25 meters. Light-colored fibers such as white, cream, or silver work beautifully for creating a classic angel effect.
- Crochet Hook: Size 2.5 mm, ideal for precise stitches.
- Additional Tools:
- Scissors.
- Yarn needle for weaving ends.
- Lighter for sealing the ends (if using polyester cord).
- A steam iron and a protective cloth or gauze for blocking.
Stitch Abbreviations
- MR: Magic Ring
- Ch: Chain
- Sl St: Slip Stitch
- SC: Single Crochet
- DC: Double Crochet
Special Stitches and Techniques
Magic Ring (MR)
Used to create a tightly closed circular base.
- Form a loop with the yarn, ensuring the working yarn sits over the tail end.
- Insert the crochet hook through the loop, yarn over, and pull up a loop.
- Work the required stitches into the loop.
- Once the stitches are complete, pull the tail firmly to close the ring tightly.
Fan Motif (2 DC, Ch 2, 2 DC)
Used to create the lacy expansion for the angel’s body.
- Work 2 DC into the designated chain space or arch.
- Ch 2 to form a small gap.
- Work 2 DC into the same space.
Repeat this stitch pattern to create the open lace fans positioned across the rows of the angel’s skirt.
Useful Tips
- Tension Control: Polyester cord can occasionally be stiff and unforgiving. Keep your tension consistent to ensure smooth, even stitches throughout the project.
- Counting Stitches and Loops: Track stitch counts and chain spaces carefully to avoid losing symmetry in the lace patterns. A stitch marker can help maintain awareness of beginnings and ends.
- Slip Stitch Positioning: For neat shaping, insert the hook only into the back loop of stitches when repositioning for later rows.
- Cord End Management: If using polyester cord, seal the ends carefully with a lighter to prevent fraying. Ensure the flame only lightly melts the cord without burning or disfiguring it.
- Effective Blocking: Wet blocking the finished piece using gentle steam ironing will help emphasize the delicate lace features and keep the skirt and border flat and properly shaped.
Detailed Pattern Instructions
The crocheted angel is crafted in three main sections: the base, the lacy body, and the flared, decorative skirt, with simple finishing touches to create an elegant ornament.
1. Base (Ring)
This step establishes the foundation of the angel’s body.
- Round 1:
- Begin with a Magic Ring (MR).
- Work 12 SC into the ring.
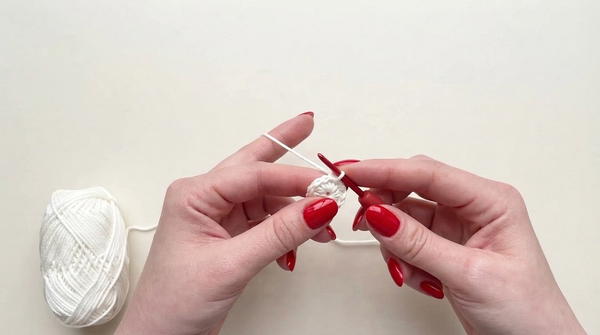
- Pull the loose tail firmly to close the circle tightly.
- Join with a Slip Stitch (Sl St) to the first SC to complete the round.
- (Total: 12 SC)
This forms a compact and stable circular base for the angel.
2. Body Expansion
The next rounds widen the angel’s body and prepare it for the shaping of arches and lace motifs.
- Round 2:
- Chain 3 (Ch 3); this counts as the first stitch.
- Work 1 DC into the same stitch as the Ch 3.
- Place 2 DC into each stitch around.
- Join the round with a Sl St to the top of the Ch 3.
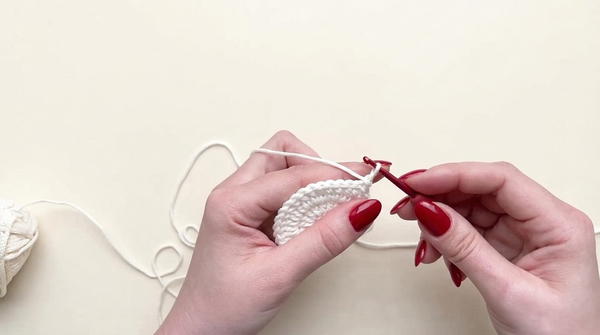
- (Total: 20 DC)
- Round 3:
- Ch 3, counts as the first DC.
- Work 1 DC into the same stitch as the Ch 3.
- Continue around by placing 2 DC into each stitch from the previous round.
- Join with a Sl St to the top of the Ch 3.
- (Total: 40 DC – 2 DC worked into each stitch of Round 2.)
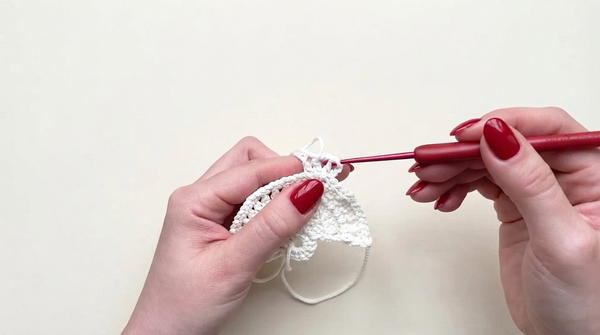
- Round 4:
- Chain 3, followed by Chain 1 (Ch 3 counts as DC; Ch 1 creates the first chain space).
- Skip 1 stitch and DC into the next stitch.
- Ch 1, skip 1 stitch, and DC into the next stitch.
- Repeat the sequence of DC, Ch 1, skip 1 stitch until the end of the round.
- Join with a Sl St to the top of the Ch 3.
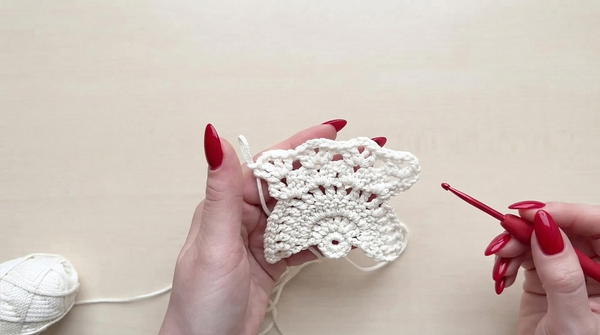
This round introduces decorative arches (DC with Ch-1 spaces) that will serve as anchor points for lace motifs.
3. Shaping the Angel
This section creates fan motifs in alternating arches, transforming the circular base into the angel’s lace skirt.
Positioning:
- Use Sl St into back loops only to reposition your work to the 7th chain arch of Round 4. This places the start of the lace fans symmetrically.
Round 5:
- In the chain space of the 7th arch:
- Ch 3 (counts as DC).
- Work 1 DC into the same arch, Ch 2, and 2 DC into the same arch.
- Skip the next arch. Work 2 DC, Ch 2, 2 DC into the following arch.
- Repeat this fan motif (2 DC, Ch 2, 2 DC) in every other arch.
- A total of 4 fan motifs will be created.
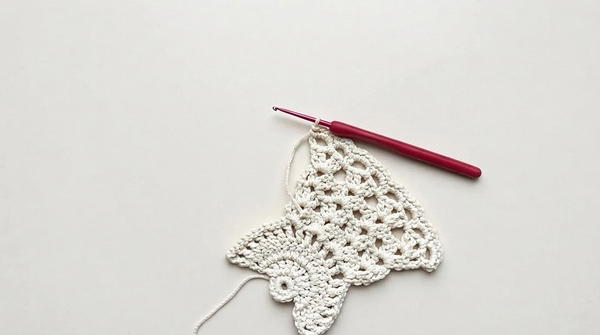
- Join with a Sl St to complete the round.
Round 6:
- Work into the Ch-2 spaces of the fans created in Round 5:
- Ch 3, followed by 1 DC in the same space, Ch 2, and 2 DC in the same space.
- Repeat this fan motif in all 4 arches.
- Join with a Sl St at the end of the round.
Rounds 7–8:
- Repeat the instructions for Round 6 for two additional rounds, working 2 DC, Ch 2, 2 DC into each Ch-2 space.
- As the lace fans progress, the angel achieves more length and flare in the skirt.
4. Decorative Border
The border completes the angel with a lacy edge around the skirt.
- Round 9:
- Ch 4, work 1 SC into the center of the first fan arch.
- Ch 3, then SC into the next arch or between motifs to create evenly spaced loops.
- Continue this sequence of Ch 3, SC around the hem, ensuring smooth and consistent placement in arches and gaps.
- Join with a Sl St to finish the round.
- Round 10:
- Ch 1 to begin.
- Work 4 SC into each Ch-3 arch of the hem.
- Continue filling every arch in this way for smooth rounding and a fuller, decorative border.
- Join with a Sl St, then fasten off.
Finishing and Blocking
- Cutting and Sealing: Trim the cord, leaving a small tail. For polyester cord, use a lighter to carefully melt the end to prevent fraying.
- Weaving Ends: Use a yarn needle to weave the tails discreetly into adjacent stitches on the reverse side of the ornament.
- Blocking: Lay the angel flat on a heat-resistant surface. Cover with a thin cotton cloth or gauze and gently steam with an iron to emphasize the lace fans and border. Allow to dry completely in the blocked position to preserve the shape.
- Hanger Loop: Use the top loop or an added chain loop for hanging.
Conclusion
This crocheted lacy angel ornament is a sophisticated addition to any holiday setting. With its delicate fan motifs, layered lace skirt, and refined border, the ornament blends charm and elegance. Experiment with different cord colors or yarn textures to customize the design for varying themes or occasions.