Bring colorful charm to your favorite space with Free Crochet Rainbow Pattern for bright detail and simple appeal suited to rooms bags and decor.
When I first tried making a bright and cheerful crochet design, I fell in love with how fun and easy it was. This project is a small, lovely rainbow that you can crochet yourself. The free crochet Rainbow Pattern is a great way to make something colorful and happy. It comes from the helpful YouTube channel Amigos y Puntos, where you can find easy-to-follow videos that make learning crochet a joy.
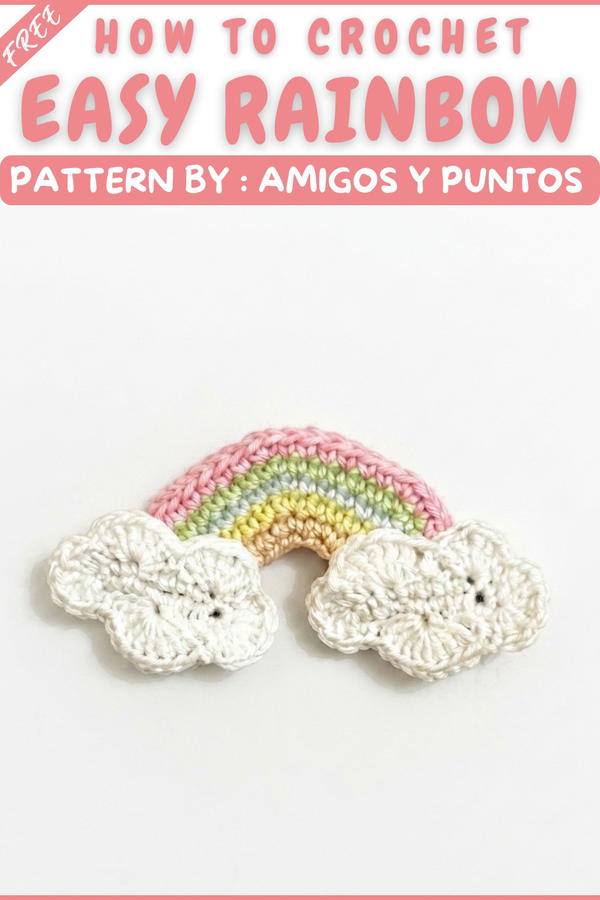
This rainbow project looks like a simple arch with soft, smooth yarn loops in many bright colors like red, orange, yellow, green, blue, and purple. The shape is curved just right, making it cute and perfect to show off anywhere. The texture is soft and squishy, which makes it nice to touch and hold. The style is playful and fresh, bringing a smile to anyone who sees it. You can use it as a wall decoration, a fun piece to hang on your bag, or even a small pillow.
Easy Steps to Free Crochet Beautiful Rainbow Pattern
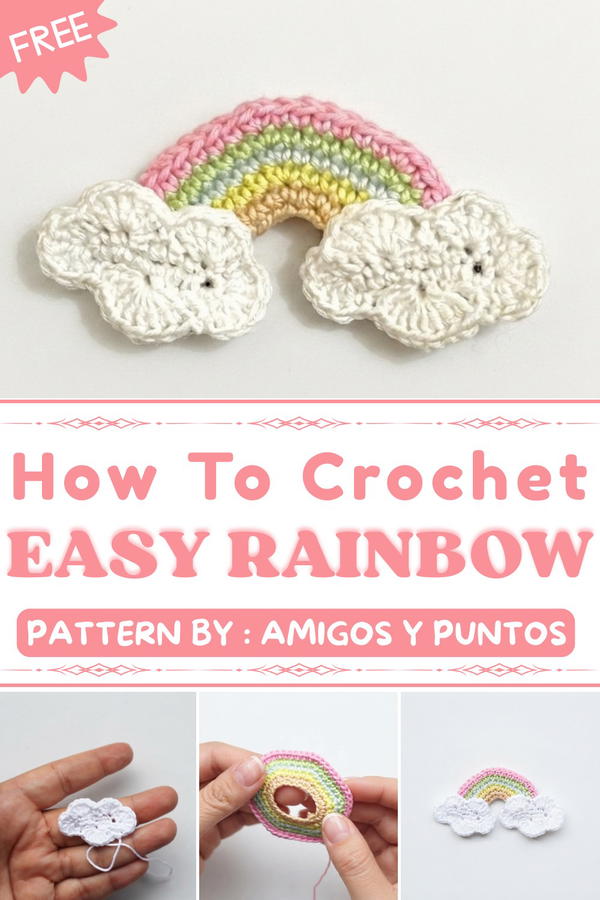
What makes this rainbow extra special is how it brightens up any space or outfit. It’s not just pretty but also very useful. You can gift it to friends or family who like handmade things, or keep it as a cheerful collectible. Its positive look is great for kids’ rooms, offices, or anywhere you want a little color and happiness.
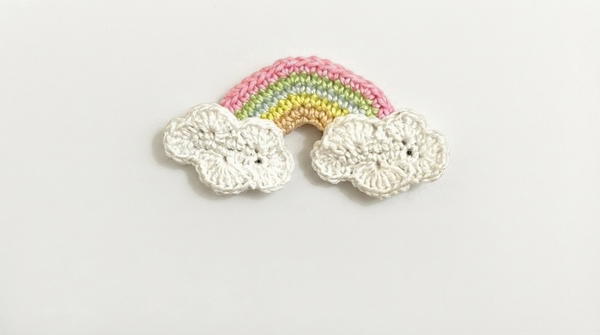
If you enjoy quick and colorful projects that make your day better, this free crochet Rainbow Pattern is perfect for you. It’s easy to make and fun to share. Give it a try and add some sunshine to your world with a handmade rainbow!
Crochet Amigurumi Rainbow with Clouds Pattern
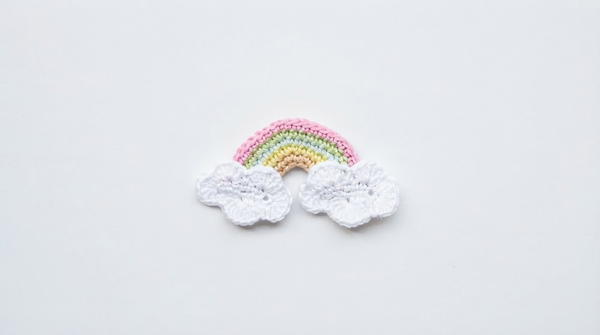
This detailed crochet pattern guides you through creating a beautiful amigurumi rainbow with clouds using pastel-colored yarn. The project uses simple stitches such as half-double crochet and double crochet to shape fluffy clouds and a charming rainbow arch. This pattern suits crocheters who want to craft a delicate, whimsical accessory or decoration.
Pattern Highlights
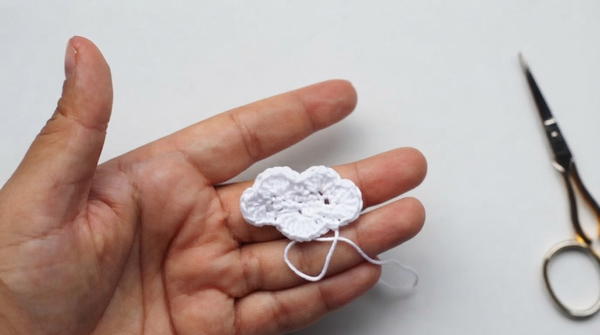
- Clouds: Crochet two puffed, round clouds using white yarn with strategic triple increases and double crochets for a fluffy texture.
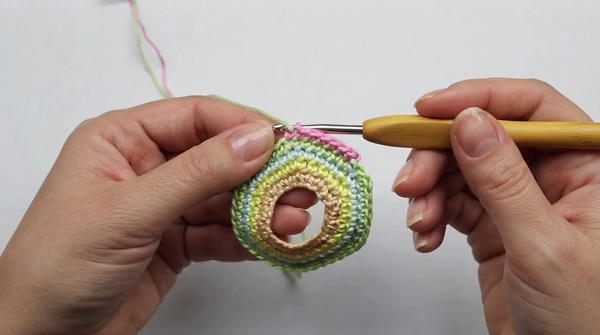
- Rainbow Body: Constructed as a smooth, colorful semicircle starting from a beige foundation with five color rounds (beige, yellow, blue, green, pink).
- Detailed Color Changes: Each rainbow round includes increases spaced evenly to expand the work gradually.
- Assembly: Folding and sewing the rainbow in halves to create the arch shape and attaching clouds at ends completes the piece.
- Use of Back Loops: Back loop stitches are worked for shaping and assembly of the rainbow’s arch.
Notes
- Make sure to keep consistent tension, especially with the triple increases in cloud foundation and double crochet clusters to achieve balanced puffiness.
- Use slip stitches carefully to join each round in the rainbow to maintain neat color transitions.
- Folding the rainbow and sewing back loops precisely is key to shaping the arch properly.
- White yarn for clouds may require blocking or light stuffing for fullest effect (optional).
- Small needle and glue are used for assembly and attaching clouds securely.
Skill Level
Intermediate
- Familiarity with half-double crochet (hdc), double crochet (dc), slip stitch (sl st), chains (ch).
- Ability to work triple stitches and clusters in the same stitch (triple increase).
- Experience with joining rounds via slip stitches.
- Comfortable with sewing crochet pieces together and basic assembly.
Materials
- Pastel yarn in the following colors:
- White (for clouds)
- Beige, Yellow, Blue, Green, Pink (for rainbow body)
- Crochet hook size 1.5 mm
- Scissors
- Tapestry needles for sewing
- Craft glue for assembling clouds to rainbow
Measurements / Sizing
- Finished rainbow arch: Approximately 12–15 cm wide, 6–8 cm high (after folding and sewing).
- Clouds: About 5 cm wide each, puffed texture providing depth and volume.
Gauge and Stitch Pattern
- Gauge is flexible but focus on tight, consistent tension for shaping.
- Clouds use half-double crochets (hdc), double crochets (dc), and triple increases to achieve their fluffiness.
- Rainbow body rounds are worked exclusively in half-double crochet (hdc) stitches with increases.
- Back loops are used in joining rounds to shape the arch.
Stitch Abbreviations
| Abbreviation | Meaning |
|---|---|
| ch | Chain |
| sc | Single Crochet |
| hdc | Half-Double Crochet |
| dc | Double Crochet |
| sl st | Slip Stitch |
| inc | Increase (2 stitches in same stitch) |
Special Stitches
- Triple Increase: Work 3 half-double crochets in the same stitch to create puffiness.
- Slip Stitch Join (sl st): Seamlessly join the end of a round to the start stitch.
- Back Loop Only (BLO): Crochet stitches working only in the back loops, used when joining rainbow halves.
The Crochet Pattern
Part 1: The Clouds (Make 2)
Using white yarn and 1.5 mm hook.
- Chain 8:
Begin by making 8 chains (ch 8). - Row 1:
- In the 2nd chain from the hook, make a triple increase:
Work 3 half-double crochets (hdc) into the same stitch. - Next, work 5 hdc one in each of the following 5 chains.

- In the second-to-last chain, work another triple increase (3 hdc in same stitch).
- Continue by working 5 hdc back along the opposite side of the foundation chain.
- Join with a slip stitch (sl st) to the first stitch to complete the round.
- In the 2nd chain from the hook, make a triple increase:
- Row 2:
- Chain 1 to turn.
- Work 1 hdc in the first stitch.
- In the next stitch, work 5 double crochets (dc) clustered together.
- Repeat pattern:
- 1 hdc
- 5 dc in next stitch
- Skip 1 stitch
- 1 hdc
- Skip 1 stitch
- 5 dc in next stitch
- 1 hdc
- 5 dc in next stitch
- After completing these clusters, skip 2 stitches, work 8 dc in the 3rd stitch, skip 2 stitches, then finish with a slip stitch join to complete the row.
Part 2: The Rainbow Body
Using beige yarn and 1.5 mm hook.
- Foundation Round:
- Make 24 chains (ch 24).
- Join with a slip stitch (sl st) to form a circle.
- Round 1:
- Chain 1.
- Work 24 half-double crochets (hdc) around the circle.
- Round 2 (Yellow):
- Change to yellow yarn.
- Chain 1.
- Repeat the sequence:
- 3 hdc,
- 1 increase (2 hdc in the same stitch),
- Repeat until you have 30 stitches in total.
- Round 3 (Blue):
- Change to blue yarn.
- Chain 1.
- Repeat:
- 4 hdc,
- 1 increase,
- Repeat around for 36 stitches.
- Round 4 (Green):
- Change to green yarn.
- Chain 1.
- Repeat:
- 5 hdc,
- 1 increase,
- Repeat until 42 stitches have been worked.
- Round 5 (Pink):
- Change to pink yarn.
- Chain 1.
- Repeat:
- 6 hdc,
- 1 increase,
- 6 hdc,
- Repeat around for 48 stitches.
Assembly & Finished Size
- Fold the circular rainbow piece in half along its diameter.
- Sew the back loops only (BLO) of the stitches together, creating the arch shape by bringing the two halves face to face and stitching them securely.
- Sew the center (fold point) closed with beige yarn for a smooth finish.
- Finally, use craft glue or sew one cloud to each end of the rainbow arch, completing the whimsical look.
Conclusion
Your amigurumi rainbow with clouds is now complete! This charming, pastel-toned project combines basic and intermediate crochet techniques, including triple increases for fluffy clouds and carefully spaced increases to shape the rainbow's gentle curve. The construction method, which folds and sews the rainbow, gives a neat, dimensional arch perfect for decoration or gifting.